light GMC YUKON 2021 Repair Manual
[x] Cancel search | Manufacturer: GMC, Model Year: 2021, Model line: YUKON, Model: GMC YUKON 2021Pages: 433, PDF Size: 6.54 MB
Page 147 of 433
GMC Yukon/Yukon XL/Denali Owner Manual (GMNA-Localizing-U.S./
Canada/Mexico-13690468) - 2021 - crc - 8/14/20
144 Infotainment System
.USB/Bluetooth: Press to seek to
the beginning of the current or
previous track. Press and hold to
quickly reverse through a track.
Release to return to playing speed.
SeeUSB Port 0152 or
Bluetooth Audio 0154.
3.{
.Press to go to the Home Page. See
“Home Page” later in this section.
.Press to exit Android Auto or Apple
CarPlay. To enter back into Android
Auto or Apple CarPlay, press and
hold. SeeApple CarPlay and
Android Auto 0186.
4.6
.Radio: Press and release to go to
the next station or channel. Press
and hold to fast seek the next
strongest station or channel.
.USB/Bluetooth: Press to seek the
next track. Press and hold to fast
forward through a track. Release to
return to playing speed. See USB
Port 0152 or
Bluetooth Audio 0154.
5.oBACK
.Press to return to the previous
display in a menu.
6.V
.Turn to highlight a feature. Press
to activate the highlighted feature.
Home Page
The Home Page is where vehicle application
icons are accessed. Some applications are
disabled when the vehicle is moving.
The Home Page can be set up to have up to
four pages with eight icons per page.
Swipe left or right across the display to
access the pages of icons.
Managing Home Page Icons 1. Touch and hold any of the Home Page icons to enter edit mode.
2. Continue holding the icon and drag it to the desired position.
3. Release your finger to drop the icon in the desired position.
4. To move an application to another page, drag the icon to the edge of the display
toward the desired page.
5. Continue dragging and dropping application icons as desired.
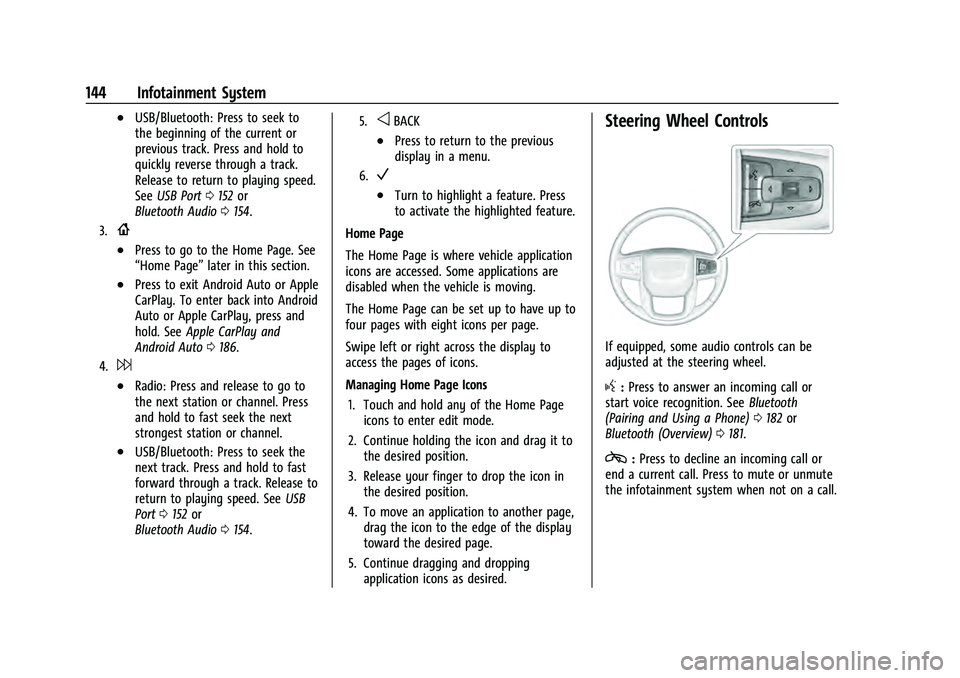
Steering Wheel Controls
If equipped, some audio controls can be
adjusted at the steering wheel.
g:Press to answer an incoming call or
start voice recognition. See Bluetooth
(Pairing and Using a Phone) 0182 or
Bluetooth (Overview) 0181.
c:Press to decline an incoming call or
end a current call. Press to mute or unmute
the infotainment system when not on a call.
Page 149 of 433

GMC Yukon/Yukon XL/Denali Owner Manual (GMNA-Localizing-U.S./
Canada/Mexico-13690468) - 2021 - crc - 8/14/20
146 Infotainment System
Availability of apps and connectivity varies
by vehicle, conditions, and location. Data
plan rates apply. Features are subject to
change. For more information, see
www.my.gmc.com/learn.
OnStar Services
If equipped, touch the OnStar Services icon
to display the OnStar Services and Account
pages. SeeOnStar Overview 0410 and
OnStar System 0155.
Camera
If equipped, touch the Camera icon to access
the camera application. See Assistance
Systems for Parking or Backing 0262.
Shortcut Tray
The shortcut tray is near the bottom of the
display. It shows up to four applications.
Infotainment Display Features
Infotainment display features show on the
display when available. When a feature is
unavailable, it may gray out. When a
feature is touched, it may highlight.
Haptic Feedback
If equipped, haptic feedback is a pulse that
occurs when an icon or option is touched on
the display or when controls on the center
stack are pressed.
Infotainment Gestures
Use the following finger gestures to control
the infotainment system.
Touch/Tap
Touch/tap is used to select an icon or
option, activate an application, or change
the location inside a map. Touch and Hold
Touch and hold can be used to start another
gesture, or to move or delete an application.
Drag
Drag is used to move applications on the
Home Page, or to pan the map. To drag the
item, it must be held and moved along the
display to the new location. This can be
Page 152 of 433
GMC Yukon/Yukon XL/Denali Owner Manual (GMNA-Localizing-U.S./
Canada/Mexico-13690468) - 2021 - crc - 8/14/20
Infotainment System 149
Direct Tune display. Directly enter a station
or channel using the keypad. When a new
station or channel is entered, the
information about that station or channel
displays on the right side. This information
will update with each new valid frequency.
Touch
Hto save the station or channel as
a favorite.
The keypad will gray out entries that do not
contribute to a valid frequency and will
automatically place a decimal point within
the frequency number.
Touch (X) to delete one number at a time.
Touch and hold (X) to delete all numbers.
A valid AM or FM station will automatically
tune to the new frequency but not close the
Direct Tune display. When listening to SXM
(if equipped), touch Go after entering the
channel. Touch the Back icon on the
infotainment display or touch
zto exit out
of Direct Tune.
The tune arrows on the right side of the
Direct Tune display will tune through the
complete station or channel list one station
step at a time per touch. A touch and hold
advances through stations or channels
quickly. If equipped, HD Radio multicast stations
cannot be tuned directly through the Direct
Tune feature. Only the analog or
HD1 station can use that feature. Use the
display arrows to adjust to the multicast
stations.
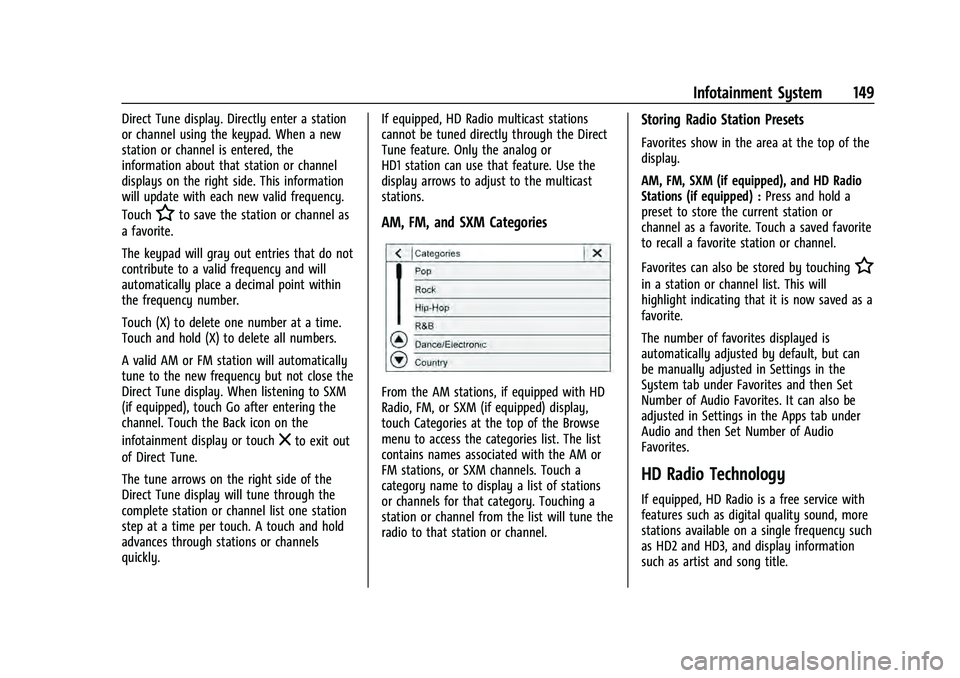
AM, FM, and SXM Categories
From the AM stations, if equipped with HD
Radio, FM, or SXM (if equipped) display,
touch Categories at the top of the Browse
menu to access the categories list. The list
contains names associated with the AM or
FM stations, or SXM channels. Touch a
category name to display a list of stations
or channels for that category. Touching a
station or channel from the list will tune the
radio to that station or channel.
Storing Radio Station Presets
Favorites show in the area at the top of the
display.
AM, FM, SXM (if equipped), and HD Radio
Stations (if equipped) :
Press and hold a
preset to store the current station or
channel as a favorite. Touch a saved favorite
to recall a favorite station or channel.
Favorites can also be stored by touching
H
in a station or channel list. This will
highlight indicating that it is now saved as a
favorite.
The number of favorites displayed is
automatically adjusted by default, but can
be manually adjusted in Settings in the
System tab under Favorites and then Set
Number of Audio Favorites. It can also be
adjusted in Settings in the Apps tab under
Audio and then Set Number of Audio
Favorites.
HD Radio Technology
If equipped, HD Radio is a free service with
features such as digital quality sound, more
stations available on a single frequency such
as HD2 and HD3, and display information
such as artist and song title.
Page 165 of 433

GMC Yukon/Yukon XL/Denali Owner Manual (GMNA-Localizing-U.S./
Canada/Mexico-13690468) - 2021 - crc - 8/14/20
162 Infotainment System
RSI Video App Front Screen
The RSI Video App will allow a front user to
control the Rear Seat Video Screen sources.
To access the RSI Video App, touch the RSI
Video App icon from the Home Page.
The Rear Screens may be powered on or off
from the RSI Video App. Touch the Rear
Screen 1 or Rear Screen 2 icons to select a
screen. Touch the 1-2 icon to view both Rear
Screens together. Touching the Power icon
next to the highlighted screen icon will turn
that screen on or off. Both screens can be
powered on or off by pressing the POWER
ALL button.
The audio for the rear users can be muted
by the front user by pressing the mute icon
associated with the left or right rear screen
on the Rear Video App screen, or both rear
screens by pressing the MUTE ALL button.The current source from the desired Rear
Screen can also be shown on the other Rear
Screen by pressing the Share button on the
lower right side of the RSI Video App
screens.
Content can be searched for the selected
source by pressing the Browse button on
the right side of the RSI Video App screen.
Source Selecting from the RSI Video App
Sources may be selected for the highlighted
Rear Screen. Select Source from the RSI App
screen, then select from the list of available
sources shown on the RSI Sources screen.
Touch More to display additional available
sources.
Playback Controls USB Sources
Playback controls include:
.6or7(Next Track/Previous Track) :
Touch
6to skip ahead or7to skip
back tracks. Touch
7less than
five seconds into the current track to start
at the beginning of the previous track.
Touch
7more than five seconds into the
current track to start at the beginning of
the current track.
.6or7(Fast Forward/Fast Rewind) :
Touch and hold
6or7for
approximately one and one-half seconds
to fast forward or fast rewind. If
6or
7are held for approximately
six seconds, the rate of fast forward or
fast rewind will increase.
Page 166 of 433
GMC Yukon/Yukon XL/Denali Owner Manual (GMNA-Localizing-U.S./
Canada/Mexico-13690468) - 2021 - crc - 8/14/20
Infotainment System 163
.porj(Play or Pause): Touchpto play
or touch
jto pause depending on the
current selection.
.Listen: Touch Listen to hear the audio
source on the vehicle speakers.
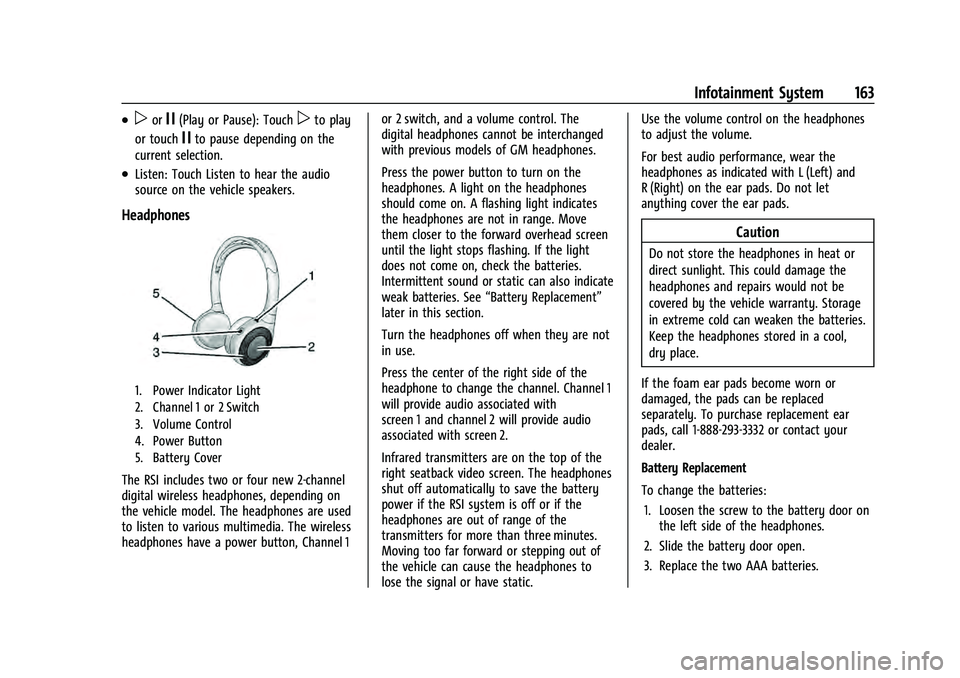
Headphones
1. Power Indicator Light
2. Channel 1 or 2 Switch
3. Volume Control
4. Power Button
5. Battery Cover
The RSI includes two or four new 2-channel
digital wireless headphones, depending on
the vehicle model. The headphones are used
to listen to various multimedia. The wireless
headphones have a power button, Channel 1 or 2 switch, and a volume control. The
digital headphones cannot be interchanged
with previous models of GM headphones.
Press the power button to turn on the
headphones. A light on the headphones
should come on. A flashing light indicates
the headphones are not in range. Move
them closer to the forward overhead screen
until the light stops flashing. If the light
does not come on, check the batteries.
Intermittent sound or static can also indicate
weak batteries. See
“Battery Replacement”
later in this section.
Turn the headphones off when they are not
in use.
Press the center of the right side of the
headphone to change the channel. Channel 1
will provide audio associated with
screen 1 and channel 2 will provide audio
associated with screen 2.
Infrared transmitters are on the top of the
right seatback video screen. The headphones
shut off automatically to save the battery
power if the RSI system is off or if the
headphones are out of range of the
transmitters for more than three minutes.
Moving too far forward or stepping out of
the vehicle can cause the headphones to
lose the signal or have static. Use the volume control on the headphones
to adjust the volume.
For best audio performance, wear the
headphones as indicated with L (Left) and
R (Right) on the ear pads. Do not let
anything cover the ear pads.
Caution
Do not store the headphones in heat or
direct sunlight. This could damage the
headphones and repairs would not be
covered by the vehicle warranty. Storage
in extreme cold can weaken the batteries.
Keep the headphones stored in a cool,
dry place.
If the foam ear pads become worn or
damaged, the pads can be replaced
separately. To purchase replacement ear
pads, call 1-888-293-3332 or contact your
dealer.
Battery Replacement
To change the batteries: 1. Loosen the screw to the battery door on the left side of the headphones.
2. Slide the battery door open.
3. Replace the two AAA batteries.
Page 167 of 433
GMC Yukon/Yukon XL/Denali Owner Manual (GMNA-Localizing-U.S./
Canada/Mexico-13690468) - 2021 - crc - 8/14/20
164 Infotainment System
4. Replace the battery door and tighten thescrew.
Remove the batteries if the headphones will
not be used for a long time.
RSI Troubleshooting
No power : The ignition might not be on or
in ACC/ACCESSORY.
There is no sound from the headphones
with the indicator light on : If the batteries
are good, make sure the headphones are
programmed to the correct screen and on
the correct channel for the screen being
viewed.
Sometimes the wireless headphone audio
cuts out or buzzes : Check for obstructions,
low batteries, reception range, and
interference from cell phone towers or from
cellular telephone use in the vehicle. Check
that the headphones are on correctly using
the L (Left) and R (Right) on the
headphones. Check that the headphones are
positioned properly with the headband
across the top of the head.
Newer mobile phones and tablets emit
infrared light for features like face and iris
detection. This infrared light can interfere
with both the headphone operation. If your headphones experience static or dropouts,
place your mobile device away from the
rear seat displays.
I lost the headphones :
See your dealer for
assistance.
Video Distortion
Video distortion can occur when operating
cellular phones, scanners, CB radios, Global
Positioning Systems (GPS), two-way radios,
mobile faxes, or walkie talkies.
It might be necessary to turn off the video
player when operating one of these devices
in or near the vehicle.
Navigation
Using the Navigation System
If equipped, launch the Nav application by
touching the Nav icon on the Home Page or
on the shortcut tray near the bottom of the
infotainment display.
When the Nav application is launched for
the first time, a product walkthrough is
available. Use of the feature requires the
Terms and Conditions and the Privacy statement to be confirmed. If available and
signed into a profile, it is also suggested to
enable and confirm Predictive Navigation.
Predictive Navigation (If Equipped)
If Predictive Navigation is available and
confirmed, this feature learns preferences by
remembering where the vehicle has been.
It uses the locations and navigation history
to personalize routes and results.
Predictive Navigation may learn elements
such as:
.Personalized routes based on preferred
streets.
.Search results that provide best matches
at the top of the list.
.Predictive traffic.
.Local map content updating.
Predictive Navigation can also be enabled or
disabled at a later time by touching
A
(Options). While in Options, touch Settings,
then Map and Navigation Settings, and then
Predictive Navigation. See Settings0187.
Page 169 of 433
GMC Yukon/Yukon XL/Denali Owner Manual (GMNA-Localizing-U.S./
Canada/Mexico-13690468) - 2021 - crc - 8/14/20
166 Infotainment System
Map Colors
.Auto–Touch to automatically change
modes based on lighting conditions.
.Day (Light)
.Night (Dark)
3D Landmark (Default is On) : Touch On or
Off. When turned on, the system will
display all 3D Landmarks on the map
depending on the zoom level.
3D Building (Default is Off) : Touch On or
Off. When turned on, the system will
display all of the possible 3D building shapes
on the map depending on the zoom level.
Show Terrain in 3D (Default is Off) :
If equipped, touch On or Off. When turned
on, the system will display terrain
information on the map in 3D view.
Auto-Zoom (Default is On) : Touch On or
Off. When turned on, the system will
automatically adjust the zoom level when
the vehicle is approaching a turn. After the
turn is completed, the system automatically
brings the zoom back to the originally set
level. If the vehicle is approaching a turn
with the next turn occurring shortly after,
the Auto-Zoom will remain on until both
turns are completed. Route Preferences
Touch to access the Route Preferences. The
choices are:
.Preferred Route
–Choose from two
different route options: Fastest or
Eco-Friendly.
‐ Fastest would be the route with the
shortest drive time.
‐ Eco-Friendly would be the most
fuel-efficient route.
.Avoid on Current Route –Choose any of
the road features to avoid while on route:
‐ Highways
‐ Unpaved Roads
‐ Ferries
‐ Carpool Lanes
‐ Toll Roads
‐ Tunnels
‐ Country Borders
Navigation Voice Control
Touch to access the voice control setting
display.
.Navigation Volume –To adjust the
volume level, touch the up and down
arrows. If the voice guidance prompt is being heard, volume can also be adjusted
using the knob on the center stack or the
volume switch on the steering wheel.
.Navigation Voice Prompt Level during a
Call. Options available are:
‐
Full Prompt (Selected by default)
‐ Tone Only
‐ None
Traffic Events (If Equipped)
This feature provides a list of events that
are on the route or nearby. Touch
Aand
then select Traffic Events. An OnStar
connected Navigation service plan is
required.
Traffic Preferences (If Equipped)
While in Map View, touch
A, then Settings
and then Map and Navigation Settings to
access Traffic Preferences. When Show
Traffic on Map is turned on, the feature
provides an overview of the traffic flow
using different coded colors. The following
options are available for rerouting:
.Auto Reroute to Better Route –The
system will automatically reroute if the
system detects there is a traffic issue
ahead.
Page 171 of 433
GMC Yukon/Yukon XL/Denali Owner Manual (GMNA-Localizing-U.S./
Canada/Mexico-13690468) - 2021 - crc - 8/14/20
168 Infotainment System
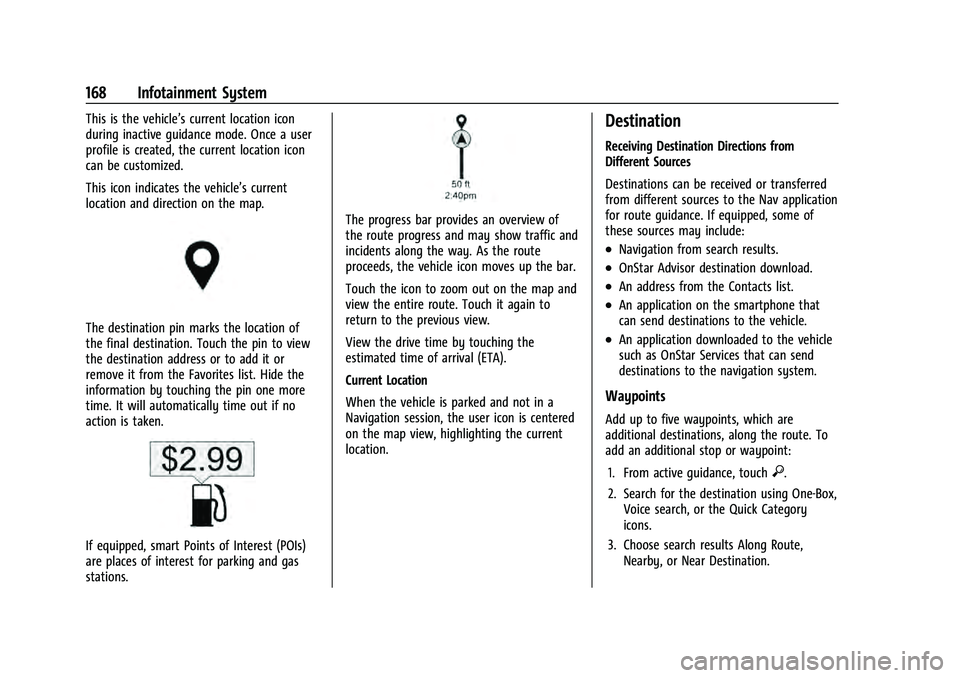
This is the vehicle’s current location icon
during inactive guidance mode. Once a user
profile is created, the current location icon
can be customized.
This icon indicates the vehicle’s current
location and direction on the map.
The destination pin marks the location of
the final destination. Touch the pin to view
the destination address or to add it or
remove it from the Favorites list. Hide the
information by touching the pin one more
time. It will automatically time out if no
action is taken.
If equipped, smart Points of Interest (POIs)
are places of interest for parking and gas
stations.
The progress bar provides an overview of
the route progress and may show traffic and
incidents along the way. As the route
proceeds, the vehicle icon moves up the bar.
Touch the icon to zoom out on the map and
view the entire route. Touch it again to
return to the previous view.
View the drive time by touching the
estimated time of arrival (ETA).
Current Location
When the vehicle is parked and not in a
Navigation session, the user icon is centered
on the map view, highlighting the current
location.
Destination
Receiving Destination Directions from
Different Sources
Destinations can be received or transferred
from different sources to the Nav application
for route guidance. If equipped, some of
these sources may include:
.Navigation from search results.
.OnStar Advisor destination download.
.An address from the Contacts list.
.An application on the smartphone that
can send destinations to the vehicle.
.An application downloaded to the vehicle
such as OnStar Services that can send
destinations to the navigation system.
Waypoints
Add up to five waypoints, which are
additional destinations, along the route. To
add an additional stop or waypoint:1. From active guidance, touch
}.
2. Search for the destination using One-Box, Voice search, or the Quick Category
icons.
3. Choose search results Along Route, Nearby, or Near Destination.
Page 172 of 433
GMC Yukon/Yukon XL/Denali Owner Manual (GMNA-Localizing-U.S./
Canada/Mexico-13690468) - 2021 - crc - 8/14/20
Infotainment System 169
4. Choose the desired waypoint and touchAdd to Trip or replace the current
destination by touching New Destination.
Route options are not available for
waypoints.
Arriving at a Waypoint
When approaching a waypoint, the system
will display a Destination Arrival view. To
continue on to the next destination touch
the Drive to message on the infotainment
display.
If the vehicle passes the waypoint or gets
out of the current route, the system will
automatically reroute back to this waypoint.
At the same time, it will show a Drive to
icon along with the next waypoint address
so the current waypoint can be skipped and
guidance can resume to the next waypoint
or destination.
Editing a Waypoint
When waypoints are added during active
guidance, the system allows a stop to be
deleted or the order to be changed. To edit
a waypoint:
1. Touch
A. 2. Touch Edit Destinations.
.Modify destination order by touching
and holding the arrow until it is
highlighted. Drag to move the
waypoint up or down the list.
.Delete a waypoint by touchingY.
A pop-up will appear to confirm
waypoint removal. Once the request
is confirmed, the system will remove
the address from the destinations list.
Touch
zon the top right corner so
the system can recalculate the route.
If there is only one address in the
destinations list, the system will
disable the move and delete
functions. The system will not allow
the final destination to be deleted.
Map Information
Road network attributes are contained in the
map database for map information.
Attributes include information such as street
names, street addresses, and turn
restrictions. A detailed area includes all
major highways, service roads, and
residential roads. The detailed areas include
Places of Interest (POIs) such as restaurants, airports, banks, hospitals, police stations, gas
stations, tourist attractions, and historical
monuments.
If the vehicle does not have an applicable
service plan, the map database may not
include data for newly constructed areas or
map database corrections that are
completed after production. The navigation
system provides full route guidance in the
detailed map areas.
Zoom Control
The zoom control display is shown on the
map view. A few ways to zoom in or
out are:
.Touch + or
–to zoom in or out on
the map.
.Double tap with one finger to zoom in or
single tap with two fingers to zoom out
on the map.
.Use the index finger and thumb to zoom
out by pinching and then zoom in by
spreading those two fingers on the map.
Map Gestures and Map Scale
Use the following gestures on the
infotainment display to adjust the map scale
and display options.
.Pinch to zoom in or out.
Page 198 of 433
GMC Yukon/Yukon XL/Denali Owner Manual (GMNA-Localizing-U.S./
Canada/Mexico-13690468) - 2021 - crc - 8/14/20
Infotainment System 195
Set Teen Driver Speed Warning :Displays a
warning in the DIC when exceeding a
selectable speed. Choose the desired speed
warning level. The speed warning does not
limit the speed of the vehicle.
SiriusXM Explicit Content Filter (if
equipped) : Allows the SiriusXM Explicit
Content Filter to be turned ON or OFF.
When ON, the teen driver will not be able
to listen to SiriusXM stations that contain
explicit content, and the Explicit Content
Filter selection in the Audio Settings will be
unavailable for change.
When Teen Driver is Active:
.If equipped with Buckle to Drive, shifting
out of P (Park) will be prevented if the
driver seat belt, and in some vehicles the
front passenger seat belt, is not buckled.
.The radio will mute when the driver seat
belt, and in some vehicles the front
passenger seat belt, is not buckled. The
audio from any device paired to the
vehicle will also be muted.
.An object placed on the front passenger
seat, such as a briefcase, handbag,
grocery bag, laptop, or other electronic
device, could cause the passenger sensing
system to falsely sense an unbuckled
front passenger and mute the radio. If this happens, remove the object from
the seat. See
Passenger Sensing System
0 66.
.Some safety systems, such as Forward
Collision Alert, if equipped, cannot be
turned off.
.The gap setting for the Forward Collision
Alert and Adaptive Cruise Control,
if equipped, cannot be changed.
.When trying to change a safety feature
that is not configurable in Teen Driver,
the DIC displays a message indicating
that Teen Driver is active and the action
is not available.
.Super Cruise, if equipped, is not available.
.Enhanced Low Fuel Warning (if equipped)
–When the vehicle is low on fuel, the
low fuel light on the instrument cluster
flashes and the DIC low fuel warning
cannot be dismissed.
.Do not tow a trailer.
Report Card
The vehicle owner must secure the driver’s
consent to record certain vehicle data when
the vehicle is driven with a registered Teen
Driver key. There is one Report Card per vehicle. Data is only recorded when a
registered Teen Driver key is used to
operate the vehicle.
The Report Card data is collected from the
time Teen Driver is activated or the last
time the Report Card was reset. The
following items may be recorded:
.Distance Driven
–the total distance
driven.
.Maximum Speed –the maximum vehicle
speed detected.
.Overspeed Warnings –the number of
times the speed warning setting was
exceeded.
.Wide Open Throttle –the number of
times the accelerator pedal was pressed
nearly all the way down.
.Forward Collision Alerts –the number of
times the driver was notified when
approaching a vehicle ahead too quickly
and at potential risk for a crash.
.Forward Automatic Braking, also called
Automatic Emergency Braking (if
equipped) –the number of times the
vehicle detected that a forward collision
was imminent and applied the brakes.