ECO mode GMC YUKON 2022 User Guide
[x] Cancel search | Manufacturer: GMC, Model Year: 2022, Model line: YUKON, Model: GMC YUKON 2022Pages: 422, PDF Size: 8.2 MB
Page 112 of 422

GMC Yukon/Yukon XL/Denali Owner Manual (GMNA-Localizing-U.S./
Canada/Mexico-15555988) - 2022 - CRC - 12/3/21
Instruments and Controls 111
Center (DIC), the vehicle must be stopped
and the cause checked. One possible cause is
a low fluid level in the transmission.
Caution
Do not drive the vehicle while the
transmission fluid is overheating, or the
transmission can be damaged. This could
lead to costly repairs that would not be
covered by the warranty.
Voltmeter Gauge
When the ignition is on, this gauge indicates
the battery voltage.
When the engine is running, this gauge
shows the condition of the charging system.
The gauge can transition from a higher to
lower or a lower to higher reading. This is
normal. If the vehicle is operating outside
the normal operating range, the chargingsystem light comes on. See
Charging System
Light 0113. The voltmeter gauge may also
read lower when in fuel economy mode.
This is normal.
Readings outside the normal operating
range can also occur when a large number
of electrical accessories are operating in the
vehicle and the engine is left idling for an
extended period. This condition is normal
since the charging system is not able to
provide full power at engine idle. As engine
speeds are increased, this condition should
correct itself as higher engine speeds allow
the charging system to create maximum
power.
The vehicle can only be driven for a short
time with the readings outside the normal
operating range. If the vehicle must be
driven, turn off all accessories, such as the
radio and air conditioner.
Readings outside the normal operating
range indicate a possible problem in the
electrical system. Have the vehicle serviced
as soon as possible.
Seat Belt Reminders
Driver Seat Belt Reminder Light
There is a driver seat belt reminder light on
the instrument cluster.
When the vehicle is started, this light
flashes and a chime may come on to remind
the driver to fasten their seat belt.
Then the light stays on solid until the belt is
buckled. This cycle may continue several
times if the driver remains or becomes
unbuckled while the vehicle is moving.
If the driver seat belt is buckled, neither the
light nor the chime comes on.
Front Passenger Seat Belt Reminder
Light
The vehicle may have a front passenger seat
belt reminder light near the passenger
airbag status indicator. See Passenger
Sensing System 066.
Page 115 of 422
GMC Yukon/Yukon XL/Denali Owner Manual (GMNA-Localizing-U.S./
Canada/Mexico-15555988) - 2022 - CRC - 12/3/21
114 Instruments and Controls
If a short distance must be driven with the
light on, be sure to turn off all accessories,
such as the radio and air conditioner. Find a
safe place to stop the vehicle.
Malfunction Indicator Lamp
(Check Engine Light)
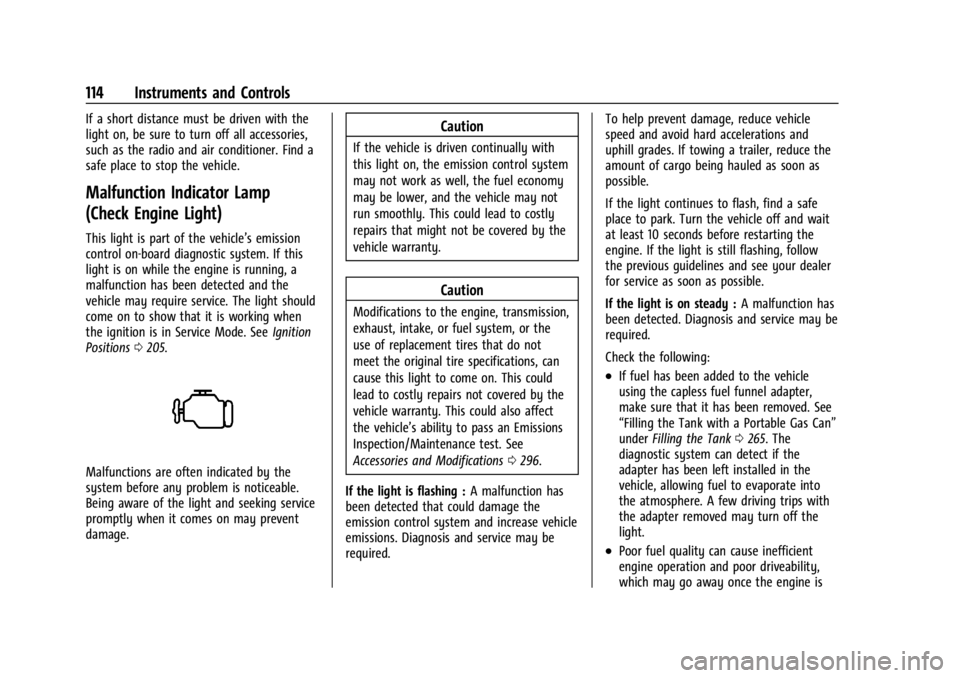
This light is part of the vehicle’s emission
control on-board diagnostic system. If this
light is on while the engine is running, a
malfunction has been detected and the
vehicle may require service. The light should
come on to show that it is working when
the ignition is in Service Mode. SeeIgnition
Positions 0205.
Malfunctions are often indicated by the
system before any problem is noticeable.
Being aware of the light and seeking service
promptly when it comes on may prevent
damage.
Caution
If the vehicle is driven continually with
this light on, the emission control system
may not work as well, the fuel economy
may be lower, and the vehicle may not
run smoothly. This could lead to costly
repairs that might not be covered by the
vehicle warranty.
Caution
Modifications to the engine, transmission,
exhaust, intake, or fuel system, or the
use of replacement tires that do not
meet the original tire specifications, can
cause this light to come on. This could
lead to costly repairs not covered by the
vehicle warranty. This could also affect
the vehicle’s ability to pass an Emissions
Inspection/Maintenance test. See
Accessories and Modifications 0296.
If the light is flashing : A malfunction has
been detected that could damage the
emission control system and increase vehicle
emissions. Diagnosis and service may be
required. To help prevent damage, reduce vehicle
speed and avoid hard accelerations and
uphill grades. If towing a trailer, reduce the
amount of cargo being hauled as soon as
possible.
If the light continues to flash, find a safe
place to park. Turn the vehicle off and wait
at least 10 seconds before restarting the
engine. If the light is still flashing, follow
the previous guidelines and see your dealer
for service as soon as possible.
If the light is on steady :
A malfunction has
been detected. Diagnosis and service may be
required.
Check the following:
.If fuel has been added to the vehicle
using the capless fuel funnel adapter,
make sure that it has been removed. See
“Filling the Tank with a Portable Gas Can”
under Filling the Tank 0265. The
diagnostic system can detect if the
adapter has been left installed in the
vehicle, allowing fuel to evaporate into
the atmosphere. A few driving trips with
the adapter removed may turn off the
light.
.Poor fuel quality can cause inefficient
engine operation and poor driveability,
which may go away once the engine is
Page 116 of 422
GMC Yukon/Yukon XL/Denali Owner Manual (GMNA-Localizing-U.S./
Canada/Mexico-15555988) - 2022 - CRC - 12/3/21
Instruments and Controls 115
warmed up. If this occurs, change the fuel
brand. It may require at least one full
tank of the proper fuel to turn the light
off. SeeRecommended Fuel (5.3L Engine)
0 264 or
Recommended Fuel (6.2L Engine) 0264.
If the light remains on, see your dealer.
Emissions Inspection and Maintenance
Programs
If the vehicle requires an Emissions
Inspection/Maintenance test, the test
equipment will likely connect to the
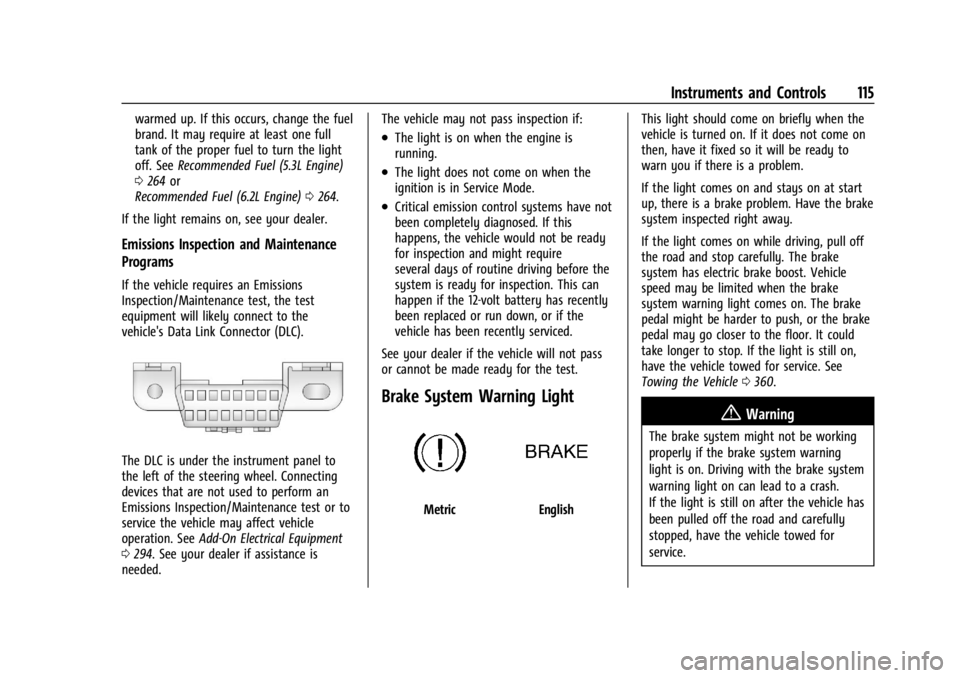
vehicle's Data Link Connector (DLC).
The DLC is under the instrument panel to
the left of the steering wheel. Connecting
devices that are not used to perform an
Emissions Inspection/Maintenance test or to
service the vehicle may affect vehicle
operation. See Add-On Electrical Equipment
0 294. See your dealer if assistance is
needed. The vehicle may not pass inspection if:
.The light is on when the engine is
running.
.The light does not come on when the
ignition is in Service Mode.
.Critical emission control systems have not
been completely diagnosed. If this
happens, the vehicle would not be ready
for inspection and might require
several days of routine driving before the
system is ready for inspection. This can
happen if the 12-volt battery has recently
been replaced or run down, or if the
vehicle has been recently serviced.
See your dealer if the vehicle will not pass
or cannot be made ready for the test.
Brake System Warning Light
MetricEnglish This light should come on briefly when the
vehicle is turned on. If it does not come on
then, have it fixed so it will be ready to
warn you if there is a problem.
If the light comes on and stays on at start
up, there is a brake problem. Have the brake
system inspected right away.
If the light comes on while driving, pull off
the road and stop carefully. The brake
system has electric brake boost. Vehicle
speed may be limited when the brake
system warning light comes on. The brake
pedal might be harder to push, or the brake
pedal may go closer to the floor. It could
take longer to stop. If the light is still on,
have the vehicle towed for service. See
Towing the Vehicle
0360.
{Warning
The brake system might not be working
properly if the brake system warning
light is on. Driving with the brake system
warning light on can lead to a crash.
If the light is still on after the vehicle has
been pulled off the road and carefully
stopped, have the vehicle towed for
service.
Page 134 of 422

GMC Yukon/Yukon XL/Denali Owner Manual (GMNA-Localizing-U.S./
Canada/Mexico-15555988) - 2022 - CRC - 12/3/21
Instruments and Controls 133
Remote Mirror Folding
When on, the outside mirrors will remotely
fold or unfold when the Remote Key
Qor
Kbutton is pressed and held. SeeFolding
Mirrors 028.
Touch Off or On.
Rain Sense Wipers
This setting automatically turns on the
wipers when moisture is detected and the
wiper switch is in intermittent mode.
Touch Disabled or Enabled.
Auto Wipe in Reverse Gear
When on and the front wiper is on, the rear
wiper will automatically activate when the
vehicle is shifted into R (Reverse).
Touch Off or On.
Lighting
Touch and the following may display:
.Vehicle Locator Lights
.Exit Lighting
.Automatic High Beam Assist
Vehicle Locator Lights
This setting flashes the vehicle’s headlamps
when
Kis pressed on the Remote Key. Touch Off or On.
Exit Lighting
This setting specifies how long the
headlamps stay on after the vehicle is
turned off and exited.
Touch Off, 30 Seconds, 60 Seconds,
or 120 Seconds.
Automatic High Beam Assist
This setting specifies how the high beams
adjust based on the vehicle environment.
See
Exterior Lamp Controls 0138.
Touch IntelliBeam or Adaptive Headlight
System.
Power Door Locks
Touch and the following may display:
.Auto Door Lock
.Auto Door Unlock
.Delayed Door Lock
Auto Door Lock
When this feature is turned on, all doors
will automatically lock when the vehicle is
shifted out of P (Park) or when the vehicle
starts moving.
Select Off or On. Auto Door Unlock
This setting allows selection of which doors
will automatically unlock when the vehicle is
shifted into P (Park).
Touch Off, All Doors, or Driver Door.
Delayed Door Lock
When on, this feature will delay the locking
of the doors. To override the delay, press
the power door lock switch on the door.
Touch Off or On.
Remote Lock, Unlock, and Start
Touch and the following may display:
.Remote Unlock Light Feedback
.Remote Lock Feedback
.Remote Door Unlock
.Remote Start Auto Cool Seats
.Remote Start Auto Heat Seats
.Remote Window Operation
.Passive Door Unlock
.Passive Door Lock
.Remote Left in Vehicle Alert
.Remote Removed from Vehicle Alert
Page 137 of 422
GMC Yukon/Yukon XL/Denali Owner Manual (GMNA-Localizing-U.S./
Canada/Mexico-15555988) - 2022 - CRC - 12/3/21
136 Instruments and Controls
Do not use the Universal Remote system
with any garage door opener that does not
have the stop and reverse feature. This
includes any garage door opener model
manufactured before April 1, 1982.
Keep the original hand-held transmitter for
use in other vehicles as well as for future
programming. Erase the programming when
vehicle ownership is terminated. See
“Erasing Universal Remote System Buttons”
later in this section.
To program a garage door opener, park
outside directly in line with and facing the
garage door opener receiver. Clear all people
and objects near the garage door.
Make sure the hand-held transmitter has a
new battery for quick and accurate
transmission of the radio-frequency signal.
Programming the Universal Remote
System
Programming involves time-sensitive actions
and may time out, requiring the procedure
to be repeated. Read these instructions
completely before programming the
Universal Remote system. It may help to
have another person assist with the
programming process.1. Hold the end of the hand-held
transmitter about 3 to 8 cm (1 to 3 in)
away from the Universal Remote system
buttons with the indicator light in view.
The hand-held transmitter was supplied
by the manufacturer of the garage door
opener receiver.
2. Press and release one of the three Universal Remote system buttons to be
programmed. Press and hold the
hand-held transmitter button. Do not
release the hand-held transmitter button
until the indicator light changes from a
slow to a rapid flash or continuous light.
Then release the hand-held transmitter
button.
Some garage door openers may require
substitution of Step 2 with the procedure
under “Radio Signals for Some Gate
Operators” later in this section.
3. Press and hold the newly programmed Universal Remote system button for
five seconds while watching the indicator
light and garage door activation.
.If the indicator light stays on
continuously or the garage door
moves when the button is pressed,
then programming is complete. There
is no need to complete Steps 4–6.
.If the indicator light does not come
on or the garage door does not
move, a second button press may be
required. For a second time, press
and hold the newly programmed
button for five seconds. If the
indicator light stays on continuously
or the garage door moves when the
button is pressed, then programming
is complete. There is no need to
complete Steps 4–6.
.If the garage door does not move,
continue with programming
Steps 4–6.
Learn or Smart Button
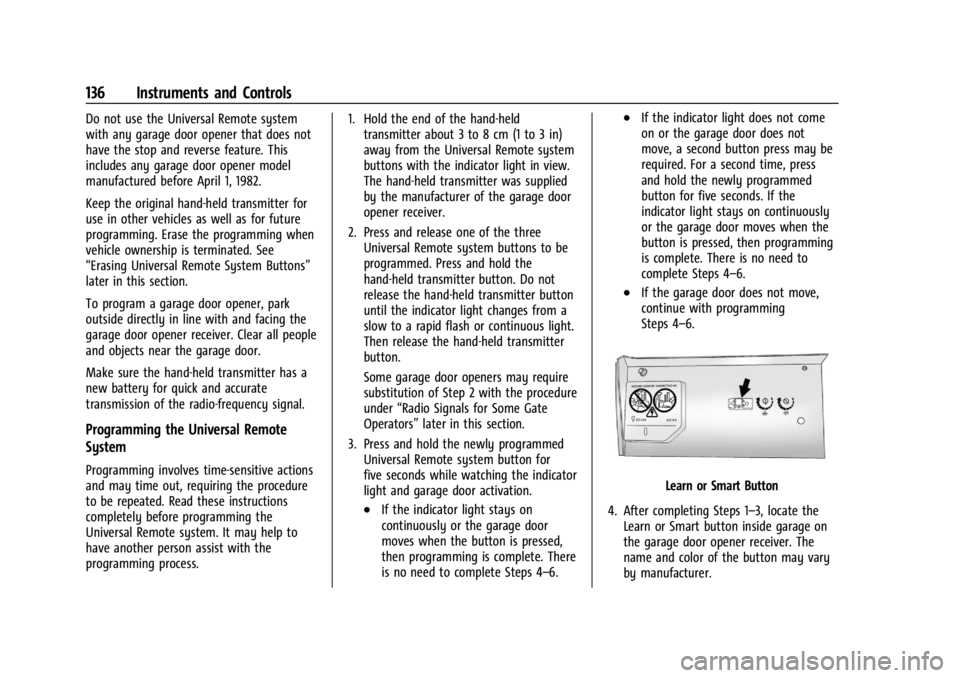
4. After completing Steps 1–3, locate the Learn or Smart button inside garage on
the garage door opener receiver. The
name and color of the button may vary
by manufacturer.
Page 143 of 422
GMC Yukon/Yukon XL/Denali Owner Manual (GMNA-Localizing-U.S./
Canada/Mexico-15555988) - 2022 - CRC - 12/3/21
142 Lighting
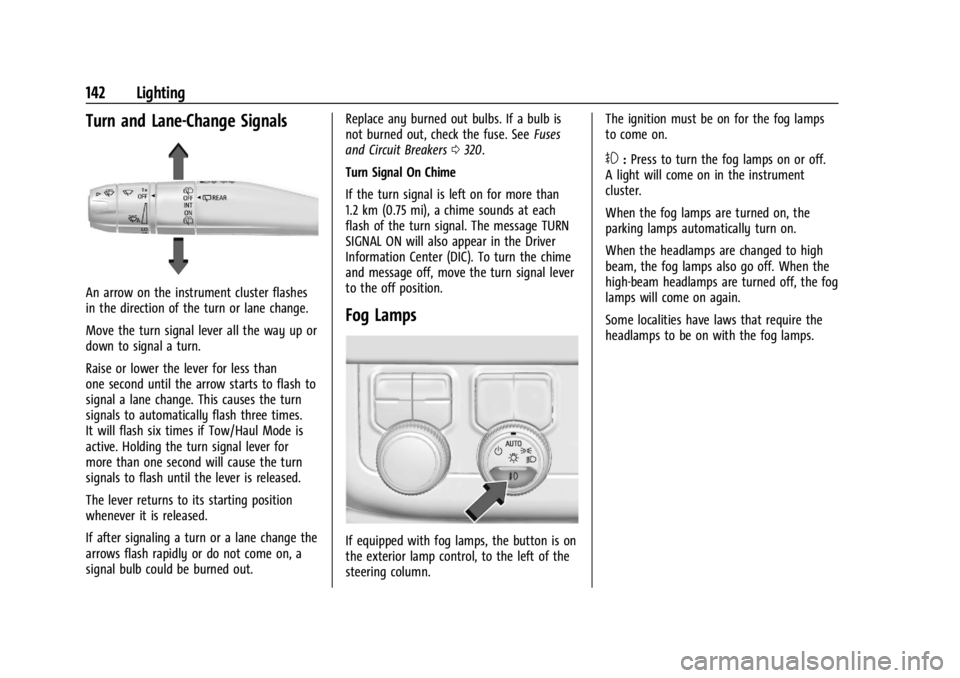
Turn and Lane-Change Signals
An arrow on the instrument cluster flashes
in the direction of the turn or lane change.
Move the turn signal lever all the way up or
down to signal a turn.
Raise or lower the lever for less than
one second until the arrow starts to flash to
signal a lane change. This causes the turn
signals to automatically flash three times.
It will flash six times if Tow/Haul Mode is
active. Holding the turn signal lever for
more than one second will cause the turn
signals to flash until the lever is released.
The lever returns to its starting position
whenever it is released.
If after signaling a turn or a lane change the
arrows flash rapidly or do not come on, a
signal bulb could be burned out.Replace any burned out bulbs. If a bulb is
not burned out, check the fuse. See
Fuses
and Circuit Breakers 0320.
Turn Signal On Chime
If the turn signal is left on for more than
1.2 km (0.75 mi), a chime sounds at each
flash of the turn signal. The message TURN
SIGNAL ON will also appear in the Driver
Information Center (DIC). To turn the chime
and message off, move the turn signal lever
to the off position.
Fog Lamps
If equipped with fog lamps, the button is on
the exterior lamp control, to the left of the
steering column. The ignition must be on for the fog lamps
to come on.
#:
Press to turn the fog lamps on or off.
A light will come on in the instrument
cluster.
When the fog lamps are turned on, the
parking lamps automatically turn on.
When the headlamps are changed to high
beam, the fog lamps also go off. When the
high-beam headlamps are turned off, the fog
lamps will come on again.
Some localities have laws that require the
headlamps to be on with the fog lamps.
Page 154 of 422
GMC Yukon/Yukon XL/Denali Owner Manual (GMNA-Localizing-U.S./
Canada/Mexico-15555988) - 2022 - CRC - 12/3/21
Infotainment System 153
‐Driver: Adjusts the audio to provide the
best sound for the driver.
‐ Centerpoint: This setting creates a
surround sound from nearly any audio
source.
‐ Rear: Adjusts the audio to provide the
best sound for the rear seat passengers.
Bose AudioPilot : This feature adjusts the
volume based on the noise in the vehicle
and the speed.
Touch Off or On.
Manage Favorites : Touch to display a list of
Audio favorites.
Favorites can be moved or deleted.
To move, touch and hold the move icon, and
then drag up or down to rearrange the
position.
Radio Text (RDS) : This allows Radio Text
(RDS) to be turned on or off.
Touch Off or On.
AM Station Update : Touch to update the
AM station list. This is only shown when
tuned to AM.Radio Data System (RDS)
If equipped, RDS features are available for
use only on FM stations that broadcast RDS
information. With RDS, the radio can:
.Display a Station Name
.Display messages from radio stations.
This system relies on receiving specific
information from these stations and only
works when the information is available.
It is possible that a radio station could
broadcast incorrect information that causes
the radio features to work improperly.
When information is broadcast from a RDS
station, the station name or call letters
display on the audio screen. Radio text
supporting the currently playing broadcast
may also appear.
To turn this feature on or off, see “Audio
Settings” underAM-FM Radio 0152.
Satellite Radio
SiriusXM Radio Service
If equipped, vehicles with a valid SiriusXM
radio subscription can receive SiriusXM
programming. SiriusXM radio has a wide variety of
programming and commercial-free music,
coast to coast, in digital-quality sound. In
the U.S., see www.siriusxm.com or call
1-888-601-6296. In Canada, see
www.siriusxm.ca or call 1-877-438-9677.
When SiriusXM is active, the channel name,
number, song title, and artist appear on the
display.
SiriusXM with 360L
SiriusXM with 360L interface has enhanced
in-vehicle listening experience for
subscribers. The experience now offers more
categories and system learned
recommendations toward discovering more
personalized content.
To use the full SiriusXM 360L program,
including streaming content and listening
recommendations, OnStar Connected Access
is required. Connected vehicle services vary
by model and require a complete working
electrical system, cell reception, and GPS
signal. An active connected plan is required.
Reference the SiriusXM user guide for use
and subscription information.
Page 159 of 422
GMC Yukon/Yukon XL/Denali Owner Manual (GMNA-Localizing-U.S./
Canada/Mexico-15555988) - 2022 - CRC - 12/3/21
158 Infotainment System
Customer Owned Bluetooth Headphones
The RSI system supports Bluetooth
headphones. Up to four Bluetooth
headphones can be paired to each REAR
SCREEN. This screen provides a list of all
Bluetooth headphones that have been paired
to the RSI system, as well as control over
their use and settings. New Bluetooth
headphones can be connected, or the
Bluetooth headphone settings can be
changed from or on this screen.
To pair Bluetooth headphones to one of the
rear screens:1. Select Bluetooth Headphones or touch
Xfrom the desired Rear Screen
Home Page.
2. Select Connect Headphones.
3. Make sure the Bluetooth headphones are in pairing mode. Once recognized by the
system, the Bluetooth headphones are
displayed on the list of Available
Headphones.
4. Select the Bluetooth headphones from the list. The headphones may need to be
unpaired from your phone before pairing
to the RSI. 5. Once a headphone is paired, touch
options for that headphone to access the
menu where the headphone can be
renamed, connected, disconnected, or to
forget.
Provided Bluetooth Headphones
{Warning
The headphones have a built-in
rechargeable lithium ion battery pack
that presents a serious fire hazard if
damaged, defective, or improperly used.
To avoid battery leakage and/or a
potential fire:
.Do not attempt to burn, crush, or cut
the battery
.Do not expose the battery to
environments with extremely low air
pressures or temperatures above 60 °C
(140 °F)
.Do not charge the battery at
temperatures above 45 °C (113 °F)
.Do not charge the battery if the
headphones are defective or damaged
Caution
Do not store the headphones in heat or
direct sunlight. This could damage the
headphones and repairs would not be
covered by the vehicle warranty. Storage
in extreme cold can weaken the batteries.
Keep the headphones stored in a cool,
dry place.
Batteries in this product should not be
disposed of with household waste. Batteries
should be recycled at an appropriate facility.
Contact local authorities for details on
recycling.
Page 160 of 422
GMC Yukon/Yukon XL/Denali Owner Manual (GMNA-Localizing-U.S./
Canada/Mexico-15555988) - 2022 - CRC - 12/3/21
Infotainment System 159
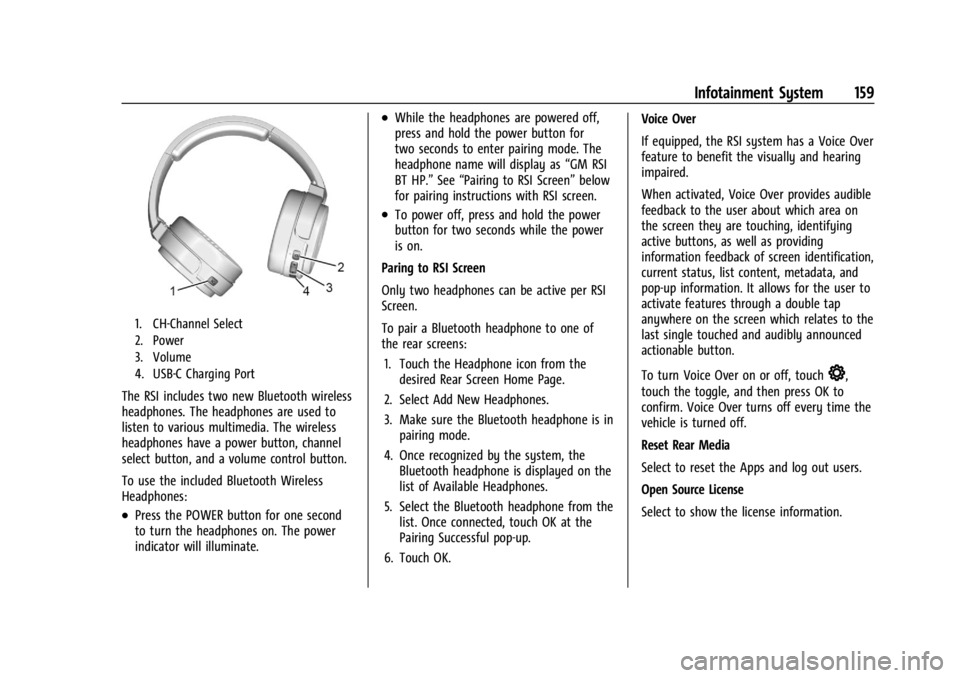
1. CH-Channel Select
2. Power
3. Volume
4. USB-C Charging Port
The RSI includes two new Bluetooth wireless
headphones. The headphones are used to
listen to various multimedia. The wireless
headphones have a power button, channel
select button, and a volume control button.
To use the included Bluetooth Wireless
Headphones:
.Press the POWER button for one second
to turn the headphones on. The power
indicator will illuminate.
.While the headphones are powered off,
press and hold the power button for
two seconds to enter pairing mode. The
headphone name will display as“GM RSI
BT HP.” See“Pairing to RSI Screen” below
for pairing instructions with RSI screen.
.To power off, press and hold the power
button for two seconds while the power
is on.
Paring to RSI Screen
Only two headphones can be active per RSI
Screen.
To pair a Bluetooth headphone to one of
the rear screens: 1. Touch the Headphone icon from the desired Rear Screen Home Page.
2. Select Add New Headphones.
3. Make sure the Bluetooth headphone is in pairing mode.
4. Once recognized by the system, the Bluetooth headphone is displayed on the
list of Available Headphones.
5. Select the Bluetooth headphone from the list. Once connected, touch OK at the
Pairing Successful pop-up.
6. Touch OK. Voice Over
If equipped, the RSI system has a Voice Over
feature to benefit the visually and hearing
impaired.
When activated, Voice Over provides audible
feedback to the user about which area on
the screen they are touching, identifying
active buttons, as well as providing
information feedback of screen identification,
current status, list content, metadata, and
pop-up information. It allows for the user to
activate features through a double tap
anywhere on the screen which relates to the
last single touched and audibly announced
actionable button.
To turn Voice Over on or off, touch
*,
touch the toggle, and then press OK to
confirm. Voice Over turns off every time the
vehicle is turned off.
Reset Rear Media
Select to reset the Apps and log out users.
Open Source License
Select to show the license information.
Page 168 of 422
GMC Yukon/Yukon XL/Denali Owner Manual (GMNA-Localizing-U.S./
Canada/Mexico-15555988) - 2022 - CRC - 12/3/21
Infotainment System 167
“Play channel
SiriusXM”:Tune to the SiriusXM radio
station channel number identified in the
command. This command may require an
online connection.
“Play
Tune to the SiriusXM radio station channel
name identified in the command. This
command may require an online connection.
Voice Recognition for the Phone
Make sure the phone is paired using
Bluetooth to use the phone related voice
commands.
“Call
stored contact. The command may include
location if the contact has location numbers
stored.
“Call < phone number>” :Initiate a call to a
phone number of seven digits or 10 digits.
“Send a message to
a message to a stored contact.
Voice Recognition for Navigation
Navigation commands can be used to start,
cancel route, or add way points/POI. “Navigate to
:
Initiate navigation to the address in the
command.
“Add
way-point to the current route.
“Take me home” :Starts navigation to
Home location set in Google maps.
Onboard Vehicle Commands
These commands can be used to adjust
vehicle temperature, control window
defrosters and obtain fuel information.
“Turn on the A/C” :Turns on the air
conditioning.
“How much gas do I have left” :Find out
how much fuel your vehicle has left.
“Set temperature to
degrees” :Set to a specific temperature
inside your vehicle.
Phone Assistant Voice Recognition
While a device is connected via Bluetooth,
press and hold
gon the steering wheel
controls to pass through and launch Google
assistant on the phone or Siri.
Phone
Bluetooth (Overview)
The Bluetooth-capable system can interact
with many mobile devices to:
.Place and receive calls in a
hands-free mode.
.Share the device’s address book or
contact list with the vehicle.
.Stream audio (music, podcasts).
.Notify receipt of text messages.
To minimize driver distraction, before
driving, and with the vehicle parked:
.Become familiar with the features of the
mobile device. Organize the phone book
and contact lists clearly and delete
duplicate or rarely used entries.
.Review the controls and operation of the
infotainment system.
.Pair mobile device(s) to the vehicle. The
system may not work with all mobile
devices. See “Pairing”later in this section.
Vehicles with a Bluetooth system can use a
Bluetooth-capable mobile device with a
Hands-Free Profile to make and receive
phone calls. The infotainment system and
voice recognition are used to control the