reset GMC YUKON 2023 Owners Manual
[x] Cancel search | Manufacturer: GMC, Model Year: 2023, Model line: YUKON, Model: GMC YUKON 2023Pages: 432, PDF Size: 9.3 MB
Page 16 of 432
GMC Yukon/Yukon XL/Denali Owner Manual (GMNA-Localizing-U.S./
Canada/Mexico-16417394) - 2023 - CRC - 4/26/22
Keys, Doors, and Windows 15
Canceling a Remote Start
To cancel a remote start, do one of the
following:
.Press and holdSuntil the parking
lamps turn off.
.Turn on the hazard warning flashers.
.Turn the ignition on and then off.
Door Locks
{Warning
Unlocked doors can be dangerous.
.Passengers, especially children, can
easily open the doors and fall out of a
moving vehicle. The doors can be
unlocked and opened while the vehicle
is moving. The chance of being thrown
out of the vehicle in a crash is
increased if the doors are not locked.
So, all passengers should wear seat
belts properly and the doors should be
locked whenever the vehicle is driven.
.Young children who get into unlocked
vehicles may be unable to get out.
A child can be overcome by extreme
heat and can suffer permanent injuries (Continued)
Warning (Continued)
or even death from heat stroke.
Always lock the vehicle whenever
leaving it.
.Outsiders can easily enter through an
unlocked door when you slow down
or stop the vehicle. Locking the doors
can help prevent this from happening.
To lock or unlock the doors from outside the
vehicle:
.PressQorKon the remote key. See
Remote Key Operation 08.
.Use the mechanical key in the
driver door.
To lock or unlock the doors from inside the
vehicle:
.PressQorKon the power door lock
switch.
.Pulling an interior door handle will unlock
the door. Pulling the door handle again
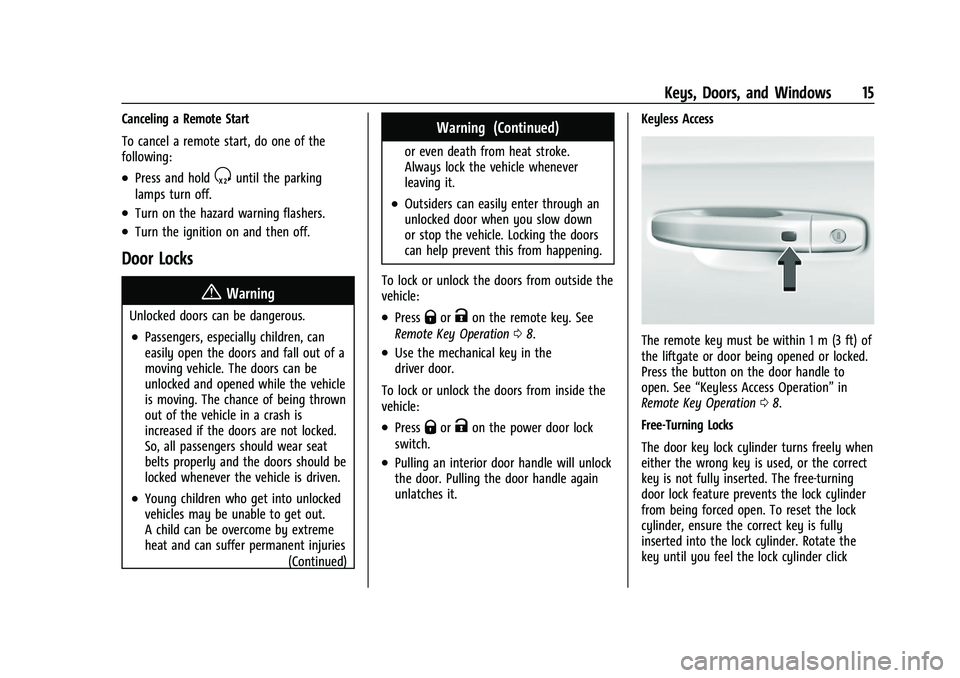
unlatches it. Keyless Access
The remote key must be within 1 m (3 ft) of
the liftgate or door being opened or locked.
Press the button on the door handle to
open. See
“Keyless Access Operation” in
Remote Key Operation 08.
Free-Turning Locks
The door key lock cylinder turns freely when
either the wrong key is used, or the correct
key is not fully inserted. The free-turning
door lock feature prevents the lock cylinder
from being forced open. To reset the lock
cylinder, ensure the correct key is fully
inserted into the lock cylinder. Rotate the
key until you feel the lock cylinder click
Page 17 of 432
GMC Yukon/Yukon XL/Denali Owner Manual (GMNA-Localizing-U.S./
Canada/Mexico-16417394) - 2023 - CRC - 4/26/22
16 Keys, Doors, and Windows
back into place. Remove the key and
reinsert fully, rotate the key to unlock the
vehicle.
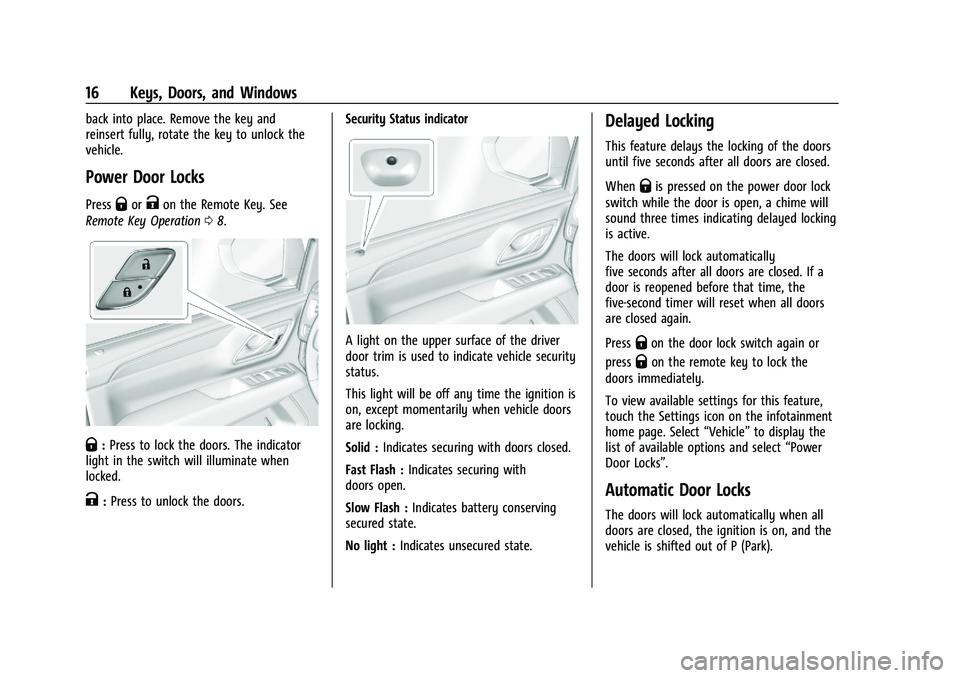
Power Door Locks
PressQorKon the Remote Key. See
Remote Key Operation 08.
Q:Press to lock the doors. The indicator
light in the switch will illuminate when
locked.
K: Press to unlock the doors. Security Status indicator
A light on the upper surface of the driver
door trim is used to indicate vehicle security
status.
This light will be off any time the ignition is
on, except momentarily when vehicle doors
are locking.
Solid :
Indicates securing with doors closed.
Fast Flash : Indicates securing with
doors open.
Slow Flash : Indicates battery conserving
secured state.
No light : Indicates unsecured state.
Delayed Locking
This feature delays the locking of the doors
until five seconds after all doors are closed.
When
Qis pressed on the power door lock
switch while the door is open, a chime will
sound three times indicating delayed locking
is active.
The doors will lock automatically
five seconds after all doors are closed. If a
door is reopened before that time, the
five-second timer will reset when all doors
are closed again.
Press
Qon the door lock switch again or
press
Qon the remote key to lock the
doors immediately.
To view available settings for this feature,
touch the Settings icon on the infotainment
home page. Select “Vehicle”to display the
list of available options and select “Power
Door Locks”.
Automatic Door Locks
The doors will lock automatically when all
doors are closed, the ignition is on, and the
vehicle is shifted out of P (Park).
Page 23 of 432
GMC Yukon/Yukon XL/Denali Owner Manual (GMNA-Localizing-U.S./
Canada/Mexico-16417394) - 2023 - CRC - 4/26/22
22 Keys, Doors, and Windows
When closing the liftgate using this feature,
there will be a short delay. The rear lights
will flash and a chime will sound. Step away
from the liftgate before it starts moving.
Projected Logo
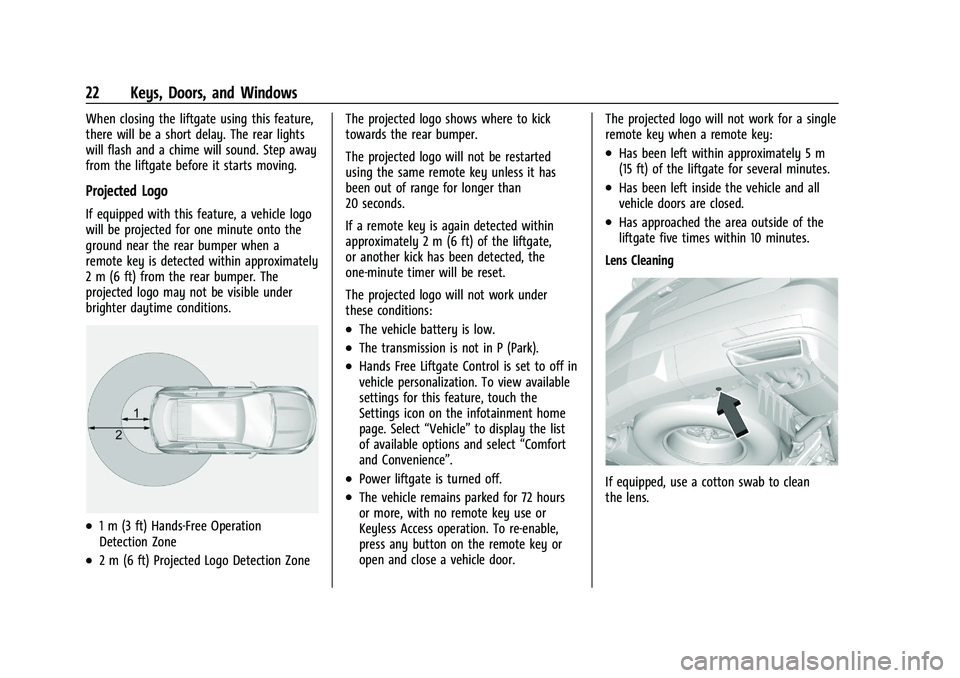
If equipped with this feature, a vehicle logo
will be projected for one minute onto the
ground near the rear bumper when a
remote key is detected within approximately
2 m (6 ft) from the rear bumper. The
projected logo may not be visible under
brighter daytime conditions.
.1 m (3 ft) Hands-Free Operation
Detection Zone
.2 m (6 ft) Projected Logo Detection ZoneThe projected logo shows where to kick
towards the rear bumper.
The projected logo will not be restarted
using the same remote key unless it has
been out of range for longer than
20 seconds.
If a remote key is again detected within
approximately 2 m (6 ft) of the liftgate,
or another kick has been detected, the
one-minute timer will be reset.
The projected logo will not work under
these conditions:
.The vehicle battery is low.
.The transmission is not in P (Park).
.Hands Free Liftgate Control is set to off in
vehicle personalization. To view available
settings for this feature, touch the
Settings icon on the infotainment home
page. Select
“Vehicle”to display the list
of available options and select “Comfort
and Convenience”.
.Power liftgate is turned off.
.The vehicle remains parked for 72 hours
or more, with no remote key use or
Keyless Access operation. To re-enable,
press any button on the remote key or
open and close a vehicle door. The projected logo will not work for a single
remote key when a remote key:
.Has been left within approximately 5 m
(15 ft) of the liftgate for several minutes.
.Has been left inside the vehicle and all
vehicle doors are closed.
.Has approached the area outside of the
liftgate five times within 10 minutes.
Lens Cleaning
If equipped, use a cotton swab to clean
the lens.
Page 27 of 432
GMC Yukon/Yukon XL/Denali Owner Manual (GMNA-Localizing-U.S./
Canada/Mexico-16417394) - 2023 - CRC - 4/26/22
26 Keys, Doors, and Windows
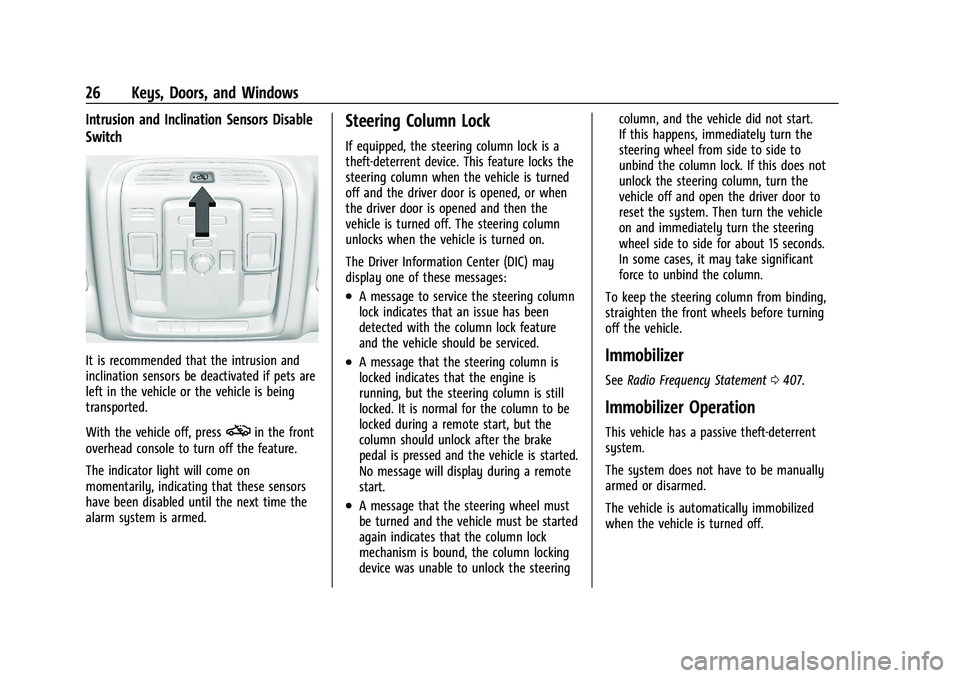
Intrusion and Inclination Sensors Disable
Switch
It is recommended that the intrusion and
inclination sensors be deactivated if pets are
left in the vehicle or the vehicle is being
transported.
With the vehicle off, press
oin the front
overhead console to turn off the feature.
The indicator light will come on
momentarily, indicating that these sensors
have been disabled until the next time the
alarm system is armed.
Steering Column Lock
If equipped, the steering column lock is a
theft-deterrent device. This feature locks the
steering column when the vehicle is turned
off and the driver door is opened, or when
the driver door is opened and then the
vehicle is turned off. The steering column
unlocks when the vehicle is turned on.
The Driver Information Center (DIC) may
display one of these messages:
.A message to service the steering column
lock indicates that an issue has been
detected with the column lock feature
and the vehicle should be serviced.
.A message that the steering column is
locked indicates that the engine is
running, but the steering column is still
locked. It is normal for the column to be
locked during a remote start, but the
column should unlock after the brake
pedal is pressed and the vehicle is started.
No message will display during a remote
start.
.A message that the steering wheel must
be turned and the vehicle must be started
again indicates that the column lock
mechanism is bound, the column locking
device was unable to unlock the steering column, and the vehicle did not start.
If this happens, immediately turn the
steering wheel from side to side to
unbind the column lock. If this does not
unlock the steering column, turn the
vehicle off and open the driver door to
reset the system. Then turn the vehicle
on and immediately turn the steering
wheel side to side for about 15 seconds.
In some cases, it may take significant
force to unbind the column.
To keep the steering column from binding,
straighten the front wheels before turning
off the vehicle.
Immobilizer
See Radio Frequency Statement 0407.
Immobilizer Operation
This vehicle has a passive theft-deterrent
system.
The system does not have to be manually
armed or disarmed.
The vehicle is automatically immobilized
when the vehicle is turned off.
Page 29 of 432
GMC Yukon/Yukon XL/Denali Owner Manual (GMNA-Localizing-U.S./
Canada/Mexico-16417394) - 2023 - CRC - 4/26/22
28 Keys, Doors, and Windows
2. Press the arrows on the control pad tomove the mirror up, down, right, or left.
3. Adjust the outside mirror so that the side of the vehicle and the area behind
are seen.
4. Press either
}or|again to deselect
the mirror. The indicator light goes off.
Turn Signal Indicator
If equipped, the mirror has turn signal
indicator lights, which flash in the direction
of the turn or lane change.
Puddle Lamps
If equipped, puddle lamps project light from
the bottom of the mirror to the area of
ground below the driver and passenger
doors. See Entry Lighting 0139 and
Exit Lighting 0139.
Memory Mirrors
The vehicle may have memory mirrors. See
Memory Seats 042.
Lane Change Alert (LCA)
The vehicle may have LCA. See Lane Change
Alert (LCA) 0269.
Folding Mirrors
Manual Folding
Fold the mirrors inward to prevent damage
when going through an automatic car wash.
To fold, pull the mirror toward the vehicle.
Push the mirror outward, to return to its
original position.
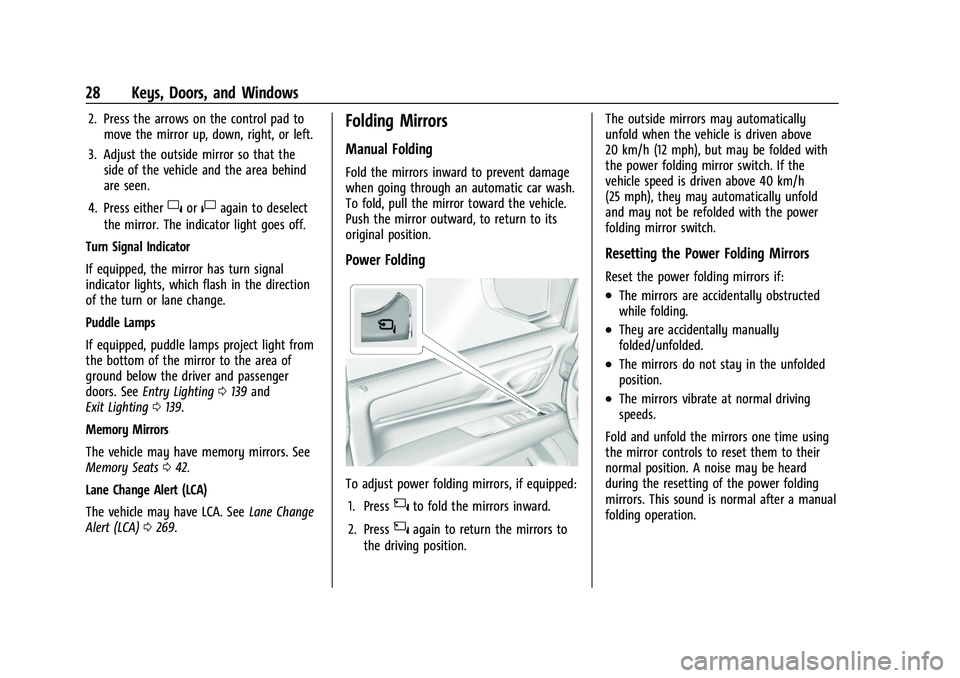
Power Folding
To adjust power folding mirrors, if equipped:
1. Press
{to fold the mirrors inward.
2. Press
{again to return the mirrors to
the driving position. The outside mirrors may automatically
unfold when the vehicle is driven above
20 km/h (12 mph), but may be folded with
the power folding mirror switch. If the
vehicle speed is driven above 40 km/h
(25 mph), they may automatically unfold
and may not be refolded with the power
folding mirror switch.
Resetting the Power Folding Mirrors
Reset the power folding mirrors if:
.The mirrors are accidentally obstructed
while folding.
.They are accidentally manually
folded/unfolded.
.The mirrors do not stay in the unfolded
position.
.The mirrors vibrate at normal driving
speeds.
Fold and unfold the mirrors one time using
the mirror controls to reset them to their
normal position. A noise may be heard
during the resetting of the power folding
mirrors. This sound is normal after a manual
folding operation.
Page 100 of 432

GMC Yukon/Yukon XL/Denali Owner Manual (GMNA-Localizing-U.S./
Canada/Mexico-16417394) - 2023 - CRC - 4/26/22
Instruments and Controls 99
on the windshield and controls the
frequency of the windshield wiper based on
the current sensitivity setting.
Keep this area of the windshield clear of
debris to allow for best system performance.
AUTO :Move the windshield wiper lever to
AUTO. Turn the band on the wiper lever to
adjust the sensitivity.
.Turn the band up for more sensitivity to
moisture.
.Turn the band down for less sensitivity to
moisture.
.Move the windshield wiper lever out of
the AUTO position to deactivate
Rainsense.
To turn the Rainsense feature on or off, see
“Rain Sense Wipers” under Settings >
Vehicle> Comfort and Convenience > Rain
Sense Wipers. Wiper Arm Assembly Protection
When using an automatic car wash, move
the windshield wiper lever to OFF. This
disables the automatic Rainsense windshield
wipers.
With Rainsense, if the transmission is in
N (Neutral) and the vehicle speed is very
slow, the wipers will automatically stop at
the base of the windshield.
The wiper operations return to normal when
the transmission is no longer in N (Neutral)
or the vehicle speed has increased.
Windshield Washer
L
m:Push the button marked with the
windshield washer symbol at the top of the
turn signal lever to spray washer fluid and
activate the wipers. The wipers will continue
until the symbol is released or the
maximum wash time is reached. When the
button is released, additional wipes may
occur depending on how long the windshield
washer had been activated. See Washer
Fluid 0323 for information on filling the
windshield washer fluid reservoir.
Rear Window Wiper/Washer
The rear window wiper/washer controls are
on the end of the turn signal/windshield
wiper lever.
Turn the band to adjust the setting.
OFF : Turns the rear wiper off.
INT : Turns on the rear wiper with a delay
between wipes.
ON : Turns on the rear wiper.
L:Turn the windshield wiper band fully
upward or downward to spray washer fluid
on the rear window. The wipers will clear
the rear window and either stop or return
to your preset speed. For more washer
cycles, turn and hold the band.
Page 101 of 432

GMC Yukon/Yukon XL/Denali Owner Manual (GMNA-Localizing-U.S./
Canada/Mexico-16417394) - 2023 - CRC - 4/26/22
100 Instruments and Controls
The rear window wiper/washer will not
operate if the liftgate is open or ajar. If the
liftgate is opened while the rear wiper is on,
the wiper returns to the parked position and
stops.
See“Rear Camera Washer” later in this
section.
Rear Wiper Arm Assembly Protection
When using an automatic car wash, move
the rear wiper control to OFF to disable the
rear wiper. In some vehicles, if the
transmission is in N (Neutral) and the
vehicle speed is very slow, the rear wiper
will automatically park under the rear
spoiler.
The wiper operations return to normal when
the transmission is no longer in N (Neutral)
or the vehicle speed has increased.
Auto Wipe in Reverse Gear
If the rear wiper control is off, the rear
wiper will automatically operate
continuously when the transmission is in
R (Reverse), and the front windshield wiper
is performing low or high speed wipes.
If the rear wiper control is off, the
transmission is in R (Reverse), and the front windshield wiper is performing INT wipes,
then the rear wiper automatically performs
INT wipes.
This feature can be turned on or off. See
“Auto Wipe in Reverse Gear”
under
Settings > Vehicle > Comfort and
Convenience > Auto Wipe in Reverse Gear.
The windshield washer reservoir is used for
the windshield, rear window, and rear mirror
camera, if equipped. See Rear Camera Mirror
0 30. Check the fluid level in the reservoir if
either washer is not working. See Washer
Fluid 0323.
Rear Camera Washer
If equipped, turn the windshield wiper band
fully upward or downward to spray washer
fluid on the rear camera. The wipers will
clear the rear camera and either stop or return to your preset speed. For more
washer cycles, turn and hold the band. See
Rear Camera Mirror
030.
Compass
The vehicle may have a compass display on
the Driver Information Center (DIC). The
compass receives its heading and other
information from the Global Positioning
System (GPS) antenna, Electronic Stability
Control (ESC), and vehicle speed information.
The compass system is designed to operate
for a certain number of miles or degrees of
turn before needing a signal from the GPS
satellites. When the compass display shows
CAL, drive the vehicle for a short distance in
an open area where it can receive a GPS
signal. The compass system will
automatically determine when a GPS signal
is restored and provide a heading again.
Clock
Set the time and date using the
infotainment system. See "Time/Date" under
Settings 0167.
Page 107 of 432
GMC Yukon/Yukon XL/Denali Owner Manual (GMNA-Localizing-U.S./
Canada/Mexico-16417394) - 2023 - CRC - 4/26/22
106 Instruments and Controls
.Digital configuration displays the info
display areas on the far left and right
sides of the display. The DIC area is larger
and located in the center of the display.
.Clean configuration is a simplified display
that has a digital speed in the center. The
DIC area is located on the far right of the
display.
Cluster Menu
There are interactive display areas in the
instrument cluster. Locations vary by the
selected display layout.
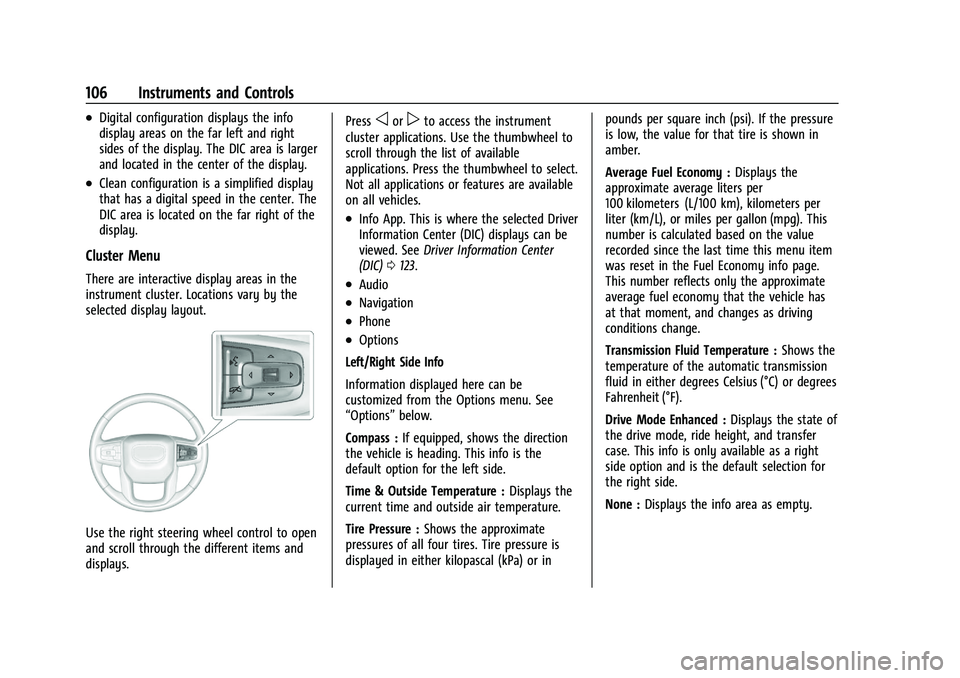
Use the right steering wheel control to open
and scroll through the different items and
displays.Press
oorpto access the instrument
cluster applications. Use the thumbwheel to
scroll through the list of available
applications. Press the thumbwheel to select.
Not all applications or features are available
on all vehicles.
.Info App. This is where the selected Driver
Information Center (DIC) displays can be
viewed. See Driver Information Center
(DIC) 0123.
.Audio
.Navigation
.Phone
.Options
Left/Right Side Info
Information displayed here can be
customized from the Options menu. See
“Options” below.
Compass : If equipped, shows the direction
the vehicle is heading. This info is the
default option for the left side.
Time & Outside Temperature : Displays the
current time and outside air temperature.
Tire Pressure : Shows the approximate
pressures of all four tires. Tire pressure is
displayed in either kilopascal (kPa) or in pounds per square inch (psi). If the pressure
is low, the value for that tire is shown in
amber.
Average Fuel Economy :
Displays the
approximate average liters per
100 kilometers (L/100 km), kilometers per
liter (km/L), or miles per gallon (mpg). This
number is calculated based on the value
recorded since the last time this menu item
was reset in the Fuel Economy info page.
This number reflects only the approximate
average fuel economy that the vehicle has
at that moment, and changes as driving
conditions change.
Transmission Fluid Temperature : Shows the
temperature of the automatic transmission
fluid in either degrees Celsius (°C) or degrees
Fahrenheit (°F).
Drive Mode Enhanced : Displays the state of
the drive mode, ride height, and transfer
case. This info is only available as a right
side option and is the default selection for
the right side.
None : Displays the info area as empty.
Page 108 of 432
GMC Yukon/Yukon XL/Denali Owner Manual (GMNA-Localizing-U.S./
Canada/Mexico-16417394) - 2023 - CRC - 4/26/22
Instruments and Controls 107
Audio
Browse music, select from the favorites,
or change the audio source. Use the
thumbwheel to change the station or go to
the next or previous track.
Navigation
If there is an active route, the Turn-by-Turn
directions will appear on the Navigation
Page, if there is no active route a compass
will be displayed.
Phone
If there is no active phone call, view recent
calls, or scroll through contacts.
Options
Use the thumbwheel to scroll through items
in the Options menu.
Display Layout :Choose Classic, Progressive,
Digital, and Clean layout by pressing the
thumbwheel while the desired item is
highlighted. Exit the Layout menu by
pressing
o.
Left/Right Side Info : Press the thumbwheel
to select the items to be displayed in the
display areas. See "Left/Right Side Info"
previously in this section. Lower Gauges :
Choose one of three gauge
configurations by pressing the thumbwheel
while the desired item is highlighted. The
selected configuration will be displayed at
the bottom of the display.
Maximum displays fuel level, coolant
temperature, engine oil pressure, and
battery voltage. Transmission fluid
temperature displays instead of battery
voltage while in Tow Haul mode.
Medium displays fuel level, and coolant
temperature.
Minimum displays only the fuel level.
Info Page Options : Press the thumbwheel
to select the items to be displayed in the
Info app. See Driver Information Center (DIC)
0 123.
Units : Choose US or metric units by
pressing the thumbwheel while the desired
item is highlighted.
Speed Warning : Allows the driver to set a
speed that they do not want to exceed. To
set the Speed Warning press the
thumbwheel when Speed Warning is
displayed. Use the thumbwheel to adjust
the value and press to set the speed. Once the speed is set, this feature can be
turned off by pressing the thumbwheel
while viewing this page. If the selected
speed limit is exceeded, a pop-up warning is
displayed with a chime.
Speed Sign Display :
Shows sign
information, which comes from a roadway
database in the onboard navigation system,
if equipped. The sign will show “− −”when
offline maps are unavailable. See Maps
0 157.
Head-up Display (HUD) : If equipped, this
feature allows for adjusting the angle of the
HUD image and changing or turning off the
Speed Limit Sign.
HUD Rotation: Press the thumbwheel while
Adjust Rotation is highlighted to enter
Adjust Mode. Scroll to adjust the angle of
the HUD display. Press the thumbwheel to
confirm and save the setting. This feature
may only be available in P (Park).
Speed Limit Style: Press the thumbwheel
while Speed Limit Style is highlighted to
change the speed sign style or to turn it off.
Software Information : Displays open source
software information.
Reset To Defaults : Allows the driver to
reset to default settings.
Page 109 of 432
GMC Yukon/Yukon XL/Denali Owner Manual (GMNA-Localizing-U.S./
Canada/Mexico-16417394) - 2023 - CRC - 4/26/22
108 Instruments and Controls
Speedometer
The speedometer shows the vehicle speed in
either kilometers per hour (km/h) or miles
per hour (mph).
Odometer
The odometer shows how far the vehicle has
been driven, in either kilometers or miles.
The odometer is always displayed in the
bottom of the Driver Information
Center (DIC).
Trip Odometer
The trip odometer shows how far the
vehicle has been driven since the trip
odometer was last reset.
The trip odometer is accessed and reset
through the Driver Information Center (DIC).
SeeDriver Information Center (DIC) 0123.
Tachometer
The tachometer displays the engine speed in
revolutions per minute (rpm).
For vehicles with the Stop/Start system,
when the ignition is on, the tachometer
indicates the vehicle status. When pointing
to AUTO STOP, the engine is off but the vehicle is on and can move. The engine
could auto start at any time. When the
indicator points to OFF, the vehicle is off.
When the engine is on, the tachometer will
indicate the rpm. The tachometer may vary
by several hundred rpm, during Auto Stop
mode, when the engine is shutting off and
restarting.
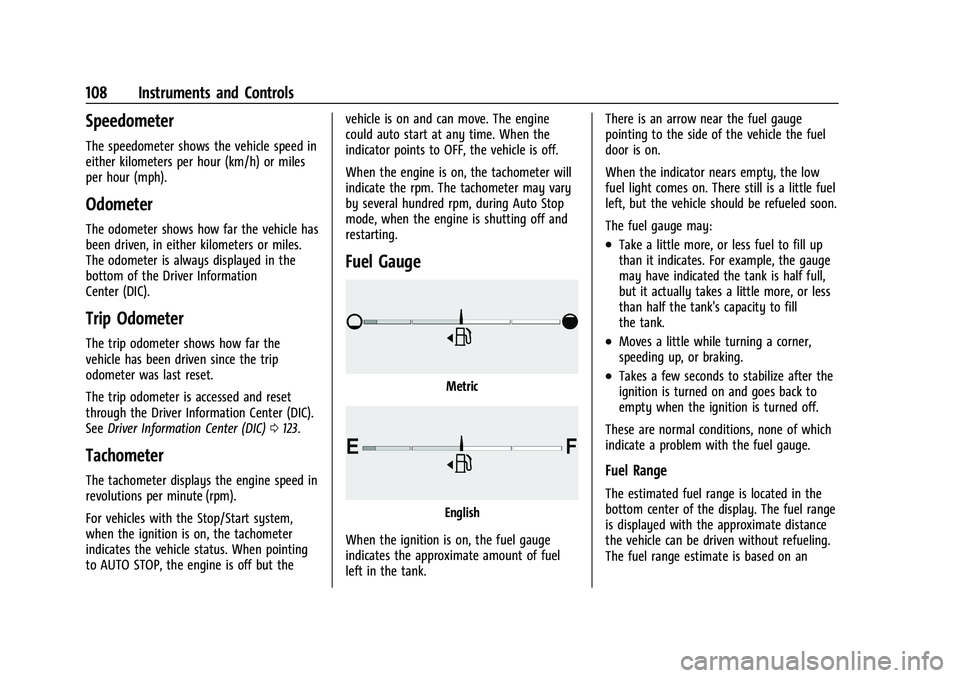
Fuel Gauge
Metric
English
When the ignition is on, the fuel gauge
indicates the approximate amount of fuel
left in the tank. There is an arrow near the fuel gauge
pointing to the side of the vehicle the fuel
door is on.
When the indicator nears empty, the low
fuel light comes on. There still is a little fuel
left, but the vehicle should be refueled soon.
The fuel gauge may:
.Take a little more, or less fuel to fill up
than it indicates. For example, the gauge
may have indicated the tank is half full,
but it actually takes a little more, or less
than half the tank's capacity to fill
the tank.
.Moves a little while turning a corner,
speeding up, or braking.
.Takes a few seconds to stabilize after the
ignition is turned on and goes back to
empty when the ignition is turned off.
These are normal conditions, none of which
indicate a problem with the fuel gauge.
Fuel Range
The estimated fuel range is located in the
bottom center of the display. The fuel range
is displayed with the approximate distance
the vehicle can be driven without refueling.
The fuel range estimate is based on an