transmission fluid GMC YUKON DENALI 2003 Owners Manual
[x] Cancel search | Manufacturer: GMC, Model Year: 2003, Model line: YUKON DENALI, Model: GMC YUKON DENALI 2003Pages: 447, PDF Size: 21.97 MB
Page 180 of 447
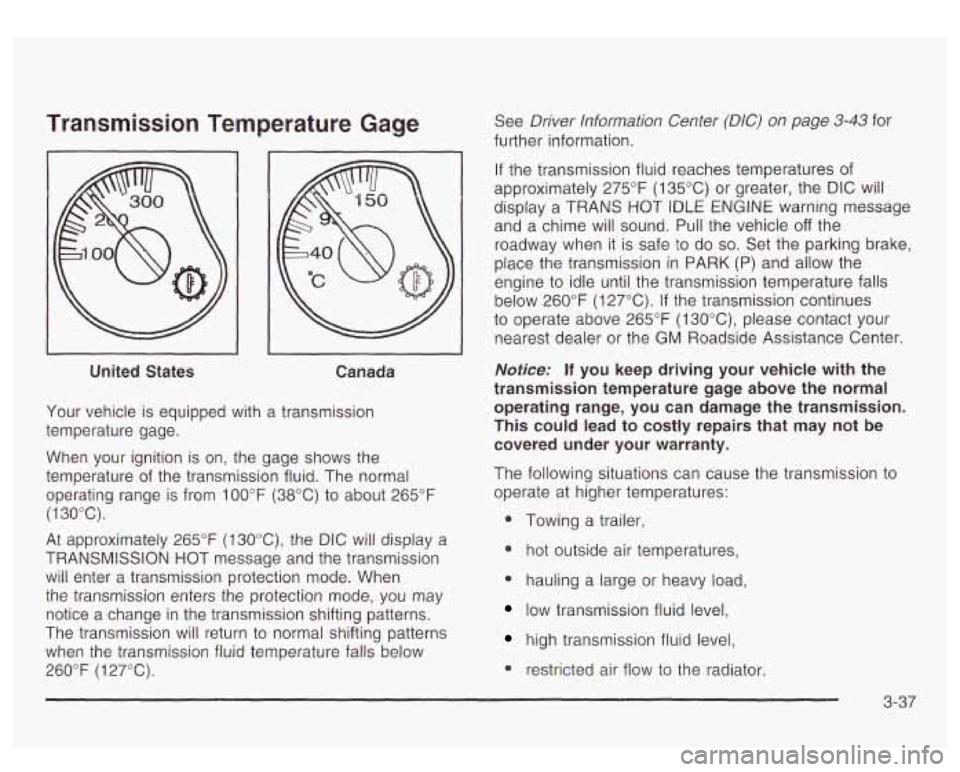
Transmission Temperature Gage
--
United States Canada
Your vehicle is equipped with a transmission
temperature gage.
When your ignition is on, the gage shows the
temperature of the transmission fluid. The normal
operating range is from
100°F (38°C) to about 265°F
(1 30°C).
At approximately 265°F (130°C), the DIC will display a
TRANSMISSION HOT message and the transmission
will enter a transmission protection mode. When
the transmission enters the protection mode, you may
notice a change in the transmission shifting patterns.
The transmission will return to normal shifting patterns
when the transmission fluid temperature falls below
260°F
(1 27°C). See
Driver Information
Center (DIC) on page 3-43 for
further information.
If the transmission fluid reaches temperatures of
approximately 275°F (135°C) or greater, the DIC will
display a TRANS
HOT tDLE ENGtNE warning message
and a chime will sound. Pull the vehicle
off the
roadway when it is safe
to do so. Set the parking brake,
place the transmission in PARK
(P) and allow the
engine to idle until the transmission temperature falls
below 260°F (127°C).
If the transmission continues
to operate above 265°F
(1 30"C), please contact your
nearest dealer or the
GM Roadside Assistance Center.
Notice: If you keep driving your vehicle with the
transmission temperature gage above the normal
operating range, you can damage the transmission.
This could lead to costly repairs that may not be
covered under your warranty.
The following situations can cause the transmission to
operate at higher temperatures:
0 Towing a trailer,
* hot outside air temperatures,
0 hauling a large or heavy load,
low transmission fluid level,
high transmission fluid level,
0 restricted air flow to the radiator.
Page 198 of 447

FUEL LEVEL LOW
If the fuel level is low, this message will appear on the
DIC and you will hear a chime. Refuel as soon as
possible. Pressing the select button will acknowledge
this message immediately and clear it from the DIC
display. It will also clear itself after
10 seconds until the
next ignition cycle. The low fuel light near the fuel
gage will still remain on in either case.
CHECK WASHER FLUID
If the washer fluid level is low, this message will appear
on the DIC. Adding washer fluid will clear the message.
Pressing the select button will acknowledge this
message and clear it from the DIC display. This
message will clear itself after
10 seconds until the next
igntion cycle.
TRANSMISSION HOT
If the transmission fluid temperature becomes high, the
message center will display this message.
When the transmission enters the protection mode, you
may notice a change in the transmission shifting
patterns. When the transmission fluid temperature
returns
to normal, the display will turn off and the
transmission shifting patterns will return
to normal.
Notice: If you keep driving your vehicle with the
transmission
TRANS FLUID HOT message
displayed, you can damage the transmission. This
could lead to costly repairs that may not be covered
under your warranty.
The following situations can cause the transmission to
operate at higher temperatures:
Towing a trailer
@ Hot outside air temperatures
Hauling a large or heavy load
Low transmission fluid level
High transmission fluid level
Restricted air flow to the radiator.
A temporary solution
to hotter transmission operating
temperatures may be
to let the transmission cool down.
If the transmission is operated at higher temperatures
on a frequent basis, see Scheduled Maintenance
on page 6-5 for the proper transmission maintenance
intervals.
TRANS HOT IDLE ENGINE
If the transmission fluid in the vehicle gets hot, this
message will appear on the DIC along with a continuous
chime. Driving with the transmission fluid temperature
high can cause damage
to the vehicle.
3-55
Page 199 of 447
Stop the vehicle and let it idle to allow the transmission
to cool. This message will clear and the chime will
stop when the fluid temperature reaches a safe level.
DRIVER DOOR AJAR
If the driver’s door is not fully closed and the vehicle is
in a drive gear, this message will appear on the
display and you will hear a chime. Stop and turn
off the
vehicle, check the door for obstacles, and close the
door again. Check
to see if the message still appears on
the DIC. Pressing the select button will acknowledge
this message and clear it from the DIC display.
PASSENGER DOOR AJAR
If the passenger’s door is not fully closed and the
vehicle is in a drive gear, this message will appear on
the display and you will hear a chime. Stop and turn
off
the vehicle, check the door for obstacles, and close
the door again. Check
to see if the message still
appears on the DIC. Pressing the select button will
acknowledge this message and clear it from the DIC
display.
LEFT REAR DOOR AJAR
If the driver’s side rear door is not fully closed and the
vehicle is in a drive gear, this message will appear
on the display and you will hear a chime. Stop and turn
off the vehicle, check the door for obstacles, and
close the door again. Check
to see if the message still
3-56
appears on the DlC. Pressing the select button will
acknowledge this message and clear it from the DIC
display.
RIGHT REAR DOOR AJAR
If the passenger’s side rear door is not fully closed and
the vehicle is in a drive gear, this message will
appear on the display and you
will hear a chime. Stop
and turn
off the vehicle, check the door for obstacles,
and close the door again. Check
to see if the message
still appears on the DIC. Pressing the select button
will acknowledge this message and clear it from the DIC
display.
RFA # BATTERY LOW
If a remote keyless entry transmitter battery is low, this
message will appear on the DIC. The battery needs
to be replaced in the transmitter. Pressing the select
button will acknowledge this message and clear it from
the DIC display.
STABILITY SYS ACTIVE
You may see the STABILITY SYS ACTIVE message on
the DIC. It means that an advanced computer-controlled
system has come on
to help your vehicle continue to
go in the direction in which you’re steering.
Stabilitrak@activates when the computer senses that
your vehicle is just starting to spin, as
it might if you hit
a patch of ice or other slippery spot on the road.
Page 269 of 447
0 Keep your vehicle in good shape. Check all fluid
levels and also the brakes, tires, cooling system
and transmission. These parts can work hard
on mountain roads.
Know how to go down hills. The most important
thing to know is this: let your engine do some of
the slowing down. Shift
to a lower gear when you go
down a steep or long hill.
_. you c tt : ft down, your brakes could get
so hot that they wouldn’t work well. You would
then have poor braking or even none going down
a hill. You could crash. Shift down to let
your engine assist your brakes on
a steep
downhill slope.
L,ast,,,, ,ownh,,, NEUTrlmL (N) or with the
ignition
off is dangerous. Your brakes will have
to do all the work
of slowing down. They could
get so hot that they wouldn’t work well. You
would then have poor braking
or even none
going down
a hill. You could crash. Always
have your engine running and your vehicle in
gear when you go downhill.
Know how to go uphill. You may want to shift down
to a lower gear. The lower gears help cool your
engine and transmission, and you can climb the
hill better.
Stay in your own lane when driving on two-lane
roads in hills or mountains. Don’t swing wide or
cut across the center of the road. Drive at speeds
that let you stay in your own lane.
As you go over the top of a hill, be alert. There
could be something in your lane, like a stalled car or
an accident.
4-36
Page 288 of 447
Parking on Hills
You really should not park your vehicle, with a
trailer attached, on a hill.
If something goes
wrong, your rig could start to move. People
can be injured, and both your vehicle and the
trailer can be damaged.
But if you ever have to park your rig on a hill, here’s
how to do it:
1. Apply your regular brakes, but don’t shift into
2. Have someone place chocks under the trailer
3. When the wheel chocks are in place, release the
PARK
(P) yet.
wheels.
regular brakes until the chocks absorb the load.
4. Reapply the regular brakes. Then apply your
5. Release the regular brakes.
parking brake
and shift into PARK
(P).
When You Are Ready to Leave After
Parking on a Hill
1. Apply your regular brakes and hold the pedal down
while you:
start your engine,
shift into a gear, and
release the parking brake.
2. Let up on the brake pedal.
3. Drive slowly until the trailer is clear of the chocks.
4. Stop and have someone pick up and store the
chocks.
Maintenance When Trailer Towing
Your vehicle will need service more often when you’re
pulling a trailer. See the Maintenance Schedule for more
on this. Things that are especially important in trailer
operation are automatic transmission fluid (don’t overfill),
engine
oil, axle lubricant, belts, cooling system and
brake system. Each
of these is covered in this manual,
and the Index will help you find them quickly. If
you’re trailering, it’s a good idea to review these sections
before you start your trip.
Check periodically to see that all hitch nuts and bolts
are tight.
4-55
Page 290 of 447
Section 5 Service and Appearance Care
Service ............................................................ 5.3
Doing Your Own Service Work
......................... 5-3
Adding Equipment
to the Outside of Your
Vehicle
.................................................. 5-4
................................................................ Fuel 5.5
Gasoline Octane ............................................ 5.5
Gasoline Specifications ................................... 5-5
California Fuel ............................................... 5-6
Additives
....................................................... 5.6
Fuels in Foreign Countries
............................... 5-6
Filling Your Tank
............................................ 5-7
Filling a Portable Fuel Container ....................... 5.9
the Hood .................... , .................... 5.10
Hood Release ...................... ................ 5-10
Engine Compartment Overview ....... ......... 5-12
Engine Oil ....................................... ..... 5.13
Engine Air Cleaner/Filter ............................. 5.17
Automatic Transmission Fluid ......................... 5-20
Engine Coolant ......................................... 5-22
Checking Things Under
~~
Coolant Surge Tank Pressure Cap ............... 5-25
Engine Overheating ....................................... 5-25
Cooling System ............................................ 5.28
Engine Fan Noise ......................................... 5.33
Power Steering Fluid
..................................... 5-34
Windshield Washer Fluid
................................ 5.34
Brakes
........................................................ 5.36
Battery
........................................................ 5-39
Jump Starting
............................................... 5.40
All-Wheel Drive .............................................. 5.46
Rear Axle .................................. .......... 5-48
Bulb Replacement .......................................... 5-49
Halogen Bulbs .............................................. 5-49
Headlamps
.................................................. 5-49
Running Lamps
......................................... 5-50
Center High-Mounted Stoplamp (CHMSL) ......... 5-52
Taillamps ..................................................... 5-52
Replacement Bulbs ................................... 5.53
Front Turn Signal, Sidemarker and Daytime
5- 1
Page 302 of 447
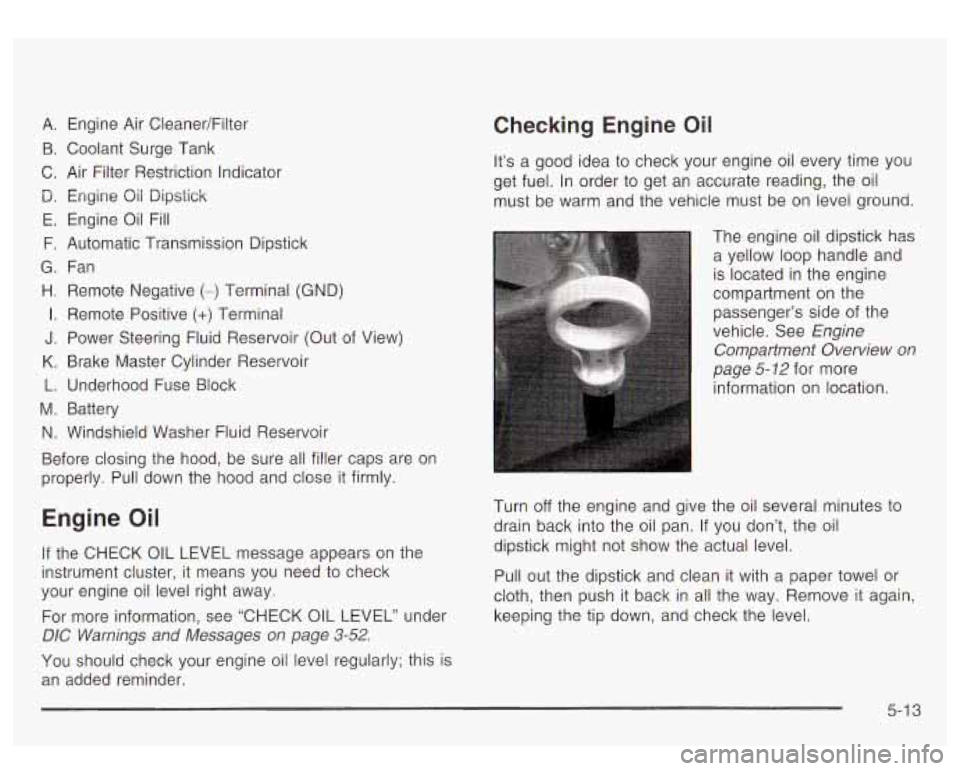
A. Engine Air CleanedFilter
B. Coolant Surge Tank
C. Air Filter Restriction Indicator
D. Engine Qii Dipstick
E. Engine Oil Fill
F. Automatic Transmission Dipstick
G. Fan
H. Remote Negative (-) Terminal (GND)
I. Remote Positive (+) Terminal
J. Power Steering Fluid Reservoir (Out of View)
K. Brake Master Cylinder Reservoir
L. Underhood Fuse Block
M. Battery
N. Windshield Washer Fluid Reservoir
Before closing the hood, be sure all filler caps are on
properly. Pull down the hood and close
it firmly.
Engine Oil
If the CHECK OIL LEVEL message appears on the
instrument cluster, it means you need to check
your engine oil level right away.
For more information, see “CHECK OIL LEVEL” under
DIC Warnings and Messages on page 3-52.
You should check your engine oil level regularly; this is
an added reminder.
Checking Engine Oil
It’s a good idea to check your engine oil every time you
get fuel. In order to get an accurate reading, the oil
must be warm and the vehicle must be on level ground.
The engine oil dipstick has a yellow loop handle and
is located in the engine
compartment on the
passenger’s side of the
vehicle. See Engine
Compartment Overview on
page
5- 12 for more
information on location.
Turn
off the engine and give the oil several minutes to
drain back into the oil pan. If you don’t, the oil
dipstick might not show the actual level.
Pull out the dipstick and clean it with a paper towel or
cloth, then push it back in all the way. Remove it again,
keeping the tip down, and check the level.
5-1 3
Page 309 of 447

Automatic Transmission Fluid
When to Check and Change
A good time to check your automatic transmission fluid
level is when the engine oil is changed.
Change both the fluid and filter every
50,000 miles
(83
000 km) if the vehicle’s GVWR is over 8,600 or if
the vehicle is mainly driven under one or more of these
conditions:
In heavy city traffic where the outside temperature
regularly reaches 90°F (32°C) or higher.
0 In hilly or mountainous terrain.
When doing frequent trailer towing.
Uses such as found in taxi, police or delivery
service.
If your vehicle’s GVWR is not over 8,600 and you do
not use your vehicle under any of these conditions,
change the fluid and filter every
100,000 miles
(1 66 000 km).
How to Check
Because this operation can be a little difficult, you may
choose to have this done at the dealership service
department.
If you do it yourself, be sure to follow all the instructions
here, or you could get a false reading on the dipstick.
Notice: Too much or too little fluid can damage
your transmission. Too much can mean that some of the fluid could come out and fall
on hot engine
part or exhaust system parts, starting a fire.
Too little fluid could cause the transmission to
overheat. Be sure to get an accurate reading if you
check your transmission fluid.
Wait at least 30 minutes before checking the
transmission fluid level
if you have been driving:
When outside temperatures are above 90°F (32°C).
At high speed for quite a while.
In heavy traffic - especially in hot weather.
While pulling a trailer.
See
Part A: Scheduled Maintenance Services on
page 6-4.
5-20
Page 310 of 447

To get the right reading, the fluid should be at normal
operating temperature, which is 180°F
to 200°F
(82°C
to 93°C).
Get the vehicle warmed up by driving about 15 miles
(24 km) when outside temperatures are above 50°F
(10°C). If it's colder than 50°F
(IO'C), drive the vehicle
in THIRD
(3) until the engine temperature gage
moves and then remains steady for
10 minutes.
A cold fluid check can be made after the vehicle has
been sitting for eight hours or more with the engine
off,
but this is used only as a reference. Let the engine
run at idle for five minutes
if outside temperatures are
50°F (10°C) or more.
If it's colder than 50°F (IO'C), you
may have to idle the engine longer. Should the fluid
level be low during this cold check,
you must check the
fluid hot before adding fluid. Checking the fluid hot
will give you a more accurate reading of the fluid level.
Checking the Fluid Level
Prepare your vehicle as follows:
@ Park your vehicle on a level place. Keep the engine
running.
With the parking brake applied, place the shift lever
in PARK (P).
With your foot on the brake pedal, move the shift
lever through each gear range, pausing for about
three seconds in each range. Then, position the shift
lever in
PARK (P).
@ Let the engine run at idle for three minutes or more.
Then, without shutting
off the engine, follow
these steps:
1- The transmission dipstick handle with the graphic is
located at the rear of
the engine compartment,
on the passenger's side.
5-21
Page 311 of 447
See Engine Compartment Overview on page 5-12 for
more information on location.
1. Flip the handle up and then pull out the dipstick
and wipe it with a clean rag or paper towel.
2. Push it back in all the way, wait three seconds and
then pull it back out again.
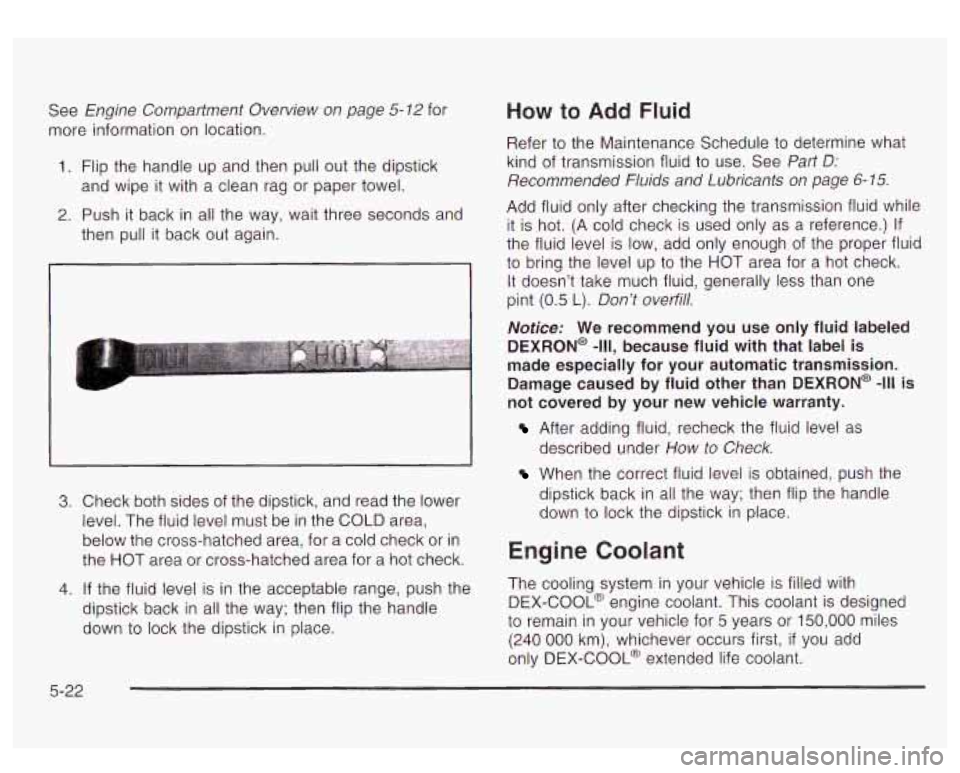
3. Check both sides of the dipstick, and read the lower
level. The fluid level must be in the COLD area,
below the cross-hatched area, for a cold check or in
the HOT area or cross-hatched area for a
hot check.
4. If the fluid level is in the acceptable range, push the
dipstick back in all the way; then flip the handle
down
to lock the dipstick in place.
How to Add Fluid
Refer to the Maintenance Schedule to determine what
kind of transmission fluid
to use. See Part D:
Recommended Fluids and Lubricants on page 6-15.
Add fluid only after checking the transmission fluid while
it is hot. (A cold check is used only as
a reference.) If
the fluid level is low, add only enough of the proper fluid
to bring the level up to the HOT area for a hot check.
It doesn't take much fluid, generally less than one
pint (0.5 L). Don't overfill.
Notice: We recommend you use only fluid labeled
DEXRON@
-111, because fluid with that label is
made especially for your automatic transmission.
Damage caused by fluid other than DEXRON@
-111 is
not covered by your new vehicle warranty.
After adding fluid, recheck the fluid level as
described under How to Check.
When the correct fluid level is obtained, push the
dipstick back in all the way; then flip the handle
down
to lock the dipstick in place.
Engine Coolant
The cooling system in your vehicle is filled with
DEX-COOL@ engine coolant. This coolant is designed
to remain in your vehicle for 5 years or 150,000 miles
(240 000 km), whichever occurs first, if you add
only DEX-COOL@ extended life coolant.
5-22