engine oil GMC YUKON DENALI 2010 Owners Manual
[x] Cancel search | Manufacturer: GMC, Model Year: 2010, Model line: YUKON DENALI, Model: GMC YUKON DENALI 2010Pages: 560, PDF Size: 4.32 MB
Page 5 of 560
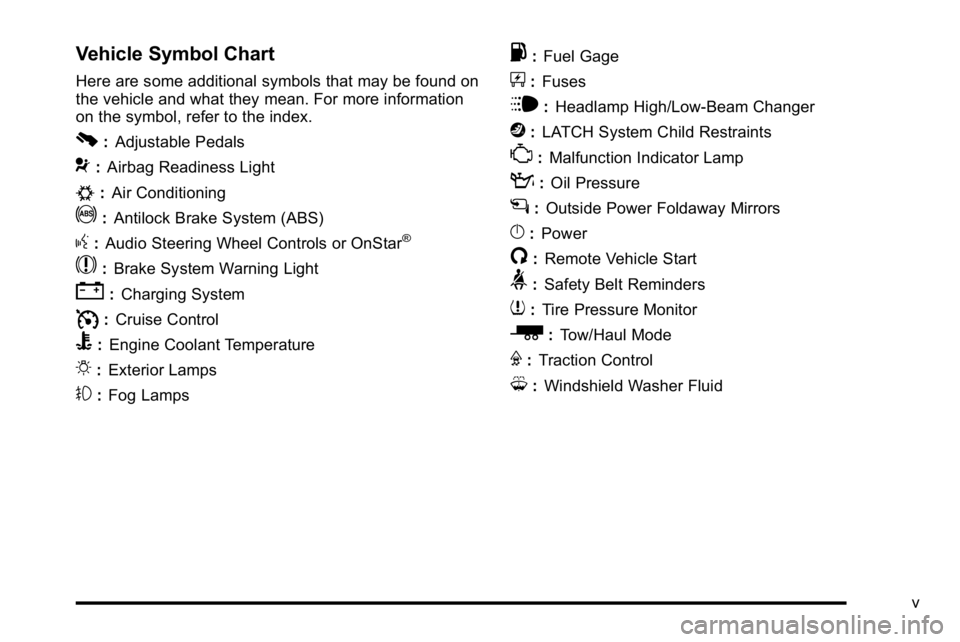
Vehicle Symbol Chart
Here are some additional symbols that may be found on
the vehicle and what they mean. For more information
on the symbol, refer to the index.
0:Adjustable Pedals
9:Airbag Readiness Light
#:Air Conditioning
!:Antilock Brake System (ABS)
g:Audio Steering Wheel Controls or OnStar®
$: Brake System Warning Light
":Charging System
I:Cruise Control
B: Engine Coolant Temperature
O:Exterior Lamps
#:Fog Lamps
.: Fuel Gage
+:Fuses
i: Headlamp High/Low-Beam Changer
j:LATCH System Child Restraints
*: Malfunction Indicator Lamp
::Oil Pressure
g:Outside Power Foldaway Mirrors
}:Power
/:Remote Vehicle Start
>:Safety Belt Reminders
7:Tire Pressure Monitor
_: Tow/Haul Mode
F:Traction Control
M:Windshield Washer Fluid
v
Page 7 of 560
Section 1 In Brief
Instrument Panel. . . . . . . . . . . . . . . . . . . . . . . . . . . . . . . . . . . 1-2
Initial Drive Information . . . . . . . . . . . . . . . . . . . . . . . . . . . 1-4
Remote Keyless Entry (RKE) System . . . . . . . . . . . 1-4
Remote Vehicle Start . . . . . . . . . . . . . . . . . . . . . . . . . . . 1-4
Door Locks . . . . . . . . . . . . . . . . . . . . . . . . . . . . . . . . . . . . . 1-5
Liftgate . . . . . . . . . . . . . . . . . . . . . . . . . . . . . . . . . . . . . . . . . . 1-6
Windows . . . . . . . . . . . . . . . . . . . . . . . . . . . . . . . . . . . . . . . . 1-7
Seat Adjustment . . . . . . . . . . . . . . . . . . . . . . . . . . . . . . . . 1-7
Second Row Seats . . . . . . . . . . . . . . . . . . . . . . . . . . . . . 1-9
Third Row Seats . . . . . . . . . . . . . . . . . . . . . . . . . . . . . . . . 1-9
Heated Seats . . . . . . . . . . . . . . . . . . . . . . . . . . . . . . . . . . . 1-9
Head Restraint Adjustment . . . . . . . . . . . . . . . . . . . . 1-10
Safety Belt . . . . . . . . . . . . . . . . . . . . . . . . . . . . . . . . . . . . . 1-10
Sensing System for Passenger Airbag . . . . . . . . . 1-11
Mirror Adjustment . . . . . . . . . . . . . . . . . . . . . . . . . . . . . . 1-11
Steering Wheel Adjustment . . . . . . . . . . . . . . . . . . . . 1-12
Interior Lighting . . . . . . . . . . . . . . . . . . . . . . . . . . . . . . . . 1-12
Exterior Lighting . . . . . . . . . . . . . . . . . . . . . . . . . . . . . . . 1-13
Windshield Wiper/Washer . . . . . . . . . . . . . . . . . . . . . . 1-14
Climate Controls . . . . . . . . . . . . . . . . . . . . . . . . . . . . . . . 1-14
Transmission . . . . . . . . . . . . . . . . . . . . . . . . . . . . . . . . . . 1-15 Vehicle Features
. . . . . . . . . . . . . . . . . . . . . . . . . . . . . . . . . . 1-16
Radio(s) . . . . . . . . . . . . . . . . . . . . . . . . . . . . . . . . . . . . . . . 1-16
Satellite Radio . . . . . . . . . . . . . . . . . . . . . . . . . . . . . . . . . 1-17
Portable Audio Devices . . . . . . . . . . . . . . . . . . . . . . . . 1-17
Steering Wheel Controls . . . . . . . . . . . . . . . . . . . . . . . 1-18
Bluetooth
®. . . . . . . . . . . . . . . . . . . . . . . . . . . . . . . . . . . . . 1-18
Navigation System . . . . . . . . . . . . . . . . . . . . . . . . . . . . . 1-18
Cruise Control . . . . . . . . . . . . . . . . . . . . . . . . . . . . . . . . . 1-19
Side Blind Zone Alert (SBZA) . . . . . . . . . . . . . . . . . . 1-19
Rear Vision Camera (RVC) . . . . . . . . . . . . . . . . . . . . 1-19
Ultrasonic Parking Assist . . . . . . . . . . . . . . . . . . . . . . 1-20
Power Outlets . . . . . . . . . . . . . . . . . . . . . . . . . . . . . . . . . 1-20
Universal Remote System . . . . . . . . . . . . . . . . . . . . . 1-20
Sunroof . . . . . . . . . . . . . . . . . . . . . . . . . . . . . . . . . . . . . . . . 1-21
Performance and Maintenance . . . . . . . . . . . . . . . . . .1-22
StabiliTrak
®. . . . . . . . . . . . . . . . . . . . . . . . . . . . . . . . . . . . 1-22
Tire Pressure Monitor . . . . . . . . . . . . . . . . . . . . . . . . . . 1-22
Engine Oil Life System . . . . . . . . . . . . . . . . . . . . . . . . 1-23
Fuel E85 (85% Ethanol) . . . . . . . . . . . . . . . . . . . . . . . 1-23
Driving for Better Fuel Economy . . . . . . . . . . . . . . . 1-24
Roadside Assistance Program . . . . . . . . . . . . . . . . . 1-24
OnStar
®. . . . . . . . . . . . . . . . . . . . . . . . . . . . . . . . . . . . . . . 1-25
1-1
Page 29 of 560
Note:The Tire Pressure Monitor can alert you about
low tire pressure, but it does not replace normal monthly
tire maintenance. It is the driver ’s responsibility to
maintain correct tire pressures.
See Tire Pressure Monitor System
on page 6‑66and
Tire Pressure Monitor Operation on page 6‑68.
Engine Oil Life System
The engine oil life system calculates engine oil life
based on vehicle use and, on most vehicles, displays a
DIC message when it is necessary to change the
engine oil and filter. The oil life system should be reset
to 100% only following an oil change.
Resetting the Oil Life System
To reset the Engine Oil Life System on most vehicles:
1. Display the OIL LIFE REMAINING on the DIC. If the vehicle does not have DIC buttons, the
vehicle must be in P (Park) to access this display.
2. Press and hold the SET/RESET button on the DIC, or the trip odometer reset stem if the vehicle does
not have DIC buttons, for more than five seconds.
The oil life will change to 100%. On all vehicles, the Engine Oil Life System can be reset
as follows:
1. Turn the ignition to ON/RUN with the engine off
2. Fully press the accelerator pedal slowly three times within five seconds.
3. Display the OIL LIFE REMAINING on the DIC. If the display shows 100%, the system is reset.
See Engine Oil Life System on page 6‑18.
Fuel E85 (85% Ethanol)
This vehicle has a yellow fuel cap and can use either
unleaded gasoline or ethanol fuel containing up to 85%
ethanol (E85). See Gasoline Octane
on page 6‑6and
Fuel E85 (85% Ethanol) on page 6‑7.
1-23
Page 134 of 560
3. If it is the first remote start since the vehicle hasbeen driven, repeat these steps, while the engine
is still running, to extend the engine running time
by 10 minutes. Remote start can be extended
one time.
After entering the vehicle during a remote start, insert
and turn the key to RUN to drive the vehicle.
To manually shut off a remote start, do any of the
following:
.Aim the RKE transmitter at the vehicle and press
the remote start button until the parking lamps
turn off.
.Turn on the hazard warning flashers.
.Turn the ignition switch on and then off.
The vehicle can be remote started two separate times
between driving sequences. The engine will run for
10 minutes after each remote start.
Or, you can extend the engine run time by another
10 minutes within the first 10 minute remote start time
frame, and before the engine stops.
For example, if the lock button and then the remote start
buttons are pressed again after the vehicle has been
running for five minutes, 10 minutes are added, allowing
the engine to run for 15 minutes.
The additional ten minutes are considered a second
remote vehicle start. Once two remote starts, or a single remote start with
one time extension has been done, the vehicle must be
started with the key. After the key is removed from the
ignition, the vehicle can be remote started again.
The vehicle cannot be remote started if the key is in the
ignition, the hood is not closed, or if there is an
emission control system malfunction and the check
engine light comes on.
Also, the engine will turn off during a remote vehicle
start if the coolant temperature gets too high or if the oil
pressure gets low.
Vehicles that have the remote vehicle start feature are
shipped from the factory with the remote vehicle start
system enabled. The system may be enabled or
disabled through the DIC. See
“REMOTE START”
under DIC Vehicle Customization (With DIC Buttons)
on
page 4‑66for additional information. If your vehicle
does not have DIC buttons, see your dealer/retailer to
enable or disable the remote vehicle start system.
Remote Start Ready
If your vehicle does not have the remote vehicle start
feature, it may have the remote start ready feature.
This feature allows your dealer/retailer to add the
manufacturer's remote vehicle start feature.
See your dealer/retailer if you would like to add the
manufacturer's remote vehicle start feature to your
vehicle.
3-8
Page 153 of 560
Starting Procedure
1. With your foot off the accelerator pedal, turn theignition to START. When the engine starts,
let go of the key. The idle speed will slow down
as the engine warms. Do not race the engine
immediately after starting it. Operate the engine
and transmission gently to allow the oil to warm up
and lubricate all moving parts.
The vehicle has a Computer-Controlled Cranking
System. This feature assists in starting the engine
and protects components. If the ignition key is
turned to the START position, and then released
when the engine begins cranking, the engine will
continue cranking for a few seconds or until the
vehicle starts. If the engine does not start and the
key is held in START, cranking will be stopped
after 15 seconds to prevent cranking motor
damage. To prevent gear damage, this system also
prevents cranking if the engine is already running.
Engine cranking can be stopped by turning the
ignition switch to the ACC/ACCESSORY or
LOCK/OFF position.
Notice: Cranking the engine for long periods of
time, by returning the key to the START position
immediately after cranking has ended, can overheat
and damage the cranking motor, and drain the
battery. Wait at least 15 seconds between each try,
to let the cranking motor cool down. 2. If the engine does not start after 5‐10 seconds,
especially in very cold weather (below 0°F or
−18°C), it could be flooded with too much gasoline.
Try pushing the accelerator pedal all the way to the
floor and holding it there as you hold the key in
START for up to a maximum of 15 seconds. Wait at
least 15 seconds between each try, to allow the
cranking motor to cool down. When the engine
starts, let go of the key and accelerator. If the
vehicle starts briefly but then stops again, repeat
these steps. This clears the extra gasoline from the
engine. Do not race the engine immediately after
starting it. Operate the engine and transmission
gently until the oil warms up and lubricates all
moving parts.
Notice: The engine is designed to work with the
electronics in the vehicle. If you add electrical
parts or accessories, you could change the way
the engine operates. Before adding electrical
equipment, check with your dealer/retailer. If you
do not, the engine might not perform properly.
Any resulting damage would not be covered by the
vehicle warranty.
3-27
Page 195 of 560
Section 4 Instrument Panel
Instrument Panel Overview. . . . . . . . . . . . . . . . . . . . . . . .4-3
Hazard Warning Flashers . . . . . . . . . . . . . . . . . . . . . . . 4-3
Horn . . . . . . . . . . . . . . . . . . . . . . . . . . . . . . . . . . . . . . . . . . . . 4-3
Tilt Wheel . . . . . . . . . . . . . . . . . . . . . . . . . . . . . . . . . . . . . . . 4-3
Heated Steering Wheel . . . . . . . . . . . . . . . . . . . . . . . . . 4-4
Turn Signal/Multifunction Lever . . . . . . . . . . . . . . . . . . 4-4
Turn and Lane-Change Signals . . . . . . . . . . . . . . . . . 4-5
Headlamp High/Low-Beam Changer . . . . . . . . . . . . 4-5
Flash-to-Pass . . . . . . . . . . . . . . . . . . . . . . . . . . . . . . . . . . . 4-6
Windshield Wipers . . . . . . . . . . . . . . . . . . . . . . . . . . . . . . 4-6
Windshield Washer . . . . . . . . . . . . . . . . . . . . . . . . . . . . . 4-7
Rear Window Wiper/Washer . . . . . . . . . . . . . . . . . . . . 4-7
Cruise Control . . . . . . . . . . . . . . . . . . . . . . . . . . . . . . . . . . 4-8
Exterior Lamps . . . . . . . . . . . . . . . . . . . . . . . . . . . . . . . . . 4-11
Headlamps on Reminder . . . . . . . . . . . . . . . . . . . . . . 4-12
Daytime Running Lamps (DRL) . . . . . . . . . . . . . . . . 4-12
Automatic Headlamp System . . . . . . . . . . . . . . . . . . 4-13
Fog Lamps . . . . . . . . . . . . . . . . . . . . . . . . . . . . . . . . . . . . 4-14
Instrument Panel Brightness . . . . . . . . . . . . . . . . . . . 4-14
Dome Lamps . . . . . . . . . . . . . . . . . . . . . . . . . . . . . . . . . . 4-14
Dome Lamp Override . . . . . . . . . . . . . . . . . . . . . . . . . . 4-14
Entry Lighting . . . . . . . . . . . . . . . . . . . . . . . . . . . . . . . . . . 4-15
Exit Lighting . . . . . . . . . . . . . . . . . . . . . . . . . . . . . . . . . . . 4-15
Front Reading Lamps . . . . . . . . . . . . . . . . . . . . . . . . . . 4-15
Electric Power Management . . . . . . . . . . . . . . . . . . . 4-15 Battery Run-Down Protection . . . . . . . . . . . . . . . . . . 4-16
Accessory Power Outlet(s) . . . . . . . . . . . . . . . . . . . . . 4-16
Ashtray(s) and Cigarette Lighter . . . . . . . . . . . . . . . 4-17
Climate Controls . . . . . . . . . . . . . . . . . . . . . . . . . . . . . . . . . . 4-18
Dual Automatic Climate Control System . . . . . . . 4-18
Outlet Adjustment . . . . . . . . . . . . . . . . . . . . . . . . . . . . . . 4-23
Rear Air Conditioning and Heating System
and Electronic Climate Controls . . . . . . . . . . . . . 4-24
Warning Lights, Gages, and Indicators . . . . . . . . . .4-25
Instrument Panel Cluster . . . . . . . . . . . . . . . . . . . . . . . 4-26
Speedometer and Odometer . . . . . . . . . . . . . . . . . . . 4-27
Trip Odometer . . . . . . . . . . . . . . . . . . . . . . . . . . . . . . . . . 4-27
Tachometer . . . . . . . . . . . . . . . . . . . . . . . . . . . . . . . . . . . . 4-27
Safety Belt Reminders . . . . . . . . . . . . . . . . . . . . . . . . . 4-27
Airbag Readiness Light . . . . . . . . . . . . . . . . . . . . . . . . 4-28
Passenger Airbag Status Indicator . . . . . . . . . . . . . 4-29
Charging System Light . . . . . . . . . . . . . . . . . . . . . . . . 4-30
Voltmeter Gage . . . . . . . . . . . . . . . . . . . . . . . . . . . . . . . . 4-31
Brake System Warning Light . . . . . . . . . . . . . . . . . . . 4-32
Antilock Brake System (ABS) Warning Light . . . 4-33
StabiliTrak
®Indicator Light . . . . . . . . . . . . . . . . . . . . . 4-33
Engine Coolant Temperature Gage . . . . . . . . . . . . 4-34
Tire Pressure Light . . . . . . . . . . . . . . . . . . . . . . . . . . . . 4-34
Malfunction Indicator Lamp . . . . . . . . . . . . . . . . . . . . 4-35
Oil Pressure Gage . . . . . . . . . . . . . . . . . . . . . . . . . . . . . 4-38
4-1
Page 232 of 560
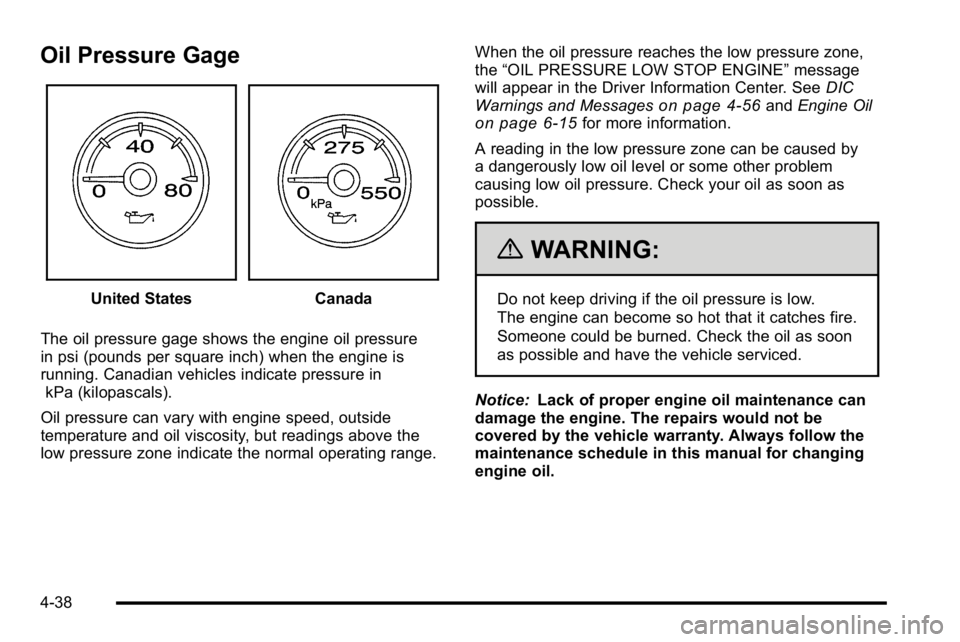
Oil Pressure Gage
United StatesCanada
The oil pressure gage shows the engine oil pressure
in psi (pounds per square inch) when the engine is
running. Canadian vehicles indicate pressure in kPa (kilopascals).
Oil pressure can vary with engine speed, outside
temperature and oil viscosity, but readings above the
low pressure zone indicate the normal operating range. When the oil pressure reaches the low pressure zone,
the
“OIL PRESSURE LOW STOP ENGINE” message
will appear in the Driver Information Center. See DIC
Warnings and Messages
on page 4‑56and Engine Oilon page 6‑15for more information.
A reading in the low pressure zone can be caused by
a dangerously low oil level or some other problem
causing low oil pressure. Check your oil as soon as
possible.
{WARNING:
Do not keep driving if the oil pressure is low.
The engine can become so hot that it catches fire.
Someone could be burned. Check the oil as soon
as possible and have the vehicle serviced.
Notice: Lack of proper engine oil maintenance can
damage the engine. The repairs would not be
covered by the vehicle warranty. Always follow the
maintenance schedule in this manual for changing
engine oil.
4-38
Page 233 of 560
Oil Pressure Light
{WARNING:
Do not keep driving if the oil pressure is low.
The engine can become so hot that it catches fire.
Someone could be burned. Check the oil as soon
as possible and have the vehicle serviced.
Notice: Lack of proper engine oil maintenance can
damage the engine. The repairs would not be
covered by the vehicle warranty. Always follow the
maintenance schedule in this manual for changing
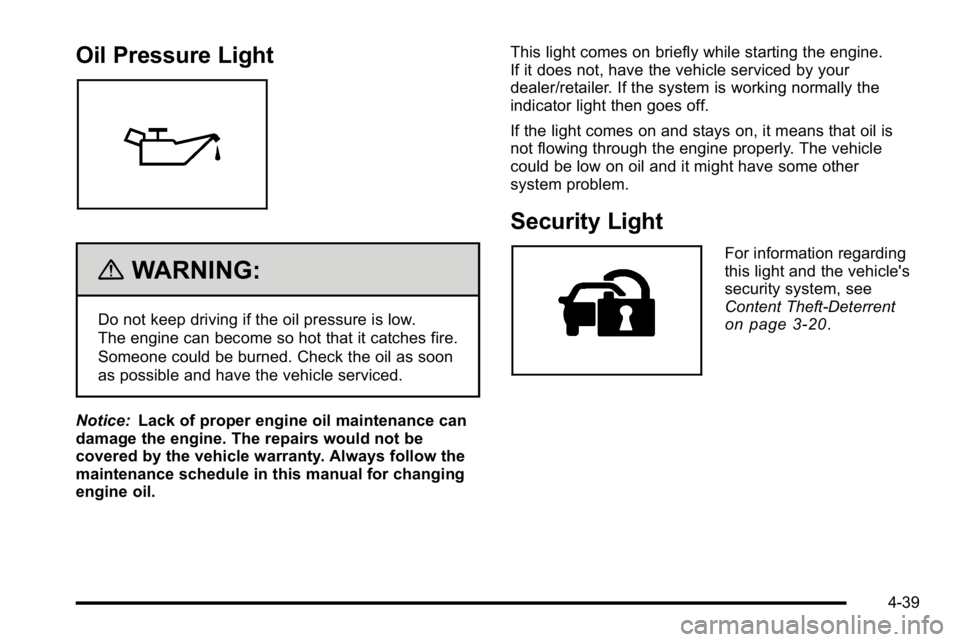
engine oil. This light comes on briefly while starting the engine.
If it does not, have the vehicle serviced by your
dealer/retailer. If the system is working normally the
indicator light then goes off.
If the light comes on and stays on, it means that oil is
not flowing through the engine properly. The vehicle
could be low on oil and it might have some other
system problem.
Security Light
For information regarding
this light and the vehicle's
security system, see
Content Theft-Deterrent
on page 3‑20.
4-39
Page 238 of 560
T(Vehicle Information):Press this button to display
the oil life, units, side blind zone system on/off, tire
pressure readings for vehicles with the Tire Pressure
Monitor System (TPMS), trailer brake gain and output
information for vehicles with the Integrated Trailer Brake
Control (ITBC) system, engine hours, Remote Keyless
Entry (RKE) transmitter programming, compass zone
setting, and compass recalibration.
U(Customization): Press this button to customize
the feature settings on your vehicle. See DIC Vehicle
Customization (With DIC Buttons)
on page 4‑66for
more information.
V(Set/Reset): Press this button to set or reset certain
functions and to turn off or acknowledge messages on
the DIC.
Trip/Fuel Menu Items
3
(Trip/Fuel): Press this button to scroll through the
following menu items:
Odometer
Press the trip/fuel button until ODOMETER displays.
This display shows the distance the vehicle has been
driven in either miles (mi) or kilometers (km). Pressing
the trip odometer reset stem will also display the
odometer.
To switch between English and metric measurements,
see “Units” later in this section.
Trip Odometer
Press the trip/fuel button until TRIP displays.
This display shows the current distance traveled in
either miles (mi) or kilometers (km) since the last reset
for the trip odometer. Pressing the trip odometer reset
stem will also display the trip odometer.
The trip odometer can be reset to zero by pressing the
set/reset button while the trip odometer is displayed.
You can also reset the trip odometer while it is
displayed by pressing and holding the trip odometer
reset stem.
The trip odometer has a feature called the retro-active
reset. This can be used to set the trip odometer to the
number of miles (kilometers) driven since the ignition
was last turned on. This can be used if the trip
odometer is not reset at the beginning of the trip.
To use the retro-active reset feature, press and hold
the set/reset button for at least four seconds. The trip
odometer will display the number of miles (mi) or
kilometers (km) driven since the ignition was last turned
on and the vehicle was moving. Once the vehicle
begins moving, the trip odometer will accumulate
mileage. For example, if the vehicle was driven
5 miles (8 km) before it is started again, and then the
retro-active reset feature is activated, the display will
show 5 miles (8 km). As the vehicle begins moving, the
display will then increase to 5.1 miles (8.2 km), 5.2 miles
(8.4 km), etc.
4-44
Page 240 of 560
Transmission Temperature
Press the trip/fuel button until TRANS TEMP displays.
This display shows the temperature of the automatic
transmission fluid in either degrees Fahrenheit (°F) or
degrees Celsius (°C).
Instantaneous Economy and Active Fuel
Management™Indicator
If your vehicle has this display, press the trip/fuel button
until INST ECON V8 displays. This display shows the
current fuel economy at a particular moment and will
change frequently as driving conditions change. This
display shows the instantaneous fuel economy in miles
per gallon (mpg) or liters per 100 kilometers (L/100 km).
Unlike average economy, this screen cannot be reset.
An Active Fuel Management indicator will display on the
right side of the DIC, while INST ECON displays on the
left side. Active Fuel Management allows the engine to
operate on either four or eight cylinders, depending on
your driving demands. When Active Fuel Management
is active, V4 will display on the DIC. When Active Fuel
Management is inactive, V8 will display. See Active
Fuel Management™
on page 3‑29for more
information.
Blank Display
This display shows no information.
Vehicle Information Menu Items
T
(Vehicle Information): Press this button to scroll
through the following menu items:
Oil Life
Press the vehicle information button until OIL LIFE
REMAINING displays. This display shows an estimate
of the oil's remaining useful life. If you see 99% OIL
LIFE REMAINING on the display, that means 99% of
the current oil life remains. The engine oil life system
will alert you to change the oil on a schedule consistent
with your driving conditions.
When the remaining oil life is low, the CHANGE
ENGINE OIL SOON message will appear on the
display. See “CHANGE ENGINE OIL SOON” under
DIC Warnings and Messages
on page 4‑56.
You should change the oil as soon as you can.
See Engine Oil
on page 6‑15. In addition to the
engine oil life system monitoring the oil life, additional
maintenance is recommended in the Maintenance
Schedule in this manual. See Scheduled Maintenance
on page 7‑3for more information.
Remember, you must reset the OIL LIFE display
yourself after each oil change. It will not reset itself.
Also, be careful not to reset the OIL LIFE display
accidentally at any time other than when the oil has
4-46