spare tire GMC YUKON XL 2006 Owners Manual
[x] Cancel search | Manufacturer: GMC, Model Year: 2006, Model line: YUKON XL, Model: GMC YUKON XL 2006Pages: 540, PDF Size: 3 MB
Page 100 of 540
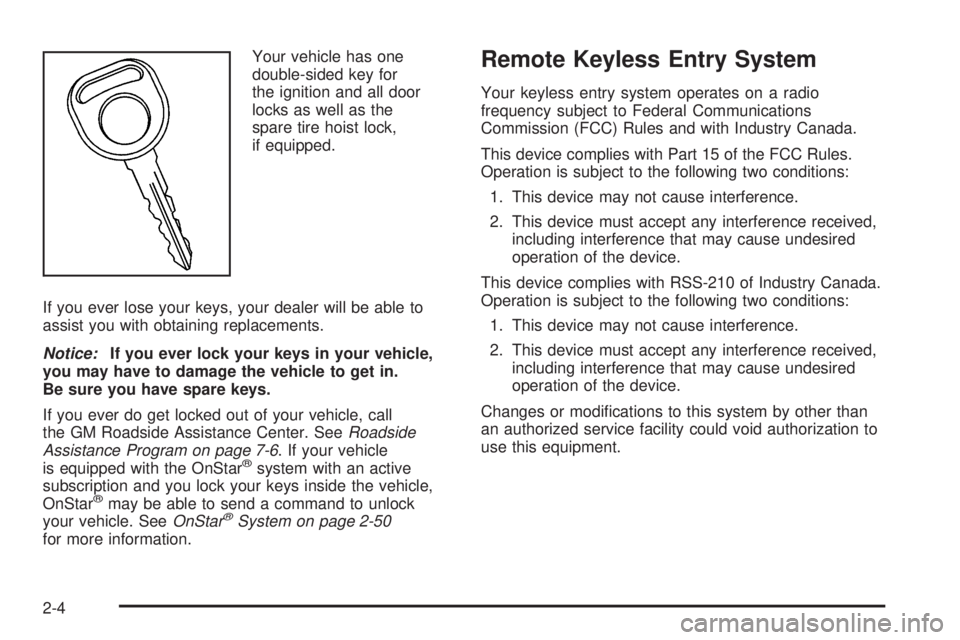
Your vehicle has one
double-sided key for
the ignition and all door
locks as well as the
spare tire hoist lock,
if equipped.
If you ever lose your keys, your dealer will be able to
assist you with obtaining replacements.
Notice:If you ever lock your keys in your vehicle,
you may have to damage the vehicle to get in.
Be sure you have spare keys.
If you ever do get locked out of your vehicle, call
the GM Roadside Assistance Center. SeeRoadside
Assistance Program on page 7-6. If your vehicle
is equipped with the OnStar
®system with an active
subscription and you lock your keys inside the vehicle,
OnStar
®may be able to send a command to unlock
your vehicle. SeeOnStar®System on page 2-50
for more information.
Remote Keyless Entry System
Your keyless entry system operates on a radio
frequency subject to Federal Communications
Commission (FCC) Rules and with Industry Canada.
This device complies with Part 15 of the FCC Rules.
Operation is subject to the following two conditions:
1. This device may not cause interference.
2. This device must accept any interference received,
including interference that may cause undesired
operation of the device.
This device complies with RSS-210 of Industry Canada.
Operation is subject to the following two conditions:
1. This device may not cause interference.
2. This device must accept any interference received,
including interference that may cause undesired
operation of the device.
Changes or modi�cations to this system by other than
an authorized service facility could void authorization to
use this equipment.
2-4
Page 315 of 540
Before You Go Off-Roading
There are some things to do before you go out. For
example, be sure to have all necessary maintenance
and service work done. Check to make sure all
underbody shields (if equipped) are properly attached.
Be sure you read all the information about your
four-wheel-drive or all-wheel-drive vehicle in this manual.
Is there enough fuel? Is the spare tire fully in�ated?
Are the �uid levels up where they should be? What
are the local laws that apply to off-roading where you will
be driving? If you do not know, you should check with
law enforcement people in the area. Will you be on
someone’s private land? If so, be sure to get the
necessary permission.
Loading Your Vehicle for Off-Road
Driving
There are some important things to remember about
how to load your vehicle.
The heaviest things should be on the load �oor and
forward of your rear axle. Put heavier items as far
forward as you can.
Be sure the load is secured properly, so driving on
the off-road terrain does not toss things around.
{CAUTION:
Cargo on the load �oor piled higher than
the seatbacks can be thrown forward
during a sudden stop. You or your
passengers could be injured. Keep cargo
below the top of the seatbacks.
Unsecured cargo on the load �oor can be
tossed about when driving over rough
terrain. You or your passengers can be
struck by �ying objects. Secure the cargo
properly.
Heavy loads on the roof raise the vehicle’s
center of gravity, making it more likely to
roll over. You can be seriously or fatally
injured if the vehicle rolls over. Put heavy
loads inside the cargo area, not on the
roof. Keep cargo in the cargo area as far
forward and low as possible.
You will �nd other important information in this manual.
SeeLoading Your Vehicle on page 4-46andTires
on page 5-57.
4-19
Page 376 of 540
Tire Pressure Monitor System.........................5-64
Tire Inspection and Rotation...........................5-68
When It Is Time for New Tires.......................5-69
Buying New Tires.........................................5-70
Different Size Tires and Wheels......................5-71
Uniform Tire Quality Grading..........................5-72
Wheel Alignment and Tire Balance..................5-73
Wheel Replacement......................................5-73
Tire Chains..................................................5-74
If a Tire Goes Flat........................................5-75
Changing a Flat Tire.....................................5-76
Removing the Spare Tire and Tools................5-78
Removing the Flat Tire and Installing
the Spare Tire..........................................5-81
Secondary Latch System...............................5-88
Storing a Flat or Spare Tire and Tools............5-92
Spare Tire...................................................5-95
Appearance Care............................................5-96
Cleaning the Inside of Your Vehicle.................5-96
Fabric/Carpet...............................................5-98
Leather.......................................................5-98
Instrument Panel, Vinyl, and Other Plastic
Surfaces..................................................5-99
Care of Safety Belts......................................5-99
Weatherstrips...............................................5-99Washing Your Vehicle..................................5-100
Cleaning Exterior Lamps/Lenses....................5-100
Finish Care................................................5-100
Windshield, Backglass, and Wiper Blades.......5-101
Aluminum or Chrome-Plated Wheels..............5-102
Tires.........................................................5-103
Sheet Metal Damage...................................5-103
Finish Damage...........................................5-103
Underbody Maintenance...............................5-103
Chemical Paint Spotting...............................5-103
Vehicle Care/Appearance Materials................5-104
Vehicle Identi�cation.....................................5-105
Vehicle Identi�cation Number (VIN)................5-105
Service Parts Identi�cation Label...................5-105
Electrical System..........................................5-106
Add-On Electrical Equipment.........................5-106
Windshield Wiper Fuses...............................5-106
Power Windows and Other Power Options......5-106
Fuses and Circuit Breakers..........................5-106
Instrument Panel Fuse Block........................5-107
Center Instrument Panel Fuse Block..............5-108
Underhood Fuse Block................................5-109
Capacities and Speci�cations........................5-114
Section 5 Service and Appearance Care
5-2
Page 437 of 540
Vehicle Capacity Weight:The number of designated
seating positions multiplied by 150 lbs (68 kg) plus
the rated cargo load. SeeLoading Your Vehicle
on page 4-46.
Vehicle Maximum Load on the Tire:Load on an
individual tire due to curb weight, accessory weight,
occupant weight, and cargo weight.
Vehicle Placard:A label permanently attached to a
vehicle showing the vehicle’s capacity weight and
the original equipment tire size and recommended
in�ation pressure. See “Tire and Loading Information
Label” underLoading Your Vehicle on page 4-46.
In�ation - Tire Pressure
Tires need the correct amount of air pressure to operate
effectively.
Notice:Do not let anyone tell you that
under-in�ation or over-in�ation is all right. It is not.
If your tires do not have enough air (under-in�ation),
you can get the following:
Too much �exing
Too much heat
Tire overloading
Premature or irregular wear
Poor handling
Reduced fuel economyIf your tires have too much air (over-in�ation),
you can get the following:
Unusual wear
Poor handling
Rough ride
Needless damage from road hazards
A Tire and Loading Information label is attached to the
vehicle’s center pillar (B-pillar), below the driver’s
door lock post (striker). This label lists your vehicle’s
original equipment tires and their recommended cold
tire in�ation pressures. The recommended cold tire
in�ation pressure, shown on the label, is the minimum
amount of air pressure needed to support your vehicle’s
maximum load carrying capacity.
For additional information regarding how much weight
your vehicle can carry, and an example of the tire
and loading information label, seeLoading Your
Vehicle on page 4-46.
When to Check
Check your tires once a month or more. Do not forget
to check the spare tire. For additional information
regarding the spare tire, seeSpare Tire on page 5-95.
5-63
Page 438 of 540
How to Check
Use a good quality pocket-type gage to check tire
pressure. You cannot tell if your tires are properly
in�ated simply by looking at them. Radial tires may
look properly in�ated even when they’re underin�ated.
Check the tire’s in�ation pressure when the tires
are cold. Cold means your vehicle has been sitting
for at least three hours or driven no more than
1 mile (1.6 km).
Remove the valve cap from the tire valve stem. Press
the tire gage �rmly onto the valve to get a pressure
measurement. If the cold tire in�ation pressure matches
the recommended pressure on the Tire and Loading
Information label, no further adjustment is necessary.
If the in�ation pressure is low, add air until you reach
the recommended amount.
If you over�ll the tire, release air by pushing on the
metal stem in the center of the tire valve. Recheck
the tire pressure with the tire gage.
Be sure to put the valve caps back on the valve
stems. They help prevent leaks by keeping out dirt
and moisture.
Tire Pressure Monitor System
The Tire Pressure Monitor System (TPMS) uses radio
and sensor technology to check tire pressure levels.
If your vehicle has this feature, sensors are mounted on
each tire and wheel assembly, except the spare tire.
The TPMS sensors monitor the air pressure in your
vehicle’s tires and transmit tire pressure readings to a
receiver located in the vehicle.
The TPMS is designed to alert the driver, if a low tire
pressure condition exists. This system also allows
the driver to check tire pressure levels using the Driver
Information Center (DIC).
When a low tire pressure condition is detected, the TPMS
displays the CHECK TIRE PRESSURE warning message
on the DIC, and at the same time illuminates the low tire
pressure warning symbol. For additional information
and details about the DIC operation and displays see
DIC Operation and Displays on page 3-53andDIC
Warnings and Messages on page 3-56.
You may notice, during cooler weather conditions, that
the tire pressure monitor light, located on the instrument
panel cluster, and the CHECK TIRE PRESSURE
message will appear when the vehicle is �rst started and
then turn off as you start to drive the vehicle. This could
be an early indicator that the tire pressures are getting
low and need to be in�ated to the proper pressure.
5-64
Page 439 of 540
Each tire, including the spare (if provided), should be
checked monthly when cold and in�ated to the in�ation
pressure recommended by the vehicle manufacturer
on the vehicle placard or tire in�ation pressure label.
(If your vehicle has tires of a different size than the
size indicated on the vehicle placard or tire in�ation
pressure label, you should determine the proper
in�ation pressure for those tires.)
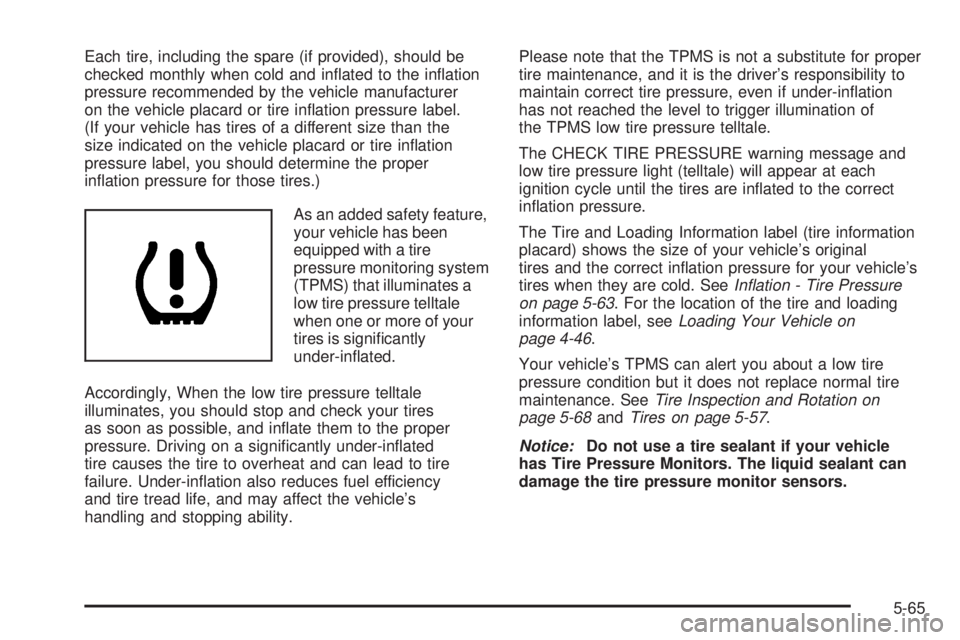
As an added safety feature,
your vehicle has been
equipped with a tire
pressure monitoring system
(TPMS) that illuminates a
low tire pressure telltale
when one or more of your
tires is signi�cantly
under-in�ated.
Accordingly, When the low tire pressure telltale
illuminates, you should stop and check your tires
as soon as possible, and in�ate them to the proper
pressure. Driving on a signi�cantly under-in�ated
tire causes the tire to overheat and can lead to tire
failure. Under-in�ation also reduces fuel efficiency
and tire tread life, and may affect the vehicle’s
handling and stopping ability.Please note that the TPMS is not a substitute for proper
tire maintenance, and it is the driver’s responsibility to
maintain correct tire pressure, even if under-in�ation
has not reached the level to trigger illumination of
the TPMS low tire pressure telltale.
The CHECK TIRE PRESSURE warning message and
low tire pressure light (telltale) will appear at each
ignition cycle until the tires are in�ated to the correct
in�ation pressure.
The Tire and Loading Information label (tire information
placard) shows the size of your vehicle’s original
tires and the correct in�ation pressure for your vehicle’s
tires when they are cold. SeeIn�ation - Tire Pressure
on page 5-63. For the location of the tire and loading
information label, seeLoading Your Vehicle on
page 4-46.
Your vehicle’s TPMS can alert you about a low tire
pressure condition but it does not replace normal tire
maintenance. SeeTire Inspection and Rotation on
page 5-68andTires on page 5-57.
Notice:Do not use a tire sealant if your vehicle
has Tire Pressure Monitors. The liquid sealant can
damage the tire pressure monitor sensors.
5-65
Page 441 of 540
7. Proceed to the passenger’s side rear tire,
and repeat the procedure in Step 5.
8. Proceed to the driver’s side rear tire, and repeat
the procedure in Step 5.
9. After hearing the con�rming horn chirp for the
left rear tire, check to see if the TPMS warning
light is still �ashing. If it is, turn the ignition switch
to LOCK to exit the sensor matching process.
If the TPMS warning light is not �ashing, the
�ve minute time limit has passed and you will need
to start the process over beginning with Step 1.
10. Set all four tires to the recommended air pressure
level as indicated on the Tire and Loading
Information label.
11. Put the valve caps back on the valve stems
The spare tire does not have a TPMS sensor. If you
replace one of the road tires with the spare, the CHECK
TIRE PRESSURE message will be displayed on the
DIC screen. This message should go off once you
re-install the road tire containing the TPMS sensor.
The SERVICE TIRE MONITOR message is displayed
when the TPMS is malfunctioning. One or more missing
or inoperable TPMS sensors will cause the service
tire monitor message to be displayed. See your
dealer for service.Federal Communications
Commission (FCC) and Industry
and Science Canada
The Tire Pressure Monitor System (TPMS) operates
on a radio frequency and complies with Part 15 of
the FCC Rules. Operation is subject to the following
two conditions:
1. This device may not cause harmful interference.
2. This device must accept any interference received,
including interference that may cause undesired
operation.
The Tire Pressure Monitor System (TPMS) operates
on a radio frequency and complies with RSS-210
of Industry and Science Canada. Operation is subject
to the following two conditions:
1. This device may not cause interference.
2. This device must accept any interference received,
including interference that may cause undesired
operation of the device.
Changes or modi�cations to this system by other than
an authorized service facility could void authorization
to use this equipment.
5-67
Page 442 of 540
Tire Inspection and Rotation
Tires should be rotated every 5,000 to 8,000 miles
(8 000 to 13 000 km).
Any time you notice unusual wear, rotate your tires
as soon as possible and check wheel alignment. Also
check for damaged tires or wheels. SeeWhen It Is Time
for New Tires on page 5-69andWheel Replacement
on page 5-73for more information.
Make sure the spare tire is stored securely. Push,
pull, and then try to rotate or turn the tire. If it moves,
use the ratchet/wheel wrench to tighten the cable.
SeeChanging a Flat Tire on page 5-76.
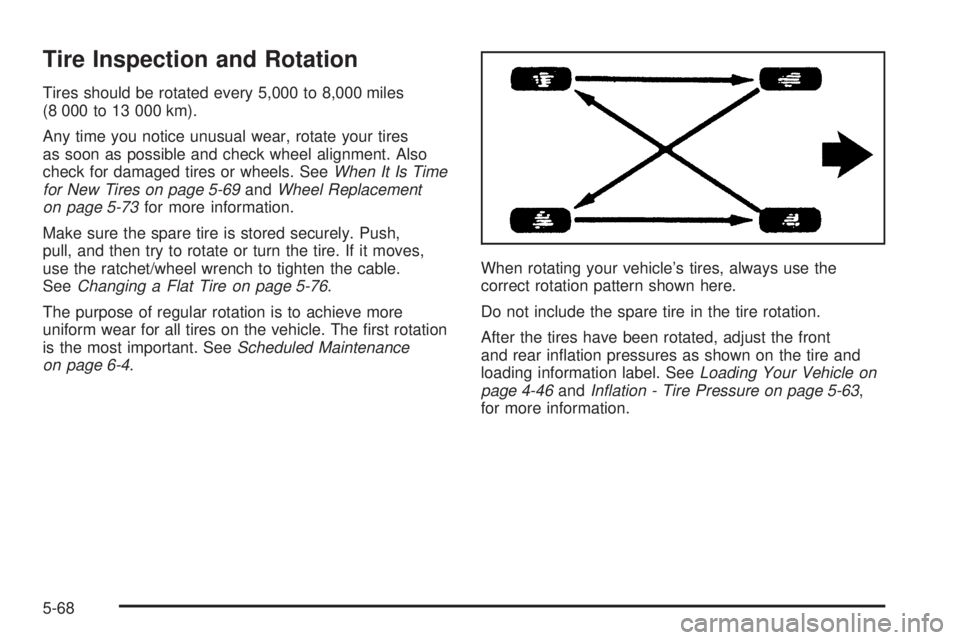
The purpose of regular rotation is to achieve more
uniform wear for all tires on the vehicle. The �rst rotation
is the most important. SeeScheduled Maintenance
on page 6-4.When rotating your vehicle’s tires, always use the
correct rotation pattern shown here.
Do not include the spare tire in the tire rotation.
After the tires have been rotated, adjust the front
and rear in�ation pressures as shown on the tire and
loading information label. SeeLoading Your Vehicle on
page 4-46andIn�ation - Tire Pressure on page 5-63,
for more information.
5-68
Page 444 of 540
Buying New Tires
GM has developed and matched speci�c tires for your
vehicle. The original equipment tires installed on
your vehicle, when it was new, were designed to meet
General Motors Tire Performance Criteria Speci�cation
(TPC spec) system rating. If you need replacement
tires, GM strongly recommends that you get tires with
the same TPC Spec rating. This way, your vehicle
will continue to have tires that are designed to give the
same performance and vehicle safety, during normal
use, as the original tires.
GM’s exclusive TPC Spec system considers over a
dozen critical speci�cations that impact the overall
performance of your vehicle, including brake system
performance, ride and handling, traction control, and
tire pressure monitoring performance. GM’s TPC Spec
number is molded onto the tire’s sidewall by the tire
manufacturer. If the tires have an all-season tread
design, the TPC spec number will be followed by an
MS for mud and snow. SeeTire Sidewall Labeling
on page 5-58for additional information.{CAUTION:
Mixing tires could cause you to lose control
while driving. If you mix tires of different sizes,
brands or types (radial and bias-belted tires),
the vehicle may not handle properly, and you
could have a crash. Using tires of different
sizes, brands or types may also cause damage
to your vehicle. Be sure to use the same size,
brand, and type tires on all wheels.
Your vehicle may have a different size spare
than the road tires (those originally installed
on your vehicle). When new, your vehicle
included a spare tire and wheel assembly with
a similar overall diameter as your vehicle’s
road tires and wheels, so it is all right to drive
on it. Because this spare was developed for
use on your vehicle, it will not affect vehicle
handling.
5-70
Page 446 of 540
Uniform Tire Quality Grading
Quality grades can be found where applicable on the
tire sidewall between tread shoulder and maximum
section width. For example:
Treadwear 200 Traction AA Temperature A
The following information relates to the system
developed by the United States National Highway
Traffic Safety Administration, which grades tires by
treadwear, traction and temperature performance.
(This applies only to vehicles sold in the United States.)
The grades are molded on the sidewalls of most
passenger car tires. The Uniform Tire Quality Grading
system does not apply to deep tread, winter-type
snow tires, space-saver or temporary use spare tires,
tires with nominal rim diameters of 10 to 12 inches
(25 to 30 cm), or to some limited-production tires.
While the tires available on General Motors passenger
cars and light trucks may vary with respect to these
grades, they must also conform to federal safety
requirements and additional General Motors Tire
Performance Criteria (TPC) standards.
Treadwear
The treadwear grade is a comparative rating based on
the wear rate of the tire when tested under controlled
conditions on a speci�ed government test course.
For example, a tire graded 150 would wear one and
a half (1.5) times as well on the government course as
a tire graded 100. The relative performance of tires
depends upon the actual conditions of their use,
however, and may depart signi�cantly from the norm
due to variations in driving habits, service practices and
differences in road characteristics and climate.
Traction – AA, A, B, C
The traction grades, from highest to lowest, are AA,
A, B, and C. Those grades represent the tire’s ability to
stop on wet pavement as measured under controlled
conditions on speci�ed government test surfaces
of asphalt and concrete. A tire marked C may have
poor traction performance. Warning: The traction
grade assigned to this tire is based on straight-ahead
braking traction tests, and does not include acceleration,
cornering, hydroplaning, or peak traction characteristics.
5-72