lock GMC YUKON XL 2015 Owners Manual
[x] Cancel search | Manufacturer: GMC, Model Year: 2015, Model line: YUKON XL, Model: GMC YUKON XL 2015Pages: 459, PDF Size: 6.05 MB
Page 315 of 459
Black plate (12,1)GMC 2015i Yukon/Yukon XL Owner Manual (GMNA-Localizing-U.S./Canada/
Mexico-8431503) - 2015 - crc - 8/11/14
10-12 Vehicle Care
6. Perform a hot check at the firstopportunity after the
transmission reaches a normal
operating temperature between
71°C to 93°C (160°F to 200°F).
7. If the fluid level is in the acceptable range, push the
dipstick back in all the way, then
flip the handle down to lock the
dipstick in place.
Hot Check Procedure
Use this procedure to check the
transmission fluid level when the
transmission fluid temperature is
between 71°C and 93°C (160°F and
200°F).
The hot check is the most accurate
method to check the fluid level. The
hot check should be performed at
the first opportunity in order to verify
the cold check. The fluid level rises
as fluid temperature increases, so it
is important to ensure the
transmission temperature is within
range.
1. Locate the transmission dipstick at the rear of the engine
compartment, on the passenger
side of the vehicle.
See Engine Compartment
Overview on page 10-5.
2. Flip the handle up, then pull out the dipstick and wipe it with a
clean rag or paper towel.
3. Install the dipstick by pushing it back in all the way; wait
three seconds, and then pull it
back out again.
4. Check both sides of the dipstick and read the lower level. Repeat
the check procedure to verify the
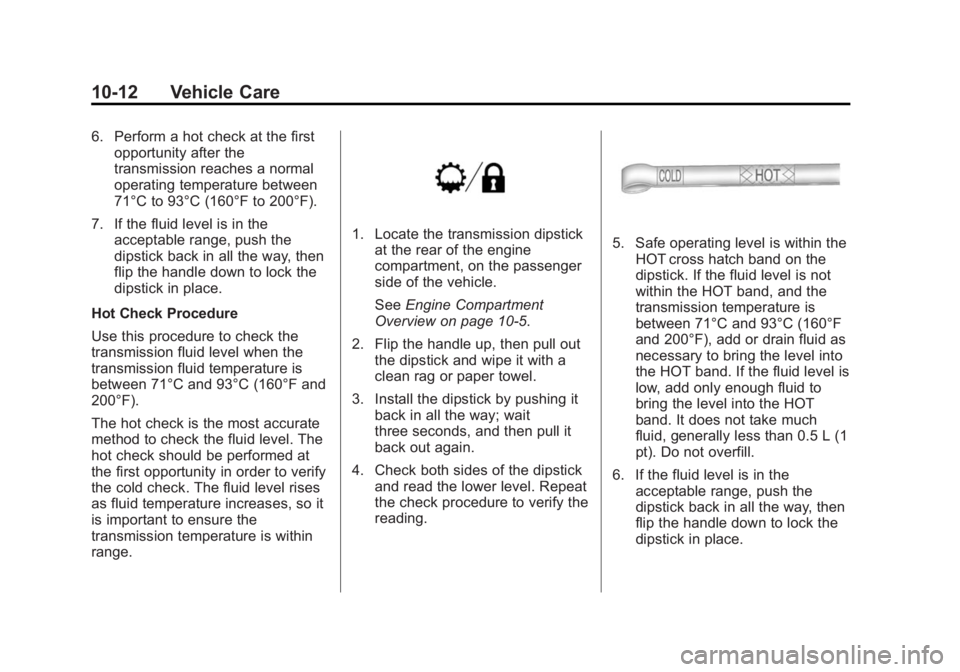
reading.5. Safe operating level is within theHOT cross hatch band on the
dipstick. If the fluid level is not
within the HOT band, and the
transmission temperature is
between 71°C and 93°C (160°F
and 200°F), add or drain fluid as
necessary to bring the level into
the HOT band. If the fluid level is
low, add only enough fluid to
bring the level into the HOT
band. It does not take much
fluid, generally less than 0.5 L (1
pt). Do not overfill.
6. If the fluid level is in the acceptable range, push the
dipstick back in all the way, then
flip the handle down to lock the
dipstick in place.
Page 320 of 459
Black plate (17,1)GMC 2015i Yukon/Yukon XL Owner Manual (GMNA-Localizing-U.S./Canada/
Mexico-8431503) - 2015 - crc - 8/11/14
Vehicle Care 10-17
{Caution
This vehicle has a specific
coolant fill procedure. Failure to
follow this procedure could cause
the engine to overheat and be
severely damaged.
{Warning
Steam and scalding liquids from a
hot cooling system can blow out
and burn you badly. Never turn
the cap when the cooling system,
including the surge tank pressure
cap, is hot. Wait for the cooling
system and surge tank pressure
cap to cool.
If no coolant is visible in the surge
tank, add coolant.
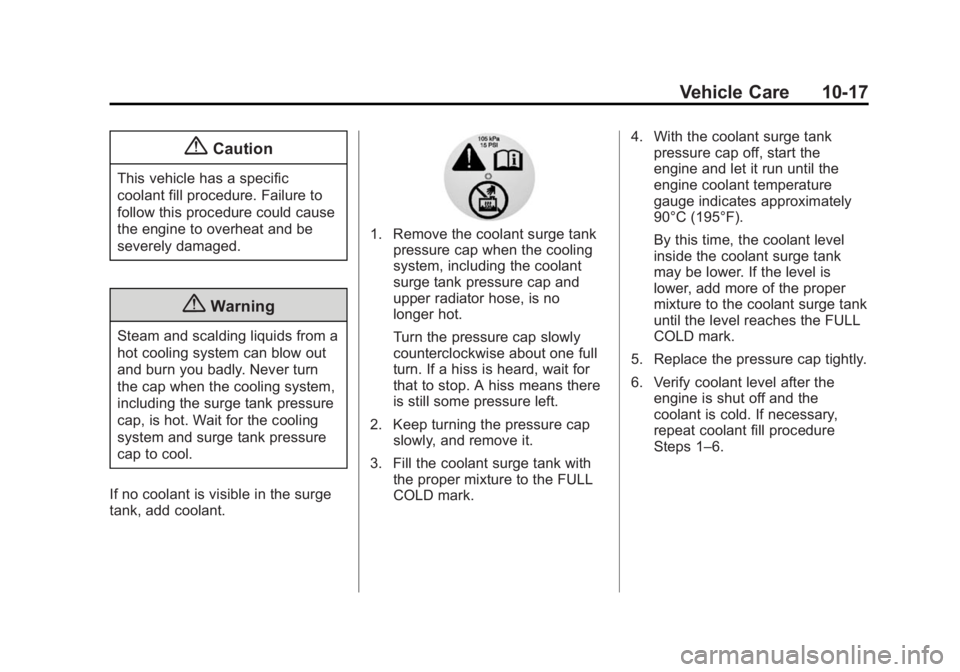
1. Remove the coolant surge tank pressure cap when the cooling
system, including the coolant
surge tank pressure cap and
upper radiator hose, is no
longer hot.
Turn the pressure cap slowly
counterclockwise about one full
turn. If a hiss is heard, wait for
that to stop. A hiss means there
is still some pressure left.
2. Keep turning the pressure cap slowly, and remove it.
3. Fill the coolant surge tank with the proper mixture to the FULL
COLD mark. 4. With the coolant surge tank
pressure cap off, start the
engine and let it run until the
engine coolant temperature
gauge indicates approximately
90°C (195°F).
By this time, the coolant level
inside the coolant surge tank
may be lower. If the level is
lower, add more of the proper
mixture to the coolant surge tank
until the level reaches the FULL
COLD mark.
5. Replace the pressure cap tightly.
6. Verify coolant level after the engine is shut off and the
coolant is cold. If necessary,
repeat coolant fill procedure
Steps 1–6.
Page 330 of 459
Black plate (27,1)GMC 2015i Yukon/Yukon XL Owner Manual (GMNA-Localizing-U.S./Canada/
Mexico-8431503) - 2015 - crc - 8/11/14
Vehicle Care 10-27
Starter Switch Check
{Warning
When you are doing this
inspection, the vehicle could
move suddenly. If the vehicle
moves, you or others could be
injured.
1. Before starting this check, be sure there is enough room
around the vehicle.
2. Apply both the parking brake and the regular brake.
Do not use the accelerator
pedal, and be ready to turn off
the engine immediately if it
starts.
3. Try to start the engine in each gear. The vehicle should start
only in P (Park) or N (Neutral).
If the vehicle starts in any other
position, contact your dealer for
service.
Automatic Transmission
Shift Lock Control
Function Check
{Warning
When you are doing this
inspection, the vehicle could
move suddenly. If the vehicle
moves, you or others could be
injured.
1. Before starting this check, be sure there is enough room
around the vehicle. It should be
parked on a level surface.
2. Apply the parking brake. Be ready to apply the regular brake
immediately if the vehicle begins
to move.
3. With the engine off, turn the ignition on, but do not start the
engine. Without applying the
regular brake, try to move the
shift lever out of P (Park) with normal effort. If the shift lever
moves out of P (Park), contact
your dealer for service.
Ignition Transmission
Lock Check
If equipped with a key type ignition,
while parked and with the parking
brake set, try to turn the ignition to
LOCK/OFF in each shift lever
position.
.The ignition should turn to
LOCK/OFF only when the shift
lever is in P (Park).
.The ignition key should come
out only in LOCK/OFF.
Contact your dealer if service is
required.
Page 332 of 459
Black plate (29,1)GMC 2015i Yukon/Yukon XL Owner Manual (GMNA-Localizing-U.S./Canada/
Mexico-8431503) - 2015 - crc - 8/11/14
Vehicle Care 10-29
warranty. Do not allow the wiper
blade arm to touch the
windshield.
5. Reverse Steps 1–3 for wiper blade replacement.
Rear Wiper Blade Replacement
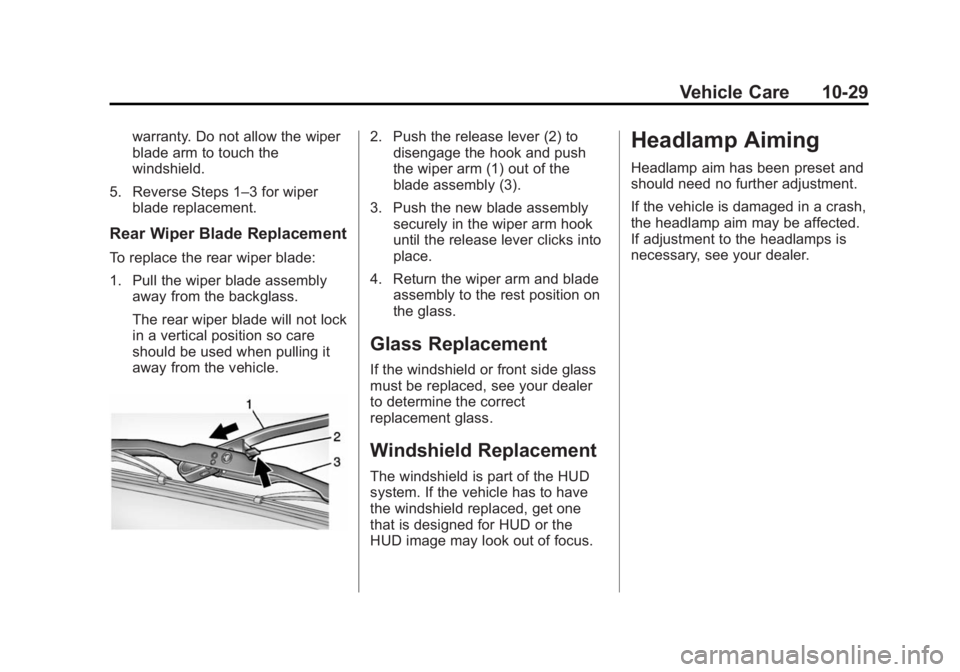
To replace the rear wiper blade:
1. Pull the wiper blade assemblyaway from the backglass.
The rear wiper blade will not lock
in a vertical position so care
should be used when pulling it
away from the vehicle.
2. Push the release lever (2) todisengage the hook and push
the wiper arm (1) out of the
blade assembly (3).
3. Push the new blade assembly securely in the wiper arm hook
until the release lever clicks into
place.
4. Return the wiper arm and blade assembly to the rest position on
the glass.
Glass Replacement
If the windshield or front side glass
must be replaced, see your dealer
to determine the correct
replacement glass.
Windshield Replacement
The windshield is part of the HUD
system. If the vehicle has to have
the windshield replaced, get one
that is designed for HUD or the
HUD image may look out of focus.
Headlamp Aiming
Headlamp aim has been preset and
should need no further adjustment.
If the vehicle is damaged in a crash,
the headlamp aim may be affected.
If adjustment to the headlamps is
necessary, see your dealer.
Page 333 of 459
Black plate (30,1)GMC 2015i Yukon/Yukon XL Owner Manual (GMNA-Localizing-U.S./Canada/
Mexico-8431503) - 2015 - crc - 8/11/14
10-30 Vehicle Care
Bulb Replacement
For the proper type of replacement
bulbs, seeReplacement Bulbs on
page 10-33.
For any bulb‐changing procedure
not listed in this section, contact
your dealer.
High Intensity Discharge
(HID) Lighting
{Warning
The high intensity discharge
lighting system operates at a very
high voltage. If you try to service
any of the system components,
you could be seriously injured.
Have your dealer or a qualified
technician service them.
After an HID headlamp bulb has
been replaced, the beam might be a
slightly different shade than it was
originally. This is normal.
LED Lighting
This vehicle has several LED lamps.
For replacement of any LED lighting
assembly, contact your dealer.
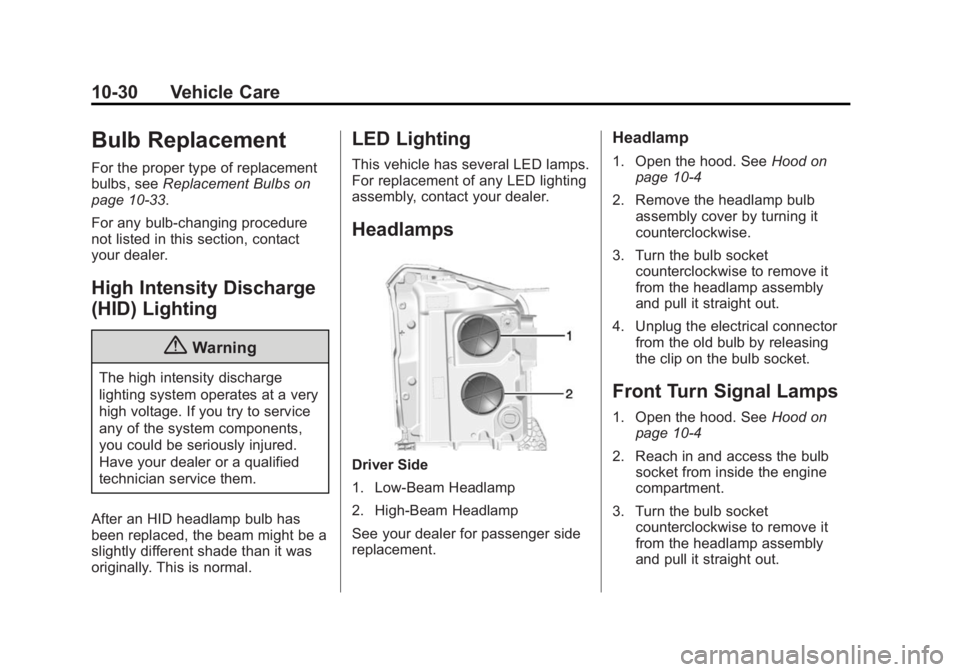
Headlamps
Driver Side
1. Low-Beam Headlamp
2. High-Beam Headlamp
See your dealer for passenger side
replacement.
Headlamp
1. Open the hood. See Hood on
page 10-4
2. Remove the headlamp bulb assembly cover by turning it
counterclockwise.
3. Turn the bulb socket counterclockwise to remove it
from the headlamp assembly
and pull it straight out.
4. Unplug the electrical connector from the old bulb by releasing
the clip on the bulb socket.
Front Turn Signal Lamps
1. Open the hood. See Hood on
page 10-4
2. Reach in and access the bulb socket from inside the engine
compartment.
3. Turn the bulb socket counterclockwise to remove it
from the headlamp assembly
and pull it straight out.
Page 334 of 459
Black plate (31,1)GMC 2015i Yukon/Yukon XL Owner Manual (GMNA-Localizing-U.S./Canada/
Mexico-8431503) - 2015 - crc - 8/11/14
Vehicle Care 10-31
4. Remove the bulb by pulling itstraight out of the socket bulb
socket.
5. Replace it with a new bulb.
6. Reinstall the new bulb socket into the headlamp assembly and
turn it clockwise to secure.
Taillamps, Turn Signal,
Stoplamps, and Back-Up
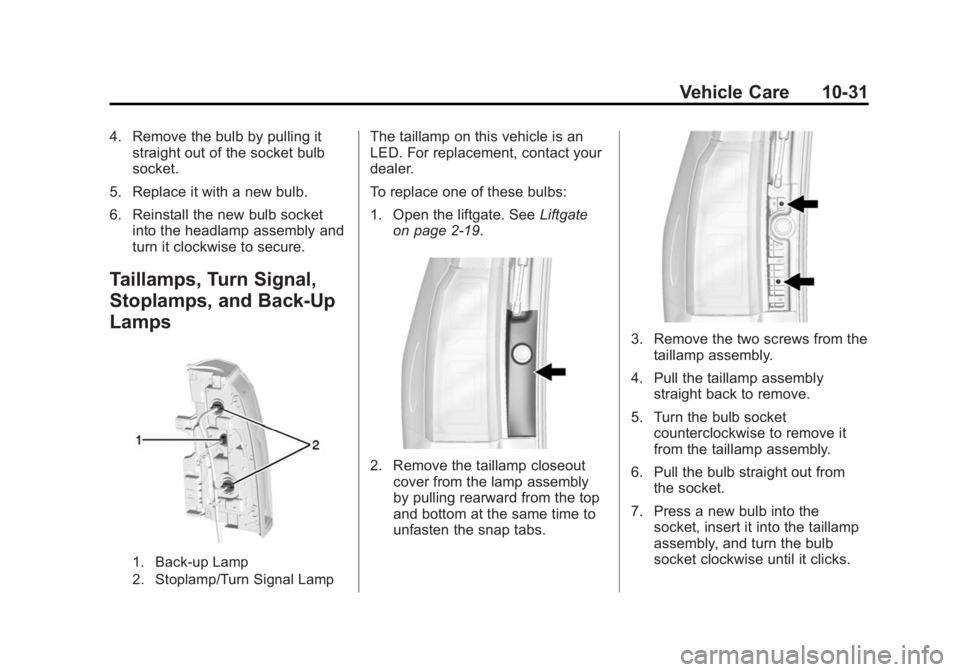
Lamps
1. Back-up Lamp
2. Stoplamp/Turn Signal Lamp
The taillamp on this vehicle is an
LED. For replacement, contact your
dealer.
To replace one of these bulbs:
1. Open the liftgate. See Liftgate
on page 2-19.
2. Remove the taillamp closeout cover from the lamp assembly
by pulling rearward from the top
and bottom at the same time to
unfasten the snap tabs.
3. Remove the two screws from the
taillamp assembly.
4. Pull the taillamp assembly straight back to remove.
5. Turn the bulb socket counterclockwise to remove it
from the taillamp assembly.
6. Pull the bulb straight out from the socket.
7. Press a new bulb into the socket, insert it into the taillamp
assembly, and turn the bulb
socket clockwise until it clicks.
Page 335 of 459
Black plate (32,1)GMC 2015i Yukon/Yukon XL Owner Manual (GMNA-Localizing-U.S./Canada/
Mexico-8431503) - 2015 - crc - 8/11/14
10-32 Vehicle Care
8. Reinstall the taillamp assemblyand tighten the screws.
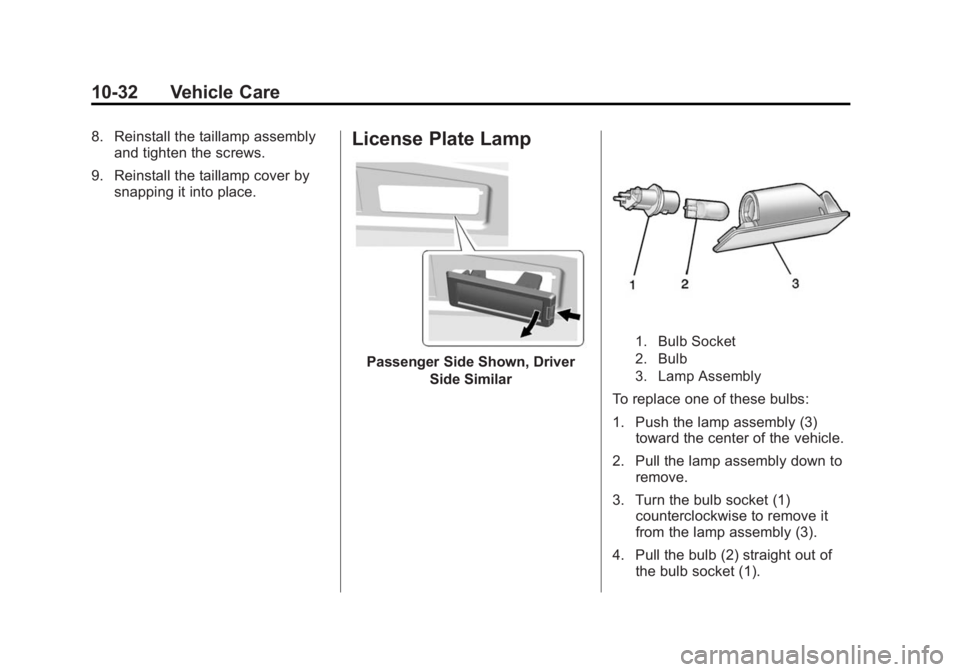
9. Reinstall the taillamp cover by snapping it into place.License Plate Lamp
Passenger Side Shown, Driver
Side Similar
1. Bulb Socket
2. Bulb
3. Lamp Assembly
To replace one of these bulbs:
1. Push the lamp assembly (3)toward the center of the vehicle.
2. Pull the lamp assembly down to remove.
3. Turn the bulb socket (1) counterclockwise to remove it
from the lamp assembly (3).
4. Pull the bulb (2) straight out of the bulb socket (1).
Page 336 of 459
Black plate (33,1)GMC 2015i Yukon/Yukon XL Owner Manual (GMNA-Localizing-U.S./Canada/
Mexico-8431503) - 2015 - crc - 8/11/14
Vehicle Care 10-33
5. Push the replacement bulbstraight into the bulb socket and
turn the bulb socket clockwise to
install it into the lamp assembly.
6. Push the lamp assembly back into position until the release tab
locks into place.
Replacement Bulbs
Exterior Lamp Bulb
Number
Back-up Lamp 921
High-Beam
Headlamp 9005 LL
Low-Beam
Headlamp H11 LL
License
Plate Lamp W5W
For replacement bulbs not listed
here, contact your dealer.
Electrical System
Electrical System
Overload
The vehicle has fuses to protect
against an electrical system
overload. Fuses also protect power
devices in the vehicle.
Replace a bad fuse with a new one
of the identical size and rating.
If there is a problem on the road and
a fuse needs to be replaced, there
are some spare fuses and a fuse
puller in the Instrument Panel Fuse
Block. The same amperage fuse
can also be borrowed. Choose
some feature of the vehicle that is
not needed to use and replace it as
soon as possible.
Headlamp Wiring
An electrical overload may cause
the lamps to go on and off, or in
some cases to remain off. Have the headlamp wiring checked right away
if the lamps go on and off or
remain off.
Windshield Wipers
If the wiper motor overheats due to
heavy snow or ice, the windshield
wipers will stop until the motor cools
and will then restart.
Although the circuit is protected
from electrical overload, overload
due to heavy snow or ice may
cause wiper linkage damage.
Always clear ice and heavy snow
from the windshield before using the
windshield wipers.
If the overload is caused by an
electrical problem and not snow or
ice, be sure to get it fixed.
Fuses
The wiring circuits in the vehicle are
protected from short circuits by
fuses. This greatly reduces the
chance of fires caused by electrical
problems.
Page 337 of 459
Black plate (34,1)GMC 2015i Yukon/Yukon XL Owner Manual (GMNA-Localizing-U.S./Canada/
Mexico-8431503) - 2015 - crc - 8/11/14
10-34 Vehicle Care
Look at the silver-colored band
inside the fuse. If the band is broken
or melted, replace the fuse. Be sure
you replace a bad fuse with a new
one of the identical size and rating.
Fuses of the same amperage can
be temporarily borrowed from
another fuse location, if a fuse goes
out. Replace the fuse as soon as
you can.
Engine Compartment
Fuse Block
The engine compartment fuse block
is in the engine compartment, on
the driver side of the vehicle.
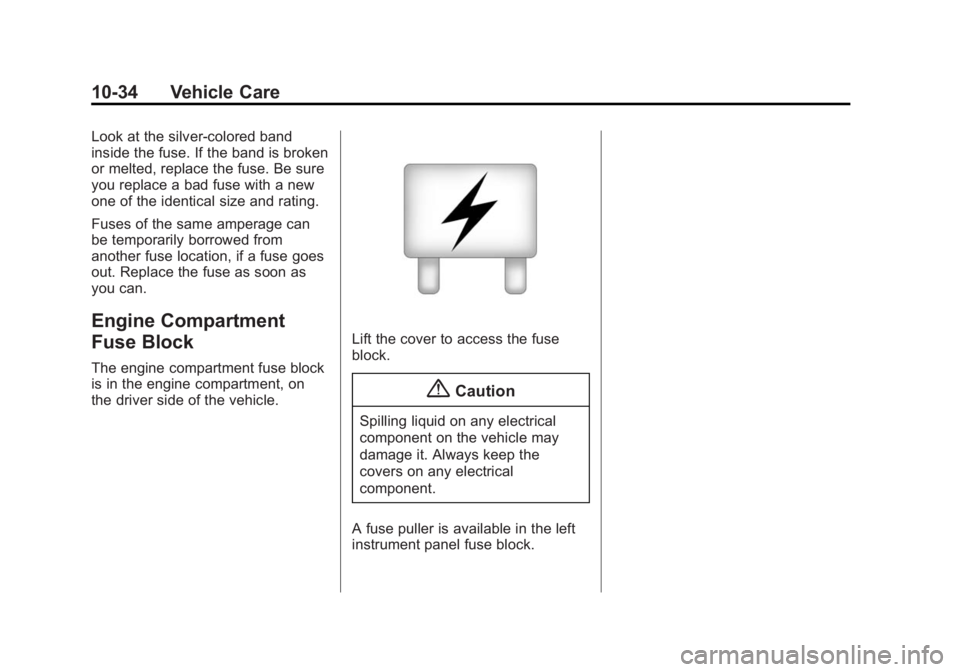
Lift the cover to access the fuse
block.
{Caution
Spilling liquid on any electrical
component on the vehicle may
damage it. Always keep the
covers on any electrical
component.
A fuse puller is available in the left
instrument panel fuse block.
Page 339 of 459

Black plate (36,1)GMC 2015i Yukon/Yukon XL Owner Manual (GMNA-Localizing-U.S./Canada/
Mexico-8431503) - 2015 - crc - 8/11/14
10-36 Vehicle Care
ItemUsage
1 Electric Running Boards
2 Antilock Brake System Pump
3 Interior BEC LT1
4 MBS Passenger
5 Suspension Leveling
Compressor
6 4WD Transfer Case Electronic
Control
10 Electric Parking Brake
13 Interior BEC LT2
14 Rear BEC 1
17 MBS Driver
21 ALC Exhaust Solenoid
23 Integrated Chassis Control Module Item
Usage
24 Real Time Dampening
25 Fuel Pump Power Module
26 Spare/Battery Regulated Voltage
Control
28 Upfitter 2
29 Upfitter 2 Relay
30 Wiper
31 TIM
34 Back-up Lamps
35 Antilock Brake System Valve
36 Trailer Brakes
37 Upfitter 3 Relay
39 Trailer Stop/Turn Right
40 Trailer Stop/ Turn Left Item
Usage
41 Trailer Park Lamps
42 Right Parking Lamps
43 Left Parking Lamps
44 Upfitter 3
45 Automatic Level Control Run/Crank
47 Upfitter 4
48 Upfitter 4 Relay
49 Reverse Lamps
51 Parking Lamp Relay
59 Euro Trailer
60 Air Conditioning Control
63 Upfitter 1
67 Trailer Battery
69 RC Upfitter 3 and 4
70 VBAT Upfitter 3 and 4