maintenance schedule GMC YUKON XL 2019 Owner's Manual
[x] Cancel search | Manufacturer: GMC, Model Year: 2019, Model line: YUKON XL, Model: GMC YUKON XL 2019Pages: 450, PDF Size: 6.5 MB
Page 29 of 450
GMC Yukon/Yukon XL/Denali Owner Manual (GMNA-Localizing-U.S./
Canada/Mexico-12460267) - 2019 - crc - 9/11/18
28 In Brief
.Avoid fast starts and accelerate
smoothly.
. Brake gradually and avoid
abrupt stops.
. Avoid idling the engine for long
periods of time.
. When road and weather
conditions are appropriate, use
cruise control.
. Always follow posted speed
limits or drive more slowly when
conditions require.
. Keep vehicle tires properly
inflated.
. Combine several trips into a
single trip.
. Replace the vehicle's tires with
the same TPC Spec number
molded into the tire's sidewall
near the size.
. Follow recommended scheduled
maintenance.Roadside Assistance
Program
U.S.: 1-888-881-3302
TTY Users (U.S. Only):
1-888-889-2438
Canada: 1-800-268-6800
New GMC owners are automatically
enrolled in the Roadside Assistance
Program.
See Roadside Assistance Program
0 415.
Page 105 of 450
GMC Yukon/Yukon XL/Denali Owner Manual (GMNA-Localizing-U.S./
Canada/Mexico-12460267) - 2019 - crc - 9/11/18
104 Seats and Restraints
Airbag System Check
The airbag system does not need
regularly scheduled maintenance or
replacement. Make sure the airbag
readiness light is working. See
Airbag Readiness Light0151.
Caution
If an airbag covering is damaged,
opened, or broken, the airbag
may not work properly. Do not
open or break the airbag
coverings. If there are any
opened or broken airbag
coverings, have the airbag
covering and/or airbag module
replaced. For the location of the
airbags, see Where Are the
Airbags? 093. See your dealer
for service.
Replacing Airbag System
Parts after a Crash
{Warning
A crash can damage the airbag
systems in the vehicle.
A damaged airbag system may
not properly protect you and your
passenger(s) in a crash, resulting
in serious injury or even death. To
help make sure the airbag
systems are working properly
after a crash, have them
inspected and any necessary
replacements made as soon as
possible.
If an airbag inflates, you will need to
replace airbag system parts. See
your dealer for service.
If the airbag readiness light stays on
after the vehicle is started or comes
on when you are driving, the airbag
system may not work properly. Have
the vehicle serviced right away. See
Airbag Readiness Light 0151.
Child Restraints
Older Children
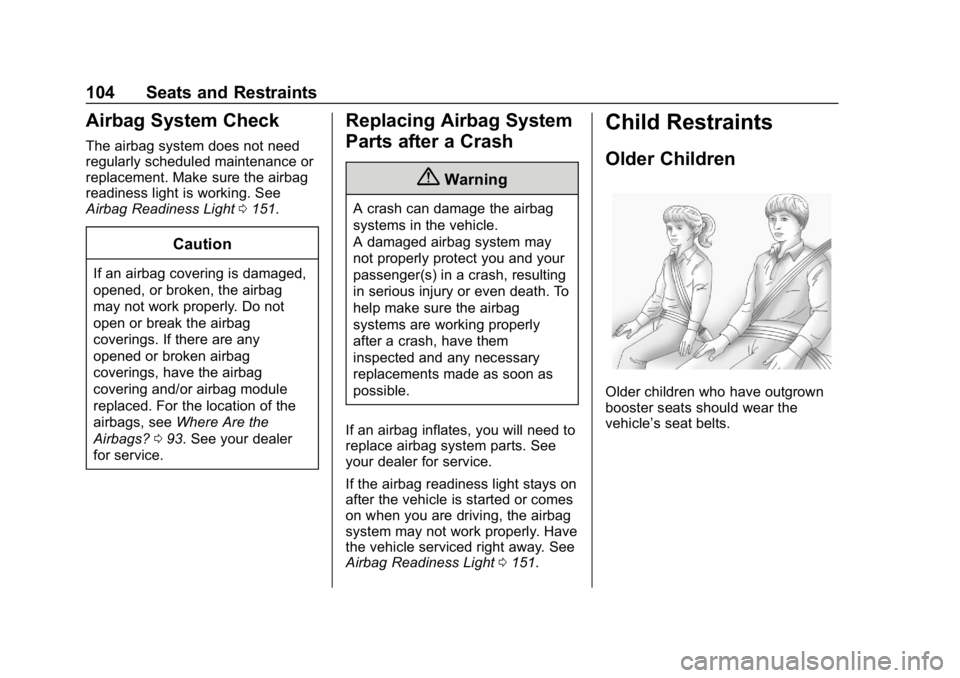
Older children who have outgrown
booster seats should wear the
vehicle’s seat belts.
Page 149 of 450
GMC Yukon/Yukon XL/Denali Owner Manual (GMNA-Localizing-U.S./
Canada/Mexico-12460267) - 2019 - crc - 9/11/18
148 Instruments and Controls
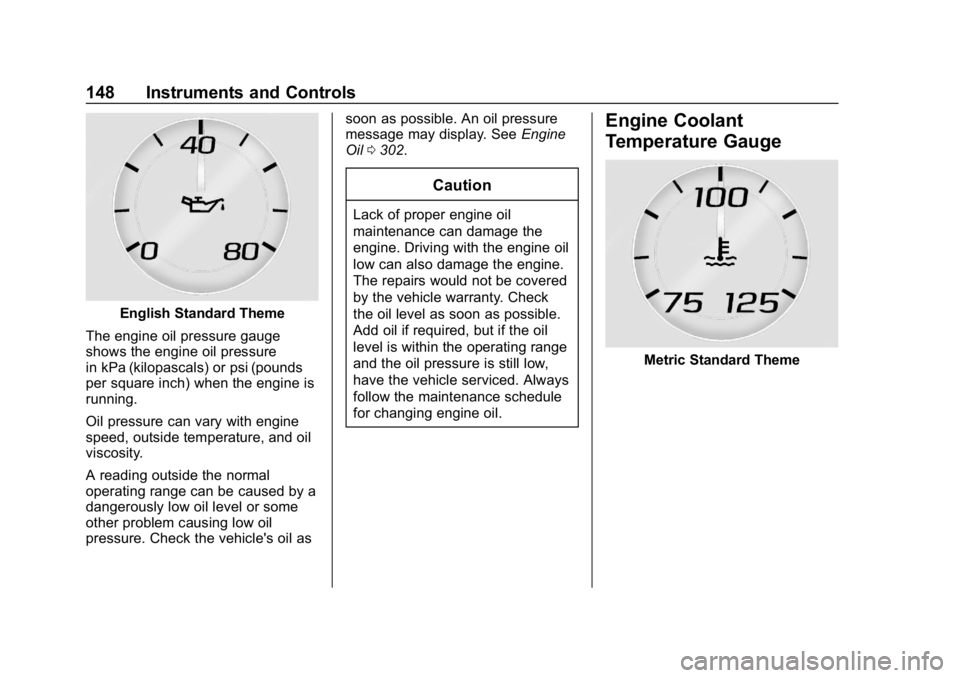
English Standard Theme
The engine oil pressure gauge
shows the engine oil pressure
in kPa (kilopascals) or psi (pounds
per square inch) when the engine is
running.
Oil pressure can vary with engine
speed, outside temperature, and oil
viscosity.
A reading outside the normal
operating range can be caused by a
dangerously low oil level or some
other problem causing low oil
pressure. Check the vehicle's oil as soon as possible. An oil pressure
message may display. See
Engine
Oil 0302.
Caution
Lack of proper engine oil
maintenance can damage the
engine. Driving with the engine oil
low can also damage the engine.
The repairs would not be covered
by the vehicle warranty. Check
the oil level as soon as possible.
Add oil if required, but if the oil
level is within the operating range
and the oil pressure is still low,
have the vehicle serviced. Always
follow the maintenance schedule
for changing engine oil.
Engine Coolant
Temperature Gauge
Metric Standard Theme
Page 160 of 450
GMC Yukon/Yukon XL/Denali Owner Manual (GMNA-Localizing-U.S./
Canada/Mexico-12460267) - 2019 - crc - 9/11/18
Instruments and Controls 159
When the Light Is On Steady
This indicates that one or more of
the tires are significantly
underinflated.
A Driver Information Center (DIC)
tire pressure message may also
display. Stop as soon as possible,
and inflate the tires to the pressure
value shown on the Tire and
Loading Information label. SeeTire
Pressure 0348.
When the Light Flashes First and
Then Is On Steady
If the light flashes for about a minute
and then stays on, there may be a
problem with the TPMS. If the
problem is not corrected, the light
will come on at every ignition cycle.
See Tire Pressure Monitor
Operation 0350.Engine Oil Pressure Light
Caution
Lack of proper engine oil
maintenance can damage the
engine. Driving with the engine oil
low can also damage the engine.
The repairs would not be covered
by the vehicle warranty. Check
the oil level as soon as possible.
Add oil if required, but if the oil
level is within the operating range
and the oil pressure is still low,
have the vehicle serviced. Always
follow the maintenance schedule
for changing engine oil.
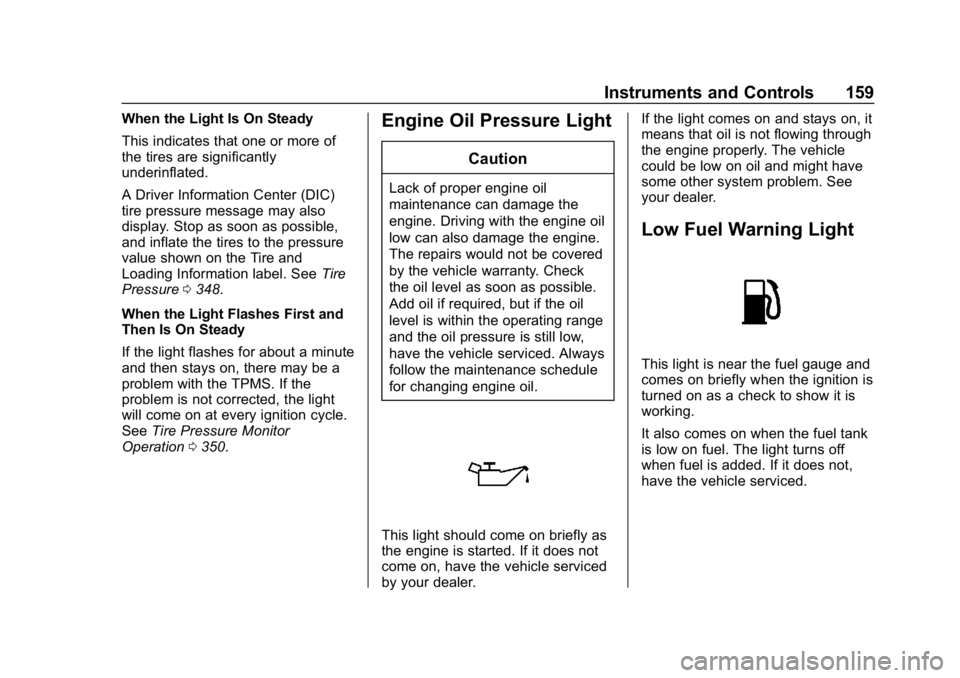
This light should come on briefly as
the engine is started. If it does not
come on, have the vehicle serviced
by your dealer. If the light comes on and stays on, it
means that oil is not flowing through
the engine properly. The vehicle
could be low on oil and might have
some other system problem. See
your dealer.
Low Fuel Warning Light
This light is near the fuel gauge and
comes on briefly when the ignition is
turned on as a check to show it is
working.
It also comes on when the fuel tank
is low on fuel. The light turns off
when fuel is added. If it does not,
have the vehicle serviced.
Page 164 of 450
GMC Yukon/Yukon XL/Denali Owner Manual (GMNA-Localizing-U.S./
Canada/Mexico-12460267) - 2019 - crc - 9/11/18
Instruments and Controls 163
LOW will be displayed when the
vehicle is low on fuel. The fuel
range estimate is based on an
average of the vehicle's fuel
economy over recent driving history
and the amount of fuel remaining in
the fuel tank. It also shows if the
Active Fuel Management is active
and in V4 mode, or inactive and in
V8 mode. SeeActive Fuel
Management 0226.
The Instantaneous Fuel Economy
display shows the current fuel
economy in either liters per
100 kilometers (L/100 km) or miles
per gallon (mpg). This number
reflects only the approximate fuel
economy that the vehicle has right
now and changes frequently as
driving conditions change.
Timer and Fuel Used : Can be
used as a timer. To start the timer,
press
Vwhile this display is active.
The display will show the amount of
time that has passed since the timer
was last reset. To stop the timer,
press
Vbriefly while this display is active and the timer is running. To
reset the timer to zero, press and
hold
Vwhile this display is active.
This also shows the number of
liters (L) or gallons (gal) of fuel used
since the last reset of this
menu item.
Oil Life : Shows an estimate of the
oil's remaining useful life.
If REMAINING OIL LIFE 99% is
displayed, that means 99% of the
current oil life remains.
When the remaining oil life is low,
the CHANGE ENGINE OIL SOON
message will appear on the display.
The oil should be changed as soon
as possible. See Engine Oil0302.
In addition to the engine oil life
system monitoring the oil life,
additional maintenance is
recommended in the Maintenance
Schedule. See Maintenance
Schedule 0395.
The Oil Life display must be reset
after each oil change. It will not
reset itself. Do not to reset the Oil
Life display at any time other than
when the oil has just been changed. It cannot be reset accurately until
the next oil change. To reset the
engine oil life system, press and
holdVfor several seconds while
the Oil Life display is active. See
Engine Oil Life System 0304.
Tire Pressure : Shows the
approximate pressures of all four
tires. Tire pressure is displayed in
either kilopascal (kPa) or in pounds
per square inch (psi). If the pressure
is low, the value for that tire is
shown in amber.
See Tire Pressure Monitor System
0 349 andTire Pressure Monitor
Operation 0350.
Best Fuel Economy : Displays
average fuel economy, the best fuel
economy over the selected
distance, and a bar graph showing
instantaneous fuel economy.
Press
pto change the selected
distance. Press and hold
Vwhile
this display is active to reset the
best fuel economy and average fuel
economy. This display can also be
reset by selecting reset in the menu.
Page 198 of 450
GMC Yukon/Yukon XL/Denali Owner Manual (GMNA-Localizing-U.S./
Canada/Mexico-12460267) - 2019 - crc - 9/11/18
Climate Controls 197
Maintenance
Passenger Compartment
Air Filter
The filter reduces the dust, pollen,
and other airborne irritants from
outside air that is pulled into the
vehicle.
The filter should be replaced as part
of routine scheduled maintenance.
SeeMaintenance Schedule 0395.
To find out what type of filter to use,
see Maintenance Replacement
Parts 0406.
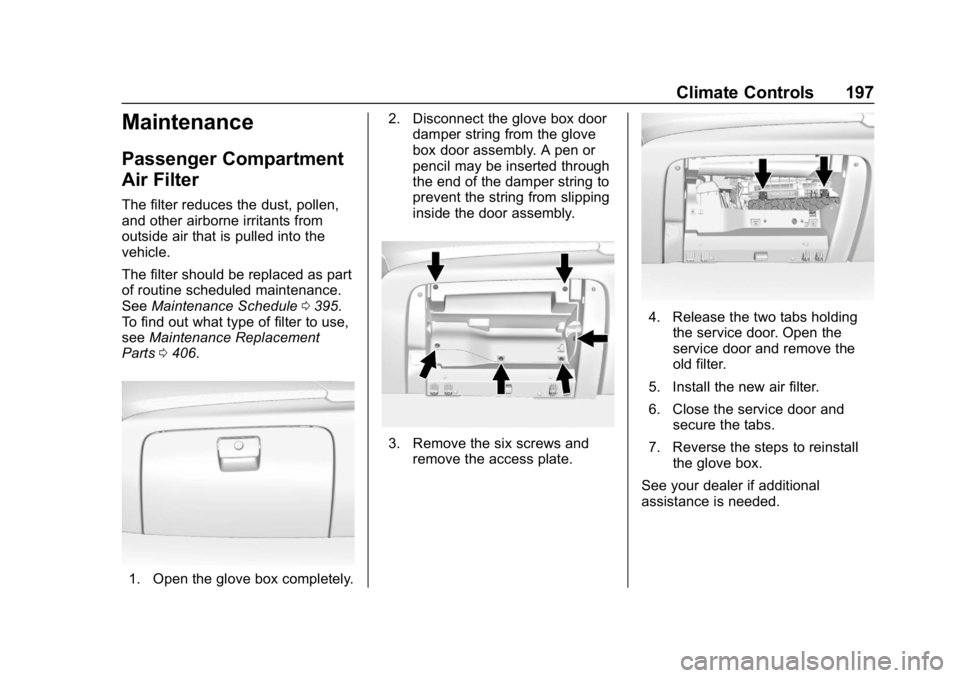
1. Open the glove box completely. 2. Disconnect the glove box door
damper string from the glove
box door assembly. A pen or
pencil may be inserted through
the end of the damper string to
prevent the string from slipping
inside the door assembly.
3. Remove the six screws and
remove the access plate.
4. Release the two tabs holdingthe service door. Open the
service door and remove the
old filter.
5. Install the new air filter.
6. Close the service door and secure the tabs.
7. Reverse the steps to reinstall the glove box.
See your dealer if additional
assistance is needed.
Page 199 of 450
GMC Yukon/Yukon XL/Denali Owner Manual (GMNA-Localizing-U.S./
Canada/Mexico-12460267) - 2019 - crc - 9/11/18
198 Climate Controls
Service
All vehicles have a label underhood
that identifies the refrigerant used in
the vehicle. The refrigerant system
should only be serviced by trained
and certified technicians. The air
conditioning evaporator should
never be repaired or replaced by
one from a salvage vehicle.
It should only be replaced by a new
evaporator to ensure proper and
safe operation.
During service, all refrigerants
should be reclaimed with proper
equipment. Venting refrigerants
directly to the atmosphere is harmful
to the environment and may also
create unsafe conditions based on
inhalation, combustion, frostbite,
or other health-based concerns.
The air conditioning system requires
periodic maintenance. See
Maintenance Schedule0395.
Page 209 of 450
GMC Yukon/Yukon XL/Denali Owner Manual (GMNA-Localizing-U.S./
Canada/Mexico-12460267) - 2019 - crc - 9/11/18
208 Driving and Operating
and it may take longer to stop. See
“Driving on Wet Roads”later in this
section.
After Off-Road Driving
Remove any brush or debris that
has collected on the underbody or
chassis, or under the hood. These
accumulations can be a fire hazard.
After operation in mud or sand,
have the brake linings cleaned and
checked. These substances can
cause glazing and uneven braking.
Check the body structure, driveline,
steering, suspension, wheels, tires,
and exhaust system for damage and
check the fuel lines and cooling
system for any leakage.
More frequent maintenance service
is required. See the Maintenance
Schedule 0395.
Driving on Wet Roads
Rain and wet roads can reduce
vehicle traction and affect your
ability to stop and accelerate.
Always drive slower in these types of driving conditions and avoid
driving through large puddles and
deep-standing or flowing water.
{Warning
Wet brakes can cause crashes.
They might not work as well in a
quick stop and could cause
pulling to one side. You could
lose control of the vehicle.
After driving through a large
puddle of water or a car/vehicle
wash, lightly apply the brake
pedal until the brakes work
normally.
Flowing or rushing water creates
strong forces. Driving through
flowing water could cause the
vehicle to be carried away. If this
happens, you and other vehicle
occupants could drown. Do not
ignore police warnings and be
very cautious about trying to drive
through flowing water.
Hydroplaning
Hydroplaning is dangerous. Water
can build up under the vehicle's
tires so they actually ride on the
water. This can happen if the road is
wet enough and you are going fast
enough. When the vehicle is
hydroplaning, it has little or no
contact with the road.
There is no hard and fast rule about
hydroplaning. The best advice is to
slow down when the road is wet.
Other Rainy Weather Tips
Besides slowing down, other wet
weather driving tips include:
.
Allow extra following distance.
. Pass with caution.
. Keep windshield wiping
equipment in good shape.
. Keep the windshield washer fluid
reservoir filled.
. Have good tires with proper
tread depth. See Tires0341.
. Turn off cruise control.
Page 279 of 450
GMC Yukon/Yukon XL/Denali Owner Manual (GMNA-Localizing-U.S./
Canada/Mexico-12460267) - 2019 - crc - 9/11/18
278 Driving and Operating
Pulling the Trailer from the Water1. Press and hold the brake pedal.
2. Start the engine and shift into a gear.
3. Release the parking brake.
4. Let up on the brake pedal.
5. Drive slowly until the tires are clear of the chocks.
6. Stop and have someone pick up and store the chocks.
7. Slowly pull the trailer from the water.
8. Once the vehicle and trailer have been driven from the
sloped part of the boat ramp,
the vehicle can be shifted from
four-wheel-drive high. Shift into
the drive mode that is
appropriate for the road
conditions.Caution
If the vehicle tires begin to spin
and the vehicle begins to slide
toward the water, remove your
foot from the accelerator pedal
and apply the brake pedal. Seek
help to have the vehicle towed up
the ramp.
Maintenance when Trailer
Towing
The vehicle needs service more
often when used to tow trailers. See
Maintenance Schedule 0395. It is
especially important to check the
automatic transmission fluid, engine
oil, axle lubricant, belts, cooling
system, and brake system before
and during each trip.
Check periodically that all nuts and
bolts on the trailer hitch are tight.
Engine Cooling when Trailer
Towing
The cooling system may temporarily
overheat during severe operating
conditions. See Engine Overheating
0 313.
Trailer Towing
Caution
Towing a trailer improperly can
damage the vehicle and result in
costly repairs not covered by the
vehicle warranty. To tow a trailer
correctly, follow the directions in
this section and see your dealer
for important information about
towing a trailer with the vehicle.
Trailer Weight
{Warning
Never exceed the towing capacity
for your vehicle.
Page 307 of 450

GMC Yukon/Yukon XL/Denali Owner Manual (GMNA-Localizing-U.S./
Canada/Mexico-12460267) - 2019 - crc - 9/11/18
306 Vehicle Care
Caution (Continued)
automatic transmission fluid. See
Recommended Fluids and
Lubricants0404.
Change the fluid and filter at the
scheduled maintenance intervals
listed in Maintenance Schedule
0 395. Be sure to use the
transmission fluid listed in
Recommended Fluids and
Lubricants 0404.
How to Check Automatic
Transmission Fluid
Caution
Too much or too little fluid can
damage the transmission. Too
much can mean that some of the
fluid could come out and fall on
hot engine parts or exhaust
system parts, starting a fire. Too
little fluid could cause the (Continued)
Caution (Continued)
transmission to overheat. Be sure
to get an accurate reading if
checking the transmission fluid.
Before checking the fluid level,
prepare the vehicle: 1. Start the engine and park the vehicle on a level surface.
Keep the engine running.
2. Apply the parking brake and place the shift lever in P (Park).
3. With your foot on the brake pedal, move the shift lever
through each gear range,
pausing for about
three seconds in each range.
Then, move the shift lever back
to P (Park).
4. Allow the engine to idle (500– 800 rpm) for at least
one minute. Slowly release the
brake pedal.
5. Keep the engine running and check the transmission fluid
temperature on the Driver Information Center (DIC). See
Driver Information Center (DIC)
0
161.
6. Using the transmission fluid temperature reading, determine
and perform the appropriate
check procedure. If the
transmission fluid temperature
reading is not within the
required temperature ranges,
allow the vehicle to cool,
or operate the vehicle until the
appropriate transmission fluid
temperature is reached.
Cold Check Procedure
Use this procedure only as a
reference to determine if the
transmission has enough fluid to be
operated safely until a hot check
procedure can be made. The hot
check procedure is the most
accurate method to check the fluid
level. Perform the hot check
procedure at the first opportunity.
Use this cold check procedure to
check fluid level when the
transmission temperature is
between 27 °C and 32 °C (80 °F and
90 °F).