fuel cap GMC YUKON XL DENALI 2004 Owners Manual
[x] Cancel search | Manufacturer: GMC, Model Year: 2004, Model line: YUKON XL DENALI, Model: GMC YUKON XL DENALI 2004Pages: 468, PDF Size: 3.18 MB
Page 1 of 468
Seats and Restraint Systems........................... 1-1
Front Seats
............................................... 1-3
Rear Seats
............................................... 1-7
Safety Belts
.............................................1-25
Child Restraints
.......................................1-48
Air Bag Systems
......................................1-72
Restraint System Check
............................1-86
Features and Controls..................................... 2-1
Keys
........................................................ 2-3
Doors and Locks
....................................... 2-8
Windows
.................................................2-14
Theft-Deterrent Systems
............................2-16
Starting and Operating Your Vehicle
...........2-18
Mirrors
....................................................2-32
OnStar
žSystem
......................................2-37
HomeLinkžTransmitter
.............................2-39
Storage Areas
.........................................2-43
Sunroof
..................................................2-47
Vehicle Personalization
.............................2-48
Instrument Panel............................................. 3-1
Instrument Panel Overview
.......................... 3-4
Climate Controls
......................................3-20
Warning Lights, Gages and Indicators
.........3-30
Driver Information Center (DIC)
..................3-46
Audio System(s)
.......................................3-64Driving Your Vehicle....................................... 4-1
Your Driving, the Road, and Your Vehicle
..... 4-2
Towing
...................................................4-44
Service and Appearance Care.......................... 5-1
Service
..................................................... 5-3
Fuel
......................................................... 5-4
Checking Things Under
the Hood
.............................................5-10
All-Wheel Drive
........................................5-45
Rear Axle
...............................................5-46
Front Axle
...............................................5-47
Bulb Replacement
....................................5-48
Windshield Wiper Blade Replacement
.........5-53
Tires
......................................................5-54
Spare Tire
...............................................5-92
Appearance Care
.....................................5-92
Vehicle Identi®cation
...............................5-102
Electrical System
....................................5-103
Capacities and Speci®cations
...................5-112
Maintenance Schedule..................................... 6-1
Maintenance Schedule
................................ 6-2
Customer Assistance and Information.............. 7-1
Customer Assistance and Information
........... 7-2
Reporting Safety Defects
...........................7-10
Index................................................................ 1
2004 GMC Yukon Denali/Yukon XL Denali Owner ManualM
Page 186 of 468
If the Light Is On Steady
You may be able to correct the emission system
malfunction by considering the following:
Did you recently put fuel into your vehicle?
If so, reinstall the fuel cap, making sure to fully install
the cap. See
Filling Your Tank on page 5-7. The
diagnostic system can determine if the fuel cap has
been left off or improperly installed. A loose or missing
fuel cap will allow fuel to evaporate into the atmosphere.
A few driving trips with the cap properly installed
should turn the light off.
Did you just drive through a deep puddle of water?
If so, your electrical system may be wet. The condition
will usually be corrected when the electrical system
dries out. A few driving trips should turn the light off.
Have you recently changed brands of fuel?
If so, be sure to fuel your vehicle with quality fuel. See
Gasoline Octane on page 5-4. Poor fuel quality will
cause your engine not to run as efficiently as designed.
You may notice this as stalling after start-up, stalling
when you put the vehicle into gear, mis®ring, hesitation
on acceleration or stumbling on acceleration. (These
conditions may go away once the engine is warmed up.)
This will be detected by the system and cause the
light to turn on.If you experience one or more of these conditions,
change the fuel brand you use. It will require at least
one full tank of the proper fuel to turn the light off.
If none of the above steps have made the light turn off,
your dealer can check the vehicle. Your dealer has
the proper test equipment and diagnostic tools to ®x any
mechanical or electrical problems that may have
developed.
Emissions Inspection and Maintenance
Programs
Some state/provincial and local governments have or
may begin programs to inspect the emission control
equipment on your vehicle. Failure to pass this
inspection could prevent you from getting a vehicle
registration.
Here are some things you need to know to help your
vehicle pass an inspection:
Your vehicle will not pass this inspection if the Check
Engine light is on or not working properly.
Your vehicle will not pass this inspection if the OBD
(on-board diagnostic) system determines that critical
emission control systems have not been completely
diagnosed by the system. The vehicle would be
considered not ready for inspection. This can happen if
you have recently replaced your battery or if your
battery has run down. The diagnostic system is
3-42
Page 189 of 468
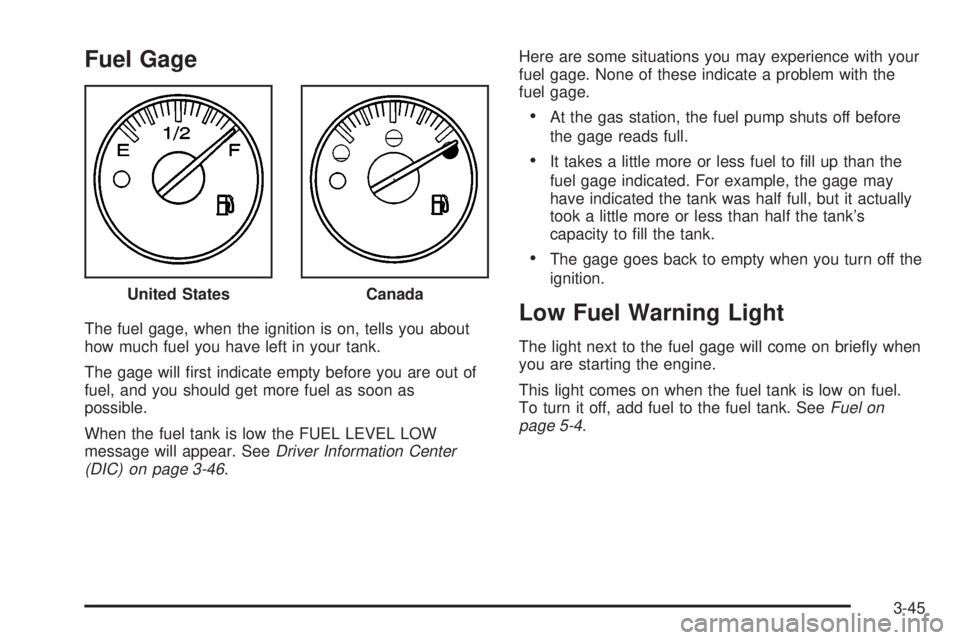
Fuel Gage
The fuel gage, when the ignition is on, tells you about
how much fuel you have left in your tank.
The gage will ®rst indicate empty before you are out of
fuel, and you should get more fuel as soon as
possible.
When the fuel tank is low the FUEL LEVEL LOW
message will appear. See
Driver Information Center
(DIC) on page 3-46.Here are some situations you may experience with your
fuel gage. None of these indicate a problem with the
fuel gage.
·At the gas station, the fuel pump shuts off before
the gage reads full.
·It takes a little more or less fuel to ®ll up than the
fuel gage indicated. For example, the gage may
have indicated the tank was half full, but it actually
took a little more or less than half the tank's
capacity to ®ll the tank.
·The gage goes back to empty when you turn off the
ignition.
Low Fuel Warning Light
The light next to the fuel gage will come on brie¯y when
you are starting the engine.
This light comes on when the fuel tank is low on fuel.
To turn it off, add fuel to the fuel tank. See
Fuel on
page 5-4. United States
Canada
3-45
Page 206 of 468
When the STABILITY SYS ACTIVE message is on, you
should continue to steer in the direction you want to
go. The system is designed to help you in bad weather
or other difficult driving situations by making the most
of whatever road conditions will permit.
SERVICE STABILITY
If you ever see the SERVICE STABILITY message, it
means there may be a problem with your
Stabilitrak
žsystem. If you see this message try to reset
the system (stop; turn off the engine; then start the
engine again). If the SERVICE STABILITY message still
comes on, it means there is a problem. You should
see your dealer for service. The vehicle is safe to drive,
however, you do not have the bene®t of Stabilitrak
ž,
so reduce your speed and drive accordingly.
STABILITY SYS DISABLED
The STABILITY SYS DISABLED message will turn on
when you press the Stabilitrakžbutton, or when the
stability control has been automatically disabled. To limit
wheel spin and realize the full bene®ts of the stability
enhancement system, you should normally leave
Stabilitrak
žon. However, you should turn Stabilitrakžoff
if your vehicle gets stuck in sand, mud, ice or snow
and you want to ªrockº your vehicle to attempt to free it,
or if you are driving in extreme off-road conditions
and require more wheel spin. See
If You Are Stuck: In
Sand, Mud, Ice or Snow on page 4-41. To turn theStabilitrak
žsystem back on press the Stabilitrakžbutton
again. There are four conditions that can cause this
message to appear. One condition is overheating, which
could occur if Stabilitrak
žactivates continuously for
an extended period of time. The message will also be
displayed if the brake system warning light is on.
See
Brake System Warning Light on page 3-36. The
message could be displayed if the stability system takes
longer than usual to complete its diagnostic checks
due to driving conditions. Also, if an engine or vehicle
related problem has been detected, and the vehicle
needs service, the message will appear.
The message will turn off as soon as the conditions that
caused the message to be displayed are no longer
present.
TIGHTEN FUEL CAP
If the vehicle's fuel cap is not tightened properly this
message may appear along with the check engine light
on the instrument panel. See
Malfunction Indicator
Lamp on page 3-40. Reinstall the fuel cap fully. SeeFilling Your Tank on page 5-7. The diagnostic system
can determine if the fuel cap has been left off, or
improperly installed. A loose or missing fuel cap will
allow fuel to evaporate into the atmosphere. A few
driving trips with the cap properly installed should turn
this light and message off.
3-62
Page 292 of 468
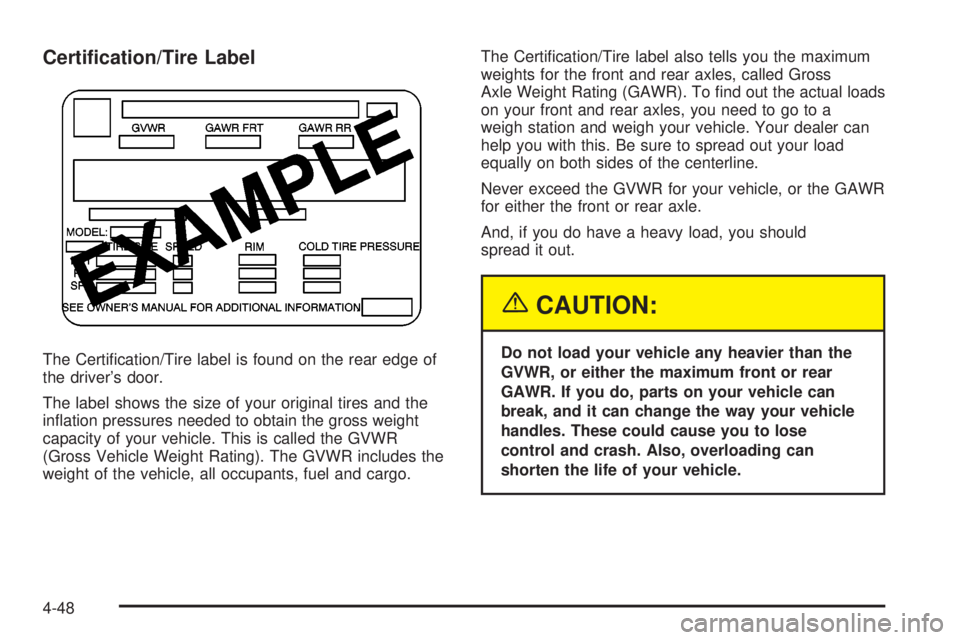
Certi®cation/Tire Label
The Certi®cation/Tire label is found on the rear edge of
the driver's door.
The label shows the size of your original tires and the
in¯ation pressures needed to obtain the gross weight
capacity of your vehicle. This is called the GVWR
(Gross Vehicle Weight Rating). The GVWR includes the
weight of the vehicle, all occupants, fuel and cargo.The Certi®cation/Tire label also tells you the maximum
weights for the front and rear axles, called Gross
Axle Weight Rating (GAWR). To ®nd out the actual loads
on your front and rear axles, you need to go to a
weigh station and weigh your vehicle. Your dealer can
help you with this. Be sure to spread out your load
equally on both sides of the centerline.
Never exceed the GVWR for your vehicle, or the GAWR
for either the front or rear axle.
And, if you do have a heavy load, you should
spread it out.
{CAUTION:
Do not load your vehicle any heavier than the
GVWR, or either the maximum front or rear
GAWR. If you do, parts on your vehicle can
break, and it can change the way your vehicle
handles. These could cause you to lose
control and crash. Also, overloading can
shorten the life of your vehicle.
4-48
Page 309 of 468
Service............................................................5-3
Doing Your Own Service Work.........................5-3
Adding Equipment to the Outside
of Your Vehicle...........................................5-4
Fuel................................................................5-4
Gasoline Octane............................................5-4
Gasoline Speci®cations....................................5-5
California Fuel...............................................5-5
Additives.......................................................5-6
Fuels in Foreign Countries...............................5-7
Filling Your Tank............................................5-7
Filling a Portable Fuel Container.......................5-9
Checking Things Under
the Hood....................................................5-10
Hood Release..............................................5-10
Engine Compartment Overview.......................5-12
Engine Oil...................................................5-13
Engine Air Cleaner/Filter................................5-18
Automatic Transmission Fluid.........................5-20
Engine Coolant.............................................5-23
Coolant Surge Tank Pressure Cap..................5-25Engine Overheating.......................................5-25
Cooling System............................................5-28
Engine Fan Noise.........................................5-33
Power Steering Fluid.....................................5-34
Windshield Washer Fluid................................5-35
Brakes........................................................5-36
Battery........................................................5-39
Jump Starting...............................................5-40
All-Wheel Drive..............................................5-45
Rear Axle.......................................................5-46
Front Axle......................................................5-47
Bulb Replacement..........................................5-48
Halogen Bulbs..............................................5-48
Headlamps..................................................5-48
Front Turn Signal, Sidemarker and
Daytime Running Lamps.............................5-49
Center High-Mounted Stoplamp (CHMSL).........5-51
Taillamps.....................................................5-51
Replacement Bulbs.......................................5-52
Section 5 Service and Appearance Care
5-1
Page 315 of 468
Fuels in Foreign Countries
If you plan on driving in another country outside the
United States or Canada, the proper fuel may be hard
to ®nd. Never use leaded gasoline or any other fuel
not recommended in the previous text on fuel. Costly
repairs caused by use of improper fuel would not
be covered by your warranty.
To check the fuel availability, ask an auto club, or
contact a major oil company that does business in the
country where you will be driving.
Filling Your Tank
{CAUTION:
Fuel vapor burns violently and a fuel ®re can
cause bad injuries. To help avoid injuries to
you and others, read and follow all the
instructions on the pump island. Turn off your
engine when you are refueling. Do not smoke
if you are near fuel or refueling your vehicle.
CAUTION: (Continued)
CAUTION: (Continued)
Keep sparks, ¯ames and smoking materials
away from fuel. Do not leave the fuel pump
unattended when refueling your vehicle Ð this
is against the law in some places. Keep
children away from the fuel pump; never let
children pump fuel.
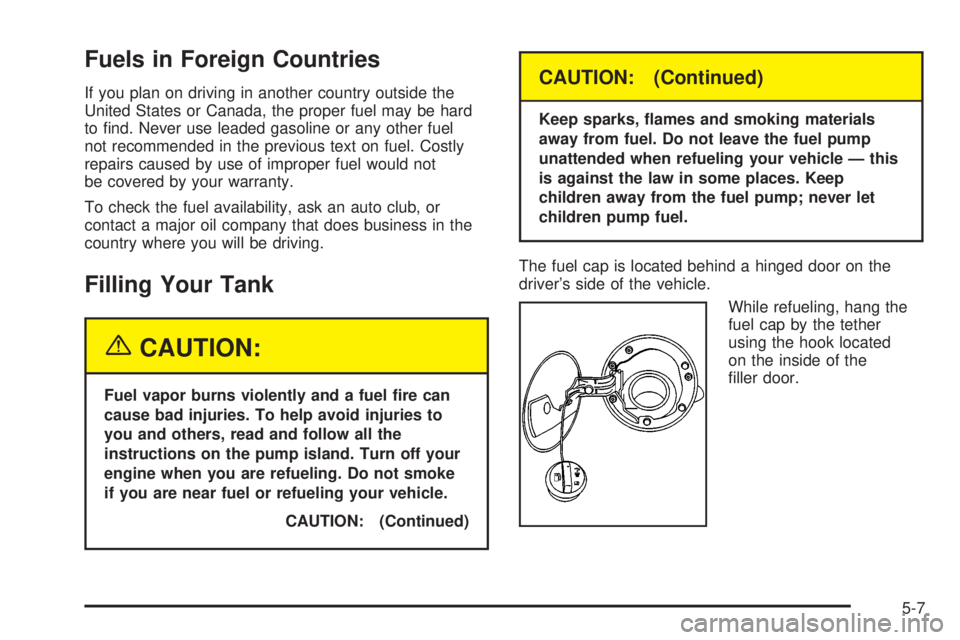
The fuel cap is located behind a hinged door on the
driver's side of the vehicle.
While refueling, hang the
fuel cap by the tether
using the hook located
on the inside of the
®ller door.
5-7
Page 316 of 468
To remove the fuel cap, turn it slowly to the left
(counterclockwise). It will require more effort to turn the
fuel cap on the last turn as you loosen it.
{CAUTION:
If you spill fuel and then something ignites it,
you could be badly burned. Fuel can spray out
on you if you open the fuel cap too quickly.
This spray can happen if your tank is nearly
full, and is more likely in hot weather. Open
the fuel cap slowly and wait for any ªhissº
noise to stop. Then unscrew the cap all
the way.Be careful not to spill fuel. Don't top off or over®ll your
tank and wait a few seconds after you've ®nished
pumping before you remove the nozzle. Clean any
spilled fuel from painted surfaces as soon as possible.
See
Cleaning the Outside of Your Vehicle on
page 5-96.
When you put the fuel cap back on, turn it to the right
(clockwise) until you hear a clicking sound. It will require
more effort to turn the fuel cap on the last turn as you
tighten it. Make sure you fully install the cap. The
diagnostic system can determine if the fuel cap has
been left off or improperly installed. this would allow fuel
to evaporate into the atmosphere. See
Malfunction
Indicator Lamp on page 3-40.
5-8
Page 317 of 468
{CAUTION:
If a ®re starts while you are refueling, do not
remove the nozzle. Shut off the ¯ow of fuel by
shutting off the pump or by notifying the
station attendant. Leave the area immediately.
Notice:If you need a new fuel cap, be sure to get
the right type. Your dealer can get one for you.
If you get the wrong type, it may not ®t properly.
This may cause your malfunction indicator lamp to
light and may damage your fuel tank and emissions
system. See
Malfunction Indicator Lamp on
page 3-40.
Filling a Portable Fuel Container
{CAUTION:
Never ®ll a portable fuel container while it is in
your vehicle. Static electricity discharge from
the container can ignite the gasoline vapor.
You can be badly burned and your vehicle
damaged if this occurs. To help avoid injury to
you and others:
·Dispense gasoline only into approved
containers.
·Do not ®ll a container while it is inside a
vehicle, in a vehicle's trunk, pickup bed or
on any surface other than the ground.
·Bring the ®ll nozzle in contact with the
inside of the ®ll opening before operating
the nozzle. Contact should be maintained
until the ®lling is complete.
·Do not smoke while pumping gasoline.
5-9
Page 321 of 468
A. Engine Air Cleaner/Filter. SeeEngine Air
Cleaner/Filter on page 5-18.
B. Coolant Surge Tank. See
Engine Coolant on
page 5-23.
C. Air Filter Restriction Indicator. See
Engine Air
Cleaner/Filter on page 5-18.
D. Engine Oil Dipstick. See
Engine Oil on page 5-13.
E. Engine Oil Fill. See
Engine Oil on page 5-13.
F. Automatic Transmission Dipstick. See
Automatic
Transmission Fluid on page 5-20.
G. Fan. See
Cooling System on page 5-28.
H. Remote Negative (-) Terminal (GND). See
Jump
Starting on page 5-40.
I. Remote Positive (+) Terminal. See
Jump Starting on
page 5-40.
J. Power Steering Fluid Reservoir (Out of View). See
Power Steering Fluid on page 5-34.
K. Brake Master Cylinder Reservoir. See
Brakes on
page 5-36.
L. Underhood Fuse Block. See
Fuses and Circuit
Breakers on page 5-103.
M. Battery. See
Battery on page 5-39.
N. Windshield Washer Fluid Reservoir. See
Windshield
Washer Fluid on page 5-35.
Before closing the hood, be sure all ®ller caps are on
properly. Pull down the hood and close it ®rmly.
Engine Oil
If the CHECK OIL LEVEL message appears on the
instrument cluster, it means you need to check
your engine oil level right away.
For more information, see ªCHECK OIL LEVELº under
DIC Warnings and Messages on page 3-57.
You should check your engine oil level regularly; this is
an added reminder.
Checking Engine Oil
It is a good idea to check your engine oil every time you
get fuel. In order to get an accurate reading, the oil
must be warm and the vehicle must be on level ground.
The engine oil dipstick handle is a yellow loop. See
Engine Compartment Overview on page 5-12for
the location of the engine oil dipstick.
Turn off the engine and give the oil several minutes to
drain back into the oil pan. If you don't, the oil
dipstick might not show the actual level.
Pull out the dipstick and clean it with a paper towel or
cloth, then push it back in all the way. Remove it again,
keeping the tip down, and check the level.
5-13