Downloaded from www.Manualslib.com manuals search engine 247Vehicle Body
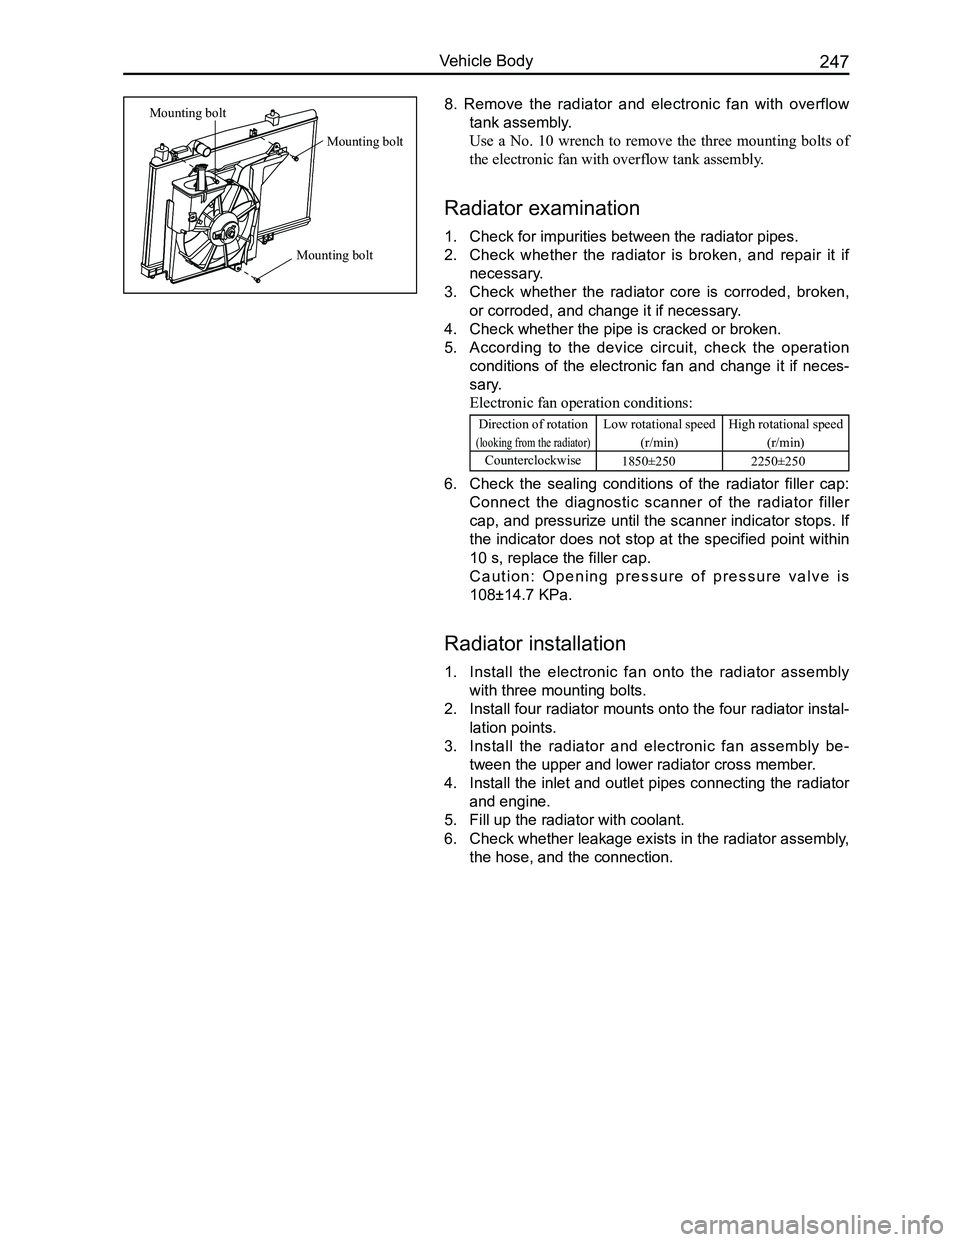
8. Remove the radiator and electronic fan with overflow
tank assembly.
Use a No. 10 wrench to remove the three mounting bolts of
the electronic fan with overflow tank assembly.
Radiator examination
1. Check for impurities between the radiator pipes.
2. Check whether the radiator is broken, and repair it if
necessary.
3. Check whether the radiator core is corroded, broken,
or corroded, and change it if necessary.
4. Check whether the pipe is cracked or broken.
5. According to the device circuit, check the operation
conditions of the electronic fan and change it if neces-
sary.
Electronic fan operation conditions:
Direction of rotation
(looking from the radiator)
Low rotational speed
(r/min)
High rotational speed
(r/min)
Counterclockwise1850±250 2250±250
6. Check the sealing conditions of the radiator filler cap:
Connect the diagnostic scanner of the radiator filler
cap, and pressurize until the scanner indicator stops. If
the indicator does not stop at the specified point within
10 s, replace the filler cap.
C a u t i o n : O p e n i n g p r e s s u r e o f p r e s s u r e v a l v e i s
108±14.7 KPa.
Radiator installation
1. Install the electronic fan onto the radiator assembly
with three mounting bolts.
2. Install four radiator mounts onto the four radiator instal-
lation points.
3. Install the radiator and electronic fan assembly be-
tween the upper and lower radiator cross member.
4. Install the inlet and outlet pipes connecting the radiator
and engine.
5. Fill up the radiator with coolant.
6. Check whether leakage exists in the radiator assembly,
the hose, and the connection.
Mounting bolt
Mounting bolt
Mounting bolt
