HONDA ACCORD COUPE 2002 CL7 / 7.G Owners Manual
Manufacturer: HONDA, Model Year: 2002, Model line: ACCORD COUPE, Model: HONDA ACCORD COUPE 2002 CL7 / 7.GPages: 375, PDF Size: 4.89 MB
Page 291 of 375
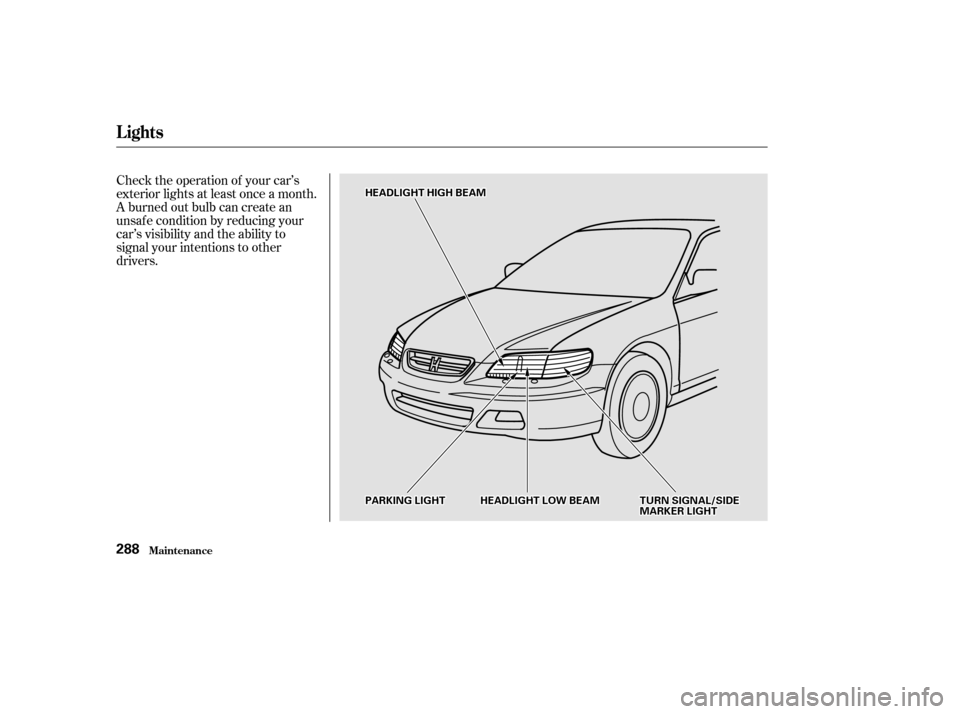
Check the operation of your car’s
exterior lights at least once a month.
A burned out bulb can create an
unsaf e condition by reducing your
car’s visibility and the ability to
signal your intentions to other
drivers.
Lights
Maint enance288
H HE
EA
A D
DL
LIIGGH HT
T H
HI
IGGH H B
BEEA
A M
M
T
TU
UR RNN S
SIIGGN NAAL
L//S
SI IDD E
E
M
M A
AR
RKKEER
R L
LIIGGH HT
T
H
H
E
EA
A D
DL
LIIGGH HT
T L
LOOW W B
BEEA
A M
M
P
P A
A R
RKKIINNG G L
LIIGGH HT
T
Page 292 of 375
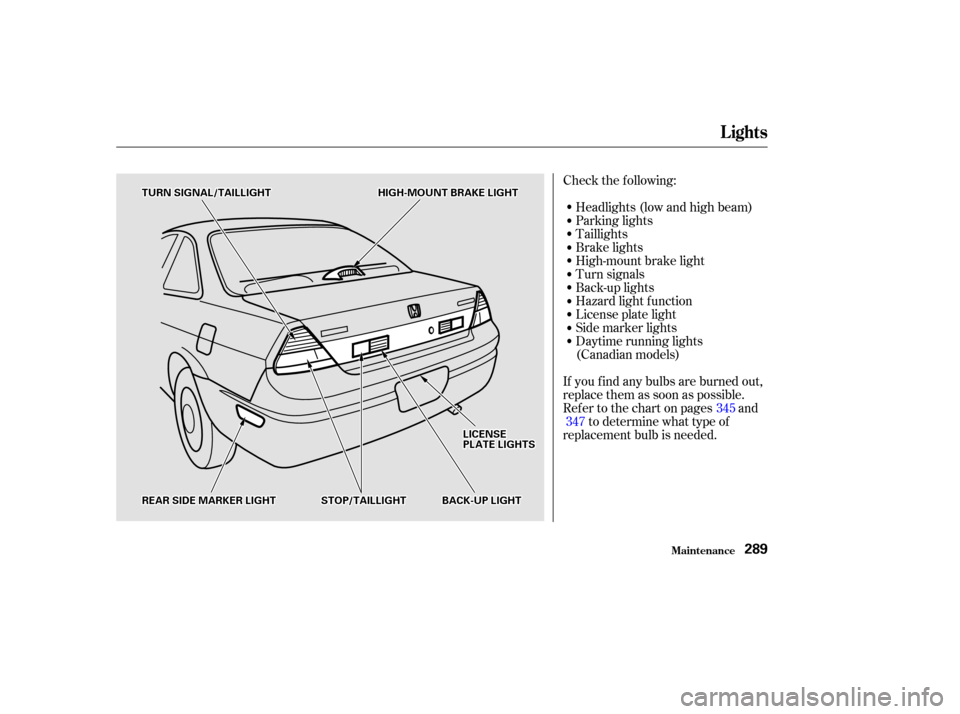
Check the f ollowing:Headlights (low and high beam)
Parking lights
Taillights
Brake lights
High-mount brake light
Turn signals
Back-up lights
Hazard light f unction
License plate light
Side marker lights
Daytime running lights
(Canadian models)
If you f ind any bulbs are burned out,
replace them as soon as possible.
Refer to the chart on pages and to determine what type of
replacement bulb is needed. 347 345
Lights
Maint enance289
T T
U
UR RNN S
SIIGGN NAAL
L//T
T A
A I
ILLL LIIGGH HT
T H
HI
IGGH H-
-M
M O
OUUNNTT B
BRRAA K
KEE L
LIIGGH HT
T
B
BA A C
CKK--U
UP P L
LIIGGH HT
T
R
RE EA
A R
R S
SIIDD E
E M
M A
AR
RKKEER
R L
LIIGGH HT
T S
STTO
OP P/
/T
T A
A I
ILLL LIIGGH HT
T L
LI
ICCE EN
NS SEE
P
P L
LAA T
TE
E L
LIIGGH HT
TS
S
Page 293 of 375
Your car has two bulbs on each side,
four in total. Make sure you are
replacing the bulb that is burned out.
Your car uses halogen headlight
bulbs. When replacing a bulb, handle
it by its plastic case and protect the
glass from contact with your skin or
hard objects. If you touch the glass,
clean it with denatured alcohol and a
clean cloth.
Theheadlightswereproperlyaimed
when your car was new. If you
regularly carry heavy items in the
trunk or pull a trailer, readjustment
may be required. Adjustment of the
headlights should be perf ormed by a
Honda technician or other qualif ied
mechanic.
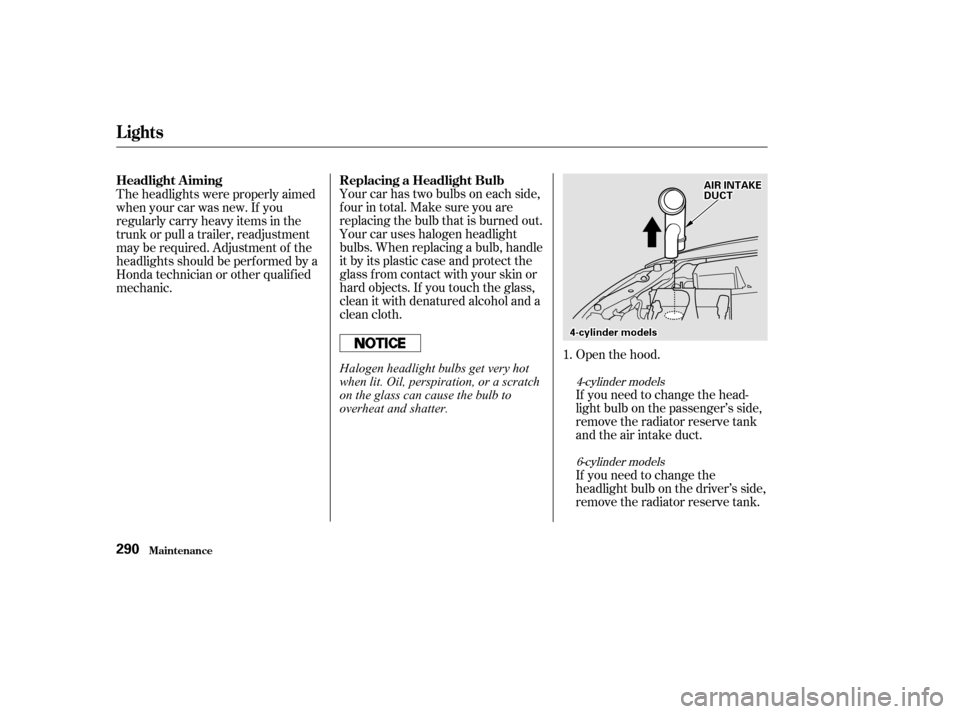
Open the hood.
If you need to change the head-
light bulb on the passenger’s side,
remove the radiator reserve tank
and the air intake duct.
If you need to change the
headlight bulb on the driver’s side,
remove the radiator reserve tank.
1.
4-cylinder models
6-cylinder models
Replacing a Headlight Bulb
Headlight A iming
Lights
Maint enance290
4 4- -c
cy yl liinn d
de
err m
m o
od
de
ellss A
A
I
IRR I
INNT TA
A K
KEE
D
D U
UC CTT
Halogen headlight bulbs get very hot
when lit. Oil, perspiration, or a scratch
on the glass can cause the bulb to
overheat and shatter.
Page 294 of 375
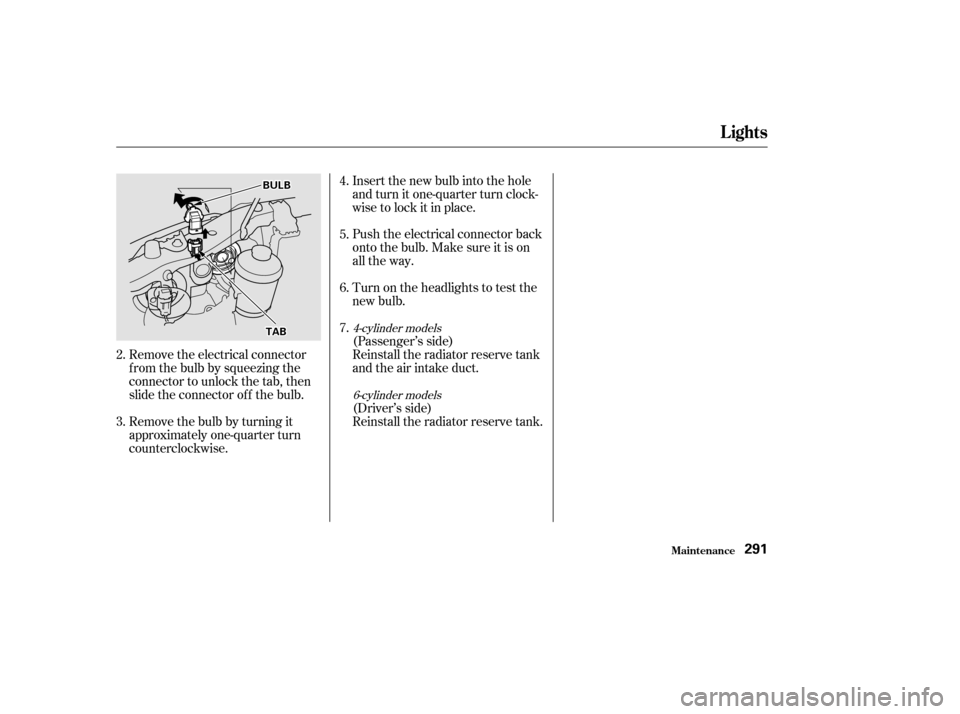
Remove the electrical connector
f rom the bulb by squeezing the
connector to unlock the tab, then
slide the connector of f the bulb.
Remove the bulb by turning it
approximately one-quarter turn
counterclockwise.Reinstall the radiator reserve tank. (Driver’s side) Reinstall the radiator reserve tank
and the air intake duct. (Passenger’s side) Turn on the headlights to test the
new bulb. Push the electrical connector back
onto the bulb. Make sure it is on
all the way. Insert the new bulb into the hole
and turn it one-quarter turn clock-
wise to lock it in place.
2.
3. 4.
7. 6. 5.
6-cylinder models
4-cylinder models
Lights
Maint enance291
B BU
UL LBB
T
T A
A B
B
Page 295 of 375
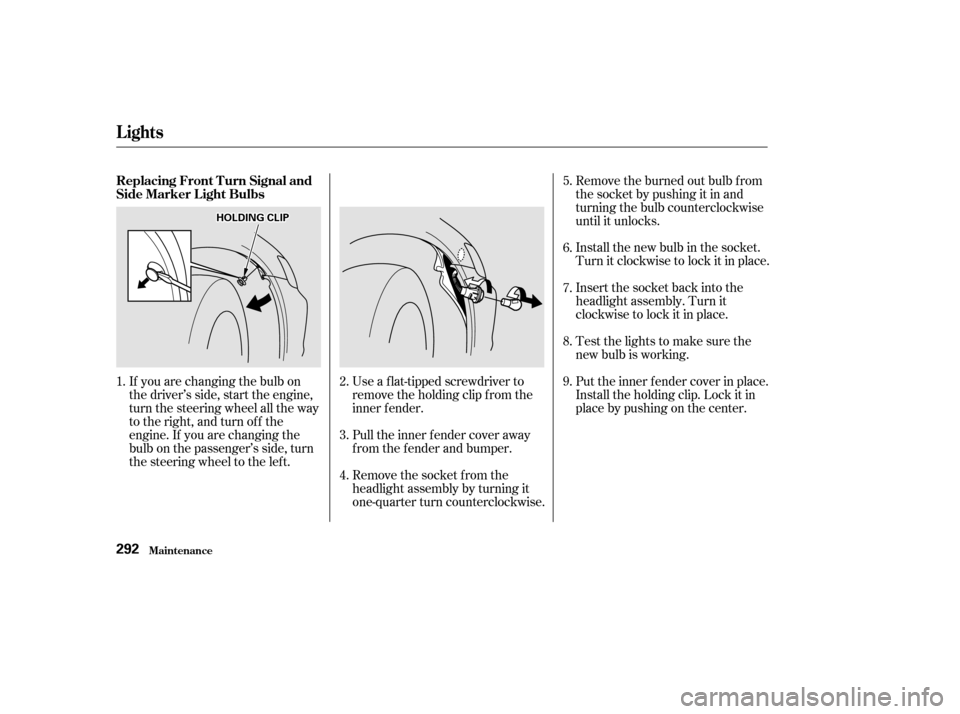
Testthelightstomakesurethe
new bulb is working. Insert the socket back into the
headlight assembly. Turn it
clockwise to lock it in place. Install the new bulb in the socket.
Turn it clockwise to lock it in place. Remove the burned out bulb f rom
thesocketbypushingitinand
turning the bulb counterclockwise
until it unlocks.
Remove the socket from the
headlight assembly by turning it
one-quarter turn counterclockwise.
If you are changing the bulb on
the driver’s side, start the engine,
turn the steering wheel all the way
to the right, and turn off the
engine. If you are changing the
bulb on the passenger’s side, turn
the steering wheel to the left.
Use a f lat-tipped screwdriver to
remove the holding clip f rom the
inner f ender.
Pull the inner f ender cover away
f rom the f ender and bumper.
Put the inner f ender cover in place.
Install the holding clip. Lock it in
place by pushing on the center.
1.
3. 2.
4.5.
6.
7.
8.
9.
Replacing Front Turn Signal and
Side Marker L ight Bulbs
Lights
Maint enance292
H H
O
OL LDD I
INNG G C
CLLIIPP
Page 296 of 375
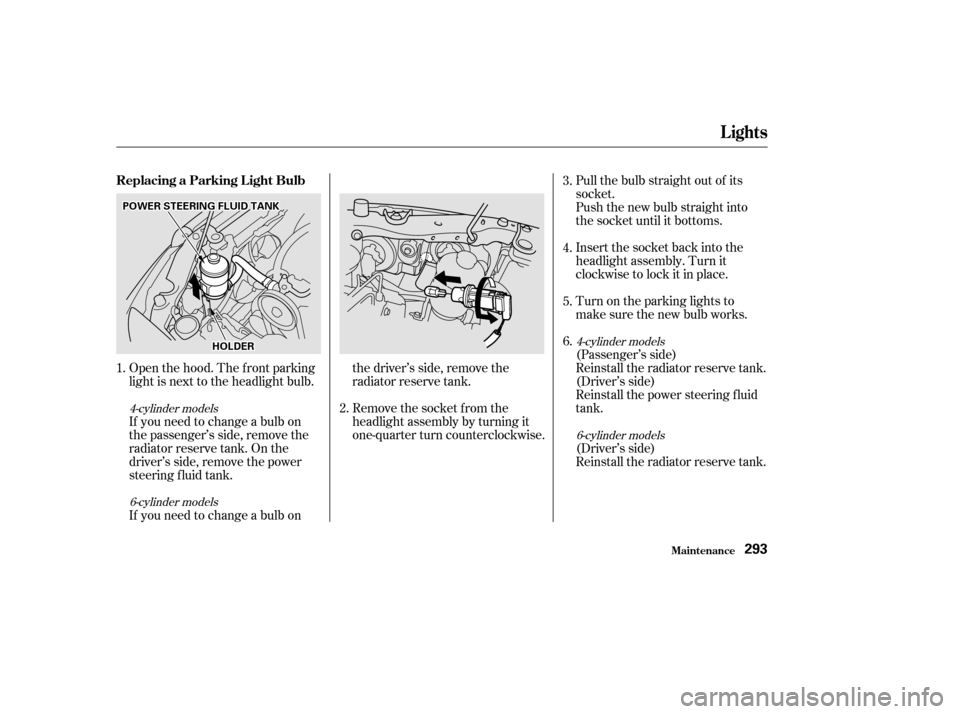
Pull the bulb straight out of its
socket.
Push the new bulb straight into
the socket until it bottoms.
Open the hood. The f ront parking
light is next to the headlight bulb. Insert the socket back into the
headlight assembly. Turn it
clockwise to lock it in place.
Turn on the parking lights to
make sure the new bulb works.
(Passenger’s side)
Reinstall the radiator reserve tank.
(Driver’s side)
If you need to change a bulb on the driver’s side, remove the
radiator reserve tank.
Remove the socket from the
headlight assembly by turning it
one-quarter turn counterclockwise.
(Driver’s side)
Reinstall the power steering f luid
tank.
Reinstall the radiator reserve tank.
If you need to change a bulb on
the passenger’s side, remove the
radiator reserve tank. On the
driver’s side, remove the power
steering f luid tank. 2. 3.
1. 4.
5.
6.
4-cylinder models
6-cylinder models
6-cylinder models 4-cylinder models
Replacing a Parking L ight Bulb
Lights
Maint enance293
P P
O
OW WE ER
R S
STTE
EE
ER
RI INNG G F
FLLUUI IDD T
TA
A N
NK K
H
H O
OL LDD E
ER
R
Page 297 of 375
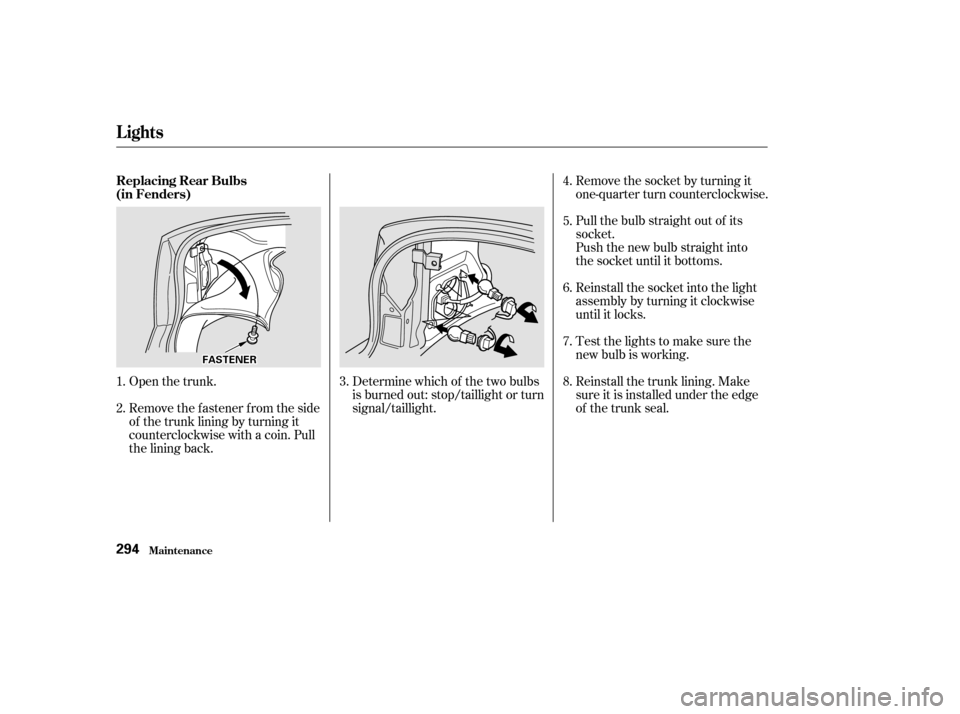
Open the trunk.
Remove the fastener from the side
of the trunk lining by turning it
counterclockwise with a coin. Pull
the lining back.Determine which of the two bulbs
is burned out: stop/taillight or turn
signal/taillight.Remove the socket by turning it
one-quarter turn counterclockwise.
Pull the bulb straight out of its
socket.
Push the new bulb straight into
the socket until it bottoms.
Reinstall the socket into the light
assembly by turning it clockwise
until it locks.
Testthelightstomakesurethe
new bulb is working.
Reinstall the trunk lining. Make
sure it is installed under the edge
of the trunk seal.
1.
3.
2. 4.
5.
6.
7.
8.
Replacing Rear Bulbs
(in Fenders)
Maint enance
Lights
294
F FA
A S
STTE
EN
NE ER
R
Page 298 of 375
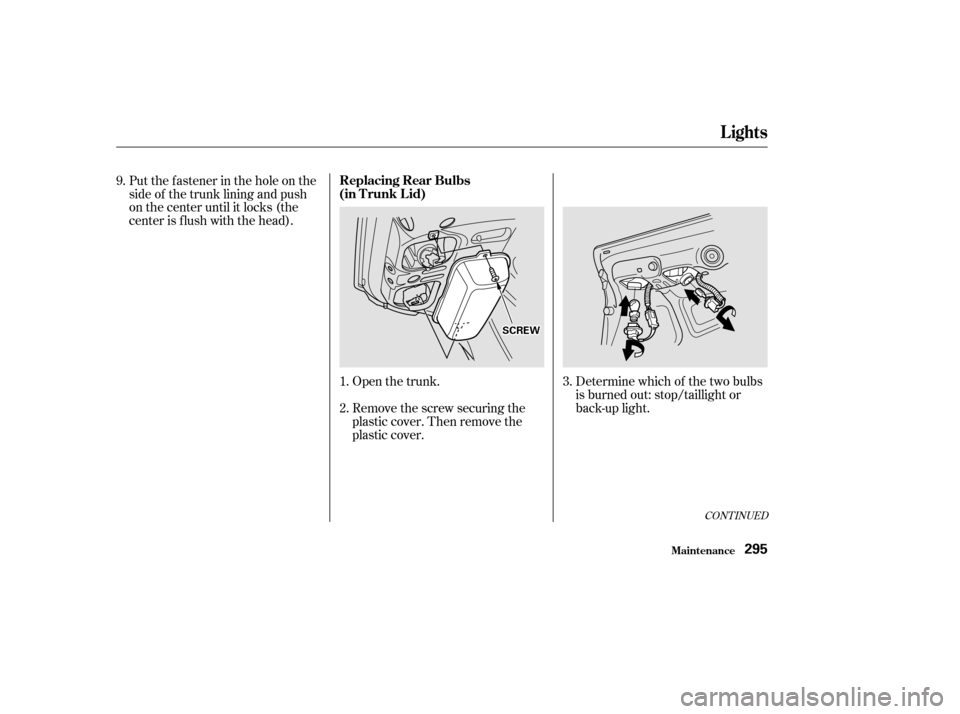
Open the trunk.
Remove the screw securing the
plastic cover. Then remove the
plastic cover.Determine which of the two bulbs
is burned out: stop/taillight or
back-up light.
Put the f astener in the hole on the
side of the trunk lining and push
on the center until it locks (the
center is f lush with the head).
1.
2. 3.
9.
CONT INUED
Replacing Rear Bulbs
(in T runk L id)
Lights
Maint enance295
S SC
CRREEW
W
Page 299 of 375
Remove the socket by turning it
one-quarter turn counterclockwise.
Pull the bulb straight out of its
socket.
Push the new bulb straight into
the socket until it bottoms.
Reinstall the socket into the light
assembly.
Testthelightstomakesurethe
new bulb is working.
Reinstall the plastic cover and
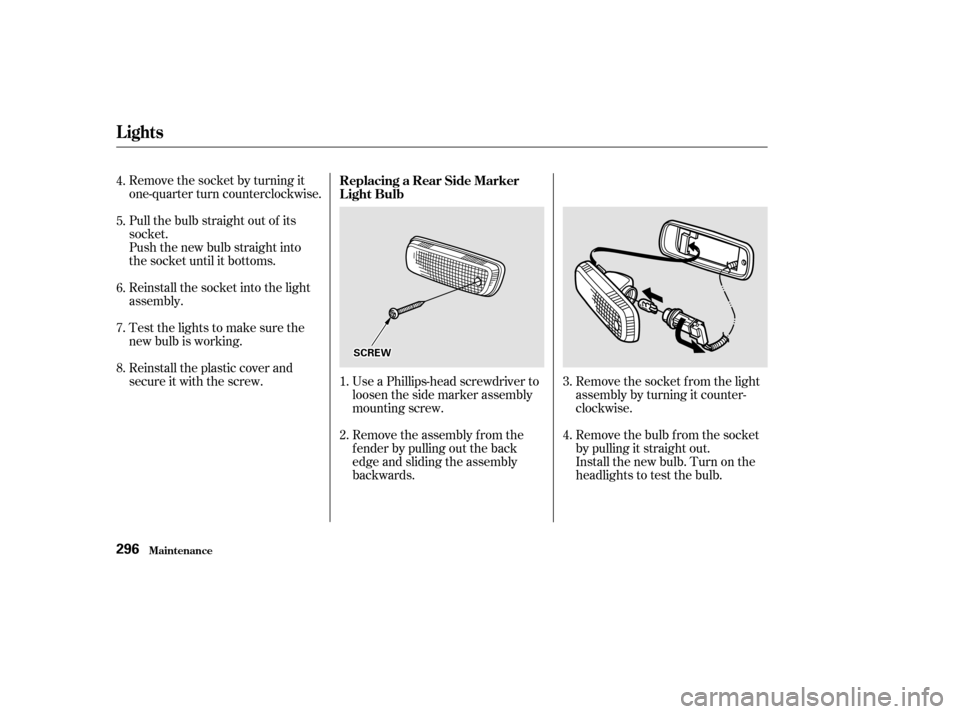
secure it with the screw.Use a Phillips-head screwdriver to
loosen the side marker assembly
mounting screw.
Remove the assembly f rom the
f ender by pulling out the back
edge and sliding the assembly
backwards. Remove the socket f rom the light
assembly by turning it counter-
clockwise.
Remove the bulb f rom the socket
by pulling it straight out.
Install the new bulb. Turn on the
headlights to test the bulb.
1.
2.
4.
5.
6.
7.
8.
4. 3.
Replacing a Rear Side Marker
Light Bulb
Lights
Maint enance296
S SC
CRREEW
W
Page 300 of 375
Insert the socket in the assembly.
Turn it clockwise to lock it in place.
Reinstall the side marker assem-
bly in the bumper. Tighten the
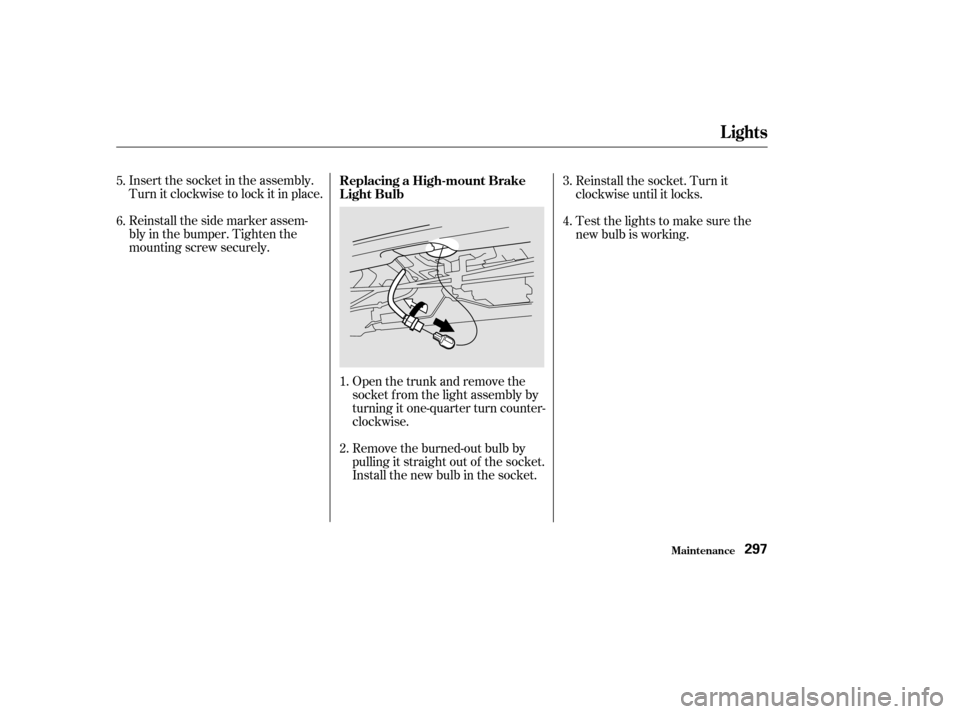
mounting screw securely.Open the trunk and remove the
socket f rom the light assembly by
turning it one-quarter turn counter-
clockwise.
Remove the burned-out bulb by
pulling it straight out of the socket.
Install the new bulb in the socket.Reinstall the socket. Turn it
clockwise until it locks.
Testthelightstomakesurethe
new bulb is working.
1.
2. 3.
5.
6. 4.
Replacing a High-mount Brake
Light Bulb
Lights
Maint enance297