warning lights HONDA ACCORD COUPE 2014 9.G Owners Manual
[x] Cancel search | Manufacturer: HONDA, Model Year: 2014, Model line: ACCORD COUPE, Model: HONDA ACCORD COUPE 2014 9.GPages: 593, PDF Size: 22.22 MB
Page 10 of 593
9
Quick Reference Guide
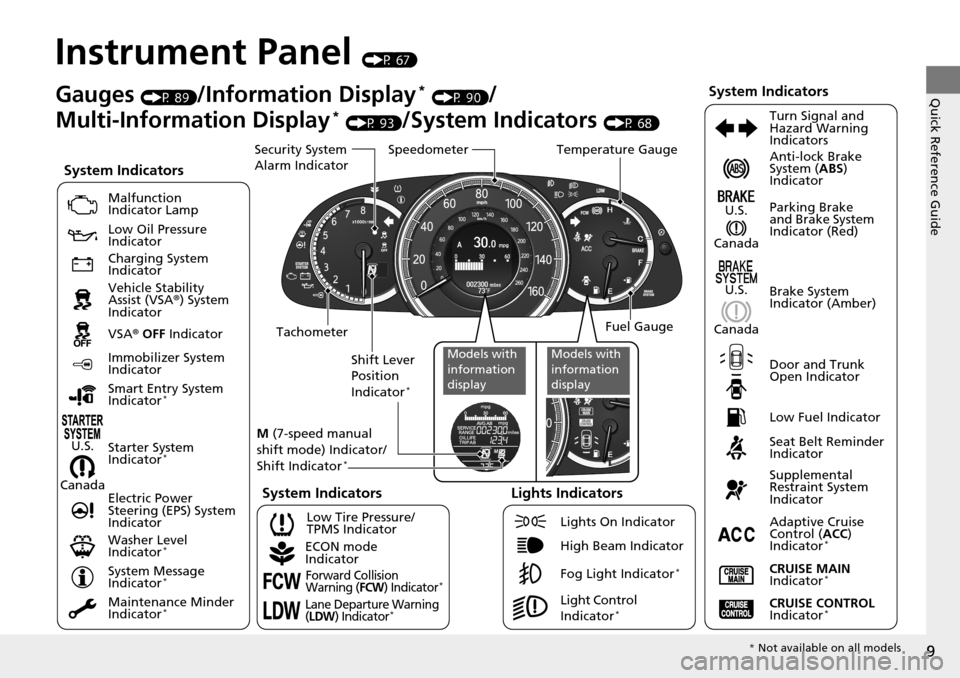
Instrument Panel (P 67)
CanadaU.S.
Low Fuel Indicator
Anti-lock Brake
System (
ABS)
Indicator
Parking Brake
and Brake System
Indicator (Red)
Canada U.S.
Washer Level
Indicator
*
System Indicators
Malfunction
Indicator Lamp
Low Oil Pressure
Indicator
Charging System
Indicator
Vehicle Stability
Assist (VSA ®) System
Indicator
VSA ® OFF Indicator
Low Tire Pressure/
TPMS Indicator
Electric Power
Steering (EPS) System
Indicator
Lights Indicators
Lights On Indicator
High Beam Indicator
Fog Light Indicator
*
Immobilizer System
Indicator
Seat Belt Reminder
Indicator
System Indicators
CRUISE CONTROL
Indicator*
Adaptive Cruise
Control ( ACC)
Indicator
*
CRUISE MAIN
Indicator*
Tachometer Speedometer
Fuel Gauge
Security System
Alarm Indicator
Shift Lever
Position
Indicator
*
Gauges (P 89)/Information Display* (P 90)/
Multi-Information Display
* (P 93)/System Indicators (P 68) Turn Signal and
Hazard Warning
Indicators
System Indicators
Temperature Gauge
M (7-speed manual
shift mode) Indicator/
Shift Indicator
*
Maintenance Minder
Indicator*
Smart Entry System
Indicator*
Starter System
Indicator*
System Message
Indicator*
ECON mode
Indicator
Forward Collision
Warning (FCW) Indicator*
Lane Departure Warning
(LDW) Indicator*Light Control
Indicator*
Door and Trunk
Open Indicator Brake System
Indicator (Amber)
Supplemental
Restraint System
Indicator
Canada U.S.Models with
information
displayModels with
information
display
*
Not available on all models
Page 77 of 593
76
uuIndicators u
Instrument Panel
*1:Models with the smart entry system have an ENGINE START/STOP button instead of an ignition switch.
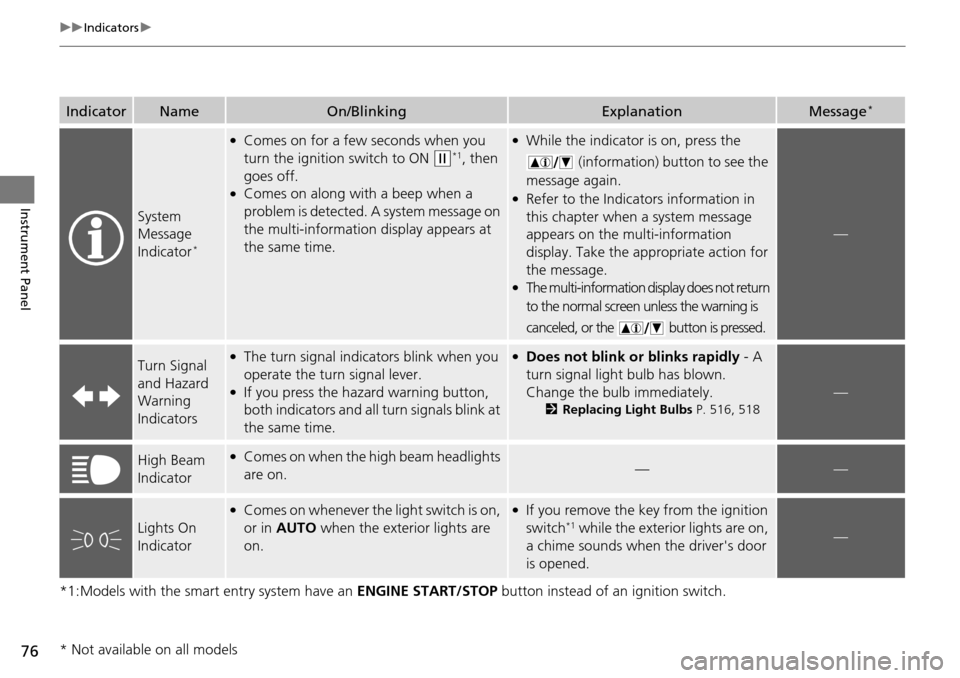
IndicatorNameOn/BlinkingExplanationMessage*
System
Message
Indicator
*
●Comes on for a few seconds when you
turn the ignition switch to ON
(w*1, then
goes off.
●Comes on along with a beep when a
problem is detected. A system message on
the multi-information display appears at
the same time.
●While the indicator is on, press the
(information) button to see the
message again.
●Refer to the Indicators information in
this chapter when a system message
appears on the multi-information
display. Take the appropriate action for
the message.
●The multi-information display does not return
to the normal screen unless the warning is
canceled, or the button is pressed.
—
Turn Signal
and Hazard
Warning
Indicators●The turn signal indica tors blink when you
operate the turn signal lever.
●If you press the hazard warning button,
both indicators and all turn signals blink at
the same time.
●Does not blink or blinks rapidly - A
turn signal light bulb has blown.
Change the bulb immediately.
2 Replacing Light Bulbs P. 516, 518
—
High Beam
Indicator●Comes on when the high beam headlights
are on.——
Lights On
Indicator
●Comes on whenever the light switch is on,
or in AUTO when the exterior lights are
on.●If you remove the key from the ignition
switch*1 while the exterior lights are on,
a chime sounds when the driver's door
is opened.—
* Not available on all models
Page 159 of 593
158
uuInterior Lights/Interior Convenience Items uInterior Convenience Items
Controls
Interior Convenience Items
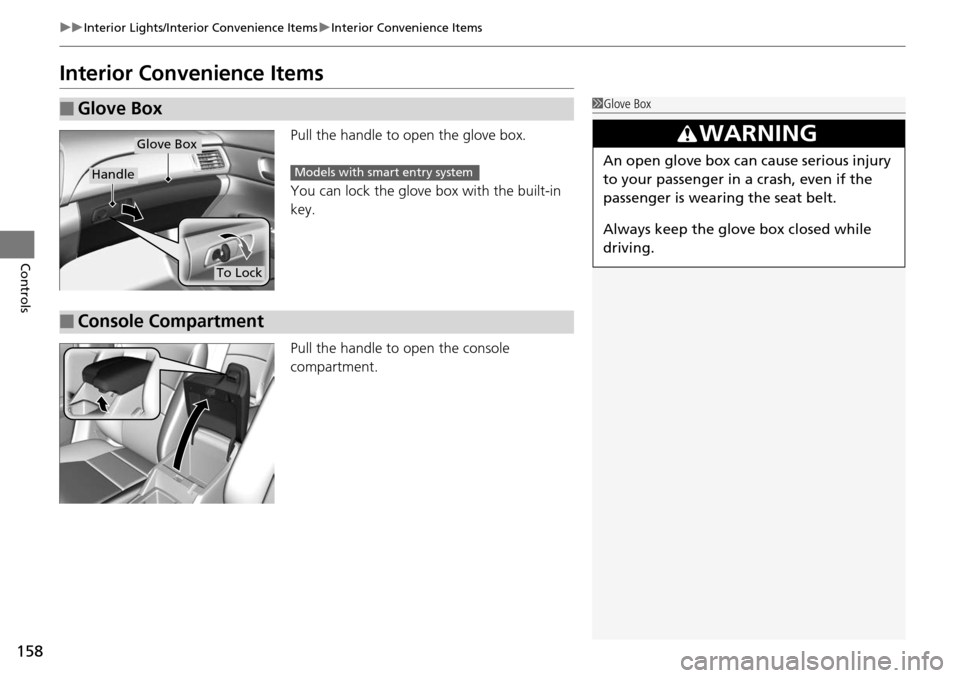
Pull the handle to open the glove box.
You can lock the glove box with the built-in
key.
Pull the handle to open the console
compartment.
■Glove Box1 Glove Box
3WARNING
An open glove box can cause serious injury
to your passenger in a crash, even if the
passenger is wearing the seat belt.
Always keep the glove box closed while
driving.
Glove Box
Handle
To Lock
Models with smart entry system
■Console Compartment
Page 165 of 593
uuInterior Lights/Interior Convenience Items uInterior Convenience Items
164
Controls
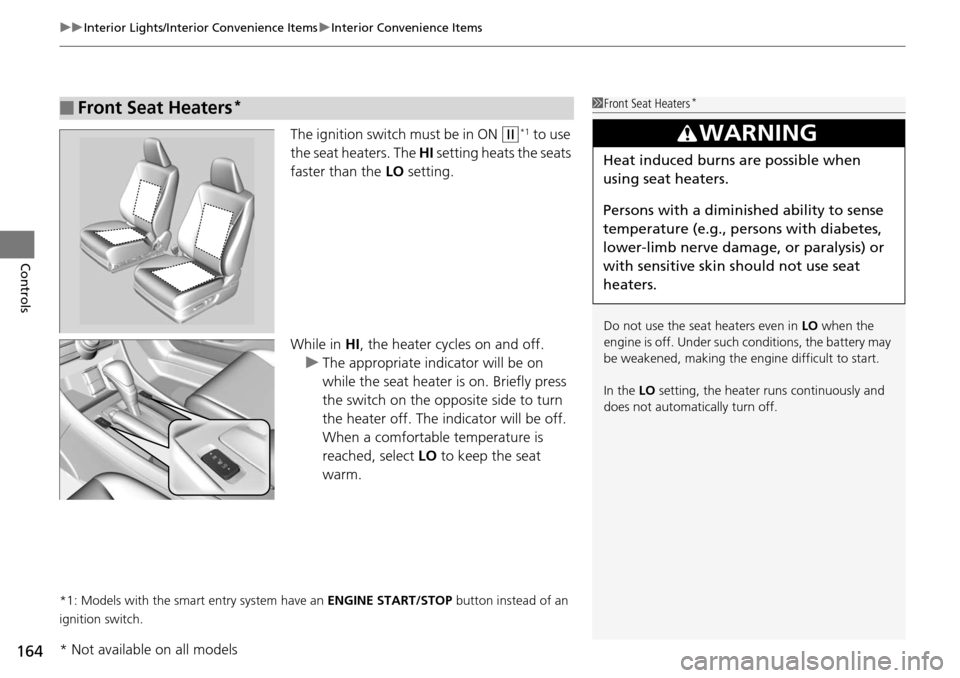
The ignition switch must be in ON (w*1 to use
the seat heaters. The HI setting heats the seats
faster than the LO setting.
While in HI, the heater cycles on and off.
u The appropriate indicator will be on
while the seat heater is on. Briefly press
the switch on the opposite side to turn
the heater off. The in dicator will be off.
When a comfortable temperature is
reached, select LO to keep the seat
warm.
*1: Models with the smart entry system have an ENGINE START/STOP button instead of an
ignition switch.
■Front Seat Heaters*1 Front Seat Heaters*
Do not use the seat heaters even in LO when the
engine is off. Under such conditions, the battery may
be weakened, making the engine difficult to start.
In the LO setting, the heater runs continuously and
does not automatically turn off.
3WARNING
Heat induced burns are possible when
using seat heaters.
Persons with a diminished ability to sense
temperature (e.g., persons with diabetes,
lower-limb nerve damage, or paralysis) or
with sensitive skin should not use seat
heaters.
* Not available on all models
Page 166 of 593
165
uuInterior Lights/Interior Convenience Items uInterior Convenience Items
Controls
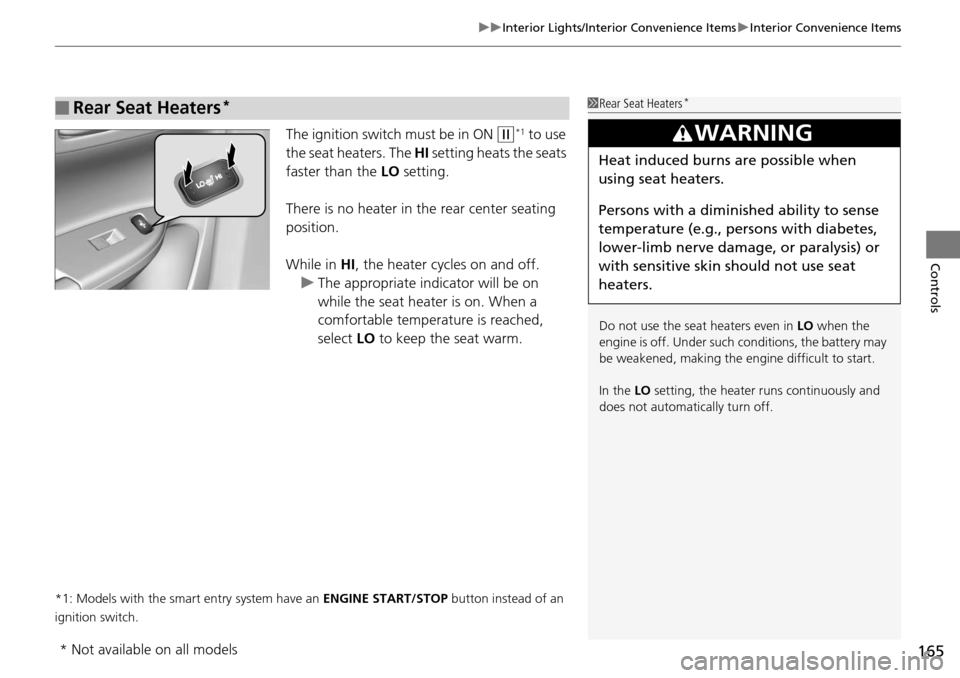
The ignition switch must be in ON (w*1 to use
the seat heaters. The HI setting heats the seats
faster than the LO setting.
There is no heater in the rear center seating
position.
While in HI , the heater cycles on and off.
u The appropriate indicator will be on
while the seat heater is on. When a
comfortable temperature is reached,
select LO to keep the seat warm.
*1: Models with the smart entry system have an ENGINE START/STOP button instead of an
ignition switch.
■Rear Seat Heaters*1 Rear Seat Heaters*
Do not use the seat heaters even in LO when the
engine is off. Under such conditions, the battery may
be weakened, making the engine difficult to start.
In the LO setting, the heater runs continuously and
does not automatically turn off.
3WARNING
Heat induced burns are possible when
using seat heaters.
Persons with a diminished ability to sense
temperature (e.g., persons with diabetes,
lower-limb nerve damage, or paralysis) or
with sensitive skin should not use seat
heaters.
* Not available on all models
Page 458 of 593
Continued457
uuWhen Driving uForward Collision Warning (FCW)*
Driving
1Forward Collision Warning (FCW)*
Never apply a film or attach any objects to the
windshield that could obs truct the FCW camera's
field of vision.
Scratches, nicks, and othe r damage to the windshield
within the FCW camera's fi eld of vision can cause the
system to operate abnormall y. If this occurs, we
recommend that you replac e the windshield with a
genuine Honda replacem ent windshield. Making
even minor repairs within th e camera's field of vision
or installing an aftermarket replacement windshield
may also cause the system to operate abnormally.
After replacing the winds hield, have a dealer
recalibrate the camera. Prop er calibration of the FCW
camera is necessary for the system to operate
properly.
Models with information display
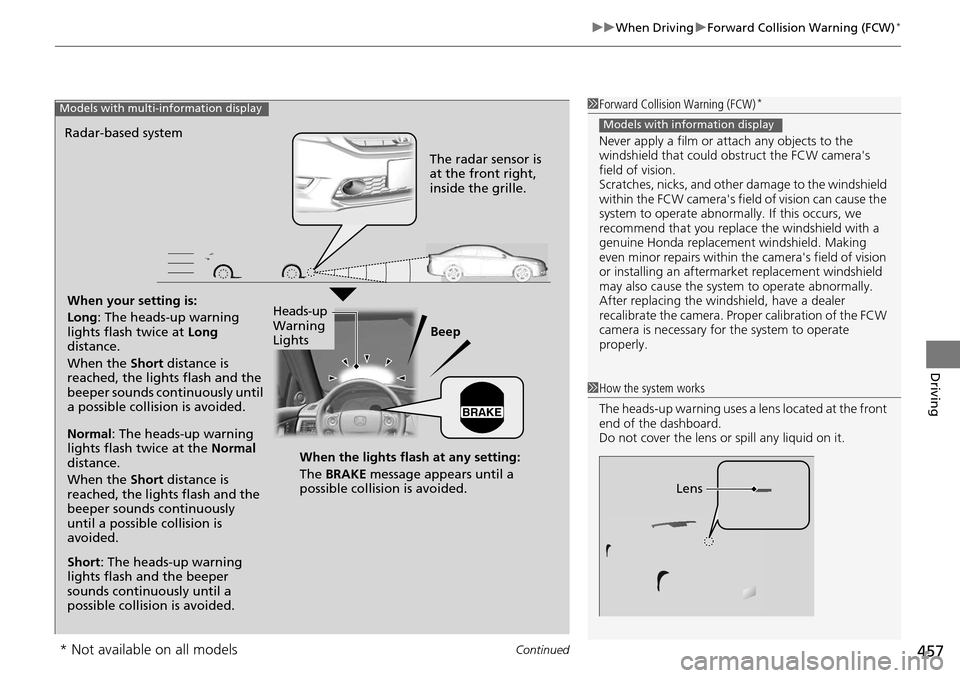
1 How the system works
The heads-up warning uses a lens located at the front
end of the dashboard.
Do not cover the lens or spill any liquid on it.
Lens
*2
When your setting is:
Long : The heads-up warning
lights flash twice at Long
distance.
When the Short distance is
reached, the lights flash and the
beeper sounds continuously until
a possible collision is avoided. Beep
Radar-based system
Models with multi-information display
The radar sensor is
at the front right,
inside the grille.
Normal
: The heads-up warning
lights flash twice at the Normal
distance.
When the Short distance is
reached, the lights flash and the
beeper sounds continuously
until a possible collision is
avoided.
Short : The heads-up warning
lights flash and the beeper
sounds continuously until a
possible collision is avoided. When the lights flash at any setting:
The BRAKE
message appears until a
possible collision is avoided.
Heads-up
Warning
Lights
* Not available on all models
Page 459 of 593
uuWhen Driving uForward Collision Warning (FCW)*
458
Driving
■Automatic shutoff
FCW may automatically shut itself off and the FCW indicator comes and stays on when:
• The temperature inside the system is high.
• The windshield is blocked by di rt, mud, leaves, wet snow, etc.
• You drive off-road or on a mountain ro ad, or curved and winding road for an
extended period.
• You drive in bad weather (rain, fog, snow, etc.).
• The radar sensor cover is blocked by dirt, mud, leaves, wet snow, etc.
• An abnormal tire condition is detected (wrong tire size, flat tire, etc.).
Once the conditions that caused FCW to shut off improve or are addressed (e.g.,
cleaning), the system comes back on.
1 Automatic shutoff
To help reduce the likel ihood that high interior
temperatures will cause the camera system to shut
off, when parking, find a sh ady area or face the front
of the vehicle away from the sun. If you use a
reflective sun shade, do not allow it to cover the
camera housing. Covering the camera can
concentrate heat on the camera.
If the CAMERA HOT message appears:
•Use the climate control system to cool down the
interior and, if necessary , the defroster mode when
windows are fogged.
•Start driving the vehicle to lower the windshield
temperature, which cool s down the area around
the FCW system.
Models with information display
Beep
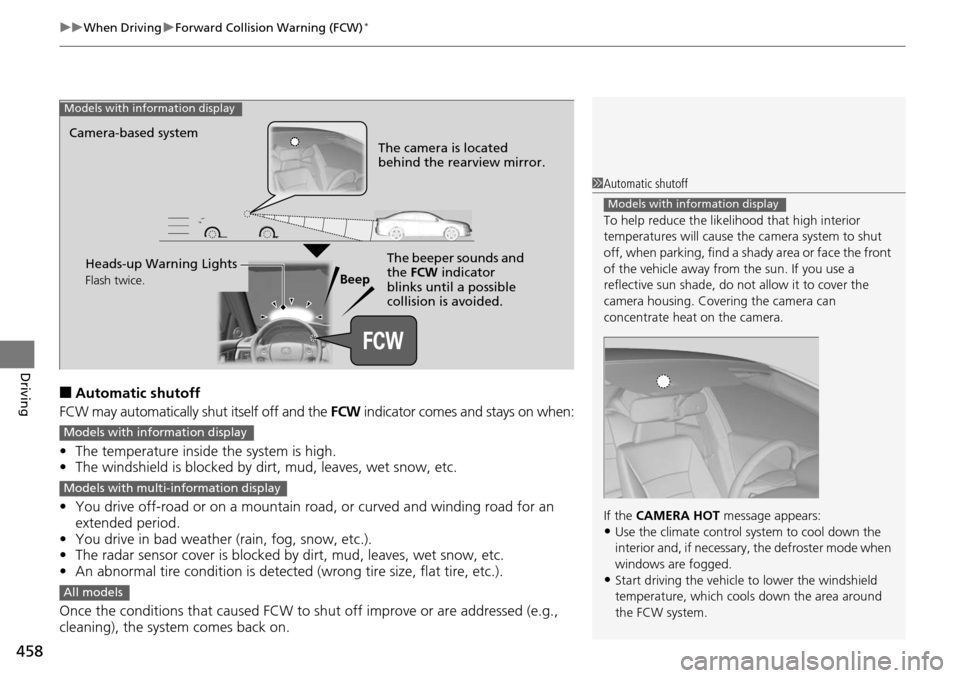
Camera-based system
Models with information display
The camera is located
behind the rearview mirror.
The beeper sounds and
the FCW
indicator
blinks until a possible
collision is avoided.Heads-up Warning Lights
Flash twice.
Models with info rmation display
Models with multi- information display
All models
Page 460 of 593
459
uuWhen Driving uForward Collision Warning (FCW)*
Driving
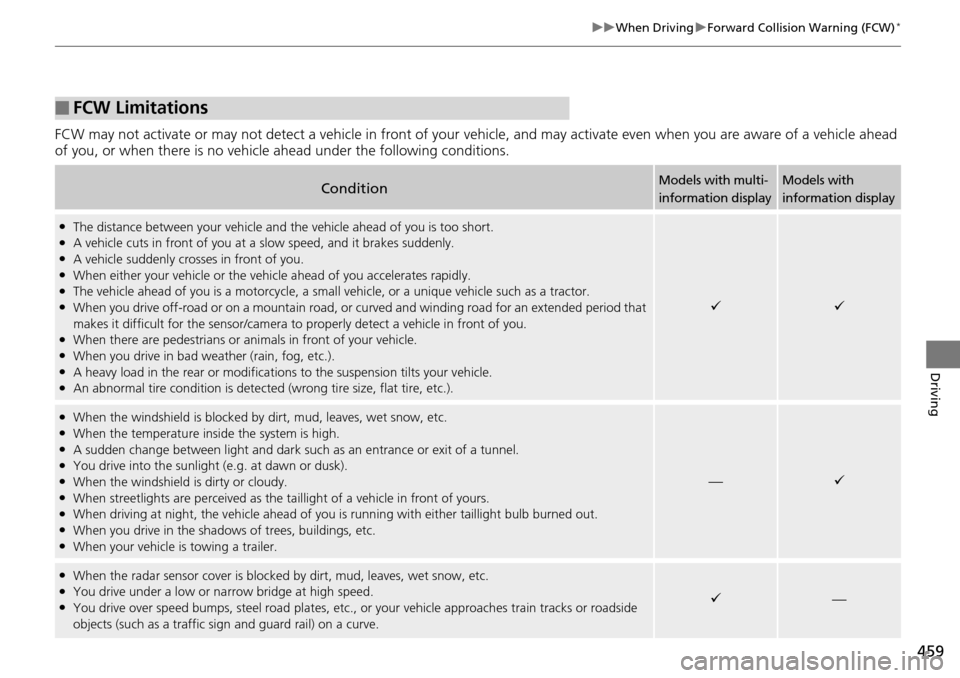
FCW may not activate or may not detect a vehicle in front of your vehicle, and may activate even when you are aware of a vehicle ahead
of you, or when there is no vehicle ahead under the following conditions.
■FCW Limitations
ConditionModels with multi-
information displayModels with
information display
●The distance between your vehicle and the vehicle ahead of you is too short.●A vehicle cuts in front of you at a slow speed, and it brakes suddenly.●A vehicle suddenly crosses in front of you.●When either your vehicle or the vehicle ahead of you a ccelerates rapidly.●The vehicle ahead of you is a motorcycle, a small vehicle, or a unique vehicle such as a tractor.●When you drive off-road or on a mountain road, or cu rved and winding road for an extended period that
makes it difficult for the sensor/camera to properly detect a vehicle in front of you.
●When there are pedestrians or an imals in front of your vehicle.●When you drive in bad weather (rain, fog, etc.).●A heavy load in the rear or modificati ons to the suspension tilts your vehicle.●An abnormal tire condition is detected (wrong tire size, flat tire, etc.).
●When the windshield is blocked by dirt, mud, leaves, wet snow, etc.●When the temperature inside the system is high.●A sudden change between light and dark such as an entr ance or exit of a tunnel.●You drive into the sunlight (e.g. at dawn or dusk).●When the windshield is dirty or cloudy.●When streetlights are perceived as the ta illight of a vehicle in front of yours.●When driving at night, the vehicle ahead of you is running with either taillight bulb burned out.●When you drive in the shadows of trees, buildings, etc.●When your vehicle is towing a trailer.
—
●When the radar sensor cover is blocke d by dirt, mud, leaves, wet snow, etc.●You drive under a low or narrow bridge at high speed.●You drive over speed bumps, steel road plates, etc., or your vehicle approaches train tracks or roadside
objects (such as a traffic si gn and guard rail) on a curve.—
Page 544 of 593
543Continued
Handling the Unexpected
If a Tire Goes Flat
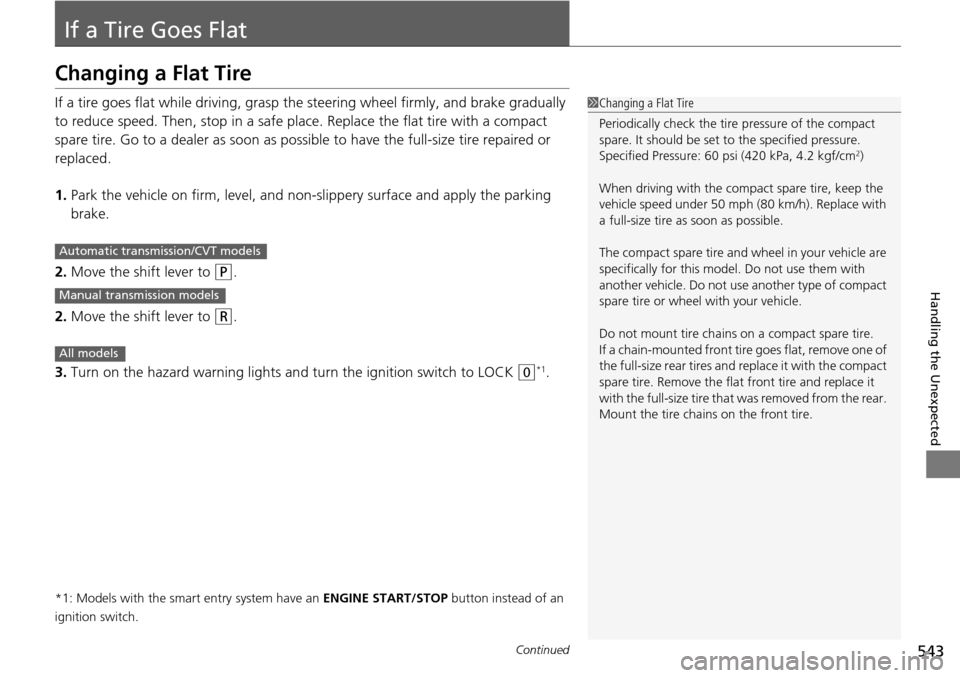
Changing a Flat Tire
If a tire goes flat while driving, grasp the steering wheel firmly, and brake gradually
to reduce speed. Then, stop in a safe plac e. Replace the flat tire with a compact
spare tire. Go to a dealer as soon as possib le to have the full-size tire repaired or
replaced.
1. Park the vehicle on firm, level, and non-slippery surface an d apply the parking
brake.
2. Move the shift lever to
(P.
2. Move the shift lever to
(R.
3. Turn on the hazard warning lights an d turn the ignition switch to LOCK
(0*1.
*1: Models with the smart entry system have an ENGINE START/STOP button instead of an
ignition switch.
1 Changing a Flat Tire
Periodically check the tire pressure of the compact
spare. It should be set to the specified pressure.
Specified Pressure: 60 psi (420 kPa, 4.2 kgf/cm
2)
When driving with the compact spare tire, keep the
vehicle speed under 50 mph (80 km/h). Replace with
a full-size tire as soon as possible.
The compact spare tire and wheel in your vehicle are
specifically for this model. Do not use them with
another vehicle. Do not us e another type of compact
spare tire or wheel with your vehicle.
Do not mount tire chains on a compact spare tire.
If a chain-mounted front tire goes flat, remove one of
the full-size rear tires and replace it with the compact
spare tire. Remove the flat front tire and replace it
with the full-size tire that was removed from the rear.
Mount the tire chains on the front tire.
Automatic transmission/CVT models
Manual transmission models
All models
Page 553 of 593
552
Handling the Unexpected
Jump Starting
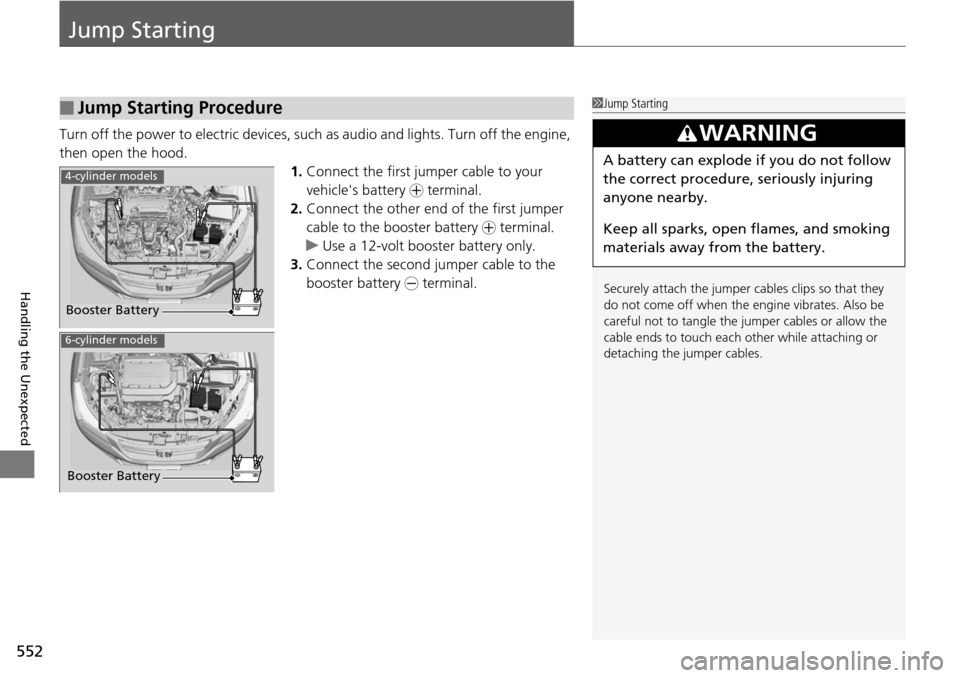
Turn off the power to electric devices, such as audio and lights. Turn off the engine,
then open the hood. 1.Connect the first jump er cable to your
vehicle's battery + terminal.
2. Connect the other end of the first jumper
cable to the booster battery + terminal.
u Use a 12-volt booster battery only.
3. Connect the second jumper cable to the
booster battery - terminal.
■Jump Starting Procedure1Jump Starting
Securely attach the jumper cables clips so that they
do not come off when the e ngine vibrates. Also be
careful not to tangle the ju mper cables or allow the
cable ends to touch each other while attaching or
detaching the jumper cables.
3WARNING
A battery can explode if you do not follow
the correct procedure, seriously injuring
anyone nearby.
Keep all sparks, open flames, and smoking
materials away from the battery.
Booster Battery
4-cylinder models
6-cylinder models
Booster Battery