HONDA ACCORD HYBRID 2015 9.G Owners Manual
Manufacturer: HONDA, Model Year: 2015, Model line: ACCORD HYBRID, Model: HONDA ACCORD HYBRID 2015 9.GPages: 569
Page 231 of 569
uuAudio System Basic Operation uPlaying a USB Flash Drive
230Features
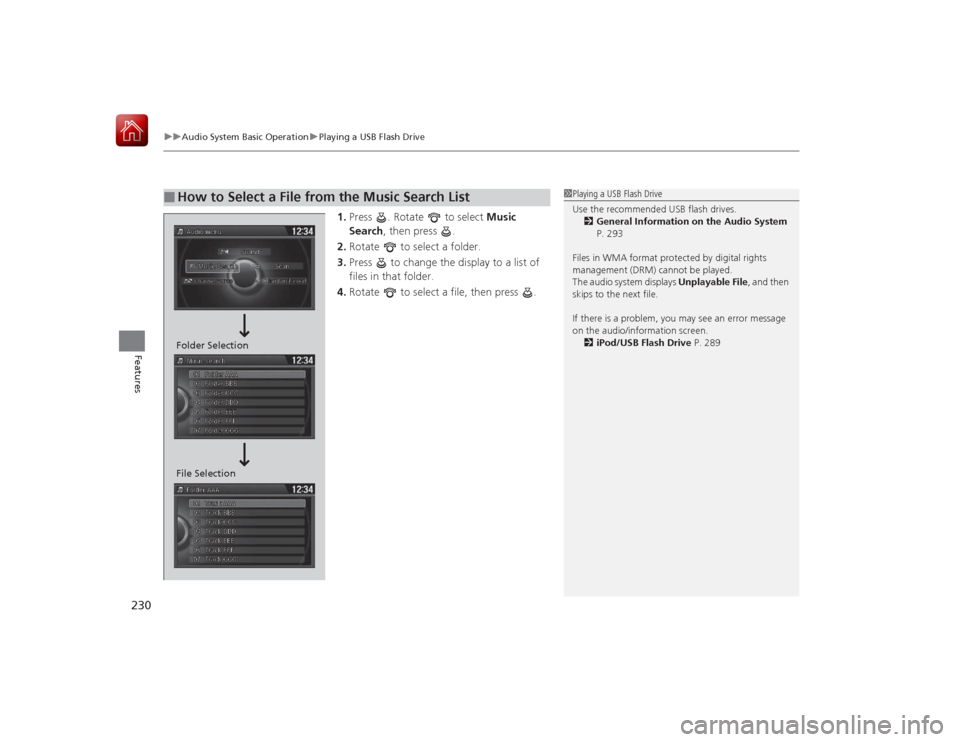
1. Press . Rotate to select Music
Search , then press .
2. Rotate to select a folder.
3. Press to change the display to a list of
files in that folder.
4. Rotate to select a file, then press .
■
How to Select a File from the Music Search List
1Playing a USB Flash Drive
Use the recommended USB flash drives.
2 General Information on the Audio System
P. 293
Files in WMA format protected by digital rights
management (DRM) cannot be played.
The audio system displays Unplayable File, and then
skips to the next file.
If there is a problem, you may see an error message
on the audio/information screen.
2 iPod/USB Flash Drive P. 289
Folder Selection
File Selection
Page 232 of 569
231
uuAudio System Basic Operation uPlaying a USB Flash Drive
Features
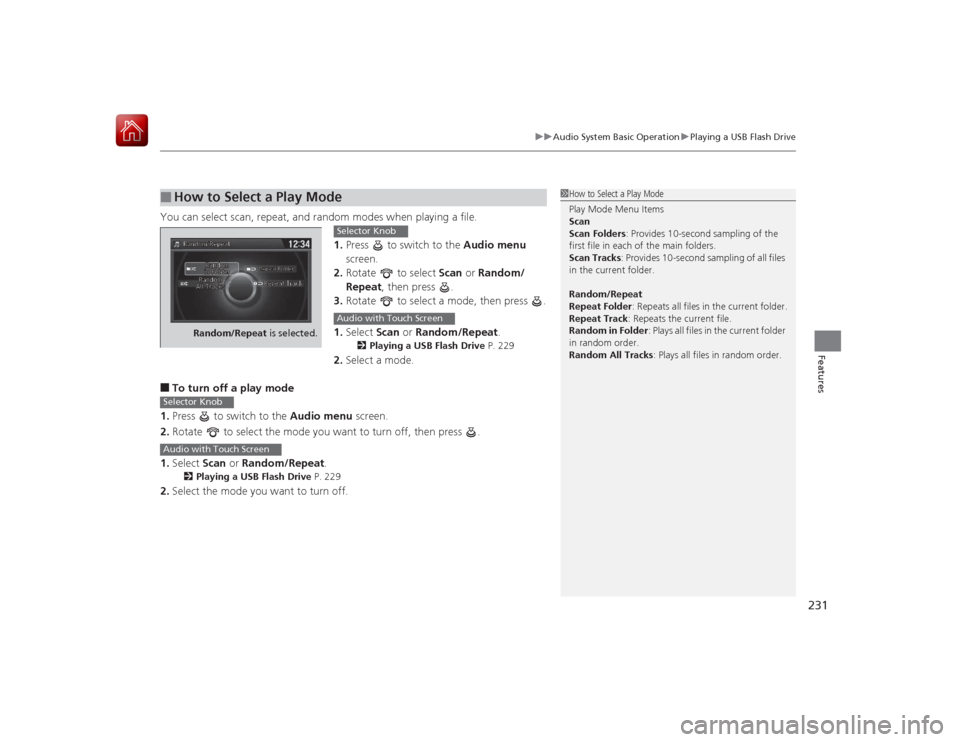
You can select scan, repeat, and random modes when playing a file.
1.Press to switch to the Audio menu
screen.
2. Rotate to select Scan or Random/
Repeat , then press .
3. Rotate to select a mode, then press .
1. Select Scan or Random/Repeat .
2Playing a USB Flash Drive P. 229
2.Select a mode.
■To turn off a play mode
1. Press to switch to the Audio menu screen.
2. Rotate to select the mode you want to turn off, then press .
1. Select Scan or Random/Repeat .2Playing a USB Flash Drive P. 229
2.Select the mode you want to turn off.■
How to Select a Play Mode
1How to Select a Play Mode
Play Mode Menu Items
Scan
Scan Folders: Provides 10-second sampling of the
first file in each of the main folders.
Scan Tracks : Provides 10-second sampling of all files
in the current folder.
Random/Repeat
Repeat Folder : Repeats all files in the current folder.
Repeat Track : Repeats the current file.
Random in Folder : Plays all files in the current folder
in random order.
Random All Tracks: Plays all files in random order.
Random/Repeat is selected.
Selector KnobAudio with Touch Screen
Selector KnobAudio with Touch Screen
Page 233 of 569
232
uuAudio System Basic Operation uPlaying Bluetooth ® Audio
Features
Playing Bluetooth® AudioYour audio system allows you to listen to music from your Bluetooth-compatible
phone.
This function is available when the phone is paired and connected to the vehicle's
Bluetooth ® HandsFreeLink ® (HFL) system.2 Phone Setup P. 345
1Playing Bluetooth ® Audio
Not all Bluetooth-enabled phones with streaming
audio capabilities are compatible with the system.
For a list of compatible phones:•U.S.: Visit www.handsfreelink.honda.com , or call
1-888-528-7876.•Canada: Visit www.handsfreelink.ca , or call 1-888-
528-7876.
In some states, it may be illegal to perform some data
device functions while driving.
If more than one phone is paired to the HFL system,
there will be a delay before the system begins to play.
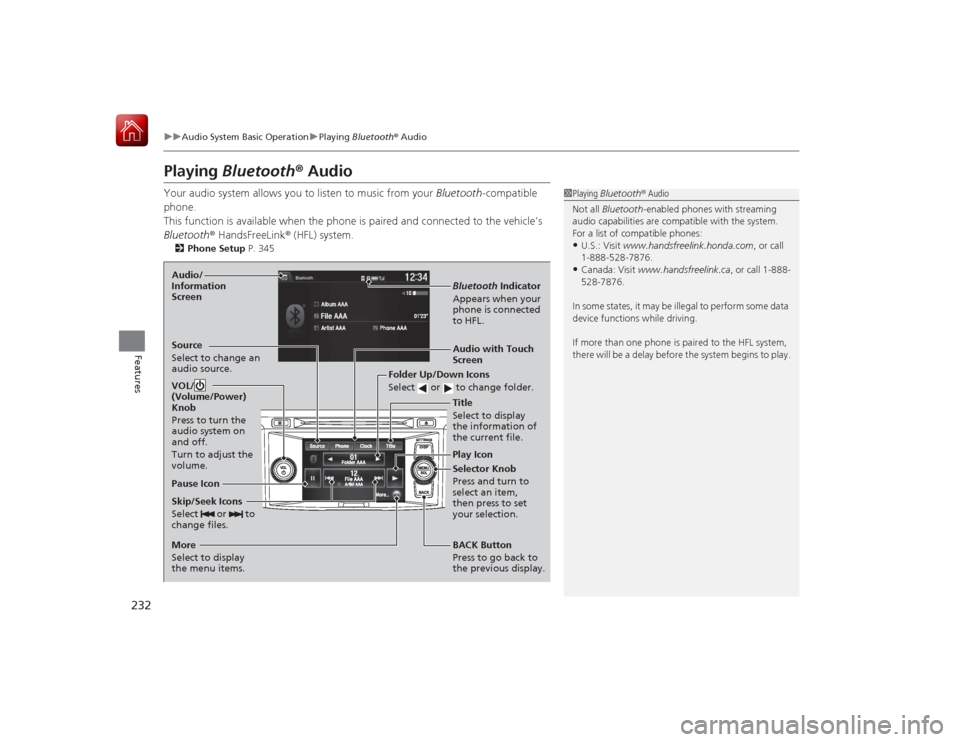
Skip/Seek Icons
Select or to
change files.
Bluetooth Indicator
Appears when your
phone is connected
to HFL.
VOL/
(Volume/Power)
Knob
Press to turn the
audio system on
and off.
Turn to adjust the
volume.
Audio/
Information
Screen
Audio with Touch
Screen
Play Icon
Pause Icon
BACK Button
Press to go back to
the previous display.
More
Select to display
the menu items. Selector Knob
Press and turn to
select an item,
then press to set
your selection.
Source
Select to change an
audio source.
Folder Up/Down Icons
Select or to change folder.Title
Select to display
the information of
the current file.
Page 234 of 569
233
uuAudio System Basic Operation uPlaying Bluetooth ® Audio
Features
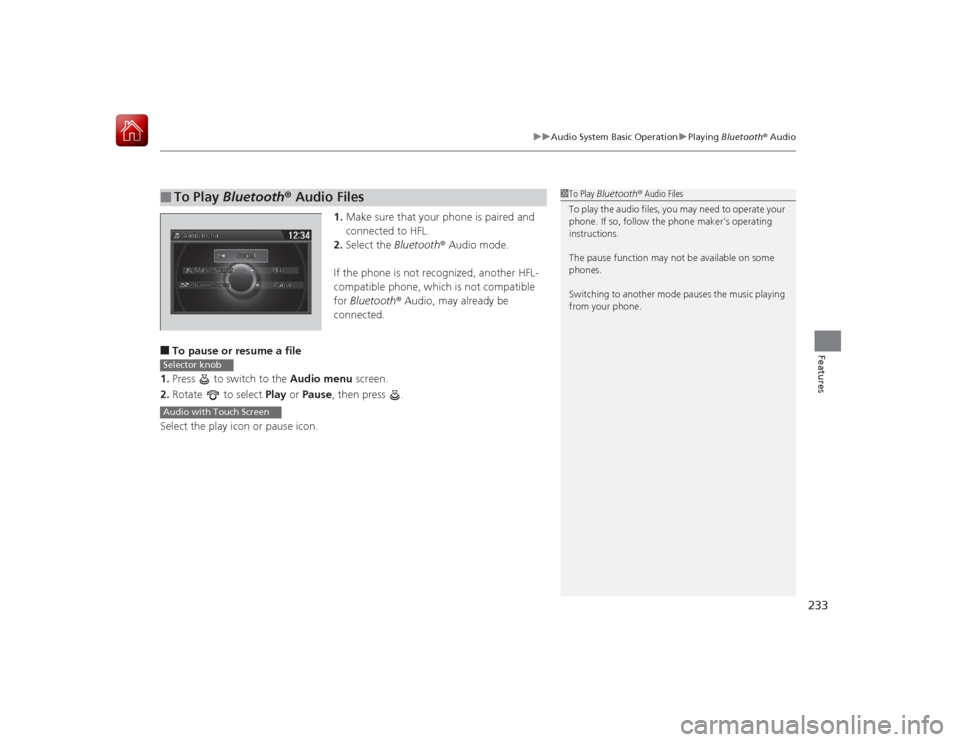
1. Make sure that your phone is paired and
connected to HFL.
2. Select the Bluetooth® Audio mode.
If the phone is not recognized, another HFL-
compatible phone, which is not compatible
for Bluetooth ® Audio, may already be
connected.
■To pause or resume a file
1. Press to switch to the Audio menu screen.
2. Rotate to select Play or Pause , then press .
Select the play icon or pause icon.■
To Play Bluetooth ® Audio Files
1 To Play Bluetooth ® Audio Files
To play the audio files, you may need to operate your
phone. If so, follow the phone maker's operating
instructions.
The pause function may not be available on some
phones.
Switching to another mode pauses the music playing
from your phone.
Selector knobAudio with Touch Screen
Page 235 of 569
234Features
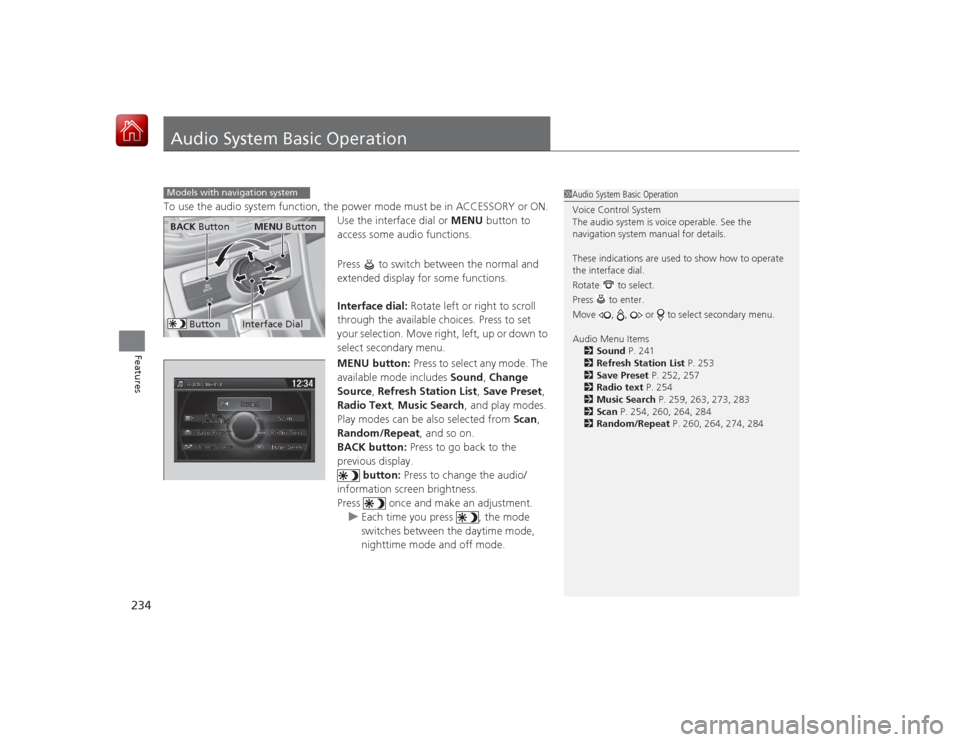
Audio System Basic OperationTo use the audio system function, the power mode must be in ACCESSORY or ON.Use the interface dial or MENU button to
access some audio functions.
Press to switch between the normal and
extended display for some functions.
Interface dial: Rotate left or right to scroll
through the available choices. Press to set
your selection. Move right, left, up or down to
select secondary menu.
MENU button: Press to select any mode. The
available mode includes Sound, Change
Source , Refresh Station List , Save Preset ,
Radio Text, Music Search , and play modes.
Play modes can be also selected from Scan,
Random/Repeat , and so on.
BACK button: Press to go back to the
previous display. button: Press to change the audio/
information screen brightness.
Press once and make an adjustment. u Each time you press , the mode
switches between the daytime mode,
nighttime mode and off mode.Models with navigation system
1Audio System Basic Operation
Voice Control System
The audio system is voice operable. See the
navigation system manual for details.
These indications are used to show how to operate
the interface dial.
Rotate to select.
Press to enter.
Move , , or to select secondary menu.
Audio Menu Items
2 Sound P. 241
2 Refresh Station List P. 253
2 Save Preset P. 252, 257
2 Radio text P. 254
2 Music Search P. 259, 263, 273, 283
2 Scan P. 254, 260, 264, 284
2 Random/Repeat P. 260, 264, 274, 284
Interface DialMENU Button
BACK Button
Button
Page 236 of 569
235
uuAudio System Basic Operation uAudio with Touch Screen
Continued
Features
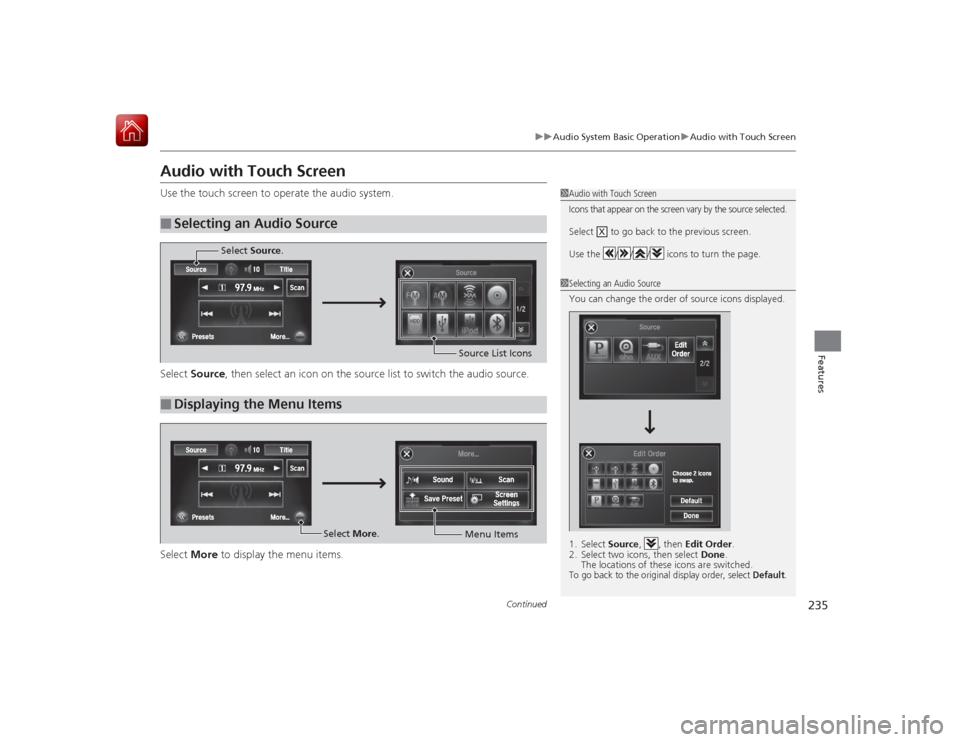
Audio with Touch ScreenUse the touch screen to operate the audio system.
Select Source , then select an icon on the sourc e list to switch the audio source.
Select More to display the menu items.■
Selecting an Audio Source
1Audio with Touch ScreenIcons that appear on the screen vary by the source selected.Select to go back to the previous screen.
Use the / / / icons to turn the page.
X
1Selecting an Audio Source
You can change the order of source icons displayed.
1. Select Source, , then Edit Order.
2. Select two icons, then select Done.
The locations of these icons are switched.To go back to the original display order, select
Default
.
■
Displaying the Menu Items
Select Source.
Source List Icons
Select More.
Menu Items
Page 237 of 569
uuAudio System Basic Operation uAudio with Touch Screen
236Features
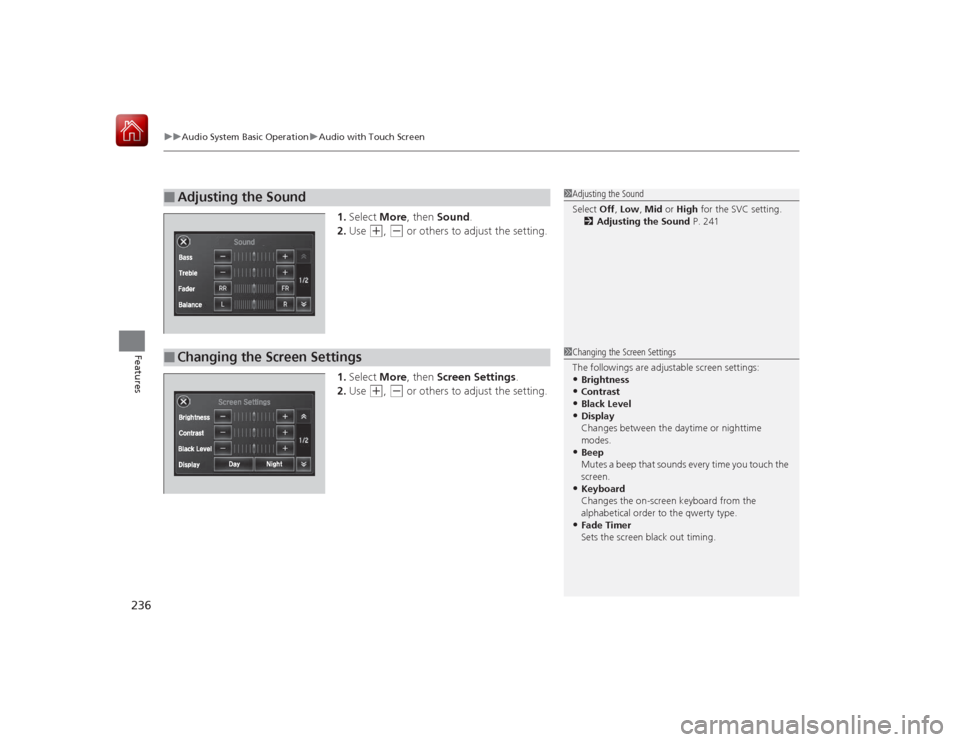
1. Select More, then Sound .
2. Use
(+
, (-
or others to adjust the setting.
1. Select More, then Screen Settings .
2. Use
(+
, (-
or others to adjust the setting.
■
Adjusting the Sound
1Adjusting the Sound
Select Off, Low , Mid or High for the SVC setting.
2 Adjusting the Sound P. 241
■
Changing the Screen Settings
1Changing the Screen Settings
The followings are adjustable screen settings:•Brightness•Contrast•Black Level•Display
Changes between the daytime or nighttime
modes.•Beep
Mutes a beep that sounds every time you touch the
screen.•Keyboard
Changes the on-screen keyboard from the
alphabetical order to the qwerty type.•Fade Timer
Sets the screen black out timing.
Page 238 of 569
237
uuAudio System Basic Operation uAudio/Information Screen
Continued
Features
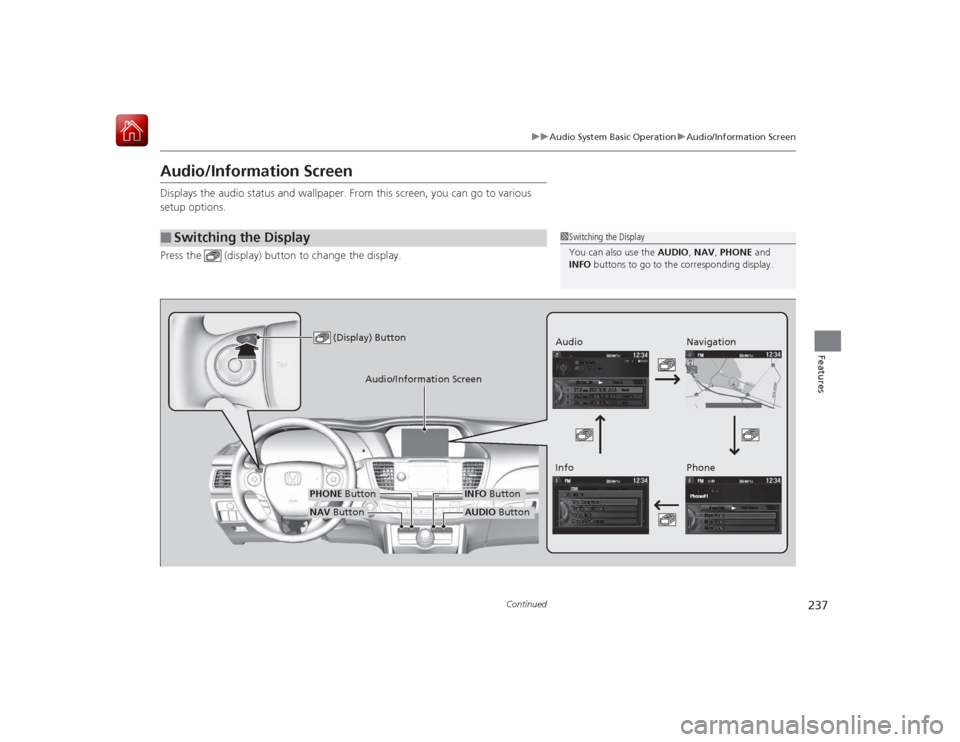
Audio/Information ScreenDisplays the audio status and wallpaper. From this screen, you can go to various
setup options.
Press the (display) button to change the display.■
Switching the Display
1Switching the Display
You can also use the AUDIO, NAV, PHONE and
INFO buttons to go to the corresponding display.
(Display) Button
Audio
Info
Audio/Information Screen
Navigation
Phone
AUDIO Button
NAV ButtonPHONE Button
INFO Button
Page 239 of 569
238
uuAudio System Basic Operation uAudio/Information Screen
Features
■Audio
Shows the current audio information.■Navigation
Shows the navigation screen.
2 Refer to the Navigation System Manual
■Phone
Shows the HFL information.
2 Bluetooth® HandsFreeLink ® P. 374
■Info
Shows the Trip Computer or Clock/Wallpaper and other information. Rotate
to select an item, then press .■Trip computer (Current Drive)
Shows the range, and instant and average fuel economy of the current trip, as well
as the average fuel economy from your last trip.■Trip computer (History of Trip A)
Shows the range, average fuel economy and distances traveled for the current trip, as well
as the average fuel economy and distances traveled during the last three driving cycles.
Each time you reset the trip meter A, the information on the display updates. The
history of the previous three driving cycles is kept.■Deleting the history manually
1. Move on the History of Trip A screen to select Delete History, then press .
2. You will receive a confirmation message on the screen. Rotate to select Yes,
then press .■Clock/Wallpaper
Shows a clock screen or an image you import.
Page 240 of 569
Continued
239
uuAudio System Basic Operation uAudio/Information Screen
Features
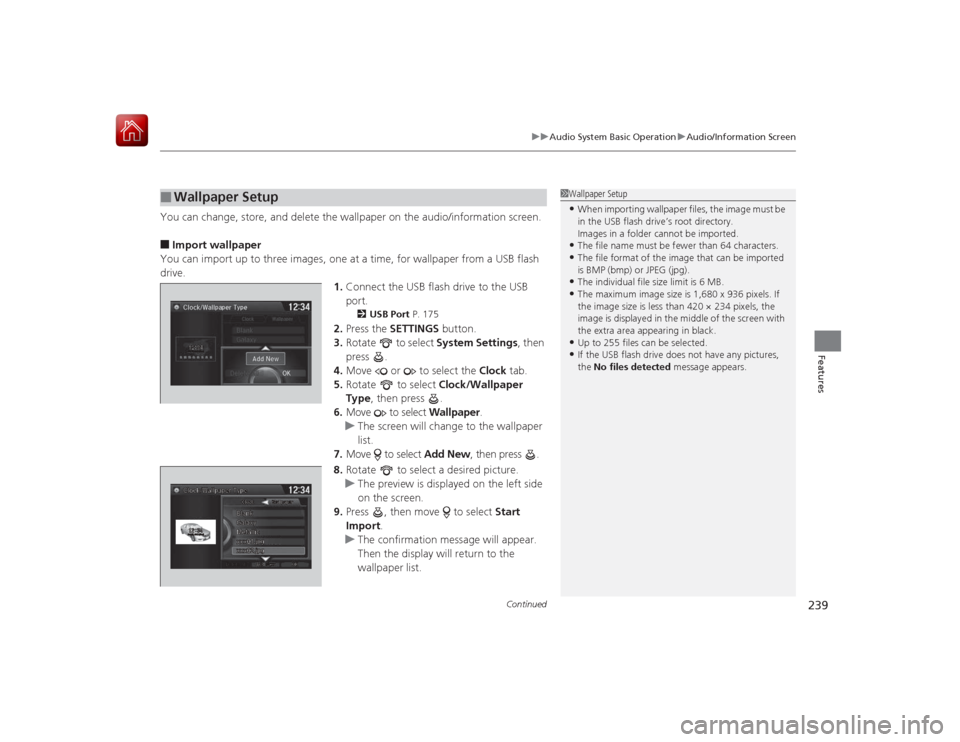
You can change, store, and delete the wallpaper on the audio/information screen.■Import wallpaper
You can import up to three images, one at a time, for wallpaper from a USB flash
drive. 1.Connect the USB flash drive to the USB
port.
2 USB Port P. 175
2.Press the SETTINGS button.
3. Rotate to select System Settings, then
press .
4. Move or to select the Clock tab.
5. Rotate to select Clock/Wallpaper
Type , then press .
6. Move to select Wallpaper.
u The screen will change to the wallpaper
list.
7. Move to select Add New, then press .
8. Rotate to select a desired picture.
u The preview is displayed on the left side
on the screen.
9. Press , then move to select Start
Import.
u The confirmation message will appear.
Then the display will return to the
wallpaper list.
■
Wallpaper Setup
1Wallpaper Setup•When importing wallpaper files, the image must be
in the USB flash drive’s root directory.
Images in a folder cannot be imported.•The file name must be fewer than 64 characters.•The file format of the image that can be imported
is BMP (bmp) or JPEG (jpg).•The individual file size limit is 6 MB.•The maximum image size is 1,680 x 936 pixels. If
the image size is less than 420 × 234 pixels, the
image is displayed in the middle of the screen with
the extra area appearing in black.•Up to 255 files can be selected.•If the USB flash drive does not have any pictures,
the No files detected message appears.