display HONDA ACCORD HYBRID 2015 9.G Workshop Manual
[x] Cancel search | Manufacturer: HONDA, Model Year: 2015, Model line: ACCORD HYBRID, Model: HONDA ACCORD HYBRID 2015 9.GPages: 569
Page 176 of 569
175
uuAudio System uUSB Port
Features
USB Port
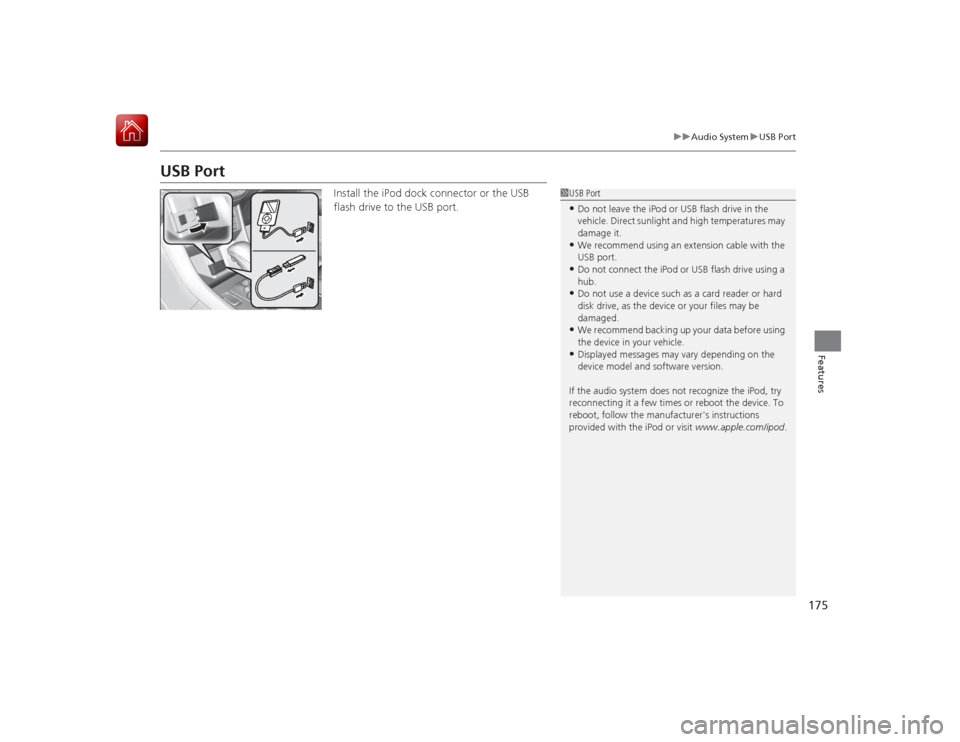
Install the iPod dock connector or the USB
flash drive to the USB port.
1USB Port•Do not leave the iPod or USB flash drive in the
vehicle. Direct sunlight and high temperatures may
damage it.•We recommend using an extension cable with the
USB port.•Do not connect the iPod or USB flash drive using a
hub.•Do not use a device such as a card reader or hard
disk drive, as the device or your files may be
damaged.•We recommend backing up your data before using
the device in your vehicle.•Displayed messages may vary depending on the
device model and software version.
If the audio system does not recognize the iPod, try
reconnecting it a few times or reboot the device. To
reboot, follow the manufacturer's instructions
provided with the iPod or visit www.apple.com/ipod.
Page 177 of 569
176
uuAudio System uAuxiliary Input Jack
Features
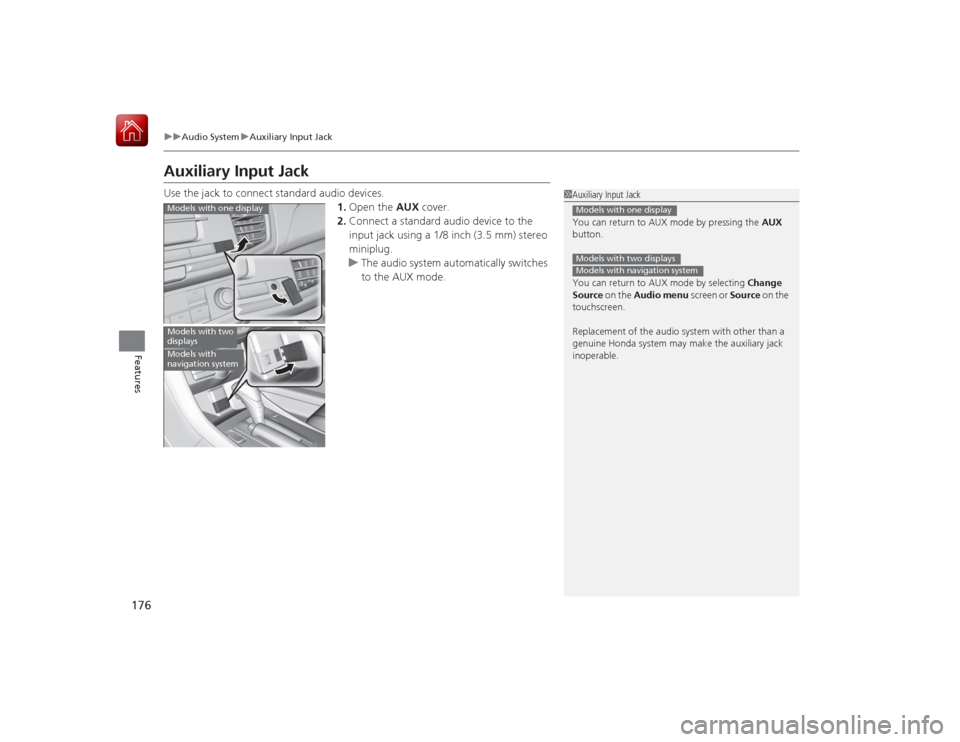
Auxiliary Input JackUse the jack to connect standard audio devices.
1.Open the AUX cover.
2. Connect a standard audio device to the
input jack using a 1/8 inch (3.5 mm) stereo
miniplug.
u The audio system automatically switches
to the AUX mode.
1Auxiliary Input Jack
You can return to AUX mode by pressing the AUX
button.
You can return to AUX mode by selecting Change
Source on the Audio menu screen or Source on the
touchscreen.
Replacement of the audio system with other than a
genuine Honda system may make the auxiliary jack
inoperable.Models with one displayModels with two displaysModels with navigation system
Models with one displayModels with two
displaysModels with
navigation system
Page 180 of 569
179Features
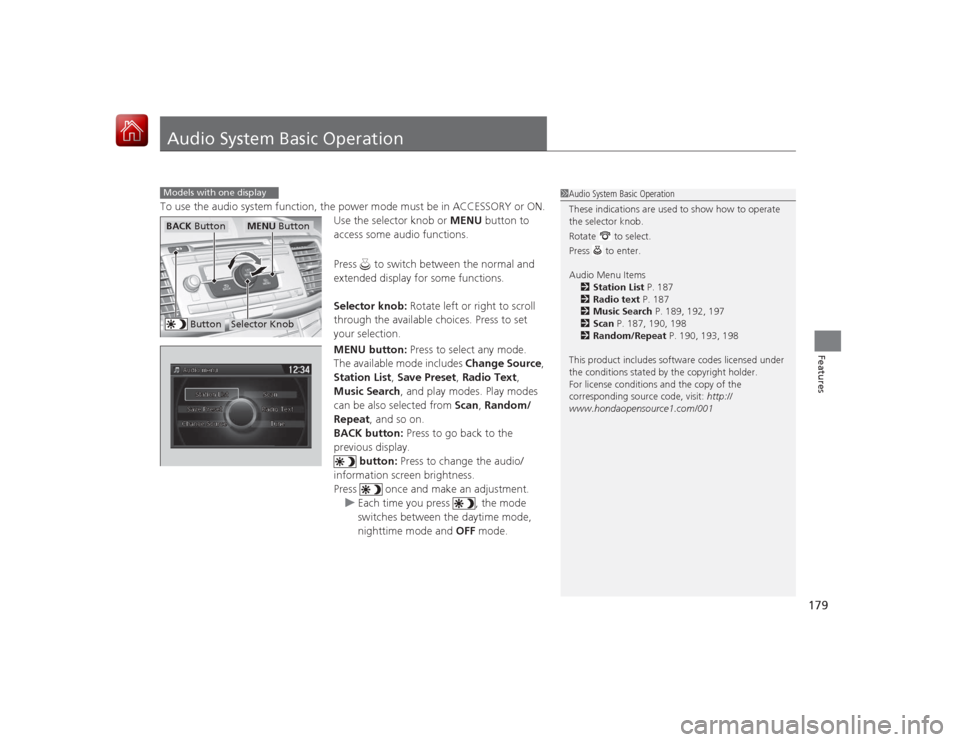
Audio System Basic OperationTo use the audio system function, the power mode must be in ACCESSORY or ON.Use the selector knob or MENU button to
access some audio functions.
Press to switch between the normal and
extended display for some functions.
Selector knob: Rotate left or right to scroll
through the available choices. Press to set
your selection.
MENU button: Press to select any mode.
The available mode includes Change Source,
Station List , Save Preset , Radio Text,
Music Search, and play modes. Play modes
can be also selected from Scan, Random/
Repeat, and so on.
BACK button: Press to go back to the
previous display.
button: Press to change the audio/
information screen brightness.
Press once and make an adjustment. u Each time you press , the mode
switches between the daytime mode,
nighttime mode and OFF mode.Models with one display
1Audio System Basic Operation
These indications are used to show how to operate
the selector knob.
Rotate to select.
Press to enter.
Audio Menu Items
2 Station List P. 187
2 Radio text P. 187
2 Music Search P. 189, 192, 197
2 Scan P. 187, 190, 198
2 Random/Repeat P. 190, 193, 198
This product includes software codes licensed under
the conditions stated by the copyright holder.
For license conditions and the copy of the
corresponding source code, visit: http://
www.hondaopensource1.com/001
Button
Selector Knob
MENU Button
BACK Button
Page 181 of 569
180
uuAudio System Basic Operation uAudio/Information Screen
Features
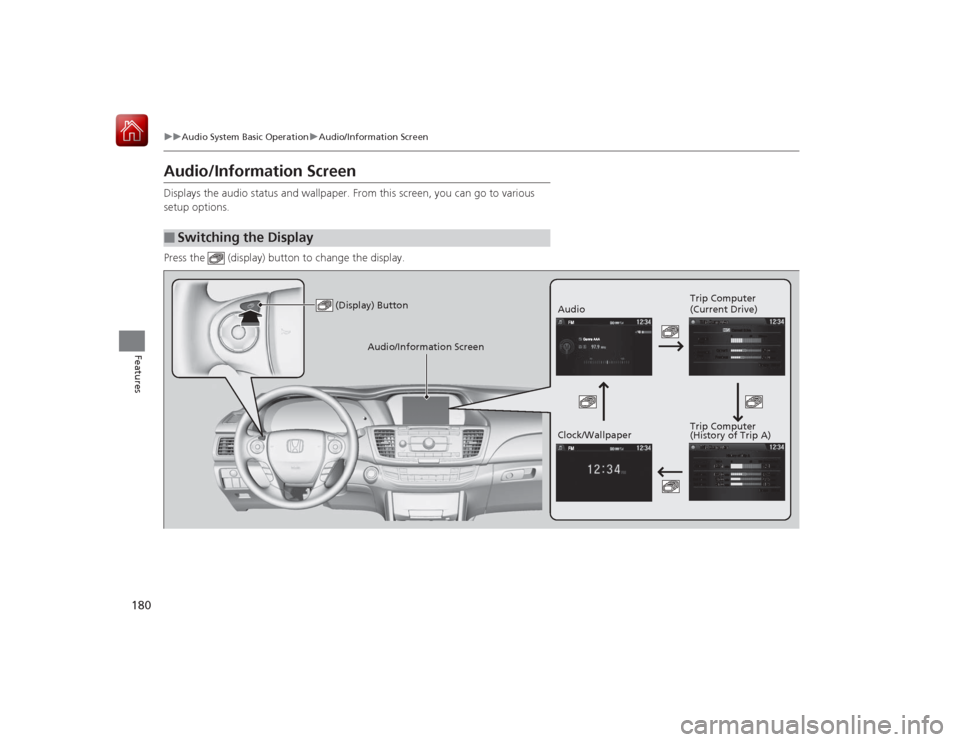
Audio/Information ScreenDisplays the audio status and wallpaper. From this screen, you can go to various
setup options.
Press the (display) button to change the display.■
Switching the Display
(Display) Button
Audio Trip Computer
(Current Drive)
Clock/Wallpaper Trip Computer
(History of Trip A)
Audio/Information Screen
Page 182 of 569
181
uuAudio System Basic Operation uAudio/Information Screen
Continued
Features
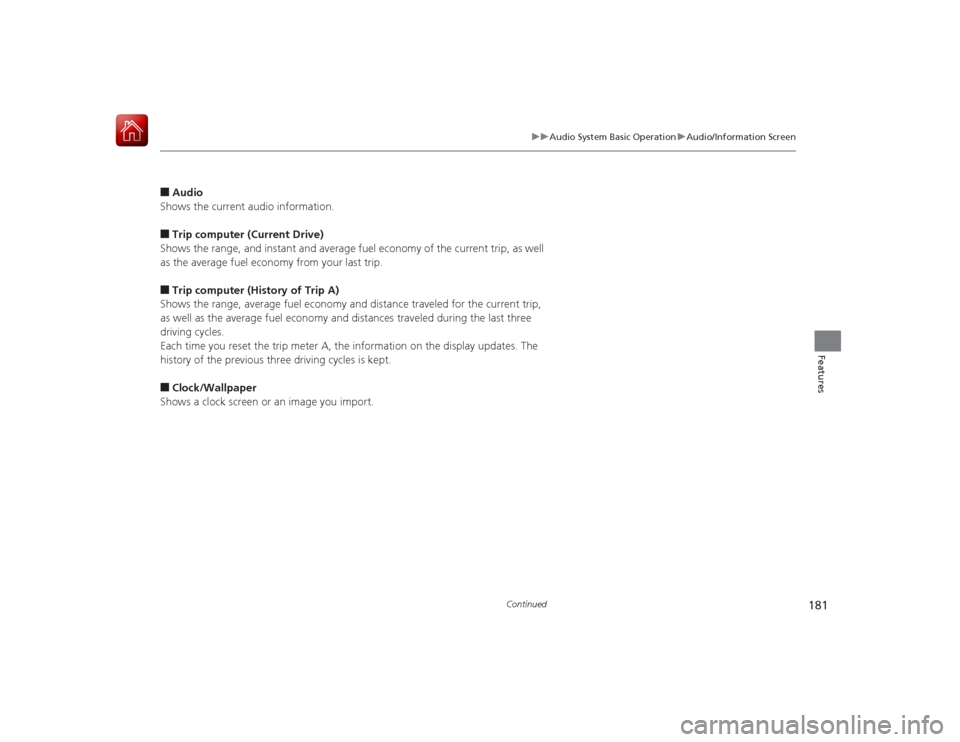
■Audio
Shows the current audio information.■Trip computer (Current Drive)
Shows the range, and instant and average fuel ec onomy of the current trip, as well
as the average fuel economy from your last trip.■Trip computer (History of Trip A)
Shows the range, average fuel economy and distance traveled for the current trip,
as well as the average fuel economy and distances traveled during the last three
driving cycles.
Each time you reset the trip meter A, the information on the display updates. The
history of the previous three driving cycles is kept.■Clock/Wallpaper
Shows a clock screen or an image you import.
Page 183 of 569
uuAudio System Basic Operation uAudio/Information Screen
182Features
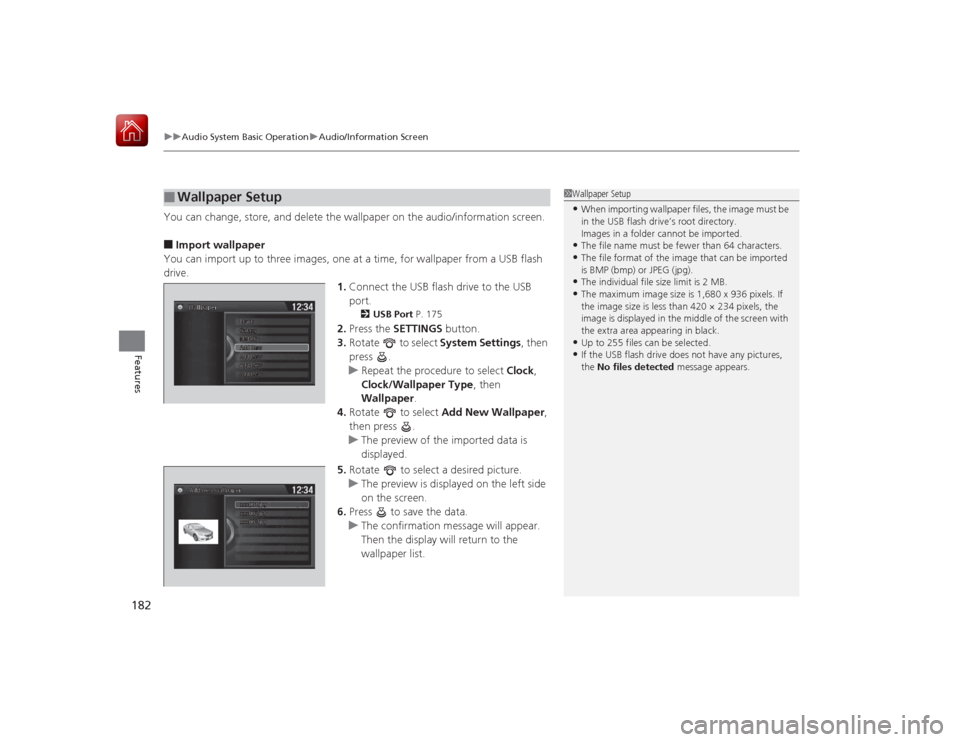
You can change, store, and delete the wallpaper on the audio/information screen.■Import wallpaper
You can import up to three images, one at a time, for wallpaper from a USB flash
drive. 1.Connect the USB flash drive to the USB
port.
2 USB Port P. 175
2.Press the SETTINGS button.
3. Rotate to select System Settings, then
press .
u Repeat the procedure to select Clock,
Clock/Wallpaper Type , then
Wallpaper .
4. Rotate to select Add New Wallpaper ,
then press .
u The preview of the imported data is
displayed.
5. Rotate to select a desired picture.
u The preview is displayed on the left side
on the screen.
6. Press to save the data.
u The confirmation message will appear.
Then the display will return to the
wallpaper list.
■
Wallpaper Setup
1Wallpaper Setup•When importing wallpaper files, the image must be
in the USB flash drive’s root directory.
Images in a folder cannot be imported.•The file name must be fewer than 64 characters.•The file format of the image that can be imported
is BMP (bmp) or JPEG (jpg).•The individual file size limit is 2 MB.•The maximum image size is 1,680 x 936 pixels. If
the image size is less than 420 × 234 pixels, the
image is displayed in the middle of the screen with
the extra area appearing in black.•Up to 255 files can be selected.•If the USB flash drive does not have any pictures,
the No files detected message appears.
Page 186 of 569
185
uuAudio System Basic Operation uDisplay Setup
Features
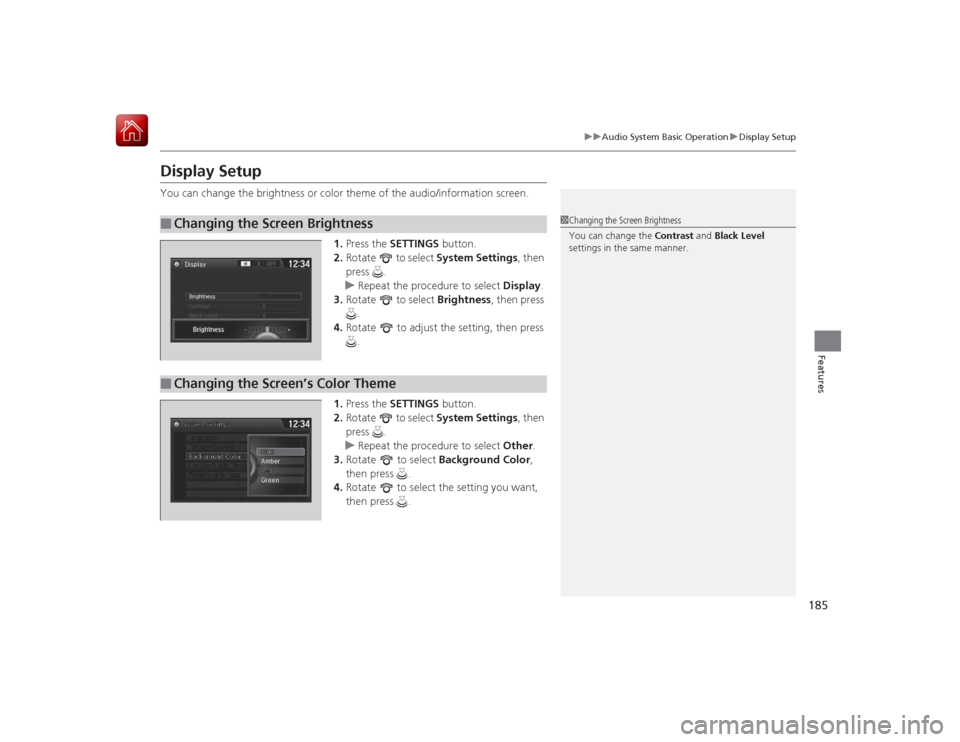
Display SetupYou can change the brightnes s or color theme of the audio/information screen.
1.Press the SETTINGS button.
2. Rotate to select System Settings, then
press .
u Repeat the procedure to select Display.
3. Rotate to select Brightness, then press
.
4. Rotate to adjust the setting, then press
.
1. Press the SETTINGS button.
2. Rotate to select System Settings, then
press .
u Repeat the procedure to select Other.
3. Rotate to select Background Color,
then press .
4. Rotate to select the setting you want,
then press .■
Changing the Screen Brightness
1Changing the Screen Brightness
You can change the Contrast and Black Level
settings in the same manner.
■
Changing the Screen’s Color Theme
Page 187 of 569
186
uuAudio System Basic Operation uPlaying AM/FM Radio
Features
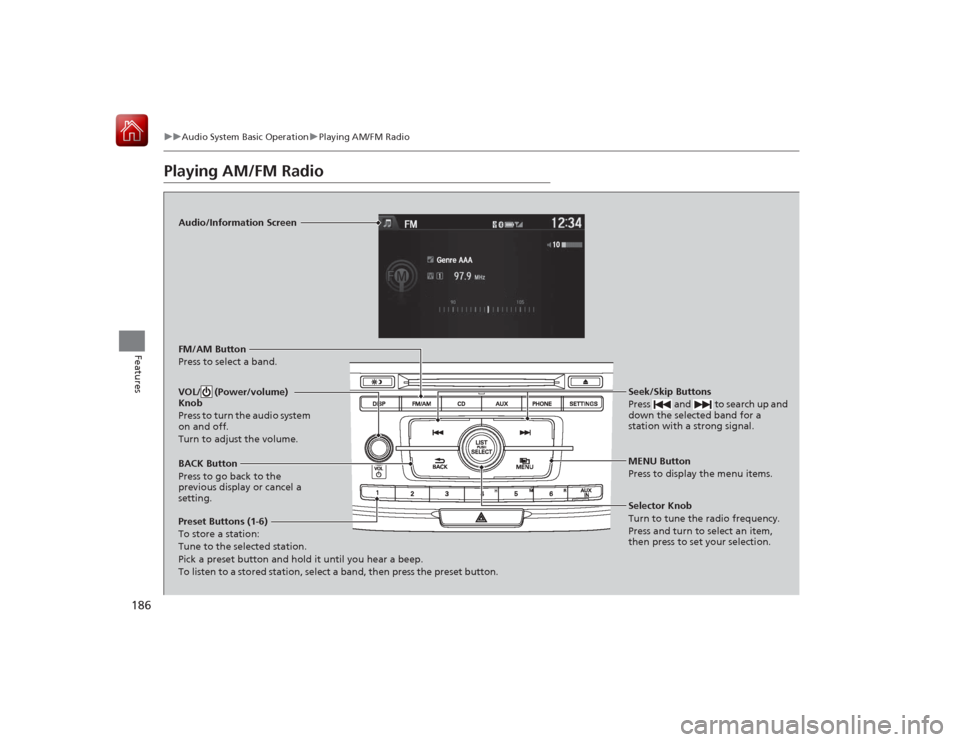
Playing AM/FM Radio
Audio/Information Screen
FM/AM Button
Press to select a band.
Preset Buttons (1-6)
To store a station:
Tune to the selected station.
Pick a preset button and hold it until you hear a beep.
To listen to a stored station, select a band, then press the preset button. Seek/Skip Buttons
Press and to search up and
down the selected band for a
station with a strong signal.
MENU Button
Press to display the menu items.
Selector Knob
Turn to tune the radio frequency.
Press and turn to select an item,
then press to set your selection.
VOL/ (Power/volume)
Knob
Press to turn the audio system
on and off.
Turn to adjust the volume.BACK Button
Press to go back to the
previous display or cancel a
setting.
Page 188 of 569
187
uuAudio System Basic Operation uPlaying AM/FM Radio
Features
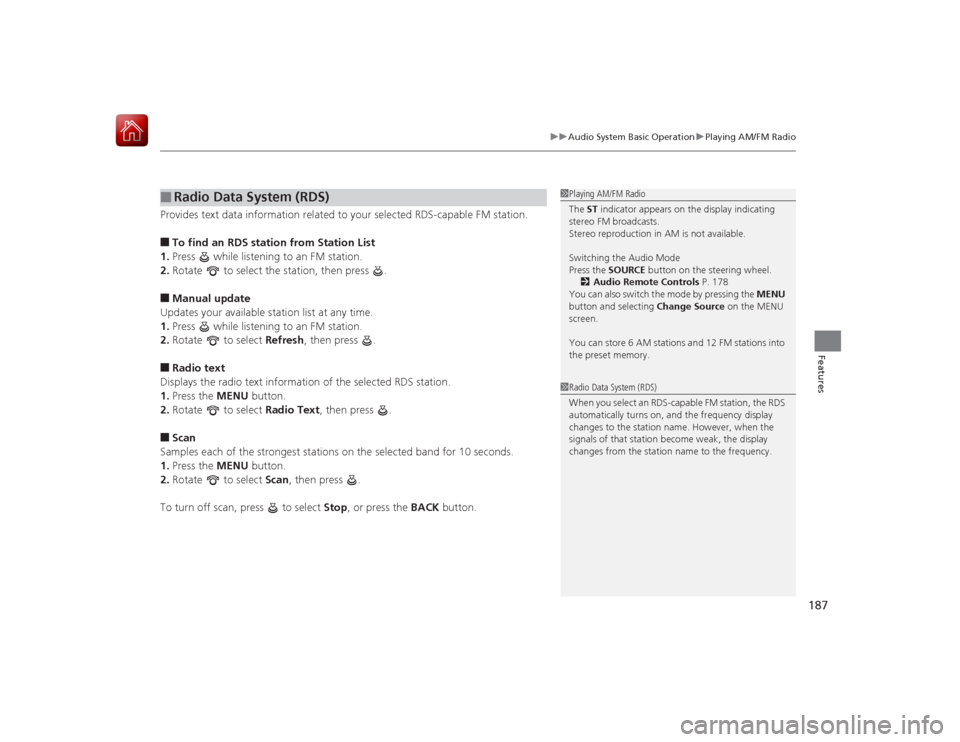
Provides text data information related to your selected RDS-capable FM station.■To find an RDS station from Station List
1. Press while listening to an FM station.
2. Rotate to select the station, then press .■Manual update
Updates your available station list at any time.
1. Press while listening to an FM station.
2. Rotate to select Refresh, then press .■Radio text
Displays the radio text information of the selected RDS station.
1. Press the MENU button.
2. Rotate to select Radio Text, then press .■Scan
Samples each of the strongest stations on the selected band for 10 seconds.
1. Press the MENU button.
2. Rotate to select Scan, then press .
To turn off scan, press to select Stop, or press the BACK button.■
Radio Data System (RDS)
1Playing AM/FM Radio
The ST indicator appears on the display indicating
stereo FM broadcasts.
Stereo reproduction in AM is not available.
Switching the Audio Mode
Press the SOURCE button on the steering wheel.
2 Audio Remote Controls P. 178
You can also switch the mode by pressing the MENU
button and selecting Change Source on the MENU
screen.
You can store 6 AM stations and 12 FM stations into
the preset memory.1 Radio Data System (RDS)
When you select an RDS-capable FM station, the RDS
automatically turns on, and the frequency display
changes to the station name. However, when the
signals of that station become weak, the display
changes from the station name to the frequency.
Page 189 of 569
188
uuAudio System Basic Operation uPlaying a CD
Features
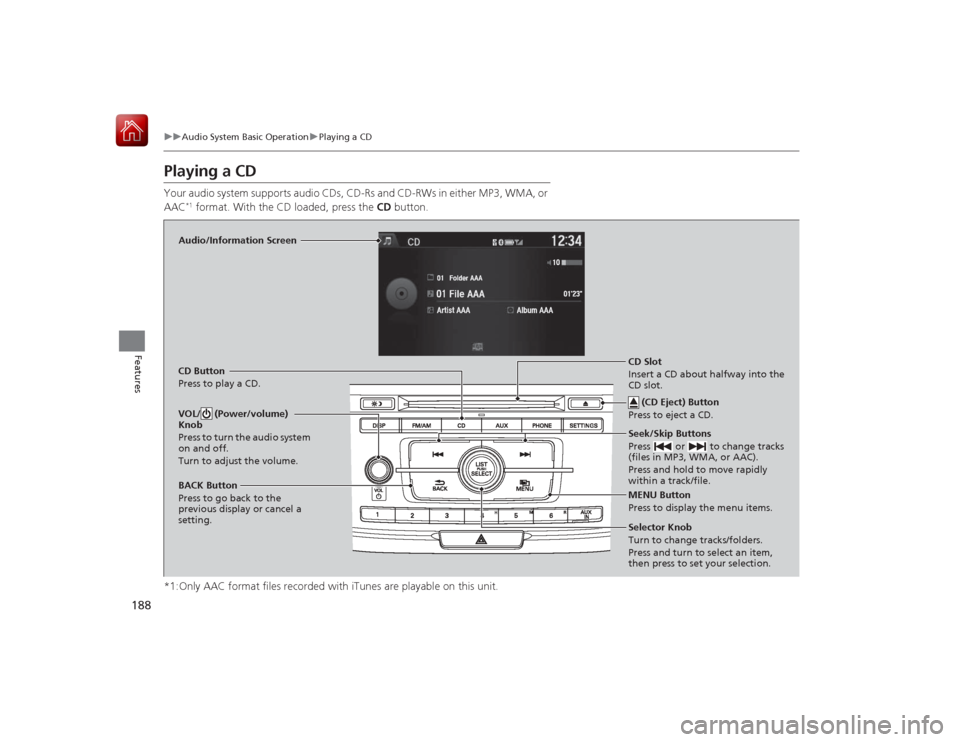
Playing a CDYour audio system supports audio CDs, CD-Rs and CD-RWs in either MP3, WMA, or
AAC
*1 format. With the CD loaded, press the CD button.
*1:Only AAC format files recorded with iTunes are playable on this unit.
Audio/Information Screen
CD Button
Press to play a CD. Seek/Skip Buttons
Press or to change tracks
(files in MP3, WMA, or AAC).
Press and hold to move rapidly
within a track/file.
MENU Button
Press to display the menu items.
Selector Knob
Turn to change tracks/folders.
Press and turn to select an item,
then press to set your selection.
VOL/ (Power/volume)
Knob
Press to turn the audio system
on and off.
Turn to adjust the volume.BACK Button
Press to go back to the
previous display or cancel a
setting.
CD Slot
Insert a CD about halfway into the
CD slot. (CD Eject) Button
Press to eject a CD.