fuel cap HONDA CIVIC 1991 Owners Manual
[x] Cancel search | Manufacturer: HONDA, Model Year: 1991, Model line: CIVIC, Model: HONDA CIVIC 1991Pages: 136, PDF Size: 1.33 MB
Page 29 of 136

Speedometer
The speed is indicated in miles per hour (outside scale) and kilometers per hour (inside).
Odometer
The numbers on the odometer indicate miles.
The odometer registers total distance traveled, and serves as your guide for determining when periodic maintenance is due. Federal lawmakes it illegal to alter the odometer of any motor vehicle with the
intent to change the number of miles indicated.
Trip Meter The numbers on the trip meter indicate miles.
The trip meter can be returned to zero by pushing in the reset button. Use it for checking fuel consumption or distance traveled
per trip.
Tachometer (Si Hatchback and LX/EX Sedan) The tachometer indicates engine speed in revolutions per minute.
The beginning of the RED ZONE indicates the maximum allowableengine R.P.M. Do not run the engine with the tachometer indicator
needle in the RED ZONE.
Fuel Gauge
FUEL TANK CAPACITY: 45 (11.9 US gal ,9.9 Imp gal)
As a convenience, the gauge continues to show the same fuel level
as when the ignition was last on. After refueling, the gauge will
slowly change to the new fuel level when the ignition is switched on.
When the needle first indicates E (empty), you have a usable
reserve left in the tank of about:
4 (1.1 US gal, 0.9 Imp gal)
Coolant Temperature Gauge
CAUTION:
The needle should stay within the white range. If the needle reaches the red line at "H" (Hot), pull safely off the road, stop theengine and check the coolant level in the reserve tank on the
driver's side of the radiator under the hood.
Do not remove the radiator cap when the engine is hot. The
coolant is under pressure and may blow out and scald you.
GaugesProCarManuals.comMain Menu s t
Page 56 of 136
Operation In Foreign Countries
In order to comply with U.S. Federal Emissions Regulations, you
must use unleaded fuels of the recommended octane rating. These
fuels may not be available in other countries. If you intend taking
your car outside the U.S. or Canada, write to American Honda Consumer Affairs (stating the year and model of your car) at the
address below for information regarding modifications you may need to have done.
American Honda Motor Co., Inc.
Consumer Affairs
1919 Torrance Blvd.
Torrance, CA 90501-2722
Fuel Filler Door and Cap
Gasoline is extremely flammable and is explosive under certain
conditions. Perform this operation in a wel-ventilated area with
the engine stopped. Do not smoke or allow open flames or sparks in the area or where gasoline is stored.
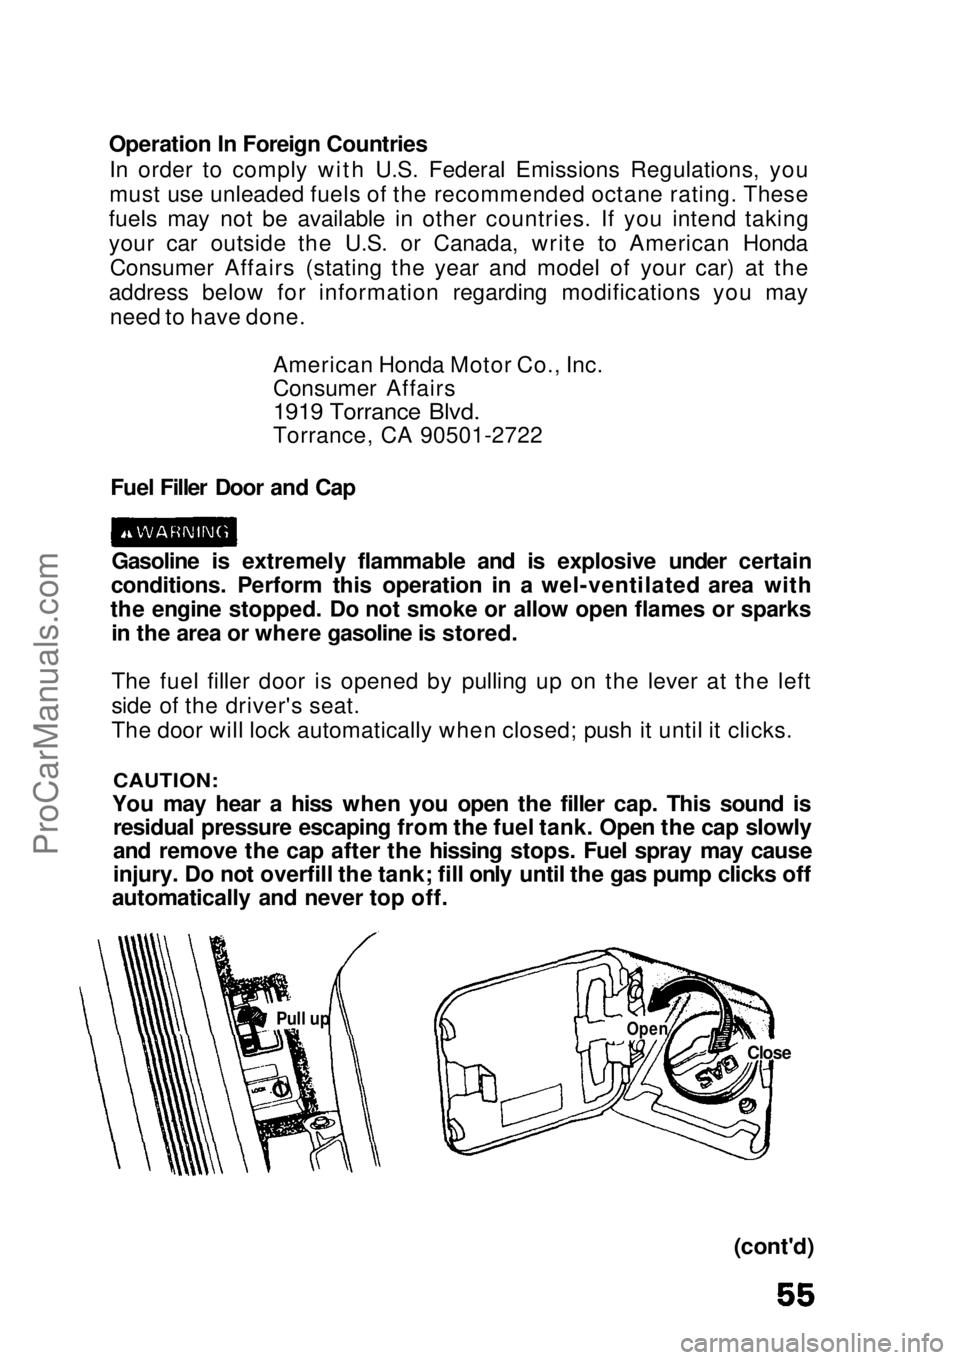
The fuel filler door is opened by pulling up on the lever at the left
side of the driver's seat.
The door will lock automatically when closed; push it until it clicks.
CAUTION:
You may hear a hiss when you open the filler cap. This sound is residual pressure escaping from the fuel tank. Open the cap slowly
and remove the cap after the hissing stops. Fuel spray may cause
injury. Do not overfill the tank; fill only until the gas pump clicks off
automatically and never top off.
(cont'd)
Pull up
Close
OpenProCarManuals.comMain Menu s t
Page 57 of 136
Gasoline (cont'd)
Fuel vapor is extremely hazardous under certain conditions.
Always stop the engine before refueling, and never refuel near
sparks or open flames. CAUTION:
When reinstalling the fuel cap, be sure both tabs on the cap are
engaged in the slots of the filler neck and turn the cap until it stops. If you replace the cap, use only a genuine Honda replacement part
or its equivalent. Failure to use the proper part could cause serious
fuel system problems.
How to Improve Your Gas Mileage: Drive at a smooth, steady pace to avoid unnecessary decele-
rations and stops — accelerating back to speed uses more fuel.Plan trips to avoid rush hour traffic if possible. Make sure the parking brake is completely released.
Consolidate trips whenever possible.
Keep vehicle weight to a minimum by removing unnecessary
items from the luggage area.
Whenever possible, use fresh air from the dash vents to keep
cool when driving; open windows, or use of the optional air
conditioning both affect fuel economy.
Keep the tires adjusted to the recommended pressure.
Tire Pressure (measured cold): STD Hatchback front 240 kPa (35 psi)
rear 220 kPa (32 psi)
DX Hatchback front 220 kPa (32 psi)
rear 220 kPa (32 psi)
Si Hatchback front 195 kPa (28 psi)
rear 195 kPa (28 psi)
DX Sedan front 220 kPa (32 psi)
rear 220 kPa (32 psi)
LX Sedan front 180 kPa (26 psi)
rear 180 kPa (26 psi)
EX Sedan front 180 kPa (26 psi)
rear 180 kPa (26 psi)
Condition of Your Car You can only get maximum fuel economy if your car is in toprunning condition. Have all required maintenance done at the proper
intervals. Check tire pressures and tire wear frequently. If tire wear is uneven, have the alignment checked by your Honda dealer.
Proper alignment saves gasoline and prolongs tire life.ProCarManuals.comMain Menu s t
Page 75 of 136
Engine Oil and Filter
Checking
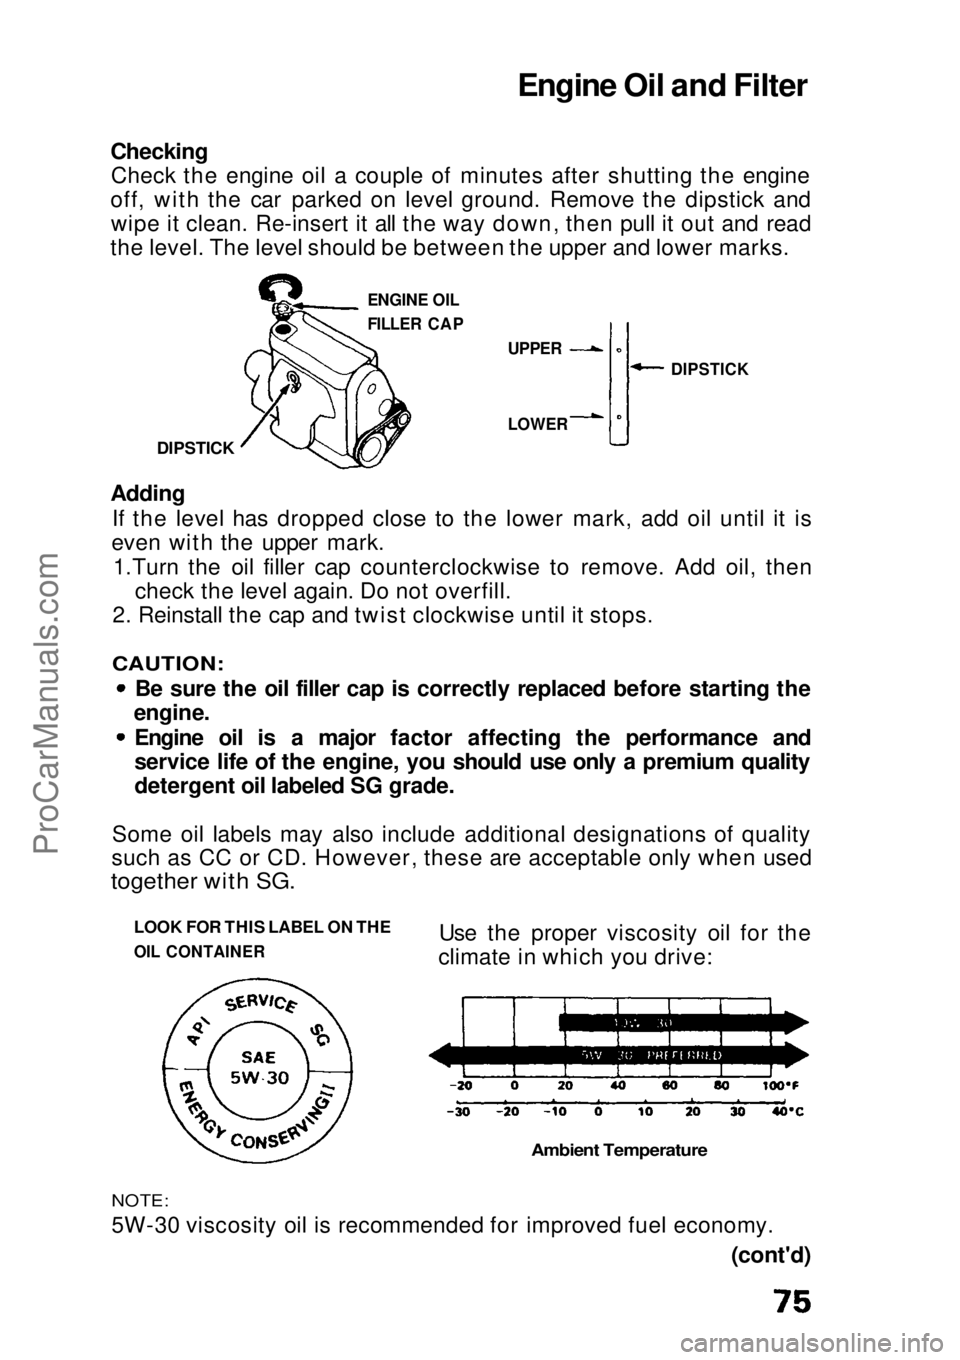
Check the engine oil a couple of minutes after shutting the engine
off, with the car parked on level ground. Remove the dipstick and wipe it clean. Re-insert it all the way down, then pull it out and read
the level. The level should be between the upper and lower marks.
DIPSTICK
ENGINE OIL
FILLER CAP
Adding
If the level has dropped close to the lower mark, add oil until it is
even with the upper mark.
1.Turn the oil filler cap counterclockwise to remove. Add oil, then check the level again. Do not overfill.
2. Reinstall the cap and twist clockwise until it stops.
CAUTION:
Be sure the oil filler cap is correctly replaced before starting the
engine.
Engine oil is a major factor affecting the performance and
service life of the engine, you should use only a premium quality
detergent oil labeled SG grade.
Some oil labels may also include additional designations of quality
such as CC or CD. However, these are acceptable only when used
together with SG.
LOOK FOR THIS LABEL ON THE
OIL CONTAINER
Use the proper viscosity oil for the
climate in which you drive:
Ambient Temperature
NOTE:
5W-30 viscosity oil is recommended for improved fuel economy.
(cont'd)
DIPSTICK
LOWER UPPERProCarManuals.comMain Menu s t
Page 76 of 136
Engine Oil and Filter (cont'd)
Fuel Efficient Oil For the best fuel economy from your car, it is recommended that
you use a fuel efficient SG grade oil. This oil is usually identified by
the words such as: "Energy Conserving II," "Gas Saving," and "Fuel Saving," etc.
Changing Oil and Filter
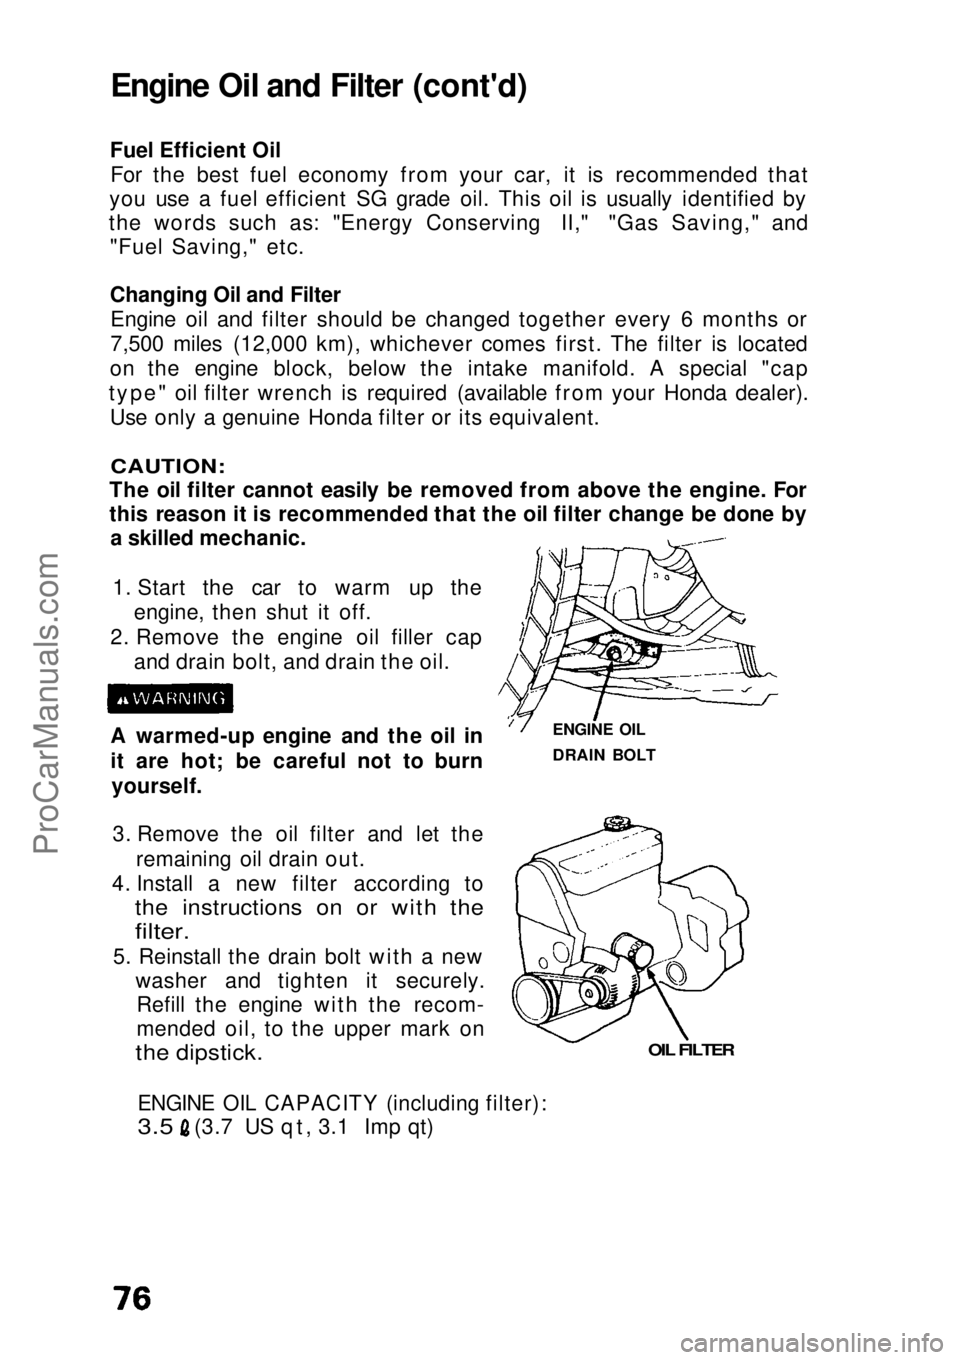
Engine oil and filter should be changed together every 6 months or
7,500 miles (12,000 km), whichever comes first. The filter is located
on the engine block, below the intake manifold. A special "cap
type" oil filter wrench is required (available from your Honda dealer). Use only a genuine Honda filter or its equivalent.
CAUTION:
The oil filter cannot easily be removed from above the engine. For
this reason it is recommended that the oil filter change be done by a skilled mechanic.
1. Start the car to warm up the engine, then shut it off.
2. Remove the engine oil filler cap and drain bolt, and drain the oil.
A warmed-up engine and the oil in
it are hot; be careful not to burn yourself.
3. Remove the oil filter and let the remaining oil drain out.
4. Install a new filter according to
the instructions on or with the
filter.
5. Reinstall the drain bolt with a new washer and tighten it securely.Refill the engine with the recom-
mended oil, to the upper mark on
the dipstick.
ENGINE OIL CAPACITY (including filter):
3.5
(3.7 US qt, 3.1 Imp qt)
OIL FILTER
ENGINE OIL
DRAIN BOLTProCarManuals.comMain Menu s t
Page 125 of 136

Evaporative Emission Control System
The Evaporative Emission Control System is designed to prevent
fuel vapors from escaping into the atmosphere. Fuel vapors from the fuel tank are directed into the charcoal
canister where they are adsorbed and stored while the engine is stopped or idling. When the coolant temperature rises to a certain
value, the vapors are drawn into the engine through the throttlebody and the intake manifold during normal engine operation.
Engine Exhaust Emission Controls
The engine exhaust emission control systems are designed to control combustion during idle, acceleration, cruise, and deceleration.
These systems are entirely separate from the crankcase and evaporative emission control systems described previously.
HONDA PGM-FI System
The PGM-FI system consists of three independent sub-systems; Air Intake, Electronic Control and Fuel Control, thus allowing moreaccurate control of air/fuel ratios under all operating conditions.
The Electronic Control Unit (ECU) detects the amount of air
drawn into the cylinders and determines the amount of fuel to be injected to provide the optimum air/fuel ratio for all engine needs.
Ignition Timing Control System
This system automatically controls the ignition timing to reduce
the amount of HC and NOx.
Catalytic Converter
Three Way Catalyst
The catalyst is used to convert hydrocarbons (HC), carbon monoxide (CO) and oxides of nitrogen (NOx) in the exhaust gas,
to carbon dioxide (CO 2
), dinitrogen (N 2
) and water vapor.
Exhaust Gas Recirculation (EGR) (California automatic models except EX Sedan)
The EGR system is designed to control the formation of oxides of nitrogen (NOx) caused when fuel mixture burns at high
temperature. It works by recirculating exhaust gas through the EGR valve and intake manifold into the combustion chambers
where it reduces peak temperature by diluting the air/fuel mixture.ProCarManuals.comMain Menu s t
Page 130 of 136
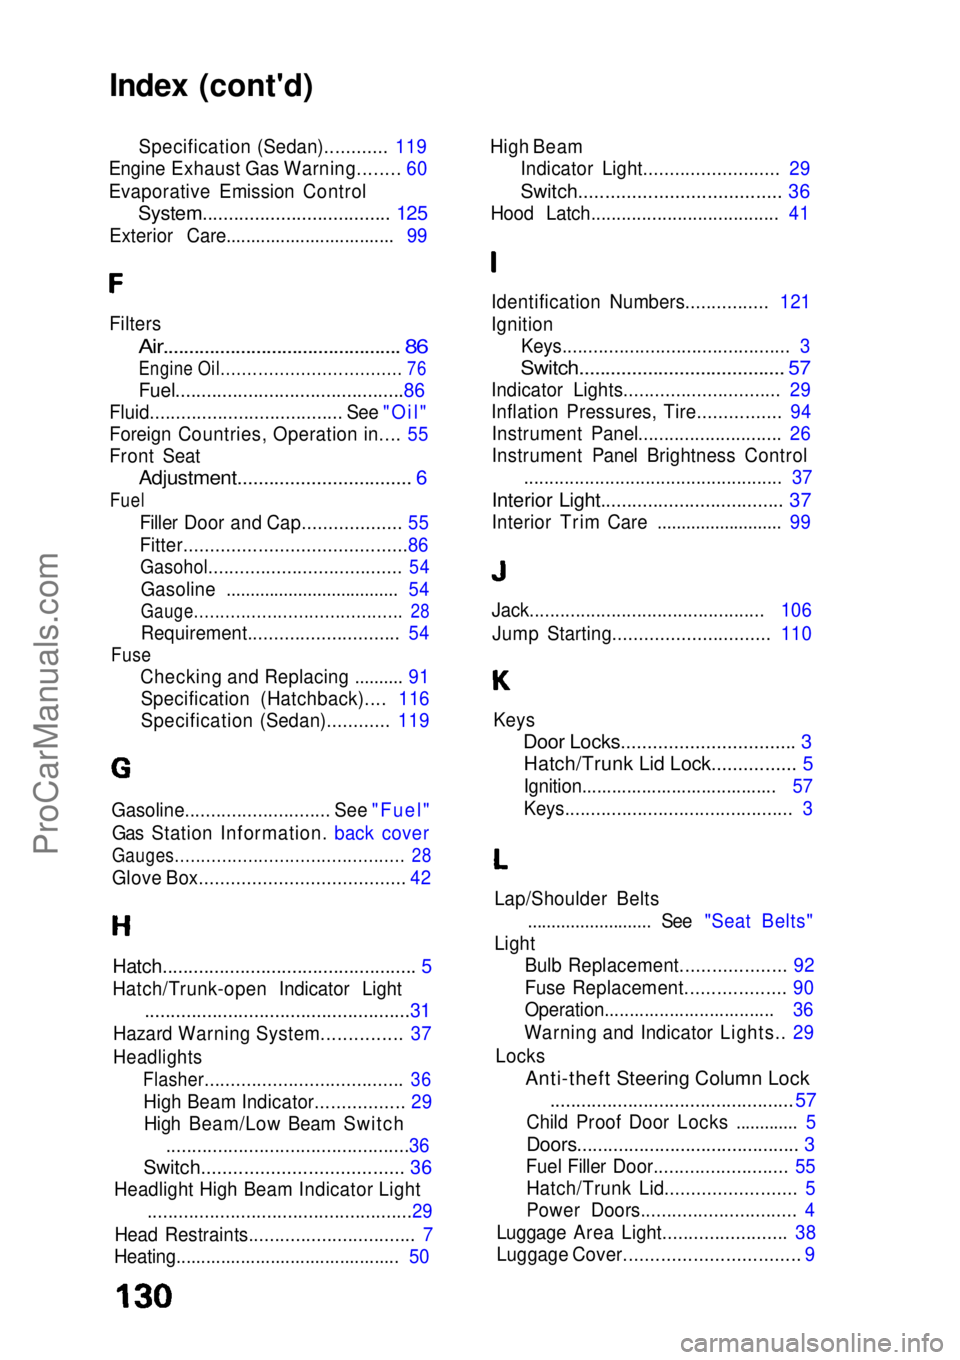
Index (cont'd)
Specification (Sedan)............ 119
Engine Exhaust Gas Warning........ 60
Evaporative Emission Control
System.................................... 125
Exterior Care.................................. 99
Filters
Air.............................................. 86
Engine Oil.................................. 76
Fuel........................................... .86
Fluid..................................... See "Oil"
Foreign Countries, Operation in.... 55
Front Seat
Adjustment................................. 6
Fuel
Filler Door and Cap................... 55
Fitter..........................................86
Gasohol..................................... 54
Gasoline .................................... 54
Gauge........................................ 28
Requirement............................. 54
Fuse
Checking and Replacing .......... 91Specification (Hatchback).... 116
Specification (Sedan)............ 119
Hatch................................................. 5
Hatch/Trunk-open Indicator Light
...................................................31
Hazard Warning System............... 37
Headlights
Flasher...................................... 36
High Beam Indicator................. 29High Beam/Low Beam Switch ...............................................36
Switch...................................... 36
Headlight High Beam Indicator Light
...................................................29
Head Restraints................................ 7
Heating............................................. 50 High Beam
Indicator Light.......................... 29
Switch...................................... 36
Hood Latch..................................... 41
Identification Numbers................ 121
Ignition Keys............................................ 3
Switch....................................... 57
Indicator Lights.............................. 29
Inflation Pressures, Tire................ 94 Instrument Panel............................ 26
Instrument Panel Brightness Control ................................................... 37
Interior Light................................... 37
Interior Trim Care .......................... 99
Keys
Door Locks................................. 3
Hatch/Trunk Lid Lock................ 5
Ignition....................................... 57
Keys............................................ 3
Lap/Shoulder Belts .......................... See "Seat Belts"
Light Bulb Replacement.................... 92
Fuse Replacement................... 90
Operation.................................. 36
Warning and Indicator Lights.. 29
Locks
Anti-theft Steering Column Lock...............................................57
Child Proo f
Door Locks ............. 5
Doors........................................... 3
Fuel Filler Door.......................... 55 Hatch/Trunk Lid......................... 5
Power Doors.............................. 4
Luggage Area Light........................ 38
Luggage Cover................................. 9
Gasoline............................ See "Fuel"
Gas Station Information. back cover
Gauges............................................ 28
Glove Box....................................... 42 Jack.............................................. 106
Jump Starting.............................. 110ProCarManuals.comMain Menu s t