key battery HONDA CIVIC COUPE 1998 Owners Manual
[x] Cancel search | Manufacturer: HONDA, Model Year: 1998, Model line: CIVIC COUPE, Model: HONDA CIVIC COUPE 1998Pages: 251, PDF Size: 2.04 MB
Page 72 of 251
Keys and Locks
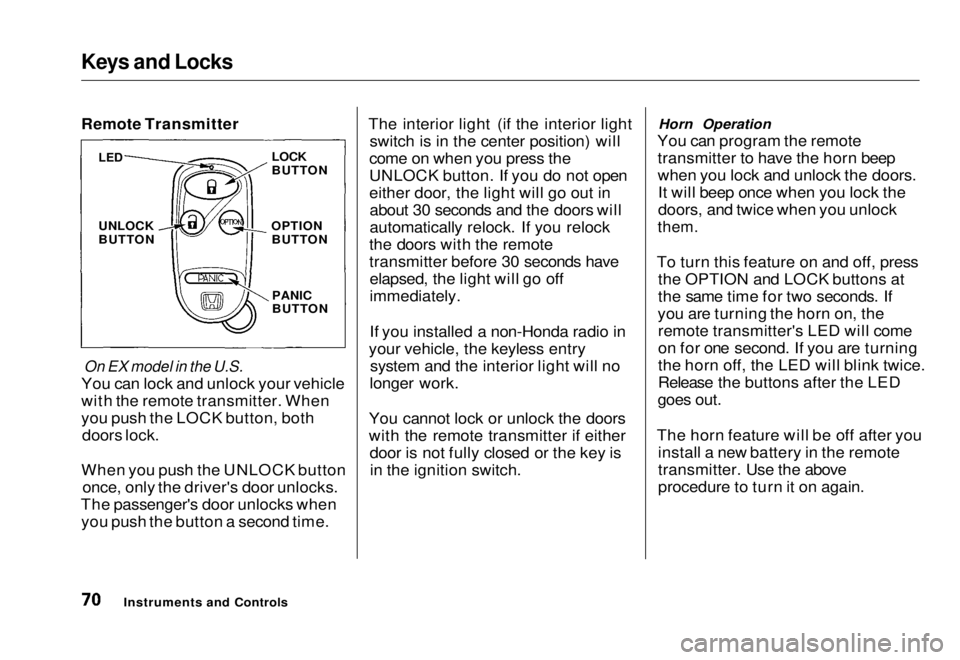
Remote Transmitter
On EX model in the U.S.
You can lock and unlock your vehicle
with the remote transmitter. When
you push the LOCK button, both doors lock.
When you push the UNLOCK button once, only the driver's door unlocks.
The passenger's door unlocks when you push the button a second time. The interior light (if the interior light
switch is in the center position) will
come on when you press the
UNLOCK button. If you do not open
either door, the light will go out in about 30 seconds and the doors will
automatically relock. If you relock
the doors with the remote
transmitter before 30 seconds have elapsed, the light will go off
immediately.
If you installed a non-Honda radio in
your vehicle, the keyless entry system and the interior light will no
longer work.
You cannot lock or unlock the doors
with the remote transmitter if either door is not fully closed or the key isin the ignition switch. Horn Operation
You can program the remote transmitter to have the horn beep
when you lock and unlock the doors.It will beep once when you lock the
doors, and twice when you unlock
them.
To turn this feature on and off, press the OPTION and LOCK buttons at
the same time for two seconds. If
you are turning the horn on, the remote transmitter's LED will come
on for one second. If you are turning
the horn off, the LED will blink twice.
Release the buttons after the LED
goes out.
The horn feature will be off after you install a new battery in the remote
transmitter. Use the above
procedure to turn it on again.
Instruments and Controls
LED
UNLOCK
BUTTON
LOCK
BUTTON
OPTION BUTTON
PANIC
BUTTONMain Menu Table of Contents s t
Page 73 of 251
Keys and Locks
Panic Mode
Panic mode allows you to remotely
sound your vehicle's horn to attract
attention. To activate this mode,
press and hold the PANIC button for
about one second. Your vehicle's
horn will beep for about 30 seconds.
To cancel PANIC mode before 30 seconds, press any button on the
remote transmitter. You can also
turn the ignition switch to
ACCESSORY (I) or ON (II).
Panic mode will not activate if the
ignition switch is in ACCESSORY (I)or ON (II).
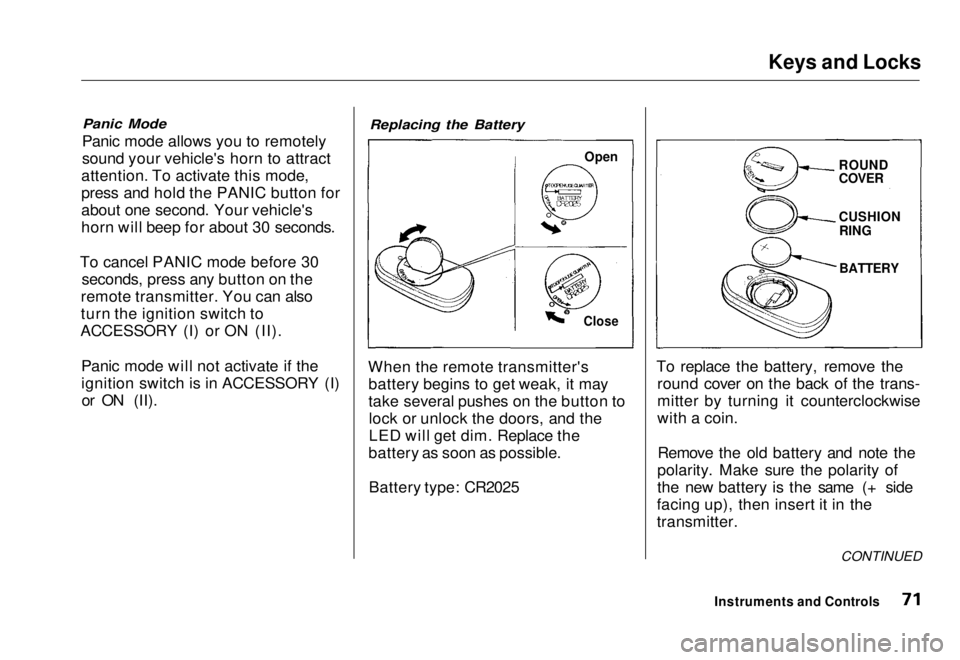
Replacing the Battery
When the remote transmitter's battery begins to get weak, it may
take several pushes on the button tolock or unlock the doors, and the
LED will get dim. Replace the
battery as soon as possible.
Battery type: CR2025 To replace the battery, remove the
round cover on the back of the trans-
mitter by turning it counterclockwise
with a coin.
Remove the old battery and note the
polarity. Make sure the polarity of
the new battery is the same (+ side
facing up), then insert it in the
transmitter.
Instruments and Controls
Open
Close
ROUND
COVER
CUSHION
RING
BATTERY
CONTINUEDMain Menu Table of Contents s t
Page 74 of 251
Keys and Locks
Reinstall the 0-ring. Align the
mark on the cover with the mark on the transmitter,
then set the cover in place and turn it
clockwise.
After the battery is changed, the transmitter must be synchronized
with the main unit. With the doors and trunk lid closed, press either theLOCK or UNLOCK button six times.
Test the transmitter by locking and unlocking the doors several times. Transmitter Care
Avoid severe shock to the trans- mitter, such as dropping or throwing
it. Also, protect it from extreme hotor cold temperatures.
Clean the transmitter case with a
soft cloth. Do not use strong
cleaners or solvents that could harm
the case. Immersing the transmitter in any liquid will harm the trans-
mitter and cause it to not function
properly.
Use the ring on the transmitter to
attach it to your main key ring. You
could damage the transmitter if you
try to use its ring as a key ring. If you lose a transmitter, you will
need to have the replacement
programmed to your vehicle's
system by your Honda dealer. Any
other transmitters you have will also
need to be reprogrammed.
As required by the FCC: This device complies with Part 15 of the
FCC rules. Operation is subject to the
following two conditions: (1) This device may not cause harmful interference, and (2) this device must accept any
interference received, including
interference that may cause undesired operation.
Changes or modifications not expressly
approved by the party responsible for
compliance could void the user's
authority to operate the equipment.
Instruments and ControlsMain Menu Table of Contents s t
Page 123 of 251

Starting the Engine
1. Apply the parking brake.
2. In cold weather, turn off all electrical accessories to reduce
the drain on the battery.
3. Manual Transmission:
Push the clutch pedal down all the
way. START (III) does not
function unless the clutch pedal is
depressed.
Automatic Transmission (Including
CVT):
Make sure the shift lever is in Park. Press on the brake pedal.
4. Without touching the accelerator
pedal, turn the ignition key to the
START (III) position. If the enginedoes not start right away, do not
hold the key in START (III) for
more than 15 seconds at a time.
Pause for at least 10 seconds
before trying again.
5. If the engine does not start within
15 seconds, or starts but stalls
right away, repeat step 4 with the accelerator pedal pressed half-way
down. If the engine starts, release
pressure on the accelerator pedal so the engine does not race.
6. If the engine still does not start, press the accelerator pedal all the
way down and hold it there while starting in order to clear flooding.
As before, keep the ignition key in the START (III) position for no
more than 15 seconds. Return to step 5 if the engine does not start.
If it starts, lift your foot off theaccelerator pedal so the enginedoes not race.
Starting in Cold Weather at High
Altitud
e (Above 8,000 feet/
2,40
0 meters)
An engine is harder to start in cold
weather. The thinner air found athigh altitude above 8,000 feet (2,400 meters) adds to the problem.
Use the following procedure:
1. Turn off all electrical accessories to reduce the drain on the battery.
2. Push the accelerator pedal half- way to the floor and hold it there
while starting the engine. Do not
hold the ignition key in START(III) for more than 15 seconds.
When the engine starts, release the accelerator pedal gradually as
th
e
engine speeds up and smooths
out.
3. I
f the engine fails to start in step 2,
push the accelerator pedal to the
floor and hold it there while you
try to start the engine for no more
than 15 seconds. If the engine does not start, return to step 2.
DrivingMain Menu Table of Contents s t
Page 212 of 251
If Your Engine Won't Start
Diagnosing why your engine won't
start falls into two areas, depending
on what you hear when you turn the
key to START (III):
You hear nothing, or almostnothing. The engine's starter
motor does not operate at all, or
operates very slowly.
You can hear the starter motor operating normally, or the starter
motor sounds like it is spinning
faster than normal, but the engine does not start up and run. Nothing Happens or the Starter
Motor Operates Very Slowly
When you turn the ignition switch to START (III), you do not hear the
normal noise of the engine trying to
start. You may hear a clicking sound
or series of clicks, or nothing at all.
Check these things:
Check the transmission interlock.
If you have a manual transmission,
the clutch pedal must be pushed
all the way to the floor or the
starter will not operate. With an
automatic transmission, it must be
in Park or Neutral.
Turn the ignition switch to ON (II).
Turn on the headlights and check their brightness. If the headlights
are very dim or don't light at all,
the battery is discharged. See
Jump Starting on page 213.
Turn the ignition switch to START
(III). If the headlights do not dim,
check the condition of the fuses. If
the fuses are OK, there is proba-
bly something wrong with the
electrical circuit for the ignition switch or starter motor. You will
need a qualified technician to determine the problem. (See
Emergency Towing on page 227).
If the headlights dim noticeably or
go out when you try to start the engine, either the battery is dis-
charged or the connections are
corroded. Check the condition of
the battery and terminal connec-
tions (see page 173). You can
then try jump starting the vehicle
from a booster battery (see page 213).
Taking Care of the UnexpectedMain Menu Table of Contents s t
Page 247 of 251
Index
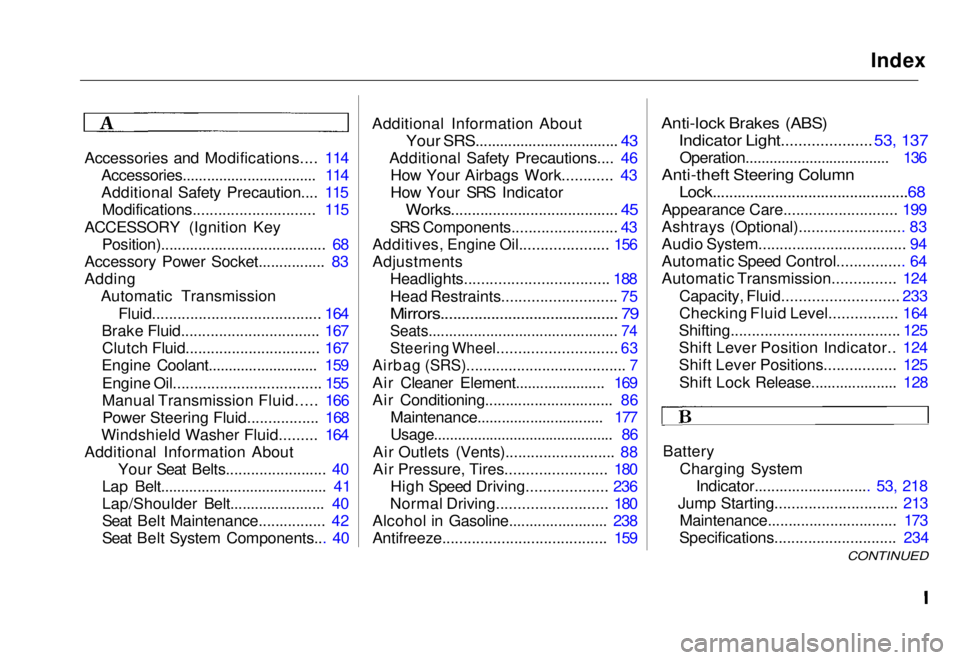
Accessories and Modifications.... 114 Accessories................................. 114
Additional Safety Precaution.... 115Modifications............................. 115
ACCESSORY (Ignition Key Position)........................................ 68
Accessory Power Socket................ 83
Adding Automatic Transmission
Fluid........................................ 164
Brake Fluid................................. 167 Clutch Fluid................................ 167
Engine Coolant........................... 159
Engine Oil................................... 155
Manual Transmission Fluid..... 166Power Steering Fluid................. 168
Windshield Washer Fluid......... 164
Additional Information About Your Seat Belts........................ 40
Lap Belt......................................... 41
Lap/Shoulder Belt....................... 40
Seat Belt Maintenance................ 42
Seat Belt System Components... 40 Additional Information About
Your SRS................................... 43
Additional Safety Precautions.... 46 How Your Airbags Work............ 43
How Your SRS Indicator
Works........................................ 45
SRS Components......................... 43
Additives, Engine Oil..................... 156
Adjustments
Headlights.................................. 188
Head Restraints........................... 75
Mirrors.......................................... 79
Seats.............................................. 74
Steering Wheel............................ 63
Airbag (SRS)...................................... 7
Air Cleaner Element...................... 169
Air Conditioning............................... 86 Maintenance............................... 177
Usage............................................. 86
Air Outlets (Vents).......................... 88
Air Pressure, Tires........................ 180 High Speed Driving................... 236
Normal Driving.......................... 180
Alcohol in Gasoline........................ 238
Antifreeze....................................... 159
Anti-lock Brakes (ABS)
Indicator Light.....................
53, 137
Operation.................................... 13 6
Anti-thef
t Steering Column
Lock...............................................68
Appearance Care........................... 199
Ashtrays (Optional)......................... 83
Audio System................................... 94
Automatic Speed Control................ 64
Automatic Transmission............... 124
Capacity, Fluid........................... 233
Checking Fluid Level................ 164
Shifting........................................ 125
Shift Lever Position Indicator.. 124
Shift Lever Positions................. 125
Shift Lock Release..................... 128
Battery Charging SystemIndicator............................ 53,
218
Jump Starting............................ .
213
Maintenance............................... 173
Specifications............................. 234
CONTINUEDMain Menu s t