coolant level HONDA CIVIC COUPE 1999 Owners Manual
[x] Cancel search | Manufacturer: HONDA, Model Year: 1999, Model line: CIVIC COUPE, Model: HONDA CIVIC COUPE 1999Pages: 269, PDF Size: 2.42 MB
Page 59 of 269
Gauges
Fuel Gauge
This shows how much fuel you have. It is most accurate when the car is on
level ground. It may show slightlymore or less than the actual amount
when you are driving on curvy or hilly roads. The gauge stays at the same fuel
level reading after you turn off the
ignition. When you add fuel, the
gauge slowly changes to the new
reading after you turn the ignitionswitch back ON (II). Temperature Gauge
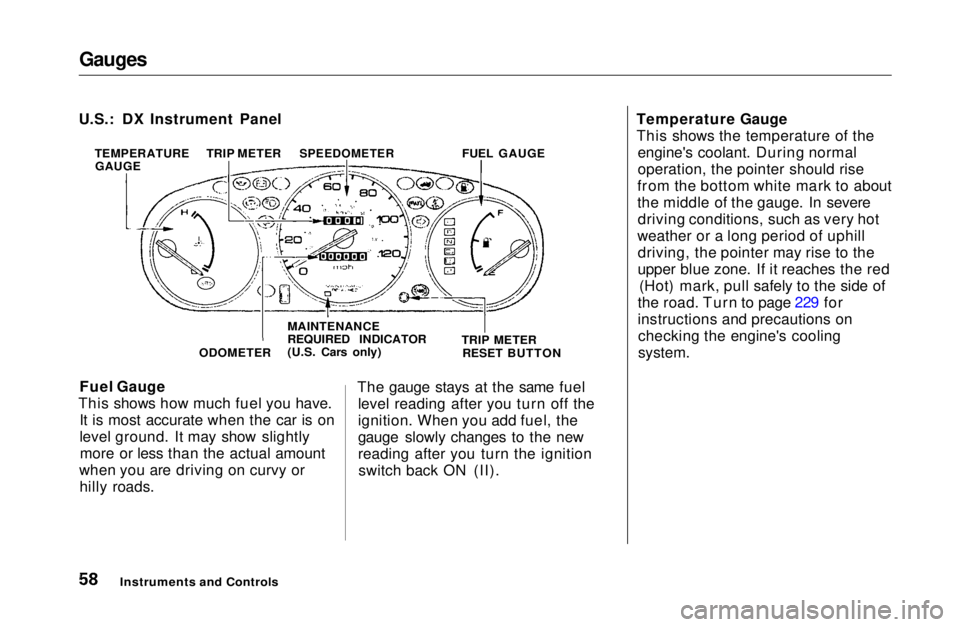
This shows the temperature of the
engine's coolant. During normal
operation, the pointer should rise
from the bottom white mark to about
the middle of the gauge. In severe driving conditions, such as very hot
weather or a long period of uphill driving, the pointer may rise to the
upper blue zone. If it reaches the red (Hot) mark, pull safely to the side of
the road. Turn to page 229 for
instructions and precautions on checking the engine's cooling
system.
Instruments and Controls
U.S.: DX Instrument Panel
TEMPERATUREGAUGE TRIP METER
SPEEDOMETER
FUEL GAUGE
ODOMETER MAINTENANCE
REQUIRED INDICATOR
(U.S. Cars only)
TRIP METER
RESET BUTTONMain Menu Table of Contents s t
Page 123 of 269
Before Driving
Before you begin driving your Honda,
you should know what gasoline to use, and how to check the levels of
important fluids. You also need to
know how to properly store luggage or packages. The information in this
section will help you. If you plan to
add any accessories to your car,
please read the information in this section first. Break-in Period.............................. 124
Gasoline.......................................... 124
Service Station Procedures .......... 125 Filling the Fuel Tank................. 125Opening the Hood..................... 126 Oil Check................................127
Engine Coolant Check.......... 128
Fuel Economy................................ 129
Vehicle Condition...................... 129Driving Habits............................ 129
Accessories and Modifications.... 130 Carrying Cargo.............................. 132
Before DrivingMain Menu s t
Page 128 of 269
Service Station Procedures
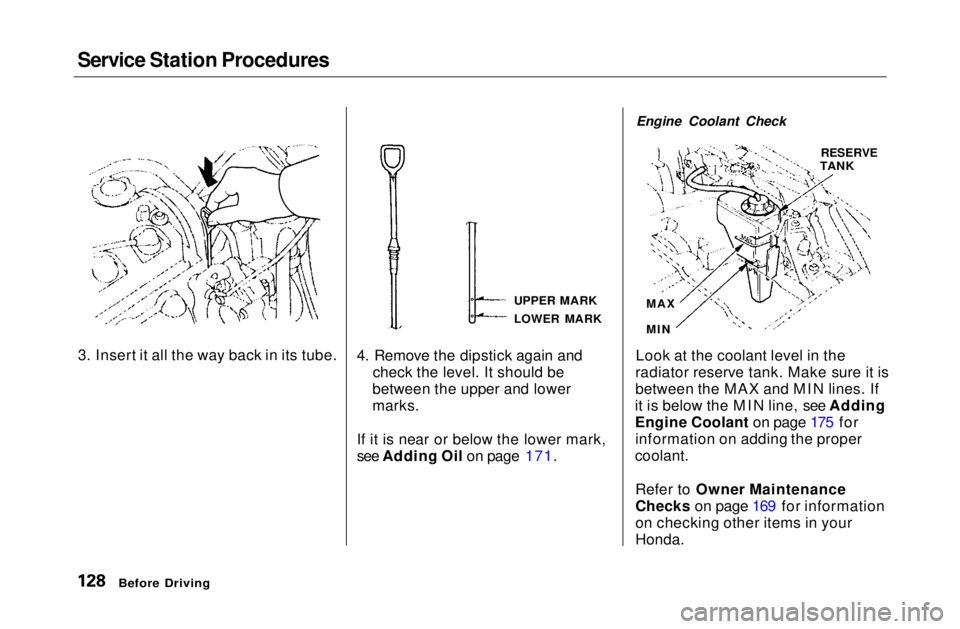
4. Remove the dipstick again andcheck the level. It should be
between the upper and lower
marks.
If it is near or below the lower mark,
see Adding Oil on page 171. Engine Coolant Check
Look at the coolant level in the
radiator reserve tank. Make sure it is
between the MAX and MIN lines. If
it is below the MIN line, see Adding
Engine Coolant on page 175 for information on adding the proper
coolant.
Refer to Owner Maintenance
Checks on page 169 for information
on checking other items in your
Honda.
Before Driving
3. Insert it all the way back in its tube.
UPPER MARK
LOWER MARKRESERVE
TANK
MAX
MINMain Menu Table of Contents s t
Page 168 of 269
Owner Maintenance Checks
You should check the following items at the specified intervals. If
you are unsure of how to perform any check, turn to the page given. Engine oil level — Check every
time you fill the fuel tank. See
page 111. Engine coolant level — Check the
radiator reserve tank every time
you fill the fuel tank. See page 127. Windshield washer fluid — Check
the level in the reservoir monthly.If weather conditions cause you to
use the washers frequently, check
the reservoir each time you stop
for fuel. See page 180. Automatic transmission — Check
the fluid level monthly. See page
180.
Brakes — Check the fluid level
monthly. See page 183.Tires — Check the tire pressure
monthly. Examine the tread for
wear and foreign objects. See page 196. Lights — Check the operation of
the headlights, parking lights,
taillights, high-mount brake light,
turn signals, brake lights, and
license plate lights monthly. See
page 202.
MaintenanceMain Menu Table of Contents s t
Page 174 of 269
Cooling System
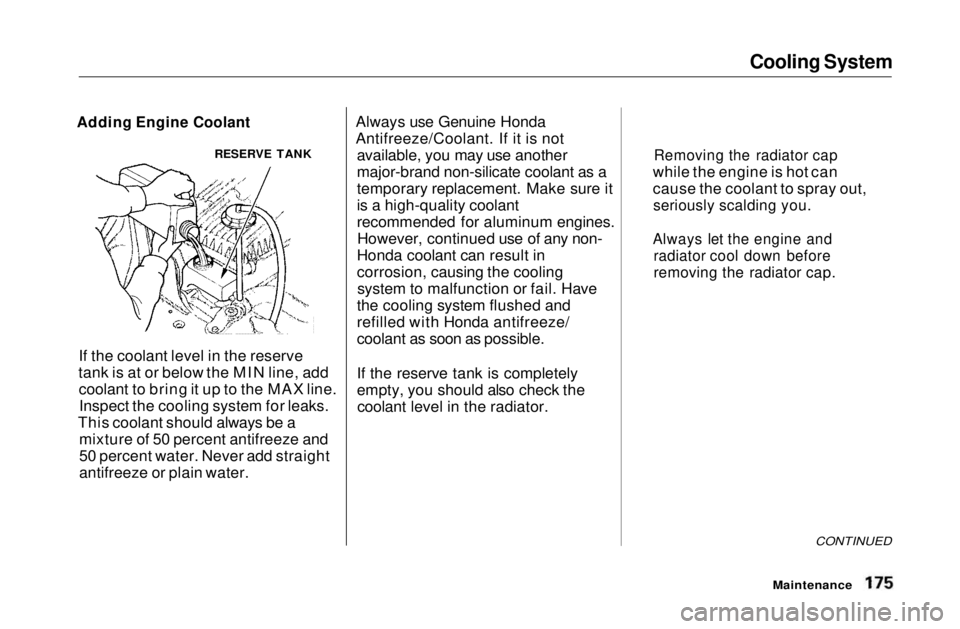
If the coolant level in the reserve
tank is at or below the MIN line, add coolant to bring it up to the MAX line.Inspect the cooling system for leaks.
This coolant should always be a mixture of 50 percent antifreeze and
50 percent water. Never add straight
antifreeze or plain water. Always use Genuine Honda
Antifreeze/Coolant. If it is not
available, you may use another
major-brand non-silicate coolant as a
temporary replacement. Make sure it
is a high-quality coolant
recommended for aluminum engines.However, continued use of any non-
Honda coolant can result in
corrosion, causing the cooling system to malfunction or fail. Have
the cooling system flushed and
refilled with Honda antifreeze/
coolant as soon as possible.
If the reserve tank is completely
empty, you should also check the coolant level in the radiator.
CONTINUED
Maintenance
Adding Engine Coolant
RESERVE TANK
Removing the radiator cap
while the engine is hot can
cause the coolant to spray out,
seriously scalding you.
Always let the engine and radiator cool down before
removing the radiator cap.Main Menu Table of Contents s t
Page 175 of 269
Cooling System
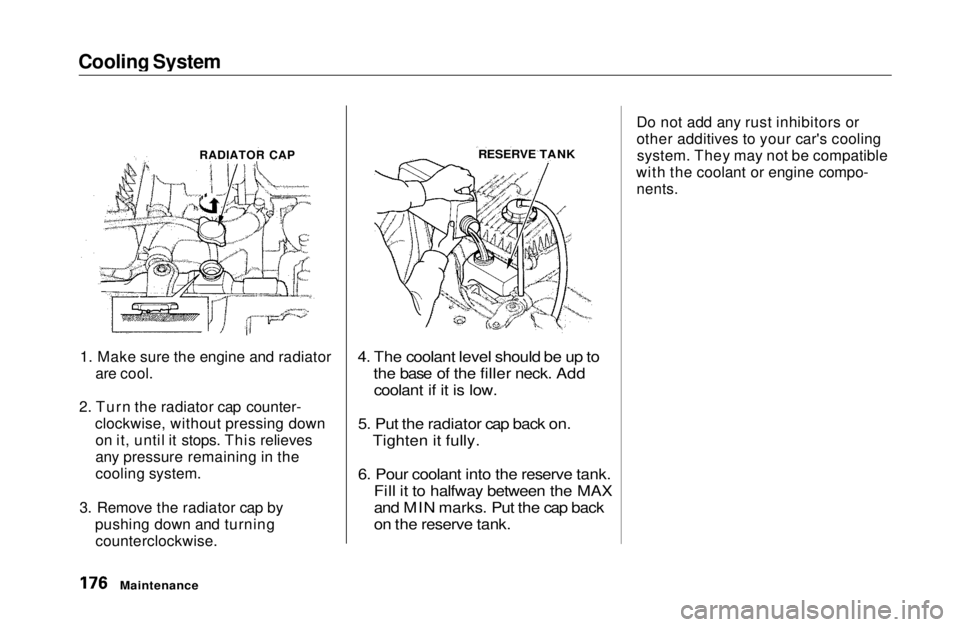
1. Make sure the engine and radiator are cool.
2. Turn the radiator cap counter- clockwise, without pressing downon it, until it stops. This relieves
any pressure remaining in the
cooling system.
3. Remove the radiator cap by pushing down and turningcounterclockwise.
4. The coolant level should be up to
the base of the filler neck. Addcoolant if it is low.
5. Put the radiator cap back on. Tighten it fully.
6. Pour coolant into the reserve tank. Fill it to halfway between the MAX
and MIN marks. Put the cap back
on the reserve tank.
Do not add any rust inhibitors or
other additives to your car's cooling
system. They may not be compatible
with the coolant or engine compo-
nents.
Maintenance
RADIATOR CAP
RESERVE TANKMain Menu Table of Contents s t
Page 177 of 269
Cooling System
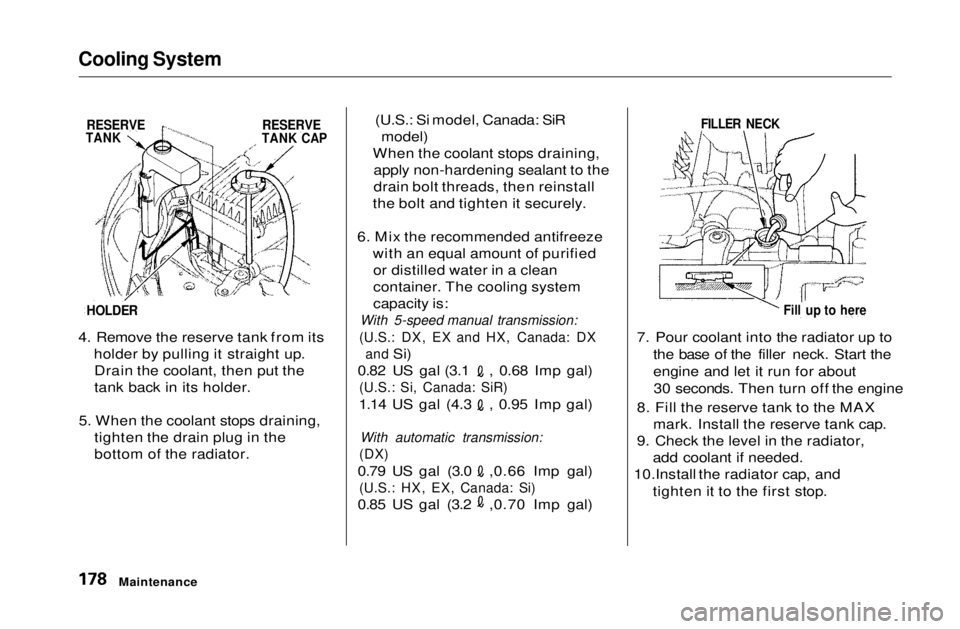
4. Remove the reserve tank from its
holder by pulling it straight up.Drain the coolant, then put the
tank back in its holder.
5. When the coolant stops draining, tighten the drain plug in the
bottom of the radiator. (U.S.: Si model, Canada: SiR
model)
When the coolant stops draining, apply non-hardening sealant to the
drain bolt threads, then reinstall
the bolt and tighten it securely.
6. Mix the recommended antifreeze with an equal amount of purifiedor distilled water in a clean
container. The cooling system
capacity is:
With 5-speed manual transmission:
(U.S.: DX, EX and HX, Canada: DX and
Si) 0.82 US gal (3.1 , 0.68 Imp gal)
(U.S.: Si, Canada: SiR)
1.14 US gal (4.3 , 0.95 Imp gal)
With automatic transmission:
(DX)
0.79 US gal (3.0 ,0.66 Imp gal)
(U.S.: HX, EX, Canada: Si)
0.85 US gal (3.2 ,0.70 Imp gal)7. Pour coolant into the radiator up to
the base of the filler neck. Start the
engine and let it run for about30 seconds. Then turn off the engine
8. Fill the reserve tank to the MAX mark. Install the reserve tank cap.
9. Check the level in the radiator, add coolant if needed.
10.Install the radiator cap, and
tighten it to the first stop.
Maintenance
RESERVE
TANK
RESERVE
TANK CAP
HOLDER
FILLER NECK
Fill up to hereMain Menu Table of Contents s t
Page 178 of 269

Cooling System
Maintenance
11.Start the engine and let it run until
the cooling fan comes on two
times. Then stop the engine.
12. Remove the radiator cap. Fill the radiator with coolant up to the
base of the filler neck.
13.Start the engine and hold it at 1,500 rpm until the cooling fan
comes on. Turn off the engine.
Check the coolant level in the radiator and add coolant if needed.
14.Install the radiator cap, and tighten it fully.
15.If necessary, fill the reserve tank to the MAX mark. Install thereserve tank cap.Main Menu Table of Contents s t
Page 229 of 269
If Your Engine Overheats
4. If the temperature gauge stays at
the red mark, turn off the engine.
5. Wait until you see no more signs of steam or spray, then open the
hood.
6. Look for any obvious coolant leaks, such as a split radiator hose.
Everything is still extremely hot, so use caution. If you find a leak, it
must be repaired before you
continue driving (see Emergency
Towing on page 241).
7. If you don't find an obvious leak, check the coolant level in the
radiator reserve tank (see page112). If the level is below the
MIN mark, add coolant to halfway
between the MIN and MAX marks.
8. If there was no coolant in the reserve tank, you may also have to
add coolant to the radiator. Let the
engine cool down until the pointer reaches the middle of the tempera-
ture gauge, or lower, before check-
ing the radiator.
9. Using gloves or a large heavy cloth, turn the radiator cap
counterclockwise, without pushing
down, to the first stop. This
releases any remaining pressure in
the cooling system. After the
pressure releases, push down on
the cap and turn it until it comes off. 10.Start the engine and set the
temperature control dial to
maximum. Add coolant to the
radiator up to the base of the filler
neck. If you do not have the
proper coolant mixture available,
you can add plain water.Remember to have the coolingsystem drained and refilled with
the proper mixture as soon as you
can.
11.Put the radiator cap back on tightly. Run the engine and watchthe temperature gauge. If it goes
back to the red mark, the engine
needs repair. (See Emergency
Towing on page 241.)
12.If the temperature stays normal, check the coolant level in the
radiator reserve tank. If it has
gone down, add coolant to the MAX mark. Put the cap back on
tightly.
Taking Care of the Unexpected
Removing the radiator cap
while the engine is hot can
cause the coolant to spray out, seriously scalding you.
Always let the engine and radiator cool down before
removing the radiator cap.Main Menu Table of Contents s t
Page 260 of 269
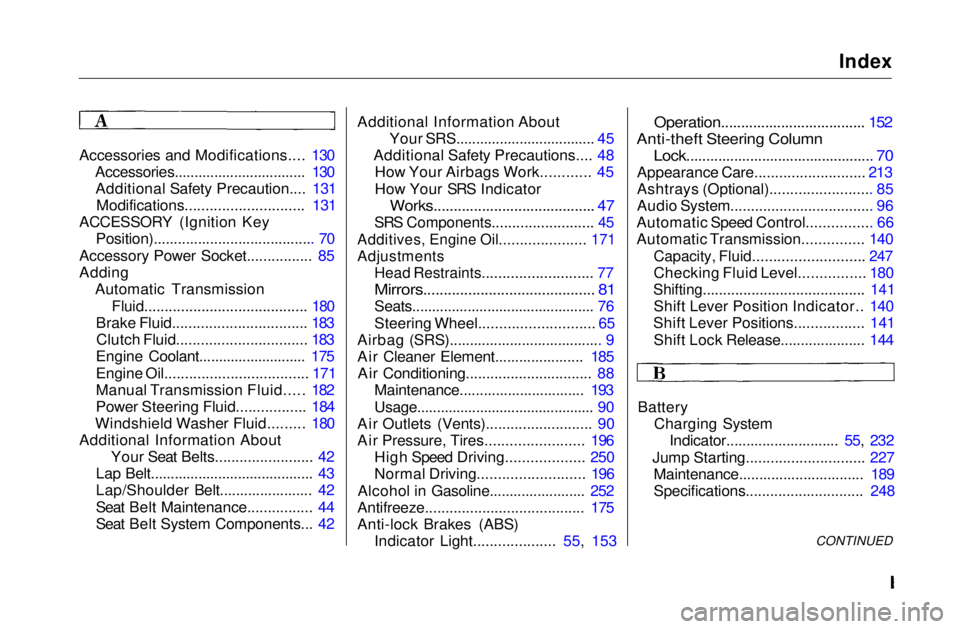
Index
Accessories and Modifications.... 130 Accessories................................. 130Additional Safety Precaution.... 131 Modifications............................. 131
ACCESSORY (Ignition Key Position)........................................ 70
Accessory Power Socket................ 85
Adding Automatic Transmission
Fluid........................................ 180
Brake Fluid................................. 183 Clutch Fluid................................ 183
Engine Coolant........................... 175
Engine Oil................................... 171
Manual Transmission Fluid..... 182
Power Steering Fluid................. 184
Windshield Washer Fluid......... 180
Additional Information About Your Seat Belts........................ 42
Lap Belt......................................... 43
Lap/Shoulder Belt....................... 42
Seat Belt Maintenance................ 44
Seat Belt System Components... 42 Additional Information About
Your SRS................................... 45
Additional Safety Precautions.... 48 How Your Airbags Work............ 45
How Your SRS Indicator
Works........................................ 47
SRS Components......................... 45
Additives, Engine Oil..................... 171
Adjustments
Head Restraints........................... 77
Mirrors.......................................... 81
Seats.............................................. 76
Steering Wheel............................ 65
Airbag (SRS)...................................... 9
Air Cleaner Element...................... 185 Air Conditioning............................... 88 Maintenance............................... 193
Usage............................................. 90
Air Outlets (Vents).......................... 90
Air Pressure, Tires........................ 196 High Speed Driving................... 250
Normal Driving.......................... 196
Alcohol in Gasoline........................ 252
Antifreeze....................................... 175
Anti-lock Brakes (ABS) Indicator Light.................... 55, 153
Operation.................................... 152
Anti-theft Steering Column
Lock............................................... 70
Appearance Care........................... 213
Ashtrays (Optional)......................... 85
Audio System................................... 96
Automatic Speed Control................ 66
Automatic Transmission............... 140
Capacity, Fluid........................... 247
Checking Fluid Level................ 180
Shifting........................................ 141
Shift Lever Position Indicator.. 140
Shift Lever Positions................. 141
Shift Lock Release..................... 144
Battery Charging SystemIndicator............................ 55, 232
Jump Starting............................. 227 Maintenance............................... 189
Specifications............................. 248
CONTINUEDMain Menu s t