turn signal HONDA CIVIC COUPE 1999 Owners Manual
[x] Cancel search | Manufacturer: HONDA, Model Year: 1999, Model line: CIVIC COUPE, Model: HONDA CIVIC COUPE 1999Pages: 269, PDF Size: 2.42 MB
Page 5 of 269
Your Car at a Glance
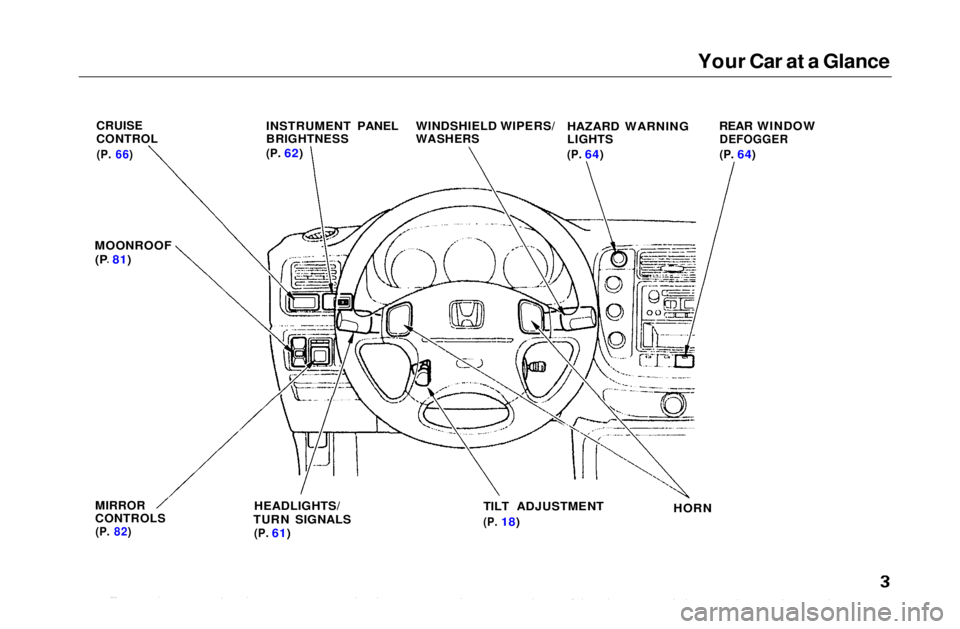
CRUISE
CONTROL
(P.
66)
INSTRUMENT PANEL
BRIGHTNESS
(P.
62)
WINDSHIELD WIPERS/
WASHERS
HAZARD WARNING
LIGHTS
(P.
64) REAR WINDOW
DEFOGGER
(P.
64)
MOONROOF (P 81)
MIRROR
CONTROLS
(P.
82)
HEADLIGHTS/
TURN SIGNALS
(P.
61) TILT ADJUSTMENT
(P.
18)
HORNMain Menu s t
Page 52 of 269
Instruments and Controls
This section gives information about
the controls and displays thatcontribute to the daily operation of
your Honda. All the essential
controls are within easy reach.
Control Locations............................ 52
Indicator Lights................................ 53
Gauges.............................................. 57
Speedometer................................ 57
Tachometer.................................. 57
Odometer...................................... 57
Trip Meter.................................... 57
Fuel Gauge................................... 58
Temperature Gauge.................... 58
Maintenance Required
Indicator.................................... 59
Controls Near the Steering Wheel........................................ 60
Headlights.................................... 61
Daytime Running Lights............. 61
Instrument Panel Brightness..... 62
Turn Signals................................. 62
Windshield Wipers...................... 63
Windshield Washers................... 63
Hazard Warning........................... 64
Rear Window Defogger.............. 64
Steering Wheel Adjustment....... 65
Steering Wheel Controls ................ 66 Cruise Control.............................. 66
Keys and Locks................................ 69
Keys.............................................. 69
Ignition Switch............................. 69
Door Locks................................... 70
Power Door Locks....................... 71
Remote Transmitter.................... 72
Trunk............................................ 75
Seat Adjustments............................. 76
Front Seat Adjustments.............. 76
Rear Seat Access......................... 77
Head Restraints........................... 77
Folding Rear Seat............................ 78
Power Windows............................... 79
Moonroof.......................................... 81
Mirrors.............................................. 81
Adjusting the Power Mirrors..... 82
Parking Brake.................................. 83 Glove Box......................................... 83
Beverage Holder.............................. 84
Accessory Power Socket................ 85
Ashtrays............................................ 85
Interior Light.................................... 86
Instruments and ControlsMain Menu s t
Page 57 of 269
Indicator Lights
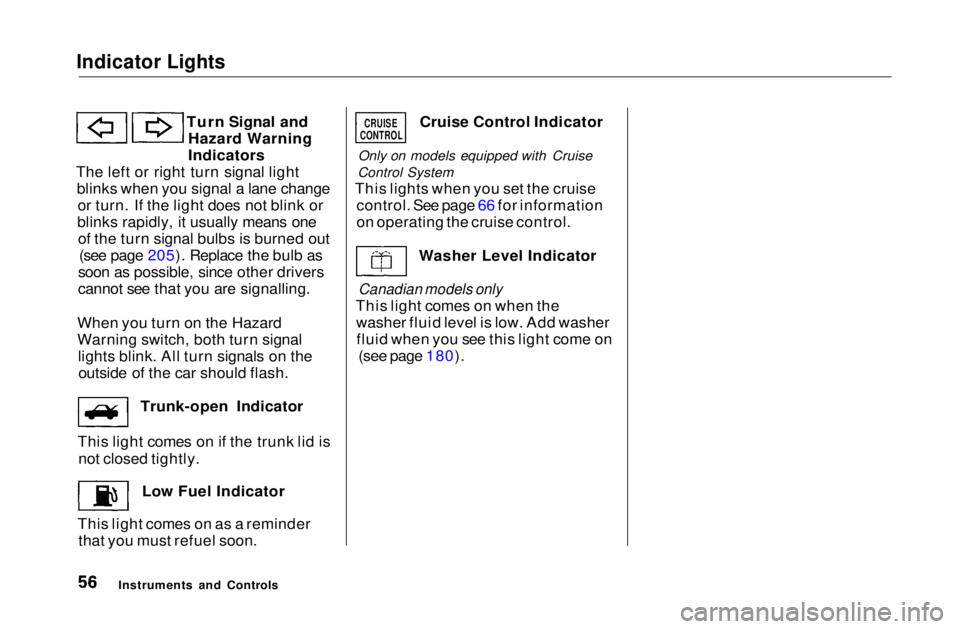
Turn Signal andHazard Warning
Indicators
The left or right turn signal light blinks when you signal a lane changeor turn. If the light does not blink or
blinks rapidly, it usually means one of the turn signal bulbs is burned out (see page 205). Replace the bulb as
soon as possible, since other drivers
cannot see that you are signalling.
When you turn on the Hazard
Warning switch, both turn signal lights blink. All turn signals on theoutside of the car should flash.
Trunk-open Indicator
This light comes on if the trunk lid is not closed tightly.
Low Fuel Indicator
This light comes on as a reminder that you must refuel soon. Cruise Control Indicator
Only on models equipped with Cruise
Control System
This lights when you set the cruise control. See page 66 for information
on operating the cruise control.
Washer Level Indicator
Canadian models only
This light comes on when the washer fluid level is low. Add washerfluid when you see this light come on (see page 180).
Instruments and Controls
CRUISE
CONTROLMain Menu Table of Contents s t
Page 61 of 269
Controls Near the Steering Wheel
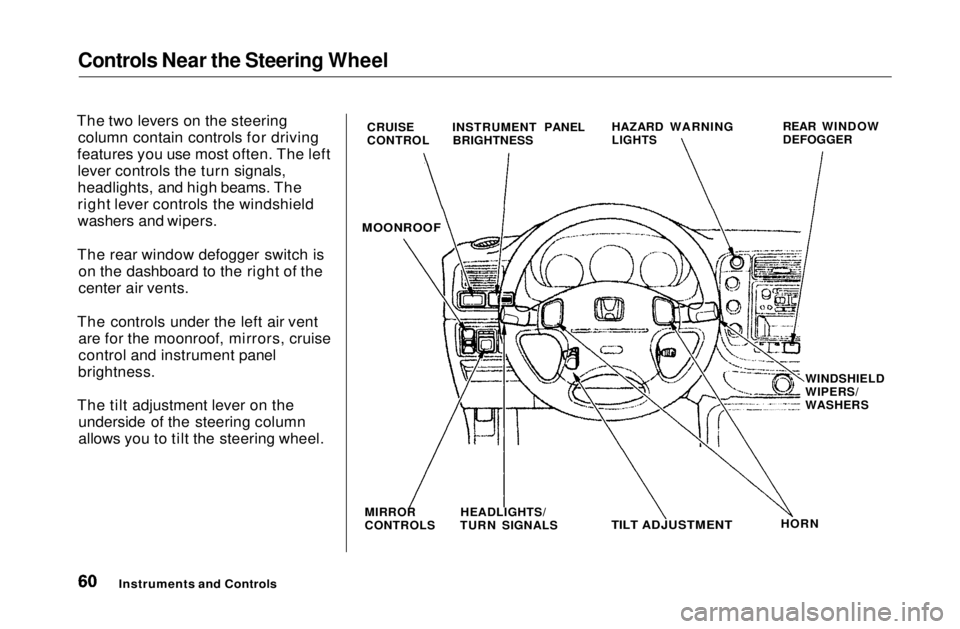
The two levers on the steering column contain controls for driving
features you use most often. The left lever controls the turn signals,
headlights, and high beams. The
right lever controls the windshield
washers and wipers.
The rear window defogger switch is on the dashboard to the right of the
center air vents.
The controls under the left air vent are for the moonroof, mirrors, cruise
control and instrument panel
brightness.
The tilt adjustment lever on the underside of the steering column
allows you to tilt the steering wheel.
Instruments and Controls
CRUISE
CONTROL
INSTRUMENT PANEL
BRIGHTNESS HAZARD WARNING
LIGHTS
REAR WINDOW
DEFOGGER
MOONROOF
MIRROR
CONTROLS HEADLIGHTS/
TURN SIGNALS
TILT ADJUSTMENT
HORNWINDSHIELD
WIPERS/
WASHERSMain Menu Table of Contents s t
Page 62 of 269
Controls Near the Steering Wheel
Headlights
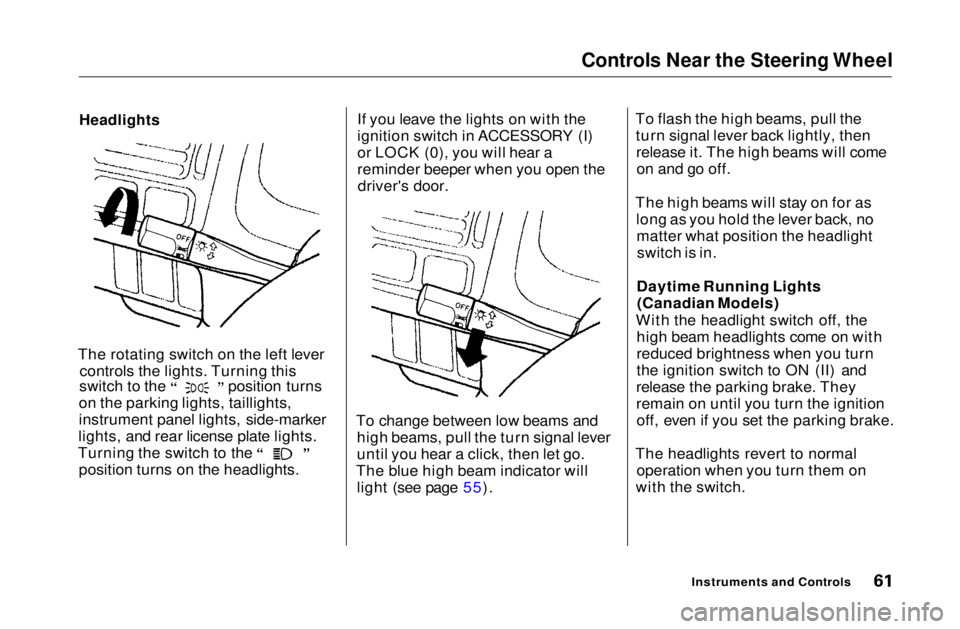
The rotating switch on the left lever controls the lights. Turning this switch to the position turns
on the parking lights, taillights,
instrument panel lights, side-marker
lights, and rear license plate lights. Turning the switch to the
position turns on the headlights. If you leave the lights on with the
ignition switch in ACCESSORY (I)
or LOCK (0), you will hear a
reminder beeper when you open the
driver's door.
To change between low beams and high beams, pull the turn signal lever
until you hear a click, then let go.
The blue high beam indicator will light (see page 55). To flash the high beams, pull the
turn signal lever back lightly, thenrelease it. The high beams will comeon and go off.
The high beams will stay on for as long as you hold the lever back, nomatter what position the headlightswitch is in.
Daytime Running Lights (Canadian Models)
With the headlight switch off, the high beam headlights come on with
reduced brightness when you turn
the ignition switch to ON (II) and
release the parking brake. They
remain on until you turn the ignition off, even if you set the parking brake.
The headlights revert to normal operation when you turn them on
with the switch.
Instruments and ControlsMain Menu Table of Contents s t
Page 63 of 269
Controls Near the Steering Wheel
Instrument Panel Brightness
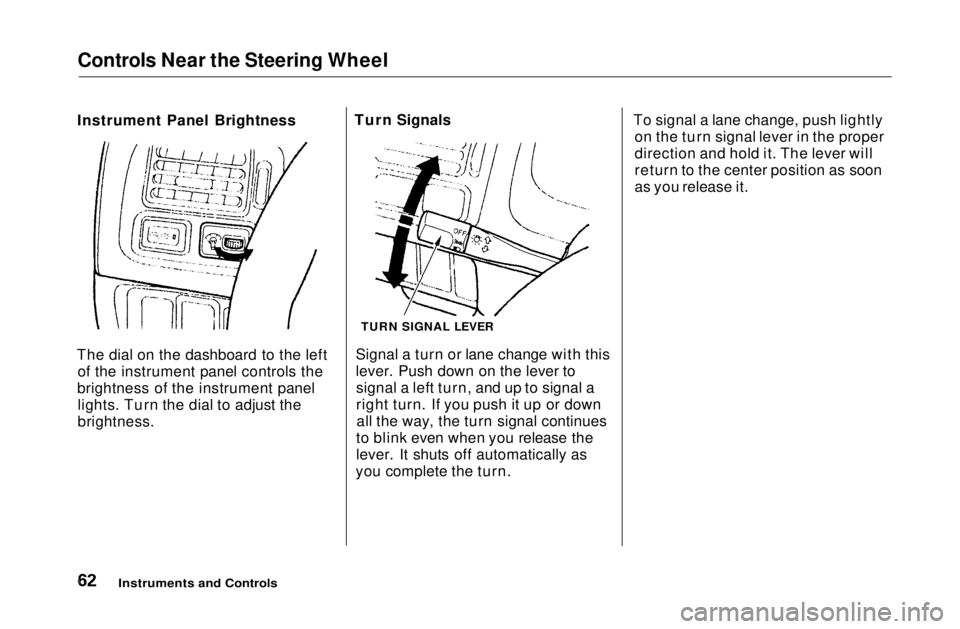
The dial on the dashboard to the left of the instrument panel controls the
brightness of the instrument panel lights. Turn the dial to adjust the
brightness. Turn Signals
Signal a turn or lane change with this
lever. Push down on the lever tosignal a left turn, and up to signal a
right turn. If you push it up or downall the way, the turn signal continues
to blink even when you release the
lever. It shuts off automatically as
you complete the turn. To signal a lane change, push lightly
on the turn signal lever in the proper
direction and hold it. The lever will
return to the center position as soon
as you release it.
Instruments and Controls
TURN SIGNAL LEVERMain Menu Table of Contents s t
Page 65 of 269
Controls Near the Steering Wheel
Hazard Warning
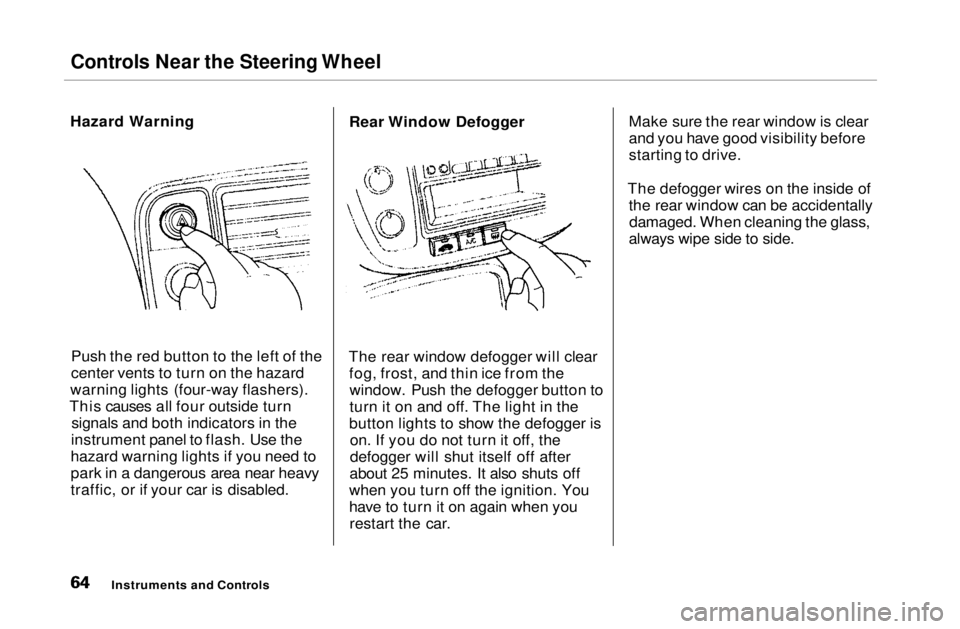
Push the red button to the left of the
center vents to turn on the hazard
warning lights (four-way flashers).
This causes all four outside turn signals and both indicators in the
instrument panel to flash. Use the
hazard warning lights if you need to
park in a dangerous area near heavy
traffic, or if your car is disabled. Rear Window Defogger
The rear window defogger will clear fog, frost, and thin ice from thewindow. Push the defogger button to
turn it on and off. The light in the
button lights to show the defogger is on. If you do not turn it off, the
defogger will shut itself off after
about 25 minutes. It also shuts off
when you turn off the ignition. You
have to turn it on again when you restart the car. Make sure the rear window is clear
and you have good visibility before
starting to drive.
The defogger wires on the inside of the rear window can be accidentallydamaged. When cleaning the glass,
always wipe side to side.
Instruments and ControlsMain Menu Table of Contents s t
Page 97 of 269
Audio System
On DX and HX models in the U.S., and
the DX model in Canada
AM/FM Stereo Audio System
Your Honda's audio system provides clear reception on both AM and FM
bands, while the preset buttons allow
you to easily select your favorite
stations.
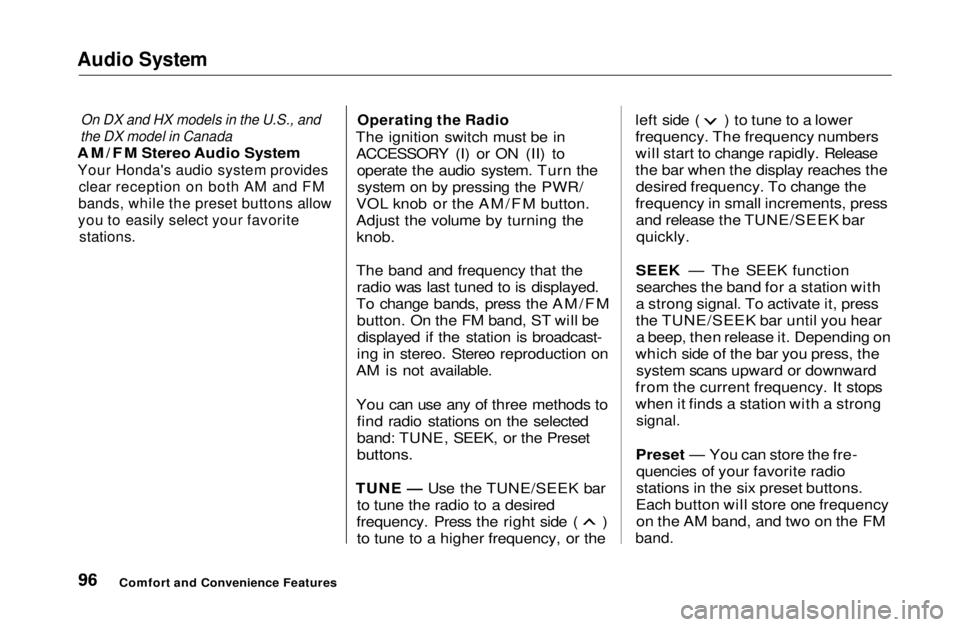
Operating the Radio
The ignition switch must be in ACCESSORY (I) or ON (II) to operate the audio system. Turn thesystem on by pressing the PWR/
VOL knob or the AM/FM button.
Adjust the volume by turning the knob.
The band and frequency that the radio was last tuned to is displayed.
To change bands, press the AM/FM button. On the FM band, ST will bedisplayed if the station is broadcast-
ing in stereo. Stereo reproduction on
AM is not available.
You can use any of three methods to find radio stations on the selected
band: TUNE, SEEK, or the Preset
buttons.
TUNE — Use the TUNE/SEEK bar to tune the radio to a desired frequency. Press the right side ( )
to tune to a higher frequency, or the left side ( ) to tune to a lower
frequency. The frequency numbers
will start to change rapidly. Release
the bar when the display reaches the
desired frequency. To change the
frequency in small increments, press and release the TUNE/SEEK barquickly.
SEEK — The SEEK function searches the band for a station with
a strong signal. To activate it, press
the TUNE/SEEK bar until you hear a beep, then release it. Depending on
which side of the bar you press, the system scans upward or downward
from the current frequency. It stops
when it finds a station with a strong
signal.
Preset — You can store the fre- quencies of your favorite radio
stations in the six preset buttons.
Each button will store one frequency on the AM band, and two on the FM
band.
Comfort and Convenience FeaturesMain Menu Table of Contents s t
Page 107 of 269
Audio System
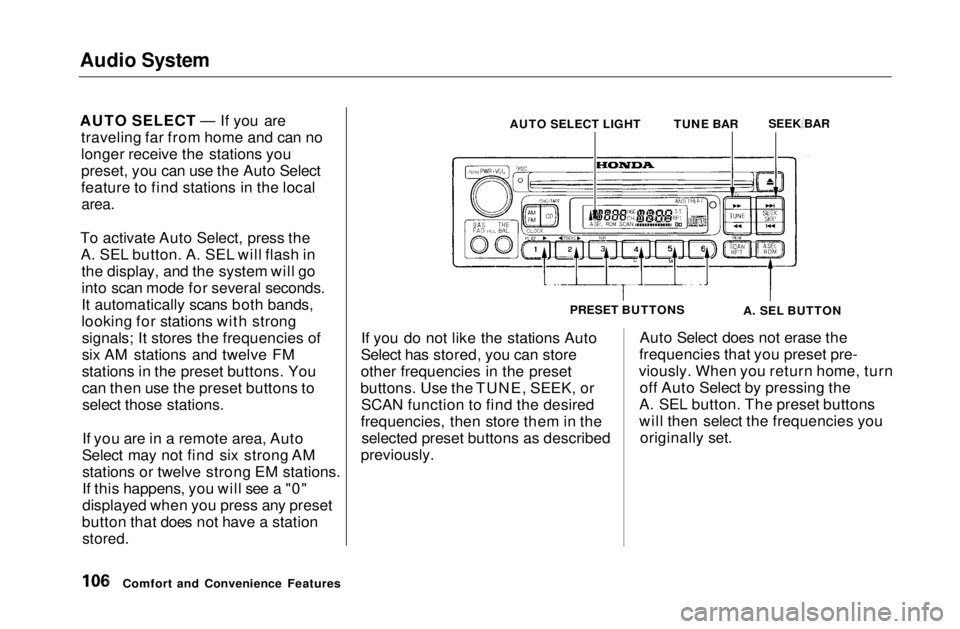
AUTO SELECT — If you are
traveling far from home and can no
longer receive the stations you
preset, you can use the Auto Select
feature to find stations in the local
area.
To activate Auto Select, press the A. SEL button. A. SEL will flash in the display, and the system will go
into scan mode for several seconds.
It automatically scans both bands,
looking for stations with strongsignals; It stores the frequencies of
six AM stations and twelve FM
stations in the preset buttons. You
can then use the preset buttons toselect those stations.
If you are in a remote area, Auto
Select may not find six strong AM stations or twelve strong EM stations.
If this happens, you will see a "0"
displayed when you press any preset
button that does not have a station
stored.
If you do not like the stations Auto
Select has stored, you can store
other frequencies in the preset
buttons. Use the TUNE, SEEK, or SCAN function to find the desired
frequencies, then store them in the selected preset buttons as described
previously. Auto Select does not erase the
frequencies that you preset pre-
viously. When you return home, turn off Auto Select by pressing the
A. SEL button. The preset buttons
will then select the frequencies you originally set.
Comfort and Convenience Features AUTO SELECT LIGHT
TUNE BARSEEK BAR
PRESET BUTTONS A. SEL BUTTONMain Menu Table of Contents s t
Page 168 of 269
Owner Maintenance Checks
You should check the following items at the specified intervals. If
you are unsure of how to perform any check, turn to the page given. Engine oil level — Check every
time you fill the fuel tank. See
page 111. Engine coolant level — Check the
radiator reserve tank every time
you fill the fuel tank. See page 127. Windshield washer fluid — Check
the level in the reservoir monthly.If weather conditions cause you to
use the washers frequently, check
the reservoir each time you stop
for fuel. See page 180. Automatic transmission — Check
the fluid level monthly. See page
180.
Brakes — Check the fluid level
monthly. See page 183.Tires — Check the tire pressure
monthly. Examine the tread for
wear and foreign objects. See page 196. Lights — Check the operation of
the headlights, parking lights,
taillights, high-mount brake light,
turn signals, brake lights, and
license plate lights monthly. See
page 202.
MaintenanceMain Menu Table of Contents s t