light HONDA CIVIC COUPE 2007 8.G Owner's Guide
[x] Cancel search | Manufacturer: HONDA, Model Year: 2007, Model line: CIVIC COUPE, Model: HONDA CIVIC COUPE 2007 8.GPages: 311, PDF Size: 5.36 MB
Page 173 of 311
Once the security system is set,
opening any door, the trunk, or the
hood without using the key or the
remote transmitter will cause it to
alarm. It also alarms if the radio is
removed from the dashboard or the
wiring is cut.
The
security system helps to protect
your vehicle and valuables from theft.
The horn sounds and a combination
of headlights (low beam), parking
lights, side marker lights, and
taillights flash if someone attempts
to break into your vehicle or remove
the radio. This alarm continues for 2
minutes, then it stops. To reset an
alarming system before the 2
minutes have elapsed, unlock the
driver’s door with the key or the
remote transmitter.
The security system automatically
sets 15 seconds after you lock the
doors, hood, and trunk. For the
system to activate, you must lock the
doors from the outside with the key,
driver’s lock tab, door lock switch, or
remote transmitter. The security
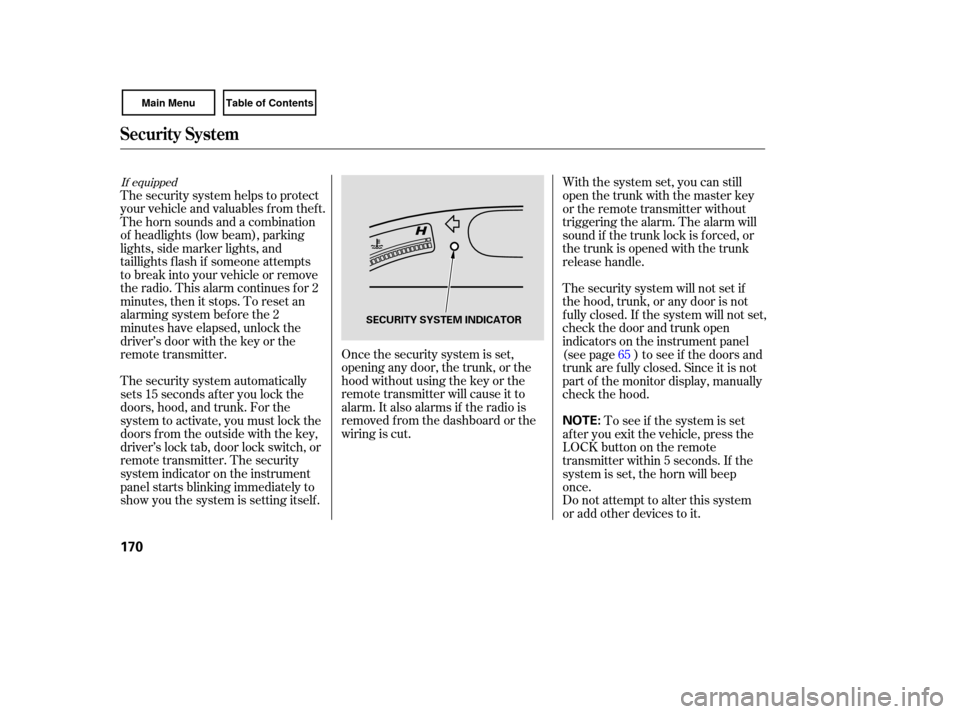
system indicator on the instrument
panel starts blinking immediately to
show you the system is setting itself. With
the system set, you can still
open the trunk with the master key
or the remote transmitter without
triggering the alarm. The alarm will
sound if the trunk lock is forced, or
the trunk is opened with the trunk
release handle.
The security system will not set if
the hood, trunk, or any door is not
f ully closed. If the system will not set,
check the door and trunk open
indicators on the instrument panel
(see page ) to see if the doors and
trunk are f ully closed. Since it is not
part of the monitor display, manually
check the hood.
Do not attempt to alter this system
or add other devices to it. To see if the system is set
af ter you exit the vehicle, press the
LOCK button on the remote
transmitter within 5 seconds. If the
system is set, the horn will beep
once. 65
If equipped
Security System
170
NOTE:
SECURITY SYSTEM INDICATOR
Page 175 of 311

You can increase the set cruising
speed in any of these ways:Press and hold the RES/ACCEL
button. When you reach the
desired cruising speed, release the
button. Press and hold the DECEL/SET
button. Release the button when
you reach the desired speed.
To slow down in very small
amounts, tap the DECEL/SET
button. Each time you do this,
your vehicle will slow down about
1 mph (1.6 km/h).
You can decrease the set cruising
speed in any of these ways:
Even with the cruise control turned
on, you can still use the accelerator
pedal to speed up f or passing. Af ter
completing the pass, take your foot
of f the accelerator pedal. The vehicle
will return to the set cruising speed.
Resting your f oot on the brake or
clutch pedal causes the cruise
control to cancel.
To increase the speed in very
small amounts, tap the RES/
ACCEL button. Each time you do
this, your vehicle will speed up
about 1 mph (1.6 km/h).Tap the brake or clutch pedal
lightly with your f oot. The
CRUISE CONTROL indicator on
the instrument panel goes out.
When the vehicle slows to the
desired speed, press the DECEL/
SETbutton.
Push on the accelerator pedal until
you reach the desired cruising
speed, then press the DECEL/
SET
button.
Cruise Control
Changing the Set Speed
172
Page 181 of 311
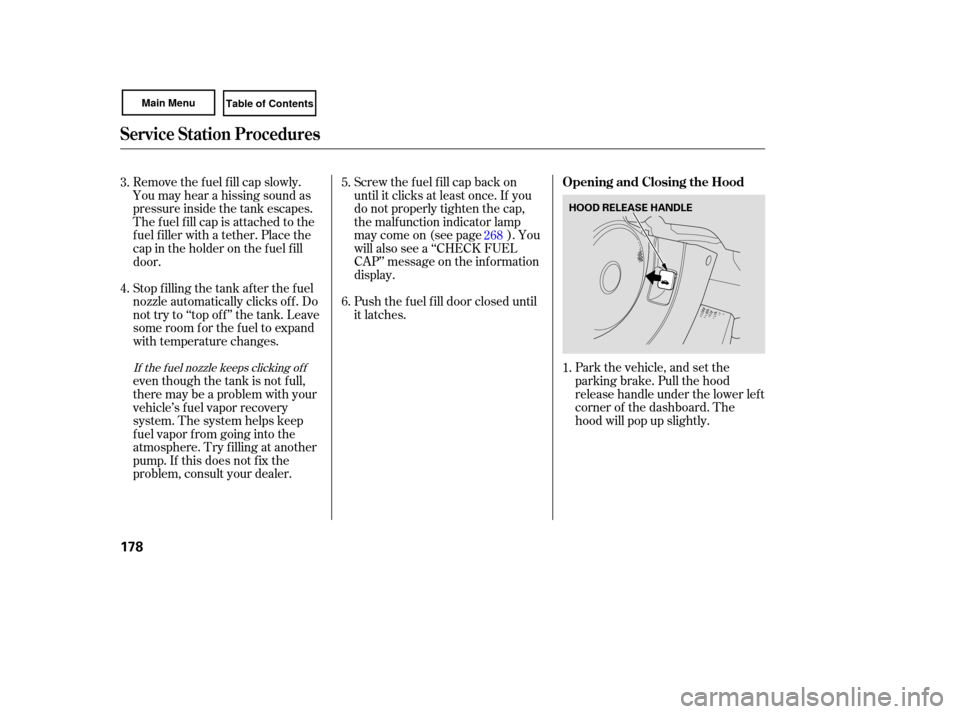
Park the vehicle, and set the
parking brake. Pull the hood
release handle under the lower left
corner of the dashboard. The
hood will pop up slightly.
Screw
the fuel fill cap back on
until it clicks at least once. If you
do not properly tighten the cap,
the malfunction indicator lamp
maycomeon(seepage ).You
will also see a ‘‘CHECK FUEL
CAP’’ message on the inf ormation
display.
Push the f uel f ill door closed until
it latches.
Remove the f uel f ill cap slowly.
You may hear a hissing sound as
pressure inside the tank escapes.
The fuel fill cap is attached to the
f uel f iller with a tether. Place the
cap in the holder on the f uel f ill
door.
Stop f illing the tank af ter the f uel
nozzle automatically clicks of f . Do
not try to ‘‘top off’’ the tank. Leave
some room f or the f uel to expand
with temperature changes.
even though the tank is not f ull,
there may be a problem with your
vehicle’s fuel vapor recovery
system. The system helps keep
f uel vapor f rom going into the
atmosphere. Try f illing at another
pump. If this does not f ix the
problem, consult your dealer.
1.
5.
6.
4. 3.
268If the f uel nozzle keeps clicking of f
Service Station Procedures
Opening and Closing the Hood
178
HOOD RELEASE HANDLE
Page 182 of 311
Wait a f ew minutes af ter turning the
engine of f bef ore you check the oil.
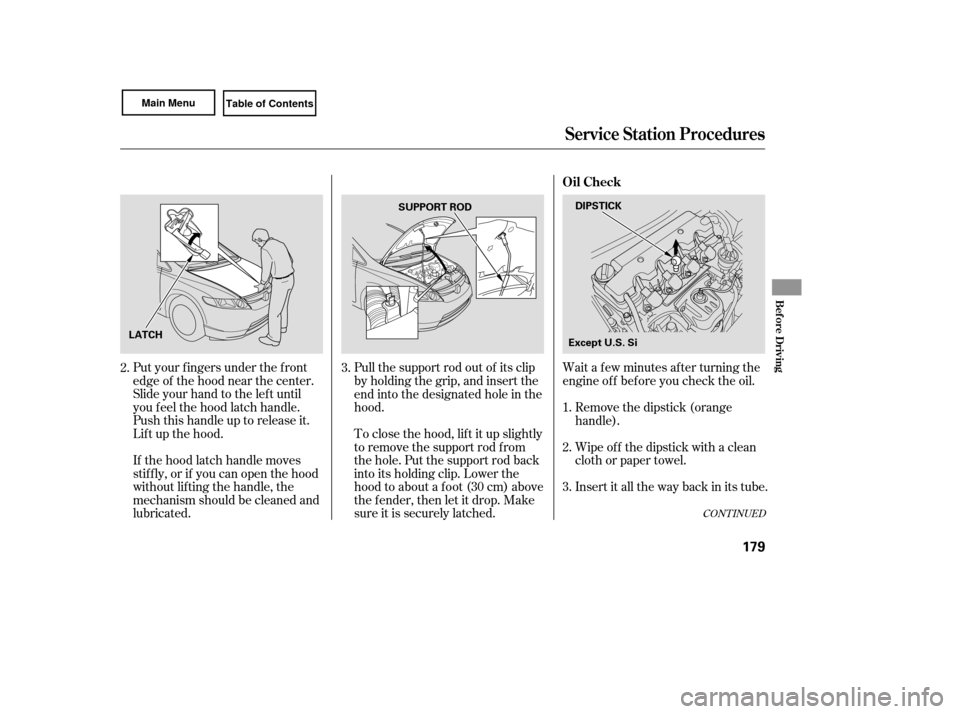
Put your f ingers under the f ront
edge of the hood near the center.
Slide your hand to the lef t until
you f eel the hood latch handle.
Push this handle up to release it.
Lif t up the hood.
If the hood latch handle moves
stif f ly, or if you can open the hood
without lifting the handle, the
mechanism should be cleaned and
lubricated. Pull the support rod out of its clip
by holding the grip, and insert the
end into the designated hole in the
hood.
To close the hood, lif t it up slightly
to remove the support rod f rom
the hole. Put the support rod back
into its holding clip. Lower the
hood to about a f oot (30 cm) above
the fender, then let it drop. Make
sure it is securely latched.
Remove the dipstick (orange
handle).
Insert it all the way back in its tube. Wipe of f the dipstick with a clean
cloth or paper towel.
3. 1.
2.
3.
2.
CONT INUED
Service Station Procedures
Oil Check
Bef ore Driving
179
DIPSTICK
SUPPORT ROD
LATCH Except U.S. Si
Page 186 of 311

Larger or smaller wheels and tires
can interfere with the operation of
your vehicle’s anti-lock brakes and
other systems.
Modifying your steering wheel or
any other part of your vehicle’s
safety features can make the
systems ineffective.
If you plan to modify your vehicle,
consult your dealer.
Removing
parts from your vehicle,
or replacing componen ts with
non-Honda components could
seriously affect your vehicle’s
handling, stability, and reliability.
Some examples are:
Lo wering your vehicle with a
non-Honda suspension kit that
signifi cantly reduces ground
clearance can allow the
undercarri age to hit speed bumps
or other raised objects, which
could cause the airbags to deploy.
Raising your vehicle with a
non-Honda suspension kit can
affect the handling and stability.
Non-Honda wheels, because they
are a universal design, can cause
excessive stress on suspension
components.
Befo
re installing any accesso ry:
Make sure the accessory does not
obscure any lights, or interfere
with proper vehicle operation or
perf ormance.
Be sure electronic accessories do
not overload electrical circuits
(see page ) or interf ere with
the proper operation of your
vehicle.
Do not install accessories on the
side pillars or across the rear
windows. In these areas,
accessories may interf ere with
proper operation of the side
curtain airbags. Bef ore installing any electronic
accessory, have the installer
contact your dealer f or assistance.
If possible, have your dealer
inspect the f inal installation. 270 Modif ying Your Vehicle
A ccessories and Modif ications
Bef ore Driving
183
Page 192 of 311
Make sure all windows, mirrors,
and outside lights are clean and
unobstructed. Remove frost, snow,
or ice.
Check that the hood and trunk are
fully closed. Check
that any items you may be
carrying are stored properly or
fastened down securely.
Check the seat adjustment (see
page ).
Check the adjustment of the
inside and outside mirrors (see
page ).
Check the steering wheel
ad justment (see page ).
Make sure the doors are securely
closed and locked. Fasten
your seat belt. Check that
your passengers have fastened
their seat belts (see page ).
Youshoulddothefollowingchecks
and
adjustments every day before
you drive your vehicle.
When you start the engine, check
the gauges and indicato rs in the
instrument panel (see page ).
Vi sually check the tires. If a tire
looks low, use a gauge to check its
pressure (see page ).
1.
2.
3. 4.
9.
8. 7. 6. 5. 10.
245 91
99 75 14
57
Preparing to Drive
Driving
189
Page 201 of 311

If your vehicle has an automatic
transmission, set the parking brake
bef ore you put the transmission in
Park. This keeps the vehicle f rom
moving and putting pressure on the
parking mechanism in the
transmission.Make sure the moonroof (if
equipped) and the windows are
closed.
Place any packages, valuables, etc.,
in the trunk or take them with you. Turn of f the lights.
If the vehicle is f acing uphill, turn
the front wheels away from the
curb. If you have a manual
transmission, put it in f irst gear.
If the vehicle is f acing downhill,
turn the front wheels toward the
curb. If you have a manual
transmission, put it in reverse gear.
Make sure the parking brake is
f ully released bef ore driving away.
Driving with the parking brake
partially set can overheat or
damage the rear brakes.
Lock the doors.
Always use the parking brake when
you park your vehicle. Make sure
the parking brake is set f irmly, or
your vehicle may roll if it is parked
on an incline.
Check the indicator on the
instrument panel to verif y that the
security system is set.
Never park over dry leaves, tall
grass, or other f lammable
materials. The hot three way
catalytic converter could cause
these materials to catch on fire.
On vehicles with security system
Parking T ips
Parking
198
Never install a sunshade between the
upper and lower meters on the
instrument panel. If you do, you could
cause heat damage to the upper meter
on a very hot day.
Page 202 of 311

Check the brakes after driving
through deep water. Apply the
brakes moderately to see if they f eel
normal. If not, apply them gently and
f requently until they do. Be extra
cautious in your driving.
Resting your f oot on the brake pedal
applies the brakes slightly. This
builds up heat, and reduces brake
ef f ectiveness and brake pad lif e. In
addition, f uel economy can be
reduced. It also keeps your brake
lights on all the time, conf using driver’s behind you. Constant
application of the brakes when going
down a long hill builds up heat and
reduces their effectiveness. Use the
engine to assist the brakes by taking
your foot off the accelerator and
downshifting to a lower gear. The hydraulic system that operates
the brakes has two separate circuits.
Each circuit works diagonally across
the vehicle (the lef t-f ront brake is
connected with the right-rear brake,
etc.). If one circuit should develop a
problem, you will still have braking
at two wheels.If the brake pads need replacing, you
will hear a distinctive, metallic
screeching sound when you apply
the brake pedal. If you do not have
the brake pads replaced, they will
screech all the time. It is normal f or
the brakes to occasionally squeal or
squeak when you apply them.
Your vehicle is equipped with f ront
disc brakes. The brakes on the rear
wheels may be disc or drum,
depending on the model. A power
assist helps reduce the ef f ort needed
on the brake pedal. The ABS helps
you retain steering control when
braking very hard.
Braking System DesignBrake Pad Wear Indicators
Braking System
Driving
199
Page 210 of 311

Trailer lights and equipment must
comply with federal, state, and local
regulations. Check with your local
recreational vehicle dealer f or the
requirements in your area, and use
only equipment designed f or your
vehicle.
Since lighting and wiring vary by
trailer type and brand, you should
have a qualif ied technician install a
suitable connector between the
vehicle and the trailer. Improper
equipment or installation can cause
damage to your vehicle’s electrical
system and af f ect your vehicle
warranty.Many states and Canadian provinces
require special outside mirrors when
towing a trailer. Even if they don’t,
you should install special mirrors if
you cannot clearly see behind you, or
if the trailer creates a blind spot.
Askyourtrailersalesorrental
agency if any other items are
recommended or required f or your
towing situation.
A ddit ional T owing Equipment
T railer L ights
Towing a Trailer
Driving
207
Page 211 of 311
When preparing to tow, and before
driving away, be sure to check the
following:
The vehicle has been properly
serviced, and the tires, brakes,
suspension, cooling system, and
lights are in good operating
condition.
All weights and loads are within
limits (see pag es and ).
Thehitch,safetychains,andany
other attachments are secure.
All items in or on the trailer are
properly secured and cannot shift
while you drive.
The lights and brakes on your
vehicle and the trailer are working
properly. Your
vehicle tires and spare are
properly inf lated (see page ),
and the trailer tires and spare are
trailer maker.
Crosswinds and air turbulence
caused by passing trucks can disrupt
your steering and cause trailer to
sway. When being passed by a large
vehicle, keep a constant speed, and
steer straight ahead. Do not try to
make quick steering or braking
corrections. Always drive slowly and have
someone guide you when backing up.
Grip the of the steering
wheel; then turn the wheel to the lef t
to get the trailer to move to the lef t,
andturnthewheelrighttomovethe
trailer to the right.
Follow all normal precautions when
parking, including f irmly setting the
parking brake and putting the
transmission in Park (automatic) or
in 1st or reverse (manual). Also,
place wheel chocks at each of the
trailer’s tires.
246
205
204
bottom
Pre-T ow Checklist
Handling Crosswinds and Buf f et ing Backing Up
Parking
Towing a Trailer
208