fog light HONDA CIVIC HYBRID 2012 9.G Owners Manual
[x] Cancel search | Manufacturer: HONDA, Model Year: 2012, Model line: CIVIC HYBRID, Model: HONDA CIVIC HYBRID 2012 9.GPages: 313, PDF Size: 8.65 MB
Page 102 of 313
101
Controls
This chapter explains how to operate the various controls necessary for driving.
Setting the Clock.............................. 102
Locking and Unlocking the Doors
Key Types and Functions .................. 103
Locking/Unlocking the Doors from the Outside .......................................... 105
Locking/Unlocking the Doors from the Inside ............................................. 107
Childproof Door Locks ..................... 108
Auto Door Locking/Unlocking .......... 109
Opening and Closing the Trunk ....... 110
Security System
Immobilizer System .......................... 113
Security System Alarm ...................... 113Opening and Closing the Windows ..... 115
Operating the Switches Around the
Steering Wheel
Ignition Switch ................................. 117
Turn Signals ..................................... 118
Light Switches.................................. 118
Daytime Running Lights ................... 120
Wipers and Washers ........................ 121
Brightness Control ........................... 122
Rear Defogger/Heated Door Mirror
*
Button ........................................... 123
ECON Button ................................... 123
Adjusting the Steering Wheel........... 124 Adjusting the Mirrors
Interior Rearview Mirror ................... 125
Door Mirrors .................................... 125
Adjusting the Seats Adjusting the Seat Positions ............. 126
Interior Lights/Interior Convenience ItemsInterior Lights .................................. 131
Interior Convenience Items .............. 132
Climate Control System Using Automatic Climate Control .... 137
Automatic Climate Control Sensors ...... 139
* Not available on all models
Page 120 of 313
119
uuOperating the Switches Around the Steering Wheel uLight Switches
Controls
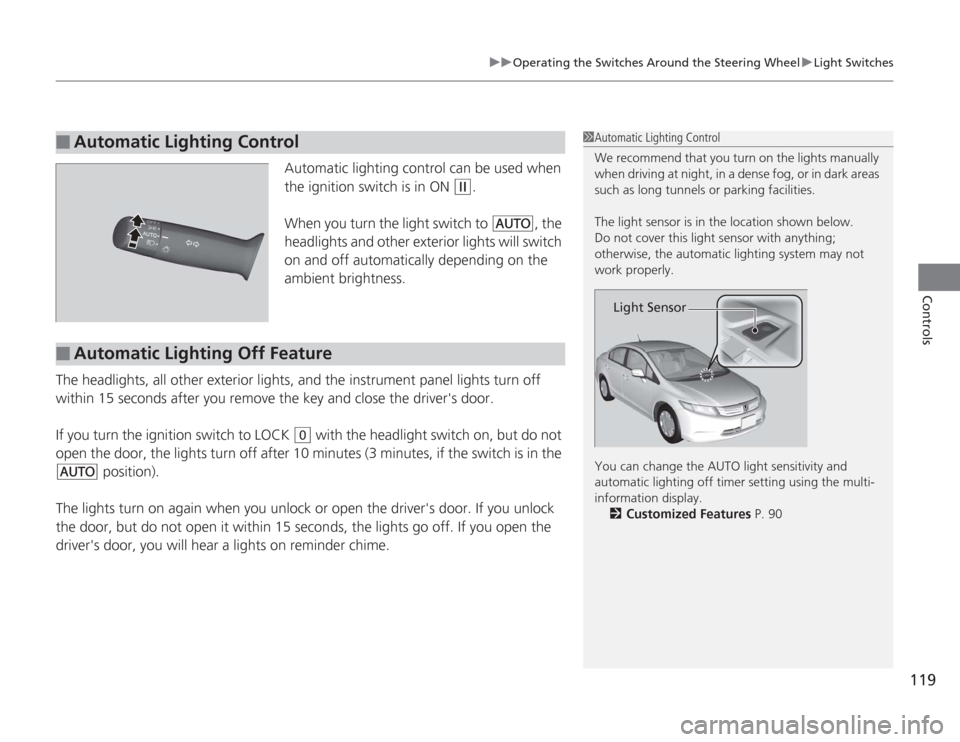
Automatic lighting control can be used when
the ignition switch is in ON
(w
.
When you turn the light switch to
#Y
, the
headlights and other exterior lights will switch
on and off automatically depending on the
ambient brightness.
The headlights, all other exterior lights, and the instrument panel lights turn off
within 15 seconds after you remove the key and close the driver's door.
If you turn the ignition switch to LOCK
(0
with the headlight switch on, but do not
open the door, the lights turn off after 10 minutes (3 minutes, if the switch is in the
#Y
position).
The lights turn on again when you unlock or open the driver's door. If you unlock
the door, but do not open it within 15 secon ds, the lights go off. If you open the
driver's door, you will hear a lights on reminder chime.
■
Automatic Lighting Control
1 Automatic Lighting Control
We recommend that you turn on the lights manually
when driving at night, in a dense fog, or in dark areas
such as long tunnels or parking facilities.
The light sensor is in the location shown below.
Do not cover this light sensor with anything;
otherwise, the automatic lighting system may not
work properly.
You can change the AUTO light sensitivity and
automatic lighting off timer setting using the multi-
information display.
2 Customized Features P. 90
Light Sensor
■
Automatic Lighting Off Feature
Page 199 of 313
198Driving
When DrivingStarting the Engine
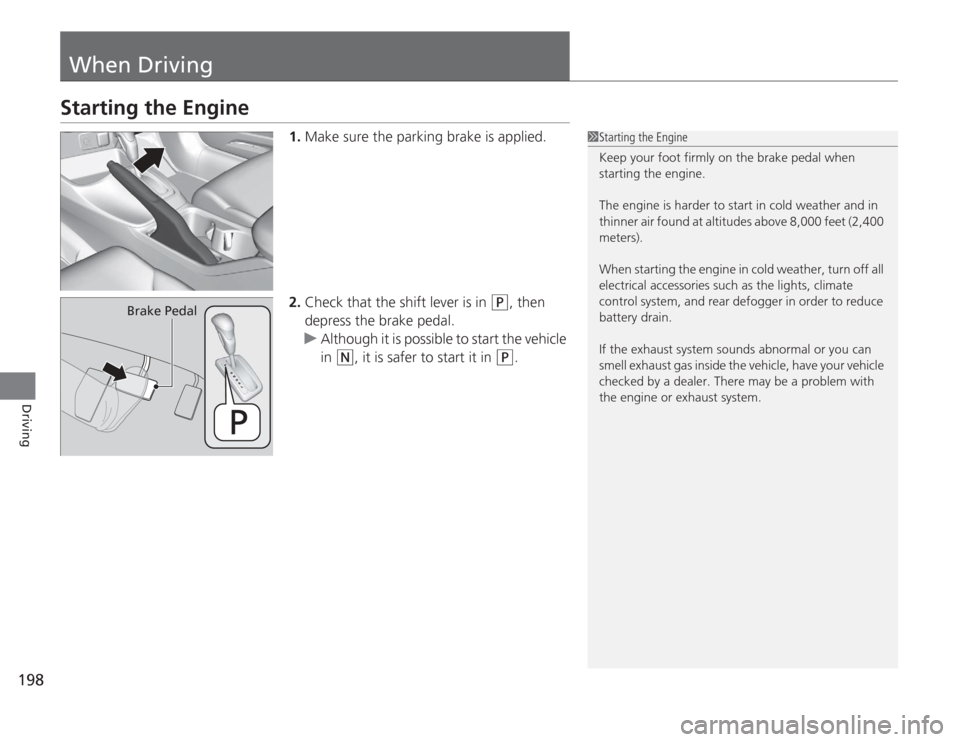
1.Make sure the parking brake is applied.
2. Check that the shift lever is in
(P
, then
depress the brake pedal.
u Although it is possible to start the vehicle
in
(N
, it is safer to start it in
(P
.
1Starting the Engine
Keep your foot firmly on the brake pedal when
starting the engine.
The engine is harder to start in cold weather and in
thinner air found at altitudes above 8,000 feet (2,400
meters).
When starting the engine in cold weather, turn off all
electrical accessories such as the lights, climate
control system, and rear defogger in order to reduce
battery drain.
If the exhaust system sounds abnormal or you can
smell exhaust gas inside the vehicle, have your vehicle
checked by a dealer. There may be a problem with
the engine or exhaust system.
Brake Pedal
Page 248 of 313
247
Continued
Maintenance
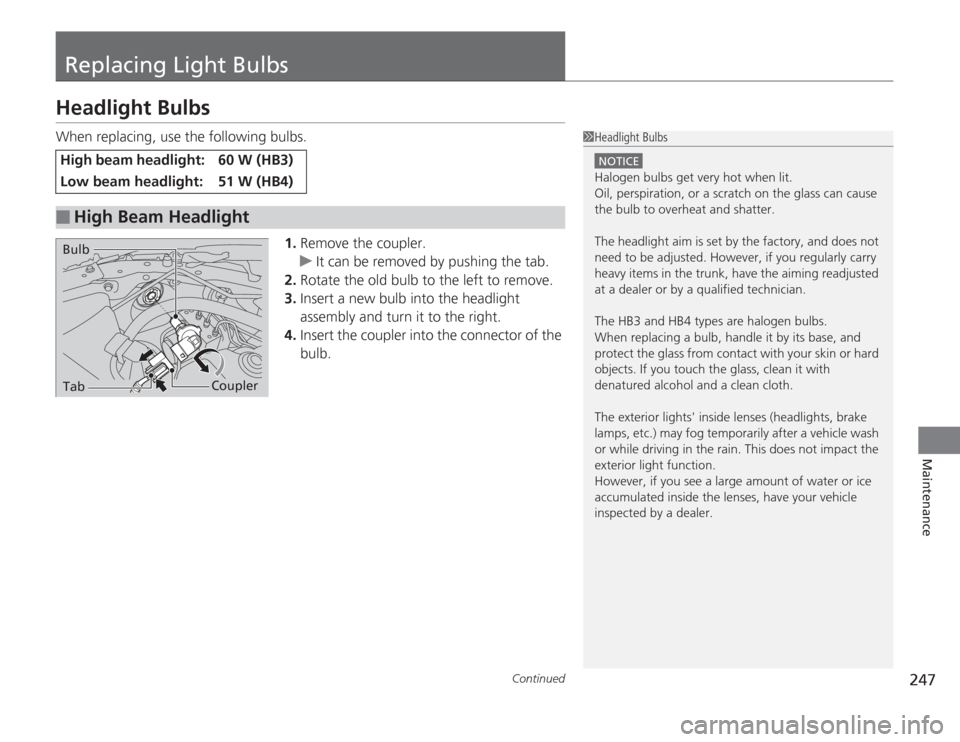
Replacing Light BulbsHeadlight BulbsWhen replacing, use the following bulbs.1.Remove the coupler.
u It can be removed by pushing the tab.
2. Rotate the old bulb to the left to remove.
3. Insert a new bulb into the headlight
assembly and turn it to the right.
4. Insert the coupler into the connector of the
bulb.High beam headlight:
60 W (HB3)
Low beam headlight:
51 W (HB4)
■
High Beam Headlight
1Headlight Bulbs
NOTICEHalogen bulbs get very hot when lit.
Oil, perspiration, or a scratch on the glass can cause
the bulb to overheat and shatter.
The headlight aim is set by the factory, and does not
need to be adjusted. However, if you regularly carry
heavy items in the trunk, have the aiming readjusted
at a dealer or by a qualified technician.
The HB3 and HB4 types are halogen bulbs.
When replacing a bulb, handle it by its base, and
protect the glass from contact with your skin or hard
objects. If you touch the glass, clean it with
denatured alcohol and a clean cloth.
The exterior lights' inside lenses (headlights, brake
lamps, etc.) may fog temporarily after a vehicle wash
or while driving in the rain. This does not impact the
exterior light function.
However, if you see a large amount of water or ice
accumulated inside the lenses, have your vehicle
inspected by a dealer.
Tab
Coupler
Bulb
Page 286 of 313
285
Handling the Unexpected
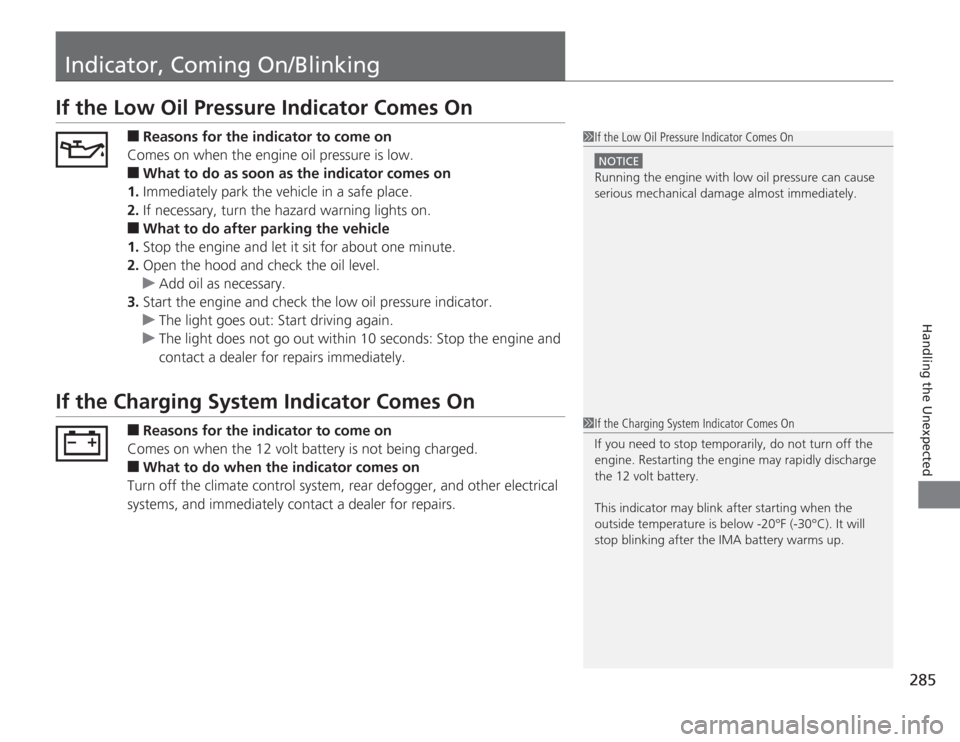
Indicator, Coming On/BlinkingIf the Low Oil Pressure Indicator Comes On
■
Reasons for the indicator to come on
Comes on when the engine oil pressure is low.
■
What to do as soon as the indicator comes on
1. Immediately park the vehicle in a safe place.
2. If necessary, turn the hazard warning lights on.
■
What to do after parking the vehicle
1. Stop the engine and let it sit for about one minute.
2. Open the hood and check the oil level.
u Add oil as necessary.
3. Start the engine and check the low oil pressure indicator.
u The light goes out: Start driving again.
u The light does not go out within 10 seconds: Stop the engine and
contact a dealer for repairs immediately.
If the Charging System Indicator Comes On
■
Reasons for the indicator to come on
Comes on when the 12 volt battery is not being charged.
■
What to do when the indicator comes on
Turn off the climate control system, rear defogger, and other electrical
systems, and immediately contact a dealer for repairs.
1 If the Low Oil Pressure Indicator Comes On
NOTICERunning the engine with low oil pressure can cause
serious mechanical damage almost immediately.1If the Charging System Indicator Comes On
If you need to stop temporarily, do not turn off the
engine. Restarting the engine may rapidly discharge
the 12 volt battery.
This indicator may blink after starting when the
outside temperature is below -20°F (-30°C). It will
stop blinking after the IMA battery warms up.
Page 290 of 313
289
Continued
Handling the Unexpected
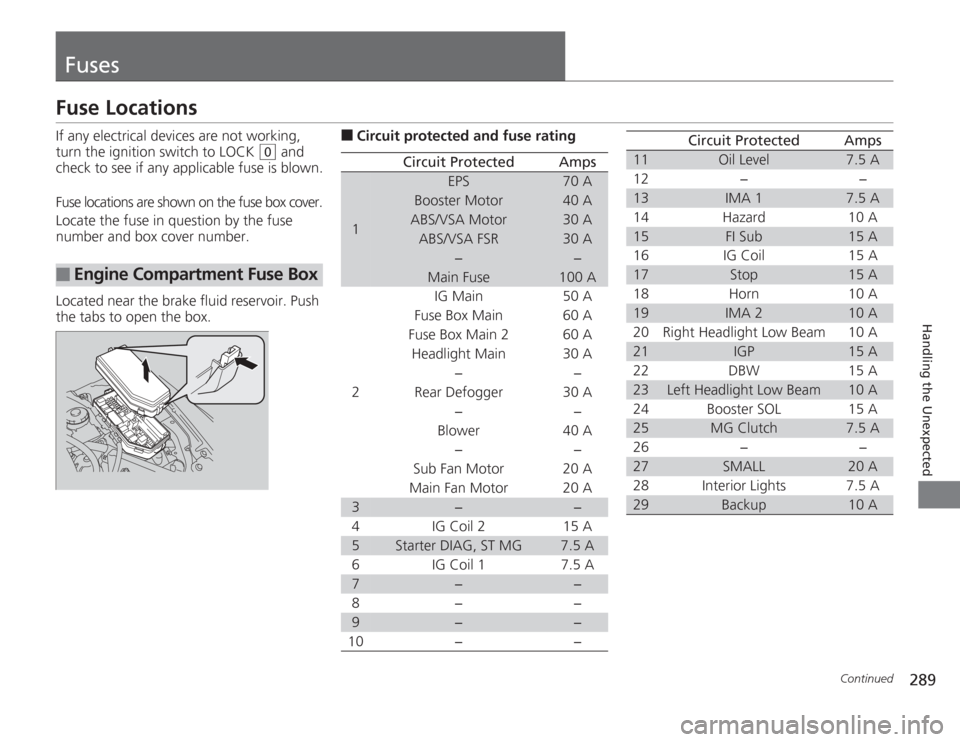
FusesFuse LocationsIf any electrical devices are not working,
turn the ignition switch to LOCK
(0
and
check to see if any applicable fuse is blown.
Fuse locations are shown on the fuse box cover.
Locate the fuse in question by the fuse
number and box cover number.
Located near the brake fluid reservoir. Push
the tabs to open the box.
■
Engine Compartmen t Fuse Box
■
Circuit protected and fuse rating
Circuit Protected
Amps
1
EPS
70 A
Booster Motor
40 A
ABS/VSA Motor
30 A
ABS/VSA FSR
30 A
−
−
Main Fuse
100 A
2
IG Main
50 A
Fuse Box Main 60 A
Fuse Box Main 2
60 A
Headlight Main 30 A
−
−
Rear Defogger 30 A −−
Blower 40 A
−−
Sub Fan Motor 20 A
Main Fan Motor 20 A
3
−
−
4 IG Coil 2 15 A
5
Starter DIAG, ST MG
7.5 A
6 IG Coil 1 7.5 A
7
−
−
8− −
9
−
−
10 − −
11
Oil Level
7.5 A
12 − −
13
IMA 1
7.5 A
14 Hazard 10 A
15
FI Sub
15 A
16 IG Coil 15 A
17
Stop
15 A
18 Horn 10 A
19
IMA 2
10 A
20 Right Headlight Low Beam 10 A
21
IGP
15 A
22 DBW 15 A
23
Left Headlight Low Beam
10 A
24 Booster SOL 15 A
25
MG Clutch
7.5 A
26 − −
27
SMALL
20 A
28 Interior Lights 7.5 A
29
Backup
10 A
Circuit Protected
Amps