key HONDA CIVIC HYBRID 2012 9.G Owners Manual
[x] Cancel search | Manufacturer: HONDA, Model Year: 2012, Model line: CIVIC HYBRID, Model: HONDA CIVIC HYBRID 2012 9.GPages: 313, PDF Size: 8.65 MB
Page 23 of 313
22Quick Reference Guide
What to Do If
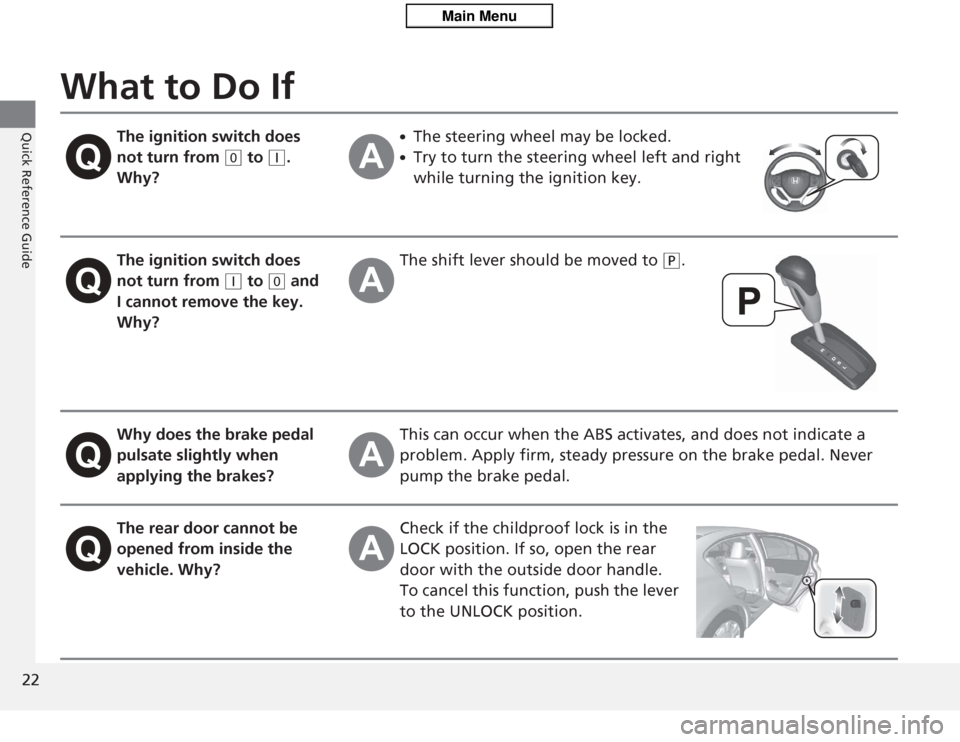
The ignition switch does
not turn from
(0
to
(q
.
Why?
●
The steering wheel may be locked.
●
Try to turn the steering wheel left and right
while turning the ignition key.
The ignition switch does
not turn from
(q
to
(0
and
I cannot remove the key.
Why? The shift lever s
hould be moved to
(P
.
Why does the brake pedal
pulsate slightly when
applying the brakes? This can occur when the ABS act
ivates, and does not indicate a
problem. Apply firm, steady pressure on the brake pedal. Never
pump the brake pedal.
The rear door cannot be
opened from inside the
vehicle. Why? Check if the childproof lock is in the
LOCK position. If so, open the rear
door with the outside door handle.
To cancel this function, push the lever
to the UNLOCK position.
Page 24 of 313
23Quick Reference Guide
Why do the doors lock
after I unlocked the doors
using a remote
transmitter?If you do not open the doors within 30 seconds, the doors are
relocked automatically for security.
Why does the beeper
sound when I open the
driver's door? The beeper sounds when:
●
The key is left in the ignition switch.
●
The exterior lights are left on.
●
The Auto Idle Stop is in operation.
Why does the beeper
sound when I start driving? The beeper sounds when:
●
Driver and/or front passenger are
not wearing their seat belts.
●
The parking brake lever is not fully released.
Why do I hear a screeching
sound when I apply the
brake pedal? The brake pads may need to be
replaced. Have your vehicle
inspected by a dealer.
Page 59 of 313
uuChild Safety uSafety of Infants and Small Children
58Safe Driving
Most child seats are LATCH-compatible (Lower Anchors and Tethers for CHildren).
Some have a rigid-type connector, while others have a flexible-type connector. Both
are equally easy to use. Some existing and previously owned child seats can only be
installed using the seat belt. Whichever type you choose, follow the child seat
manufacturer's use and care instructions as well as the instructions in this manual.
Proper installation is key to maximizing your child's safety.
In seating positions and vehicl es not equipped with LATCH, a LATCH compatible
child seat can be installed using the seat bel t and a top tether for added security.
This is because all child seats are required to be designed so that they can be secured
with a lap belt or the lap part of a lap/shoulder belt. In addition, the child seat
manufacturer may advise that a seat belt be used to attach a LATCH-compatible seat
once a child reaches a specified weight. Please read the child seat owner’s manual
for proper installation instructions.■
Important consideration when sele cting a child seat
Make sure the child seat meets the following three requirements:
• The child seat is the correct type and size for the child.
• The child seat is the correct type for the seating position.
• The child seat is compliant with Federal Motor Vehicle Safety Standard 213 or
Canadian Motor Vehicle Safety Standard 213.
■
Selecting a Child Seat
1Selecting a Child Seat
Installation of a LATCH-compatible child seat is
simple.
LATCH-compatible child seats have been developed
to simplify the installation process and reduce the
likelihood of injuries caused by incorrect installation.
Page 78 of 313
77
uuIndicators u
Continued
Instrument Panel
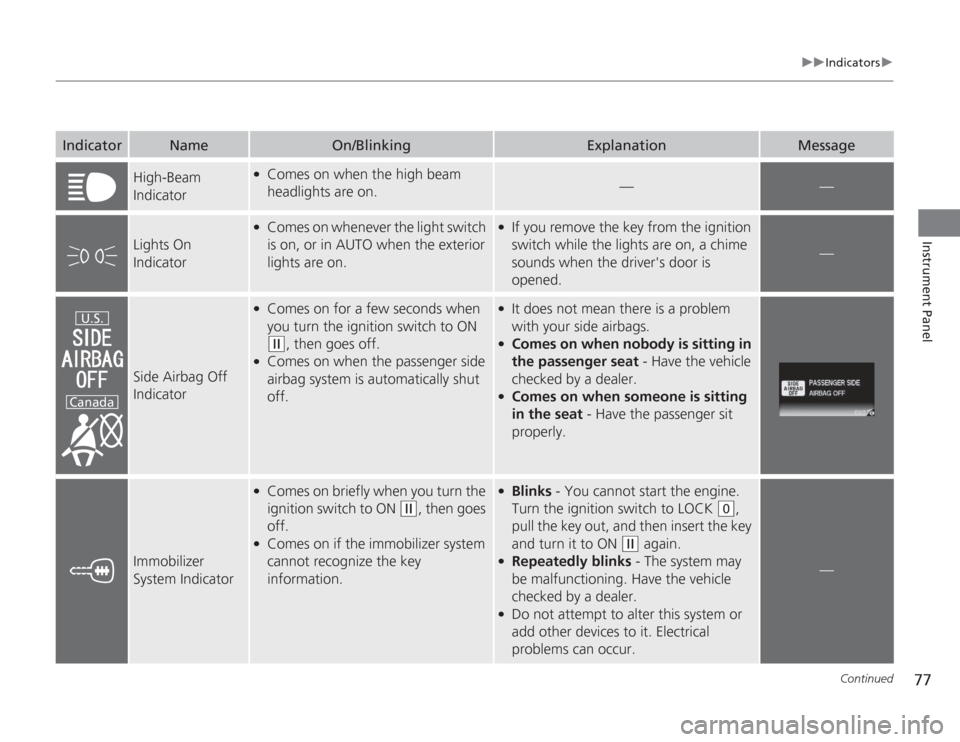
Indicator
Name
On/Blinking
Explanation
Message
High-Beam
Indicator
●
Comes on when the high beam
headlights are on.
—
—
Lights On
Indicator
●
Comes on whenever the light switch
is on, or in AUTO when the exterior
lights are on.
●
If you remove the key from the ignition
switch while the lights are on, a chime
sounds when the driver's door is
opened.
—
Side Airbag Off
Indicator
●
Comes on for a few seconds when
you turn the ignition switch to ON (w
, then goes off.
●
Comes on when the passenger side
airbag system is automatically shut
off.
●
It does not mean there is a problem
with your side airbags.
●
Comes on when nobo dy is sitting in
the passenger seat - Have the vehicle
checked by a dealer.
●
Comes on when someone is sitting
in the seat - Have the passenger sit
properly.
Immobilizer
System Indicator
●
Comes on briefly when you turn the
ignition switch to ON
(w
, then goes
off.
●
Comes on if the immobilizer system
cannot recognize the key
information.
●
Blinks - You cannot start the engine.
Turn the ignition switch to LOCK
(0
,
pull the key out, and then insert the key
and turn it to ON
(w
again.
●
Repeatedly blinks - The system may
be malfunctioning. Have the vehicle
checked by a dealer.
●
Do not attempt to alter this system or
add other devices to it. Electrical
problems can occur.
—
U.S.
Canada
Page 82 of 313
81
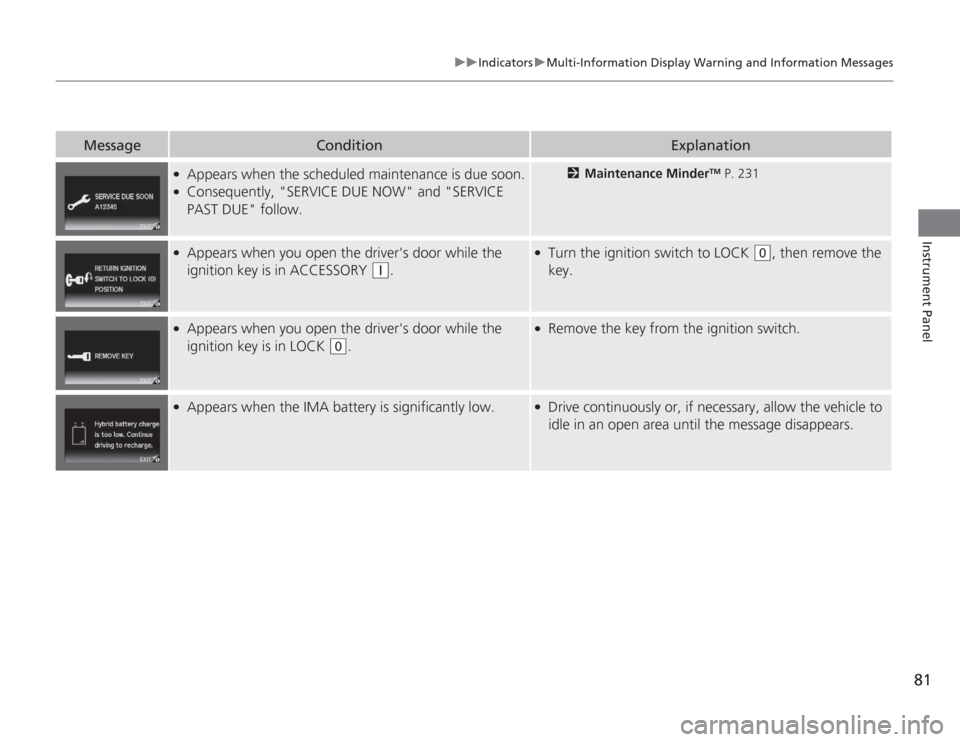
uuIndicators uMulti-Information Display Warning and Information Messages
Instrument Panel
Message
Condition
Explanation
●
Appears when the scheduled maintenance is due soon.
●
Consequently, "SERVICE DUE NOW" and "SERVICE
PAST DUE" follow.
2 Maintenance Minder
TM P. 231
●
Appears when you open the driver's door while the
ignition key is in ACCESSORY
(q
.
●
Turn the ignition switch to LOCK
(0
, then remove the
key.
●
Appears when you open the driver's door while the
ignition key is in LOCK
(0
.
●
Remove the key from the ignition switch.
●
Appears when the IMA battery is significantly low.
●
Drive continuously or, if necessary, allow the vehicle to
idle in an open area until the message disappears.
Page 93 of 313
92
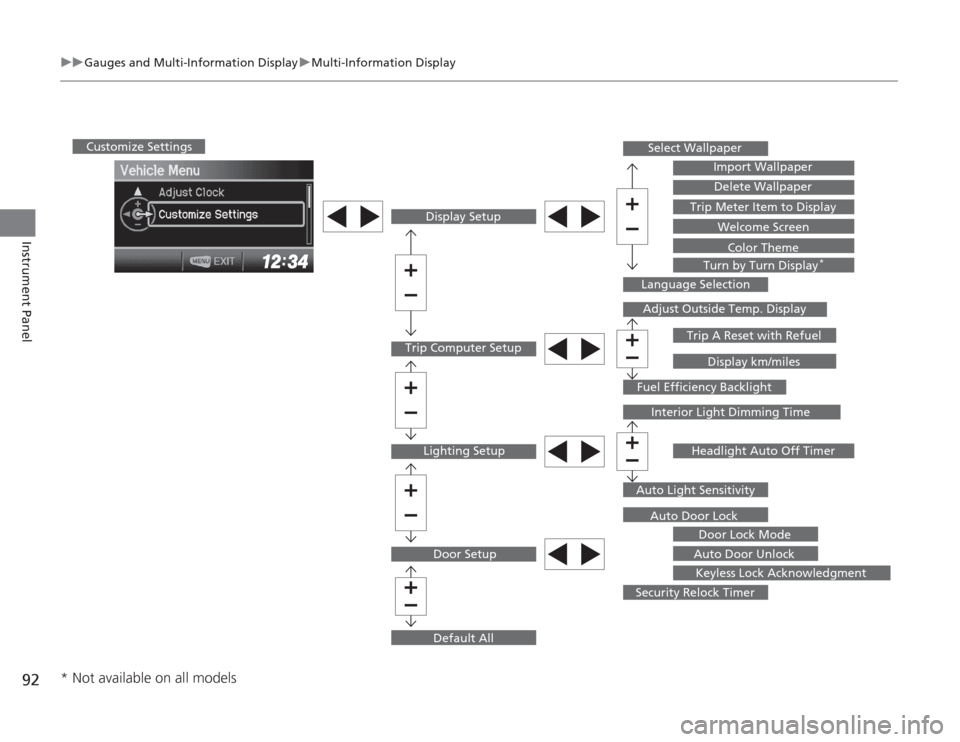
uuGauges and Multi- Information Display uMulti-Information Display
Instrument Panel
Trip Computer Setup Display Setup
Lighting Setup
Customize Settings
Door SetupSelect Wallpaper
Import Wallpaper
Delete Wallpaper
Trip Meter Item to Display Welcome Screen
Color Theme
Turn by Turn Display
*
Language Selection
Adjust Outside Temp. Display
Trip A Reset with RefuelDisplay km/miles
Fuel Efficiency Backlight
Interior Light Dimming Time
Headlight Auto Off Timer
Auto Light Sensitivity Auto Door Lock Door Lock Mode
Auto Door Unlock Keyless Lock Acknowledgment
Security Relock Timer
Default All
* Not available on all models
Page 97 of 313
96
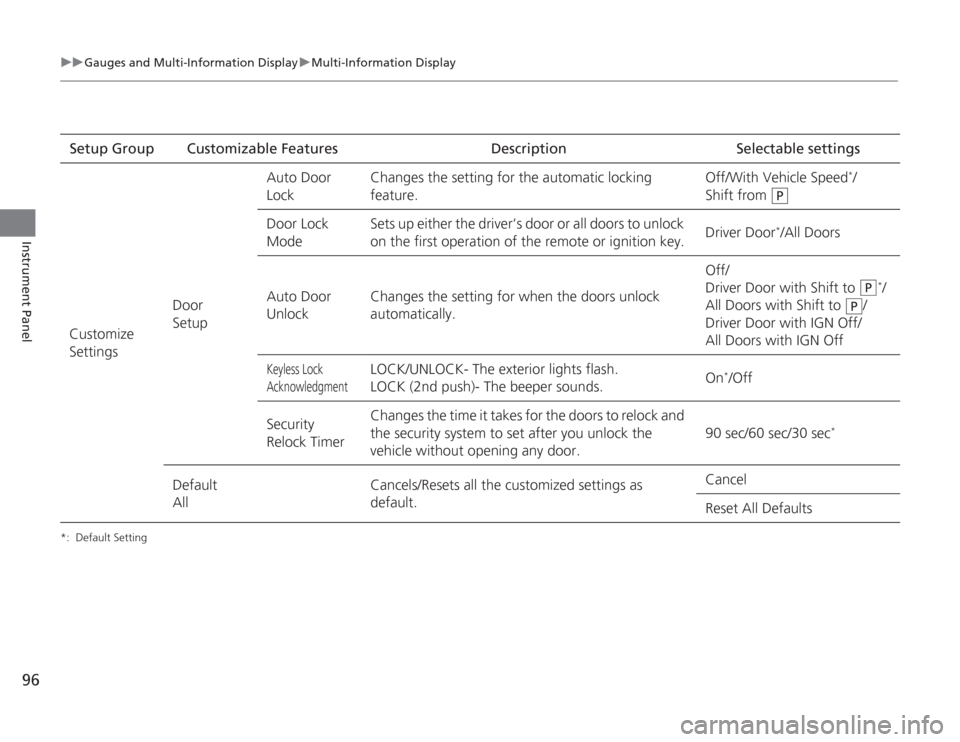
uuGauges and Multi- Information Display uMulti-Information Display
Instrument Panel
*: Default SettingSetup Group Customizable Features DescriptionSelectable settings
Customize
Settings Door
SetupAuto Door
Lock
Changes the setting for the automatic locking
feature. Off/With Vehicle Speed
*/
Shift from
Door Lock
Mode Sets up either the driver’s door or all doors to unlock
on the first operation of the remote or ignition key.
Driver Door
*/All Doors
Auto Door
UnlockChanges the setting fo
r when the doors unlock
automatically. Off/
Driver Door with Shift to
*/
All Doors with Shift to /
Driver Door with IGN Off/
All Doors with IGN Off
Keyless Lock
Acknowledgment
LOCK/UNLOCK- The exterior lights flash.
LOCK (2nd push)- The beeper sounds. On
*/Off
Security
Relock Timer Changes the time it takes for the doors to relock and
the security system to set after you unlock the
vehicle without opening any door.
90 sec/60 sec/30 sec
*
Default
AllCancels/Resets all the customized settings as
default. Cancel
Reset All Defaults
P
P
P
Page 102 of 313
101
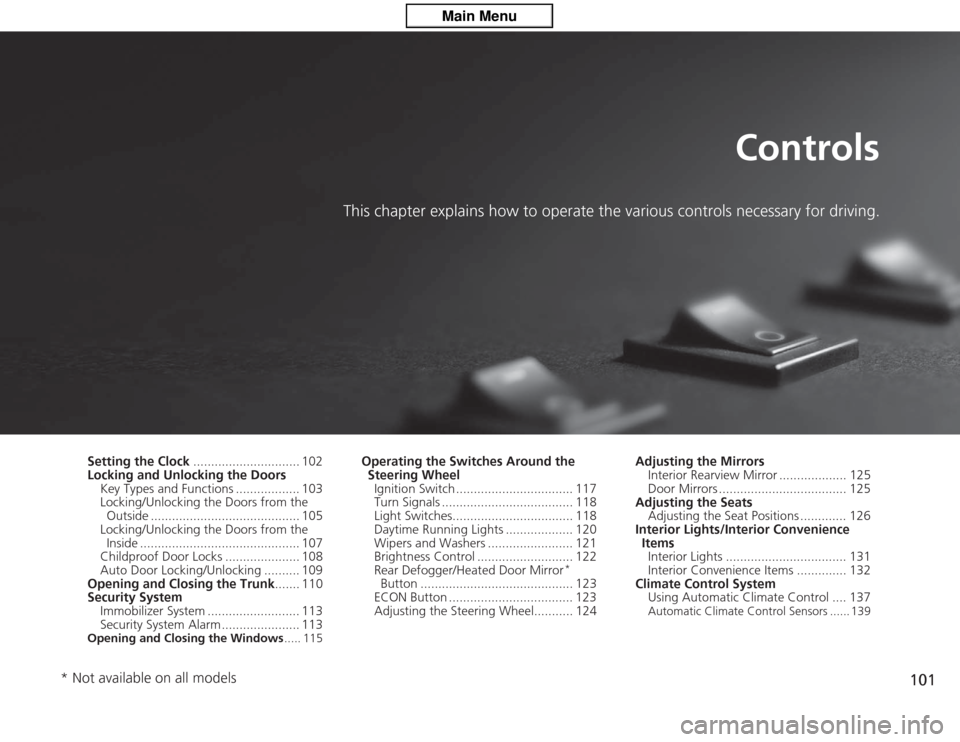
Controls
This chapter explains how to operate the various controls necessary for driving.
Setting the Clock.............................. 102
Locking and Unlocking the Doors
Key Types and Functions .................. 103
Locking/Unlocking the Doors from the Outside .......................................... 105
Locking/Unlocking the Doors from the Inside ............................................. 107
Childproof Door Locks ..................... 108
Auto Door Locking/Unlocking .......... 109
Opening and Closing the Trunk ....... 110
Security System
Immobilizer System .......................... 113
Security System Alarm ...................... 113Opening and Closing the Windows ..... 115
Operating the Switches Around the
Steering Wheel
Ignition Switch ................................. 117
Turn Signals ..................................... 118
Light Switches.................................. 118
Daytime Running Lights ................... 120
Wipers and Washers ........................ 121
Brightness Control ........................... 122
Rear Defogger/Heated Door Mirror
*
Button ........................................... 123
ECON Button ................................... 123
Adjusting the Steering Wheel........... 124 Adjusting the Mirrors
Interior Rearview Mirror ................... 125
Door Mirrors .................................... 125
Adjusting the Seats Adjusting the Seat Positions ............. 126
Interior Lights/Interior Convenience ItemsInterior Lights .................................. 131
Interior Convenience Items .............. 132
Climate Control System Using Automatic Climate Control .... 137
Automatic Climate Control Sensors ...... 139
* Not available on all models
Page 104 of 313
103
Continued
Controls
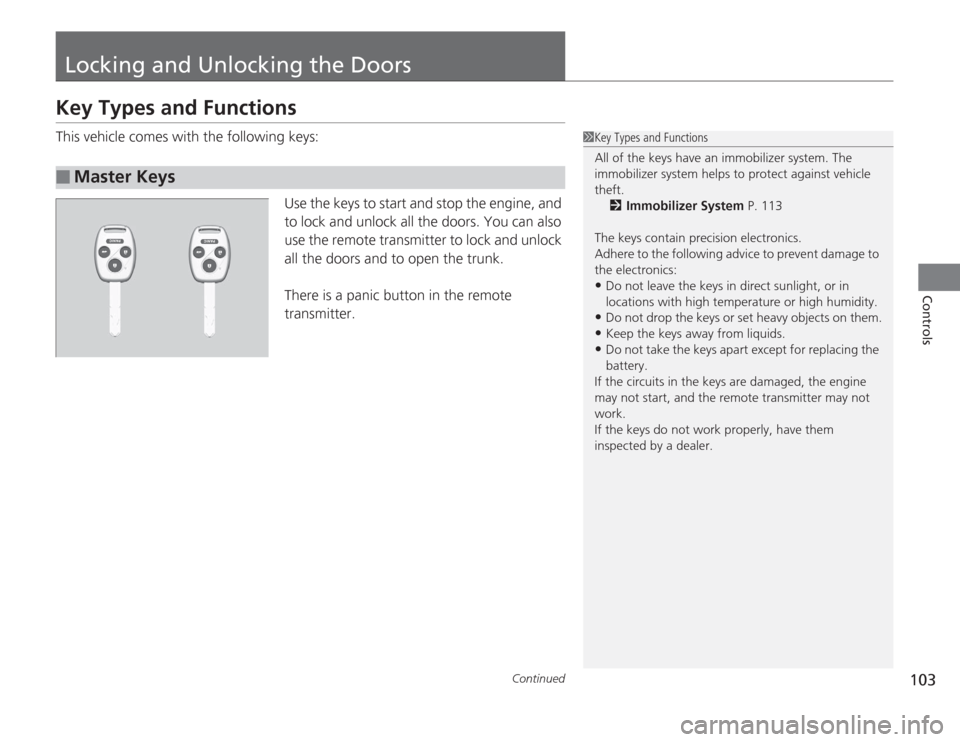
Locking and Unlocking the DoorsKey Types and FunctionsThis vehicle comes with the following keys:Use the keys to start and stop the engine, and
to lock and unlock all the doors. You can also
use the remote transmitter to lock and unlock
all the doors and to open the trunk.
There is a panic button in the remote
transmitter.■
Master Keys
1Key Types and Functions
All of the keys have an immobilizer system. The
immobilizer system helps to protect against vehicle
theft.
2 Immobilizer System P. 113
The keys contain precision electronics.
Adhere to the following advice to prevent damage to
the electronics:•Do not leave the keys in direct sunlight, or in
locations with high temperature or high humidity.•Do not drop the keys or set heavy objects on them.•Keep the keys away from liquids.•Do not take the keys apa rt except for replacing the
battery.
If the circuits in the keys are damaged, the engine
may not start, and the re mote transmitter may not
work.
If the keys do not work properly, have them
inspected by a dealer.
Page 105 of 313
uuLocking and Unlocking the Doors uKey Types and Functions
104Controls
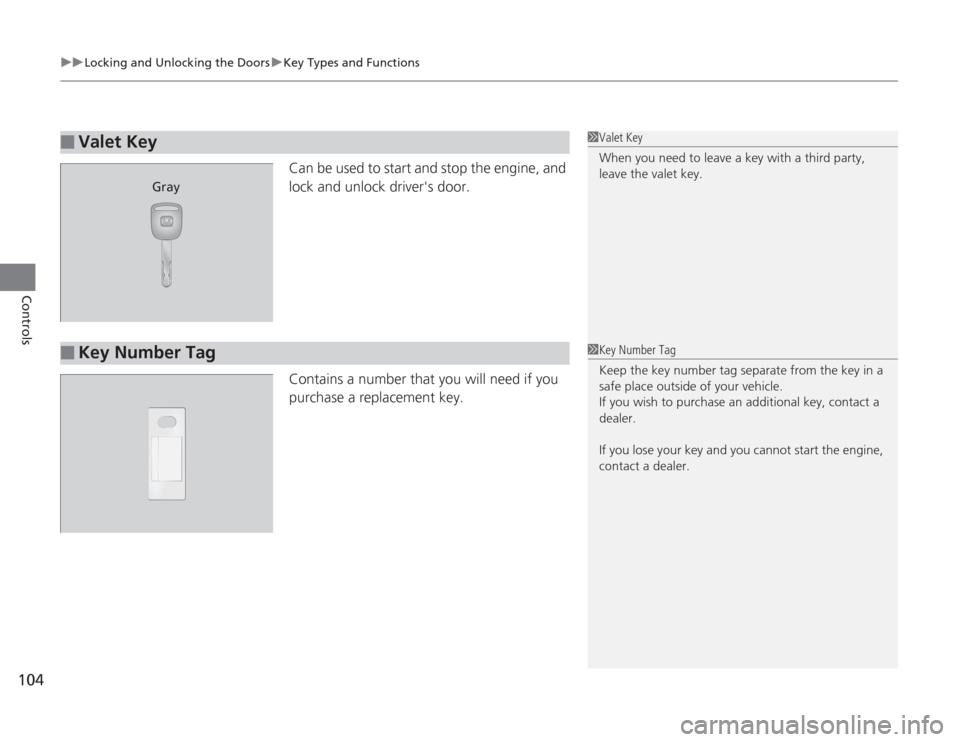
Can be used to start and stop the engine, and
lock and unlock driver's door.
Contains a number that you will need if you
purchase a replacement key.
■
Valet Key
1Valet Key
When you need to leave a key with a third party,
leave the valet key.
Gray
■
Key Number Tag
1Key Number Tag
Keep the key number tag separate from the key in a
safe place outside of your vehicle.
If you wish to purchase an additional key, contact a
dealer.
If you lose your key and you cannot start the engine,
contact a dealer.