brake HONDA CIVIC HYBRID 2013 9.G Owner's Guide
[x] Cancel search | Manufacturer: HONDA, Model Year: 2013, Model line: CIVIC HYBRID, Model: HONDA CIVIC HYBRID 2013 9.GPages: 346, PDF Size: 6.95 MB
Page 232 of 346
231
uuWhen DrivinguForward Collision Warning (FCW)
*
Driving
FCW may not activate or may not detect a vehicle in front of your vehicle, and may activate even when you are aware of a vehicle ahead
of you, or when there is no vehicle ahead under the following conditions.■FCW Limitations
Condition
●The distance between your vehicle and the vehicle ahead of you is too short.●A vehicle cuts in front of you at a slow speed, and it brakes suddenly.●A vehicle suddenly crosses in front of you.●When either your vehicle or the vehicle ahead of you accelerates rapidly.●The vehicle ahead of you is a motorcycle, a small vehicle, or a unique vehicle such as a tractor.●When you drive off-road or on a mountain road, or curved and winding road for an extended period that makes it difficult for the camera to properly
detect a vehicle in front of you.●When there are pedestrians or animals in front of your vehicle.●When you drive in bad weather (rain, fog, etc.).●A heavy load in the rear or modifications to the suspension tilts your vehicle.●An abnormal tire condition is detected (wrong tire size, flat tire, etc.).●When the windshield is blocked by dirt, mud, leaves, wet snow, etc.●When the temperature inside the system is high.●A sudden change between light and dark such as an entrance or exit of a tunnel.●You drive into the sunlight (e.g. at dawn or dusk).●When the windshield is dirty or cloudy.●When streetlights are perceived as the taillight of a vehicle in front of yours.●When driving at night, the vehicle ahead of you is running with either taillight bulb burned out.●When you drive in the shadows of trees, buildings, etc.
Page 234 of 346
Continued
233
uuWhen DrivinguLane Departure Warning (LDW)
*
Driving
The system begins to search for lane markings when all the following conditions are met:
•The vehicle is traveling between at 40-90 mph (64-145 km/h).
•The vehicle is on a straight or slightly curved road.
•The turn signals are off.
•The brake pedal is not depressed.
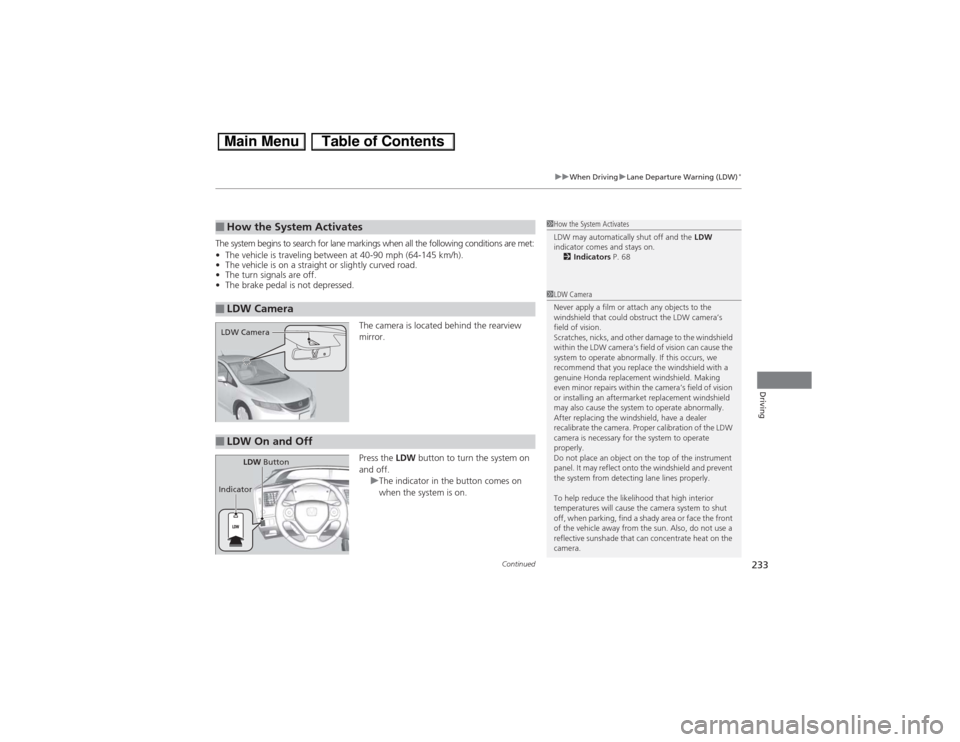
The camera is located behind the rearview
mirror.
Press the LDW button to turn the system on
and off.
uThe indicator in the button comes on
when the system is on.■How the System Activates■LDW Camera
1How the System Activates
LDW may automatically shut off and the LDW
indicator comes and stays on.
2Indicators P. 681LDW Camera
Never apply a film or attach any objects to the
windshield that could obstruct the LDW camera’s
field of vision.
Scratches, nicks, and other damage to the windshield
within the LDW camera’s field of vision can cause the
system to operate abnormally. If this occurs, we
recommend that you replace the windshield with a
genuine Honda replacement windshield. Making
even minor repairs within the camera’s field of vision
or installing an aftermarket replacement windshield
may also cause the system to operate abnormally.
After replacing the windshield, have a dealer
recalibrate the camera. Proper calibration of the LDW
camera is necessary for the system to operate
properly.
Do not place an object on the top of the instrument
panel. It may reflect onto the windshield and prevent
the system from detecting lane lines properly.
To help reduce the likelihood that high interior
temperatures will cause the camera system to shut
off, when parking, find a shady area or face the front
of the vehicle away from the sun. Also, do not use a
reflective sunshade that can concentrate heat on the
camera.
LDW Camera■LDW On and Off
LDW Button
Indicator
Page 236 of 346
235
uuWhen DrivinguVehicle Stability Assist (VSA®), aka Electronic Stability Control (ESC), System
Continued
Driving
Vehicle Stability Assist (VSA®), aka Electronic Stability Control (ESC), SystemVSA® helps to stabilize the vehicle during cornering if the vehicle turns more or less
than what was intended. It also assists in maintaining traction on slippery surfaces.
It does so by regulating engine output and selectively applying the brakes.
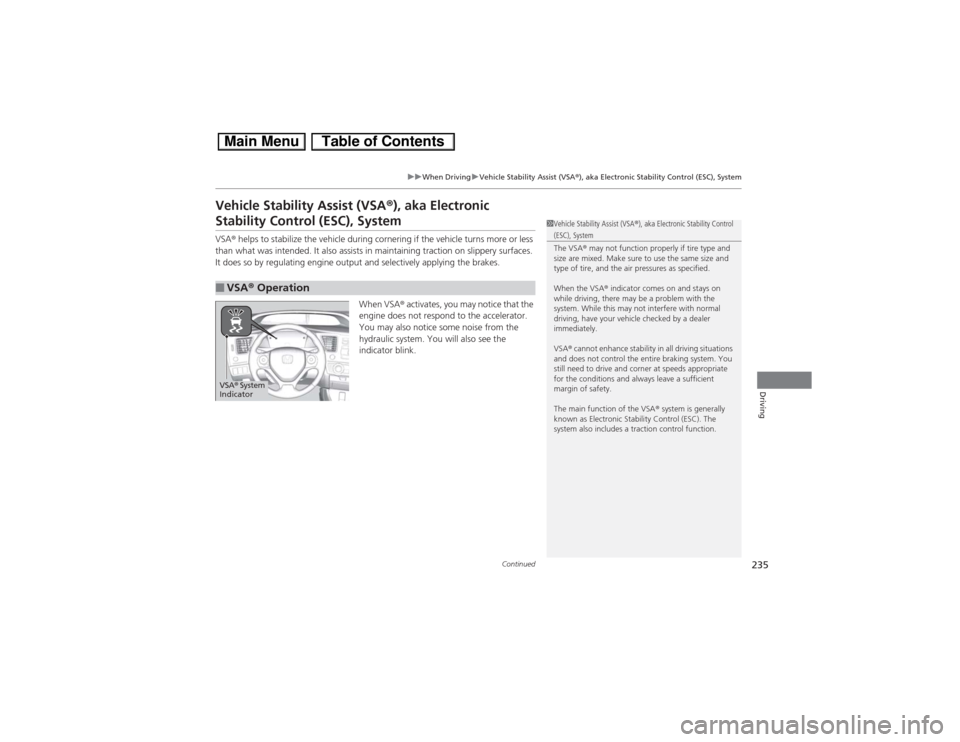
When VSA® activates, you may notice that the
engine does not respond to the accelerator.
You may also notice some noise from the
hydraulic system. You will also see the
indicator blink.■VSA® Operation
1Vehicle Stability Assist (VSA®), aka Electronic Stability Control (ESC), System
The VSA® may not function properly if tire type and
size are mixed. Make sure to use the same size and
type of tire, and the air pressures as specified.
When the VSA® indicator comes on and stays on
while driving, there may be a problem with the
system. While this may not interfere with normal
driving, have your vehicle checked by a dealer
immediately.
VSA® cannot enhance stability in all driving situations
and does not control the entire braking system. You
still need to drive and corner at speeds appropriate
for the conditions and always leave a sufficient
margin of safety.
The main function of the VSA® system is generally
known as Electronic Stability Control (ESC). The
system also includes a traction control function.
VSA® System
Indicator
Page 241 of 346
240Driving
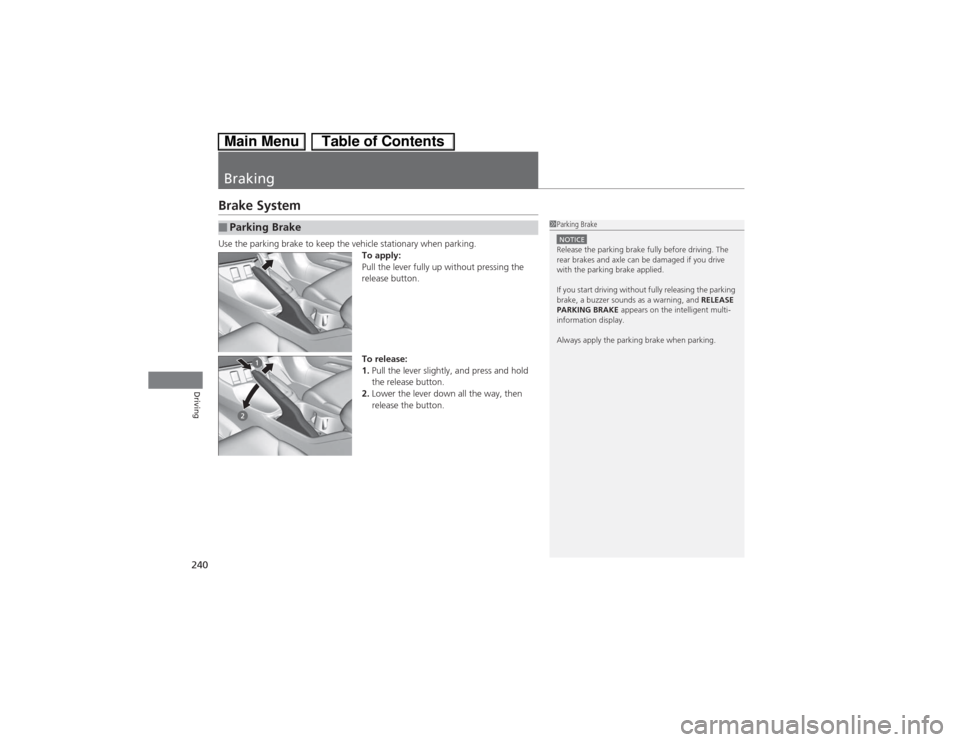
BrakingBrake SystemUse the parking brake to keep the vehicle stationary when parking.
To apply:
Pull the lever fully up without pressing the
release button.
To release:
1.Pull the lever slightly, and press and hold
the release button.
2.Lower the lever down all the way, then
release the button.■Parking Brake
1Parking BrakeNOTICERelease the parking brake fully before driving. The
rear brakes and axle can be damaged if you drive
with the parking brake applied.
If you start driving without fully releasing the parking
brake, a buzzer sounds as a warning, and RELEASE
PARKING BRAKE appears on the intelligent multi-
information display.
Always apply the parking brake when parking.
Page 242 of 346
241
uuBrakinguBrake System
Driving
Your vehicle is equipped with front disc brakes. The brakes on the rear wheels are
drum. A vacuum power assist helps reduce the effort needed on the brake pedal.
The brake assist system increases the stopping force when you depress the brake
pedal hard in an emergency situation. The anti-lock brake system (ABS) helps you
retain steering control when braking very hard.2Brake Assist System P. 243
2Anti-lock Brake System (ABS) P. 242■Foot Brake
1Foot Brake
Check the brakes after driving through deep water,
or if there is a buildup of road surface water. If
necessary, dry the brakes by lightly depressing the
pedal several times.
If you hear a continuous metallic friction sound when
applying the brakes, the brake pads need to be
replaced. Have the vehicle checked by a dealer.
Constantly using the brake pedal while going down a
long hill builds up heat, which reduces the brake
effectiveness. Apply engine braking by taking your
foot off the accelerator pedal and downshifting to a
lower speed position.
Do not rest your foot on the brake pedal while
driving, as it will lightly apply the brakes and cause
them to lose effectiveness over time and reduce pad
life. It will also confuse drivers behind you.
Page 243 of 346
242
uuBrakinguAnti-lock Brake System (ABS)
Driving
Anti-lock Brake System (ABS)Helps prevent the wheels from locking up, and helps you retain steering control by
pumping the brakes rapidly, much faster than you.
The electronic brake distribution (EBD) system, which is part of the ABS, also
balances the front-to-rear braking distribution according to vehicle loading.
You should never pump the brake pedal. Let the ABS work for you by always
keeping firm, steady pressure on the brake pedal. This is sometimes referred to as
“stomp and steer.”■ABS operation
The brake pedal may pulsate slightly when the ABS is working. Keep holding the
pedal firmly down. On dry pavement, you will need to press on the brake pedal very
hard before the ABS activates. However, you may feel the ABS activate immediately
if you are trying to stop on snow or ice.
When the vehicle speed goes under 6 mph (10 km/h), the ABS stops.■ABS
1Anti-lock Brake System (ABS)NOTICEThe ABS may not function correctly if you use an
incorrect tire type and size.
When the ABS indicator comes on while driving,
there may be a problem with the system.
While normal braking is not affected, there is a
possibility of the ABS not operating. Have the vehicle
checked by a dealer immediately.
The ABS does not reduce the time or distance it takes
to stop the vehicle. It only helps with steering control
during hard braking.
In the following cases, your vehicle may need more
stopping distance than a vehicle without the ABS:•When driving on rough road surfaces, including
when driving on uneven surfaces, such as gravel or
snow.•When tire chains are installed.
You may hear a motor sound coming from the
engine compartment while system checks are being
performed immediately after starting the engine or
while driving. This is normal.
Page 244 of 346
243
uuBrakinguBrake Assist System
Driving
Brake Assist SystemDesigned to assist the driver by generating greater braking force when you depress
the brake pedal hard during emergency braking.■Brake assist system operation
Press the brake pedal firmly for more powerful braking.
When brake assist operates, the pedal may wiggle slightly and an operating noise
may be heard. This is normal. Keep holding the brake pedal firmly down.■Brake Assist System
Page 245 of 346
244Driving
Parking Your VehicleWhen Stopped1.Depress the brake pedal firmly.
2.Firmly apply the parking brake.
3.Move the shift lever from
(D to
(P.
4.Turn off the engine.
Always set the parking brake firmly, in particular if you are parked on an incline.
1Parking Your Vehicle
Do not park your vehicle near flammable objects,
such as dry grass, oil, or timber.
Heat from the exhaust can cause a fire.1When StoppedNOTICEThe following can damage the transmission:•Depressing the accelerator and brake pedals
simultaneously.•Holding the vehicle in place when facing uphill by
depressing the accelerator pedal.•Moving the shift lever into
(P before the vehicle
stops completely.
Raise the wiper arms when snow is expected.
Page 252 of 346
251
Maintenance
This chapter discusses basic maintenance.
Before Performing Maintenance
Inspection and Maintenance ............ 252Safety When Performing Maintenance .... 253Parts and Fluids Used in Maintenance
Service ........................................... 254
Maintenance Minder
TM..................... 255
Maintenance Under the Hood
Maintenance Items Under the Hood ..... 259Opening the Hood ........................... 260
Recommended Engine Oil ................ 261
Oil Check ......................................... 262
Adding Engine Oil ............................ 263Changing the Engine Oil and Oil Filter .. 264
Engine Coolant ................................ 266
Transmission Fluid ............................ 268
Brake Fluid ....................................... 269
Refilling Window Washer Fluid......... 270
Replacing Light Bulbs....................... 271Checking and Maintaining Wiper
Blades.......................................... 277Checking and Maintaining Tires
Checking Tires ................................. 279
Tire and Loading Information Label .. 280
Tire Labeling .................................... 280DOT Tire Quality Grading (U.S. Vehicles) .. 282Wear Indicators................................ 284Tire Service Life ................................ 284
Tire and Wheel Replacement ........... 285
Tire Rotation .................................... 286
Winter Tires ..................................... 287
12 Volt Battery.................................. 288
Remote Transmitter Care
Replacing the Button Battery ........... 289
Climate Control System Maintenance...... 290Cleaning
Interior Care .................................... 291
Exterior Care.................................... 293
Page 253 of 346
252Maintenance
Before Performing MaintenanceInspection and MaintenanceFor your safety, perform all listed inspections and maintenance to keep your vehicle
in good condition. If you become aware of any abnormality (noise, smell, insufficient
brake fluid, oil residue on the ground, etc.), have your vehicle inspected by a dealer.
(Note, however, that service at a dealer is not mandatory to keep your warranties in
effect.) Refer to the separate maintenance booklet for detailed maintenance and
inspection information.■Daily inspections
Perform inspections before long distance trips, when washing the vehicle, or when
refueling.■Periodic inspections
•Check the continuously variable transmission fluid level monthly.2Continuously Variable Transmission (CVT) Fluid P. 268
•Check the brake fluid level monthly.
2Checking the Brake Fluid P. 269
•Check the tire pressure monthly. Examine the tread for wear and foreign objects.
2Checking and Maintaining Tires P. 279
•Check the operation of the exterior lights monthly.
2Replacing Light Bulbs P. 271
•Check the condition of the wiper blades at least every six months.
2Checking and Maintaining Wiper Blades P. 277
■Types of Inspection and Maintenance
1Inspection and Maintenance
Maintenance, replacement, or repair of
emissions control devices and systems may be
done by any automotive repair establishment or
individuals using parts that are “certified” to
EPA standards.
According to state and federal regulations, failure to
perform maintenance on the maintenance main
items marked with # will not void your emissions
warranties. However, all maintenance services should
be performed in accordance with the intervals
indicated by the intelligent multi-information display.
2Maintenance Service Items P. 257
If you want to perform complex maintenance tasks
that require more skills and tools, you can purchase a
subscription to the Service Express website at
www.techinfo.honda.com.
2Authorized Manuals P. 335
If you want to perform maintenance yourself, make
sure that you have the necessary tools and skills first.
After performing maintenance, update the records in
the separate maintenance booklet.U.S. models