change time HONDA CIVIC HYBRID 2013 9.G Owners Manual
[x] Cancel search | Manufacturer: HONDA, Model Year: 2013, Model line: CIVIC HYBRID, Model: HONDA CIVIC HYBRID 2013 9.GPages: 346, PDF Size: 6.95 MB
Page 1 of 346
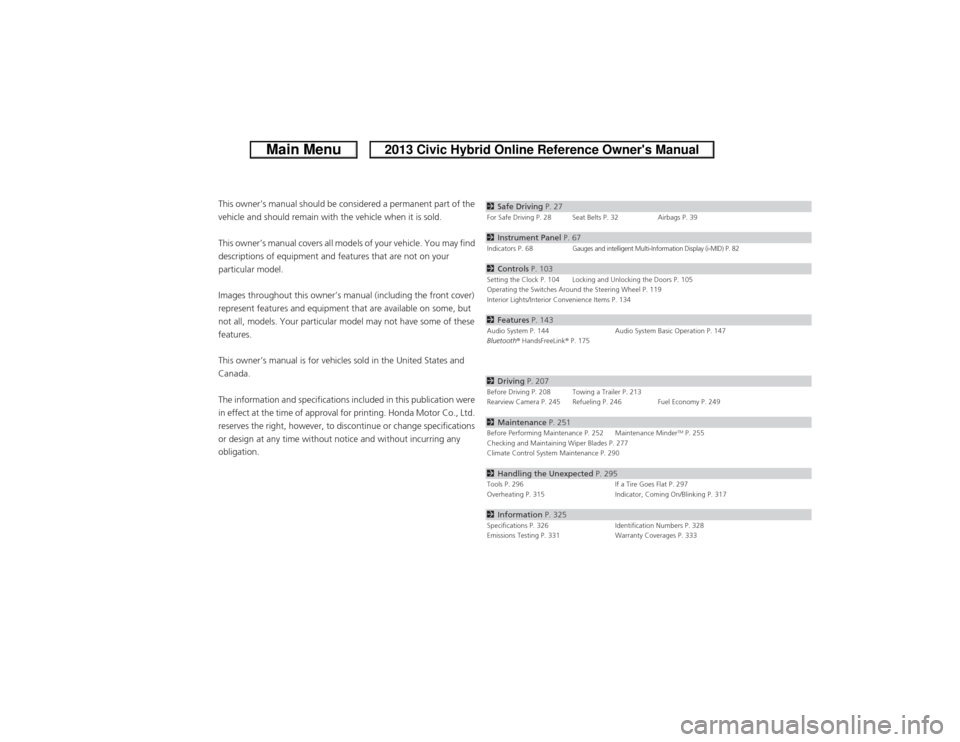
ContentsThis owner’s manual should be considered a permanent part of the
vehicle and should remain with the vehicle when it is sold.
This owner’s manual covers all models of your vehicle. You may find
descriptions of equipment and features that are not on your
particular model.
Images throughout this owner’s manual (including the front cover)
represent features and equipment that are available on some, but
not all, models. Your particular model may not have some of these
features.
This owner’s manual is for vehicles sold in the United States and
Canada.
The information and specifications included in this publication were
in effect at the time of approval for printing. Honda Motor Co., Ltd.
reserves the right, however, to discontinue or change specifications
or design at any time without notice and without incurring any
obligation.
2Safe Driving P. 27For Safe Driving P. 28 Seat Belts P. 32 Airbags P. 392Instrument Panel P. 67Indicators P. 68
Gauges and intelligent Multi-Information Display (i-MID) P. 82
2Controls P. 103Setting the Clock P. 104 Locking and Unlocking the Doors P. 105
Operating the Switches Around the Steering Wheel P. 119
Interior Lights/Interior Convenience Items P. 1342Features P. 143Audio System P. 144 Audio System Basic Operation P. 147
Bluetooth® HandsFreeLink® P. 1752Driving P. 207Before Driving P. 208 Towing a Trailer P. 213
Rearview Camera P. 245 Refueling P. 246 Fuel Economy P. 2492Maintenance P. 251Before Performing Maintenance P. 252 Maintenance Minder
TM P. 255
Checking and Maintaining Wiper Blades P. 277
Climate Control System Maintenance P. 290
2Handling the Unexpected P. 295Tools P. 296 If a Tire Goes Flat P. 297
Overheating P. 315 Indicator, Coming On/Blinking P. 3172Information P. 325Specifications P. 326 Identification Numbers P. 328
Emissions Testing P. 331 Warranty Coverages P. 333
Page 75 of 346
74
uuIndicatorsu
Instrument Panel
Indicator
Name
On/Blinking
Explanation
Message
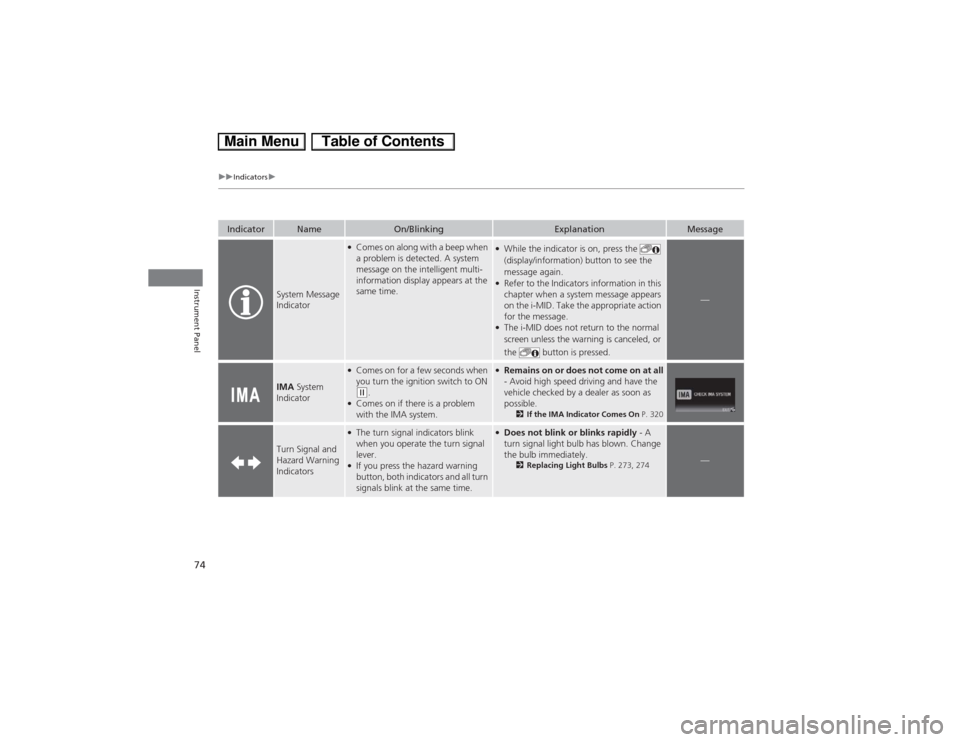
System Message
Indicator
●Comes on along with a beep when
a problem is detected. A system
message on the intelligent multi-
information display appears at the
same time.
●While the indicator is on, press the
(display/information) button to see the
message again.●Refer to the Indicators information in this
chapter when a system message appears
on the i-MID. Take the appropriate action
for the message.●The i-MID does not return to the normal
screen unless the warning is canceled, or
the button is pressed.
—
IMA System
Indicator
●Comes on for a few seconds when
you turn the ignition switch to ON (w.
●Comes on if there is a problem
with the IMA system.
●Remains on or does not come on at all
- Avoid high speed driving and have the
vehicle checked by a dealer as soon as
possible.
2If the IMA Indicator Comes On P. 320
Turn Signal and
Hazard Warning
Indicators
●The turn signal indicators blink
when you operate the turn signal
lever.●If you press the hazard warning
button, both indicators and all turn
signals blink at the same time.
●Does not blink or blinks rapidly - A
turn signal light bulb has blown. Change
the bulb immediately.
2Replacing Light Bulbs P. 273, 274
—
Page 86 of 346
Continued
85
uuGauges and intelligent Multi-Information Display (i-MID)uintelligent Multi-Information Display (i-MID)
Instrument Panel
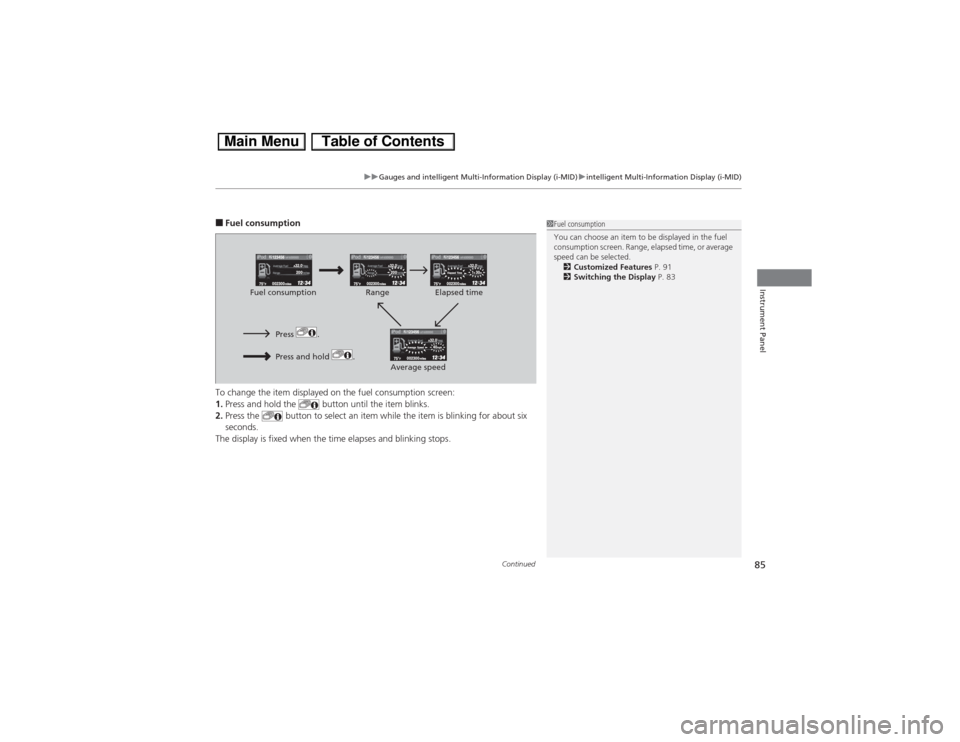
■Fuel consumption
To change the item displayed on the fuel consumption screen:
1.Press and hold the button until the item blinks.
2.Press the button to select an item while the item is blinking for about six
seconds.
The display is fixed when the time elapses and blinking stops.
1Fuel consumption
You can choose an item to be displayed in the fuel
consumption screen. Range, elapsed time, or average
speed can be selected.
2Customized Features P. 91
2Switching the Display P. 83
Press .Press and hold .
Average speedElapsed time Range Fuel consumption
Page 87 of 346
uuGauges and intelligent Multi-Information Display (i-MID)uintelligent Multi-Information Display (i-MID)
86Instrument Panel
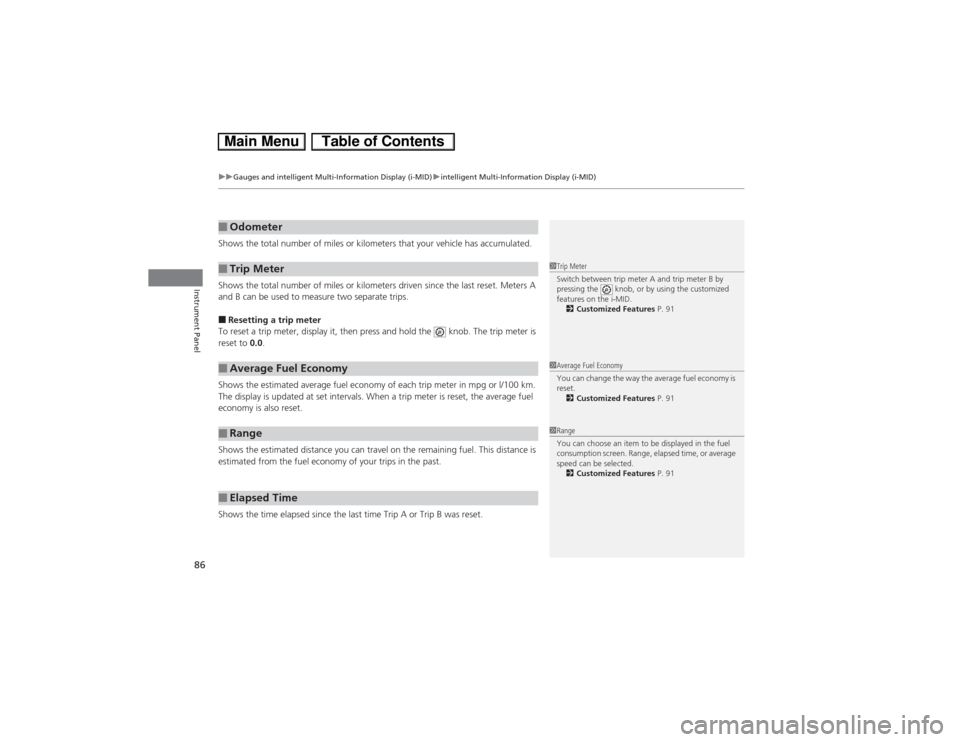
Shows the total number of miles or kilometers that your vehicle has accumulated.
Shows the total number of miles or kilometers driven since the last reset. Meters A
and B can be used to measure two separate trips.■Resetting a trip meter
To reset a trip meter, display it, then press and hold the knob. The trip meter is
reset to 0.0.
Shows the estimated average fuel economy of each trip meter in mpg or l/100 km.
The display is updated at set intervals. When a trip meter is reset, the average fuel
economy is also reset.
Shows the estimated distance you can travel on the remaining fuel. This distance is
estimated from the fuel economy of your trips in the past.
Shows the time elapsed since the last time Trip A or Trip B was reset.■Odometer■Trip Meter■Average Fuel Economy■Range■Elapsed Time
1Trip Meter
Switch between trip meter A and trip meter B by
pressing the knob, or by using the customized
features on the i-MID.
2Customized Features P. 911Average Fuel Economy
You can change the way the average fuel economy is
reset.
2Customized Features P. 911Range
You can choose an item to be displayed in the fuel
consumption screen. Range, elapsed time, or average
speed can be selected.
2Customized Features P. 91
Page 89 of 346
88
uuGauges and intelligent Multi-Information Display (i-MID)uintelligent Multi-Information Display (i-MID)
Instrument Panel
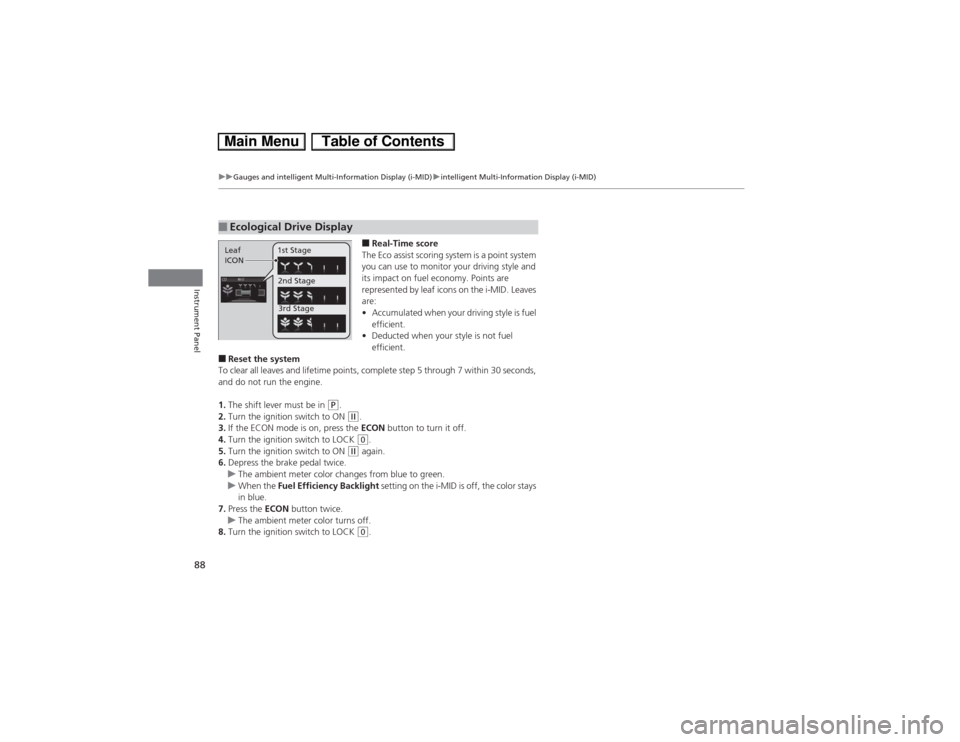
■Real-Time score
The Eco assist scoring system is a point system
you can use to monitor your driving style and
its impact on fuel economy. Points are
represented by leaf icons on the i-MID. Leaves
are:
•Accumulated when your driving style is fuel
efficient.
•Deducted when your style is not fuel
efficient.
■Reset the system
To clear all leaves and lifetime points, complete step 5 through 7 within 30 seconds,
and do not run the engine.
1.The shift lever must be in
(P.
2.Turn the ignition switch to ON (w.
3.If the ECON mode is on, press the ECON button to turn it off.
4.Turn the ignition switch to LOCK (0.
5.Turn the ignition switch to ON
(w again.
6.Depress the brake pedal twice.
uThe ambient meter color changes from blue to green.
uWhen the Fuel Efficiency Backlight setting on the i-MID is off, the color stays
in blue.
7.Press the ECON button twice.
uThe ambient meter color turns off.
8.Turn the ignition switch to LOCK (0.
■Ecological Drive DisplayLeaf
ICON1st Stage
2nd Stage
3rd Stage
Page 97 of 346
96
uuGauges and intelligent Multi-Information Display (i-MID)uintelligent Multi-Information Display (i-MID)
Instrument Panel
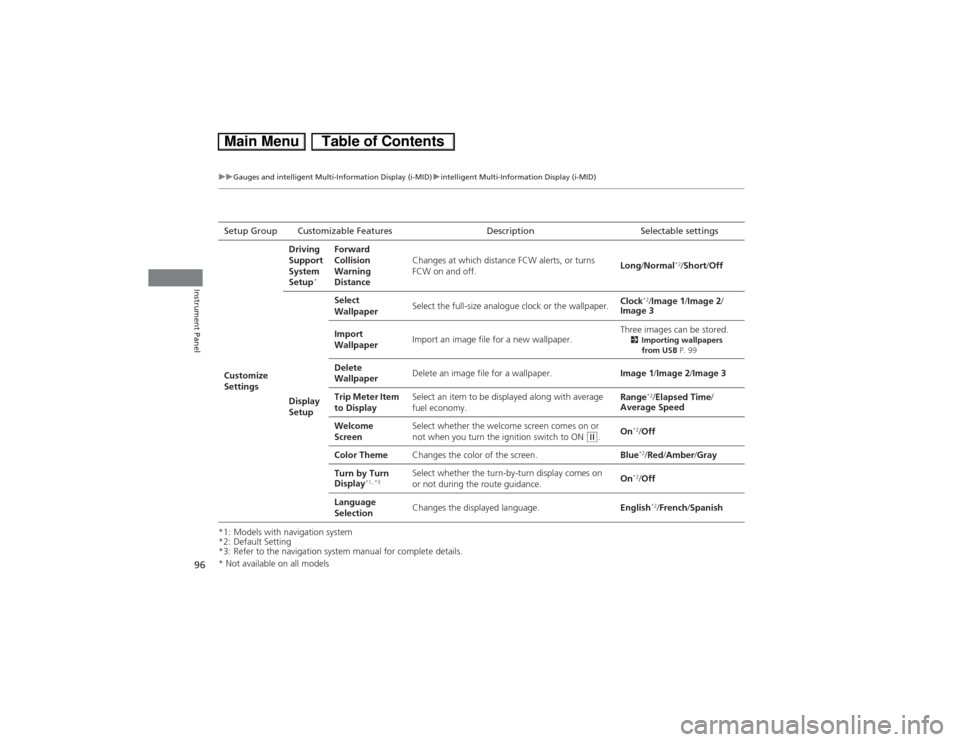
*1: Models with navigation system
*2: Default Setting
*3: Refer to the navigation system manual for complete details.Setup Group Customizable Features Description Selectable settings
Customize
SettingsDriving
Support
System
Setup
*
Forward
Collision
Warning
DistanceChanges at which distance FCW alerts, or turns
FCW on and off.Long/Normal
*2/Short/Off
Display
SetupSelect
WallpaperSelect the full-size analogue clock or the wallpaper.Clock
*2/Image 1/Image 2/
Image 3
Import
WallpaperImport an image file for a new wallpaper.Three images can be stored.
2Importing wallpapers
from USB P. 99
Delete
WallpaperDelete an image file for a wallpaper.Image 1/Image 2/Image 3
Trip Meter Item
to DisplaySelect an item to be displayed along with average
fuel economy.Range
*2/Elapsed Time/
Average Speed
Welcome
ScreenSelect whether the welcome screen comes on or
not when you turn the ignition switch to ON
(w.On
*2/Off
Color ThemeChanges the color of the screen.Blue*2/Red/Amber/Gray
Turn by Turn
Display
*1, *3
Select whether the turn-by-turn display comes on
or not during the route guidance.On
*2/Off
Language
SelectionChanges the displayed language.English*2/French/Spanish
* Not available on all models
Page 98 of 346
97
uuGauges and intelligent Multi-Information Display (i-MID)uintelligent Multi-Information Display (i-MID)
Continued
Instrument Panel
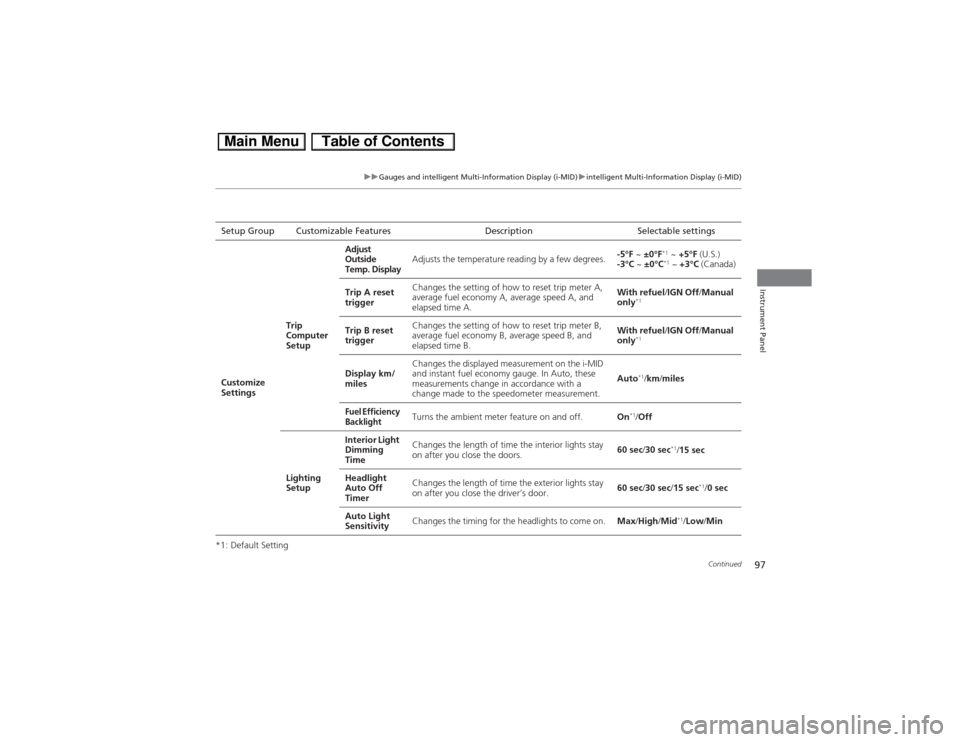
*1: Default SettingSetup Group Customizable Features Description Selectable settings
Customize
SettingsTrip
Computer
SetupAdjust
Outside
Temp. DisplayAdjusts the temperature reading by a few degrees.-5°F ~ ±0°F
*1 ~ +5°F (U.S.)
-3°C ~ ±0°C*1 ~ +3°C (Canada)
Trip A reset
triggerChanges the setting of how to reset trip meter A,
average fuel economy A, average speed A, and
elapsed time A.With refuel/IGN Off/Manual
only
*1
Trip B reset
triggerChanges the setting of how to reset trip meter B,
average fuel economy B, average speed B, and
elapsed time B.With refuel/IGN Off/Manual
only
*1
Display km/
milesChanges the displayed measurement on the i-MID
and instant fuel economy gauge. In Auto, these
measurements change in accordance with a
change made to the speedometer measurement.Auto
*1/km/miles
Fuel Efficiency
Backlight
Turns the ambient meter feature on and off.On
*1/Off
Lighting
SetupInterior Light
Dimming
TimeChanges the length of time the interior lights stay
on after you close the doors.60 sec/30 sec
*1/15 sec
Headlight
Auto Off
TimerChanges the length of time the exterior lights stay
on after you close the driver’s door.60 sec/30 sec/15 sec
*1/0 sec
Auto Light
SensitivityChanges the timing for the headlights to come on.Max/High/Mid
*1/Low/Min
Page 99 of 346
98
uuGauges and intelligent Multi-Information Display (i-MID)uintelligent Multi-Information Display (i-MID)
Instrument Panel
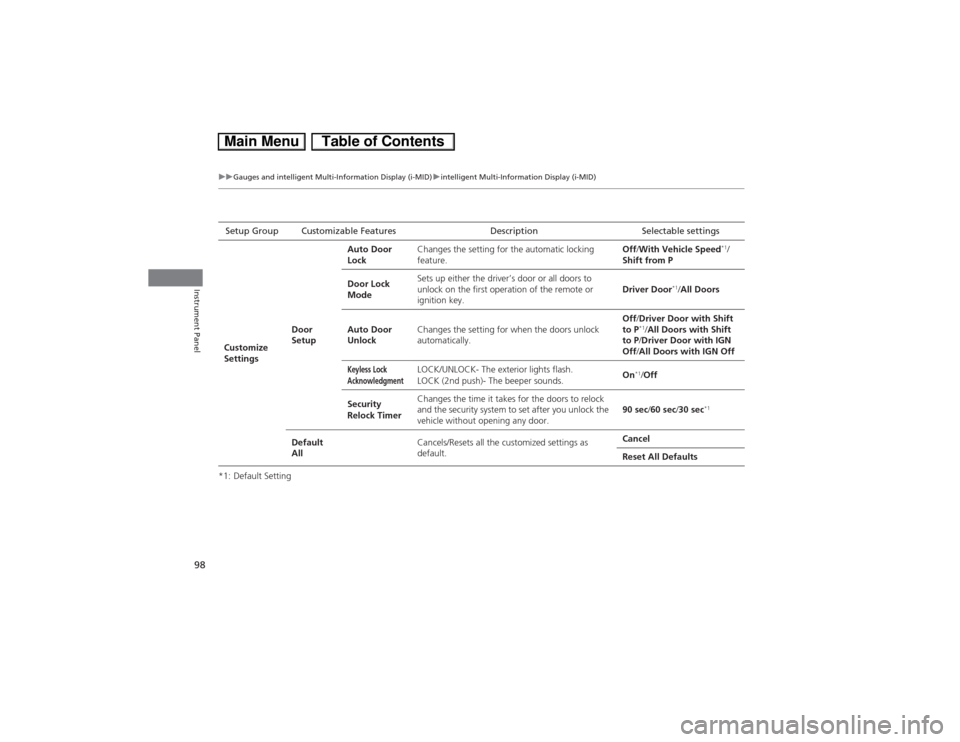
*1: Default SettingSetup Group Customizable Features Description Selectable settings
Customize
SettingsDoor
SetupAuto Door
LockChanges the setting for the automatic locking
feature.Off/With Vehicle Speed
*1/
Shift from P
Door Lock
ModeSets up either the driver’s door or all doors to
unlock on the first operation of the remote or
ignition key.Driver Door
*1/All Doors
Auto Door
UnlockChanges the setting for when the doors unlock
automatically.Off/Driver Door with Shift
to P
*1/All Doors with Shift
to P/Driver Door with IGN
Off/All Doors with IGN Off
Keyless Lock
Acknowledgment
LOCK/UNLOCK- The exterior lights flash.
LOCK (2nd push)- The beeper sounds.On
*1/Off
Security
Relock TimerChanges the time it takes for the doors to relock
and the security system to set after you unlock the
vehicle without opening any door.90 sec/60 sec/30 sec
*1
Default
AllCancels/Resets all the customized settings as
default.Cancel
Reset All Defaults
Page 108 of 346
107
uuLocking and Unlocking the DoorsuLocking/Unlocking the Doors from the Outside
Continued
Controls
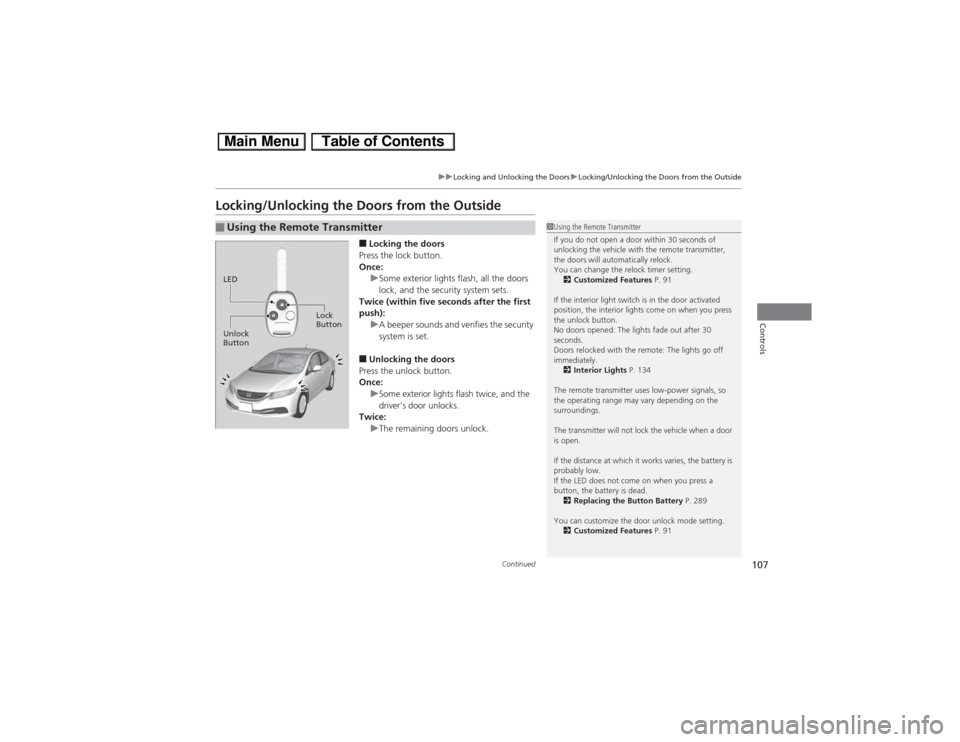
Locking/Unlocking the Doors from the Outside
■Locking the doors
Press the lock button.
Once:
uSome exterior lights flash, all the doors
lock, and the security system sets.
Twice (within five seconds after the first
push):
uA beeper sounds and verifies the security
system is set.■Unlocking the doors
Press the unlock button.
Once:
uSome exterior lights flash twice, and the
driver’s door unlocks.
Twice:
uThe remaining doors unlock.
■Using the Remote Transmitter
1Using the Remote Transmitter
If you do not open a door within 30 seconds of
unlocking the vehicle with the remote transmitter,
the doors will automatically relock.
You can change the relock timer setting.
2Customized Features P. 91
If the interior light switch is in the door activated
position, the interior lights come on when you press
the unlock button.
No doors opened: The lights fade out after 30
seconds.
Doors relocked with the remote: The lights go off
immediately.
2Interior Lights P. 134
The remote transmitter uses low-power signals, so
the operating range may vary depending on the
surroundings.
The transmitter will not lock the vehicle when a door
is open.
If the distance at which it works varies, the battery is
probably low.
If the LED does not come on when you press a
button, the battery is dead.
2Replacing the Button Battery P. 289
You can customize the door unlock mode setting.
2
Customized Features P. 91
LED
Unlock
ButtonLock
Button
Page 117 of 346
uuSecurity SystemuSecurity System Alarm
116Controls
■Setting the security system alarm
The security system alarm automatically sets when the following conditions have
been met:
•The ignition switch is in LOCK
(0, and the key has been removed from the
ignition switch.
•The hood and trunk are closed.
•All doors are locked with the key or the remote transmitter.
■When the security system alarm sets
The security system indicator in the instrument panel blinks. When the blinking
interval changes after about 15 seconds, the security system is set.■To cancel the security system alarm
The security system is canceled when the vehicle is unlocked using the key or remote
transmitter, or the ignition switch is turned to ON
(w. The security system indicator
goes off at the same time.
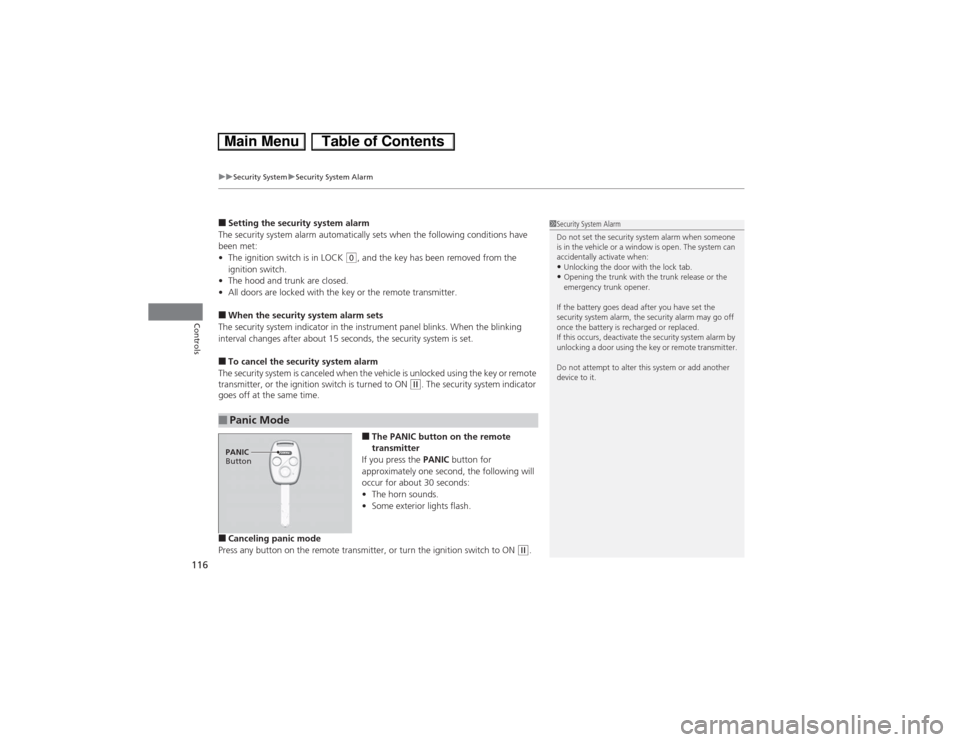
■The PANIC button on the remote
transmitter
If you press the PANIC button for
approximately one second, the following will
occur for about 30 seconds:
•The horn sounds.
•Some exterior lights flash.
■Canceling panic mode
Press any button on the remote transmitter, or turn the ignition switch to ON
(w.
■Panic Mode
1Security System Alarm
Do not set the security system alarm when someone
is in the vehicle or a window is open. The system can
accidentally activate when:•Unlocking the door with the lock tab.•Opening the trunk with the trunk release or the
emergency trunk opener.
If the battery goes dead after you have set the
security system alarm, the security alarm may go off
once the battery is recharged or replaced.
If this occurs, deactivate the security system alarm by
unlocking a door using the key or remote transmitter.
Do not attempt to alter this system or add another
device to it.
PANIC
Button