display HONDA CIVIC HYBRID 2014 9.G Owner's Guide
[x] Cancel search | Manufacturer: HONDA, Model Year: 2014, Model line: CIVIC HYBRID, Model: HONDA CIVIC HYBRID 2014 9.GPages: 377, PDF Size: 17.8 MB
Page 103 of 377
102
Controls
Clock
Adjusting the Clock
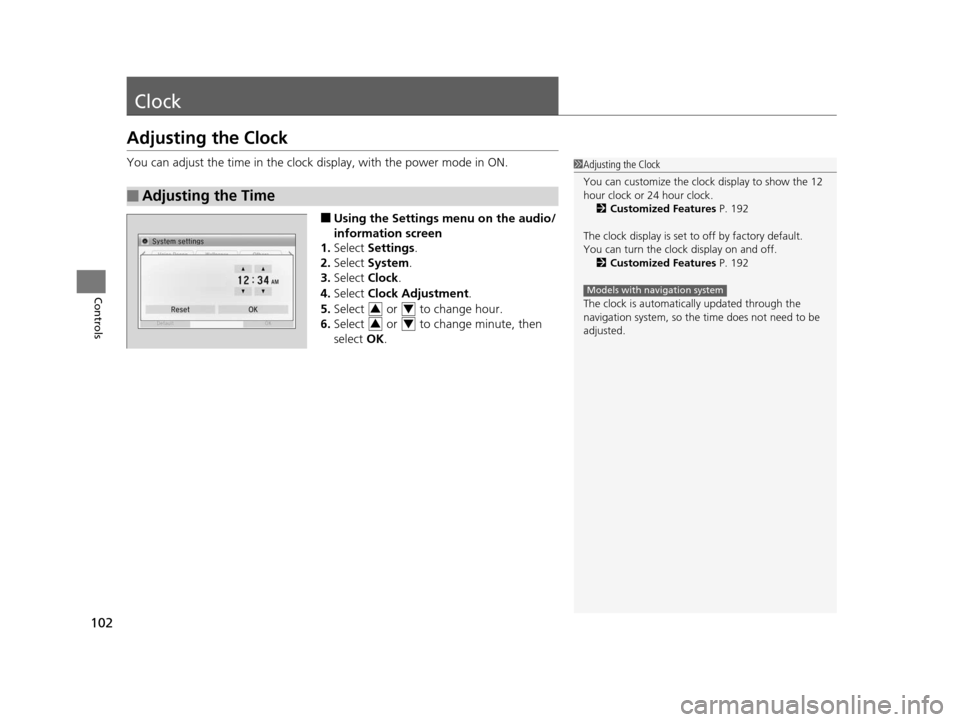
You can adjust the time in the clock display, with the power mode in ON.
■Using the Settings menu on the audio/
information screen
1. Select Settings .
2. Select System .
3. Select Clock.
4. Select Clock Adjustment .
5. Select or to change hour.
6. Select or to change minute, then
select OK.
■Adjusting the Time
1Adjusting the Clock
You can customize the clock display to show the 12
hour clock or 24 hour clock.
2 Customized Features P. 192
The clock display is set to off by factory default.
You can turn the clock display on and off.
2 Customized Features P. 192
The clock is automatica lly updated through the
navigation system, so the ti me does not need to be
adjusted.
Models with navigation system
34
34
14 CIVIC IMA-31TR26200.book 102 ページ 2013年12月23日 月曜日 午後4時9分
Page 130 of 377
129
uuOperating the Switches Around the Steering Wheel uBrightness Control
Controls
Brightness Control
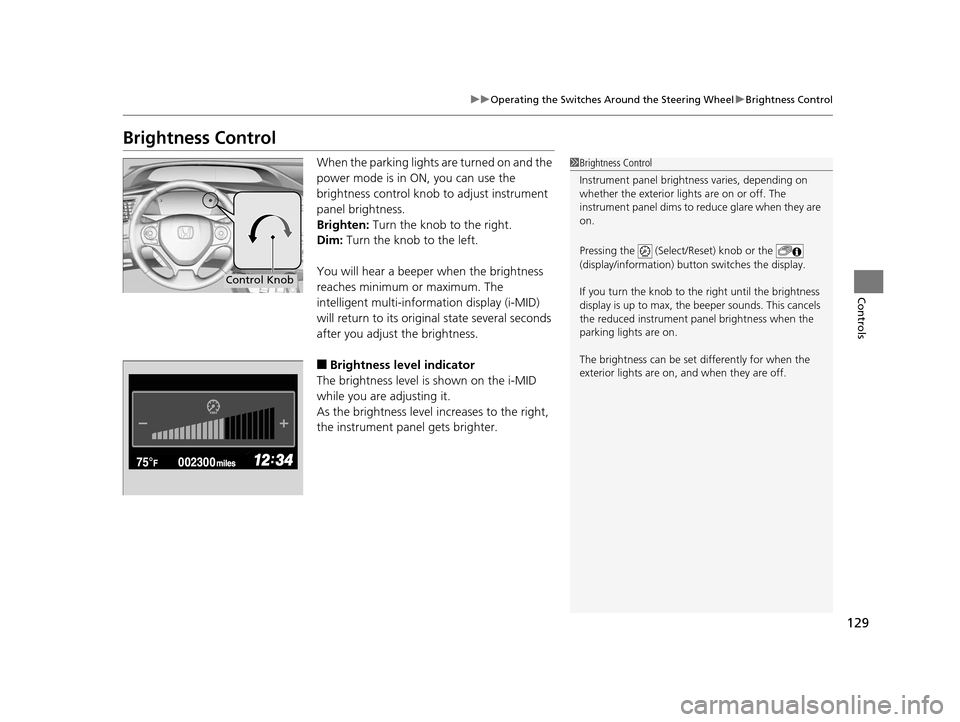
When the parking lights are turned on and the
power mode is in ON, you can use the
brightness control knob to adjust instrument
panel brightness.
Brighten: Turn the knob to the right.
Dim: Turn the knob to the left.
You will hear a beeper when the brightness
reaches minimum or maximum. The
intelligent multi-information display (i-MID)
will return to its original state several seconds
after you adjust the brightness.
■Brightness level indicator
The brightness level is shown on the i-MID
while you are adjusting it.
As the brightness level increases to the right,
the instrument panel gets brighter.
1 Brightness Control
Instrument panel brightne ss varies, depending on
whether the exterior lights are on or off. The
instrument panel dims to reduce glare when they are
on.
Pressing the (Select/Reset) knob or the
(display/information) button switches the display.
If you turn the knob to the right until the brightness
display is up to max, the beeper sounds. This cancels
the reduced instrument panel brightness when the
parking lights are on.
The brightness can be set differently for when the
exterior lights are on, and when they are off.
Control Knob
14 CIVIC IMA-31TR26200.book 129 ページ 2013年12月23日 月曜日 午後4時9分
Page 145 of 377
144
Controls
Climate Control System
Using Automatic Climate Control
The automatic climate control system maintains the interior temperature you select.
The system also selects the proper mix of heated or cooled air that raises or lowers
the interior temperature to your preference as quickly as possible.
Use the system when the engine is running.
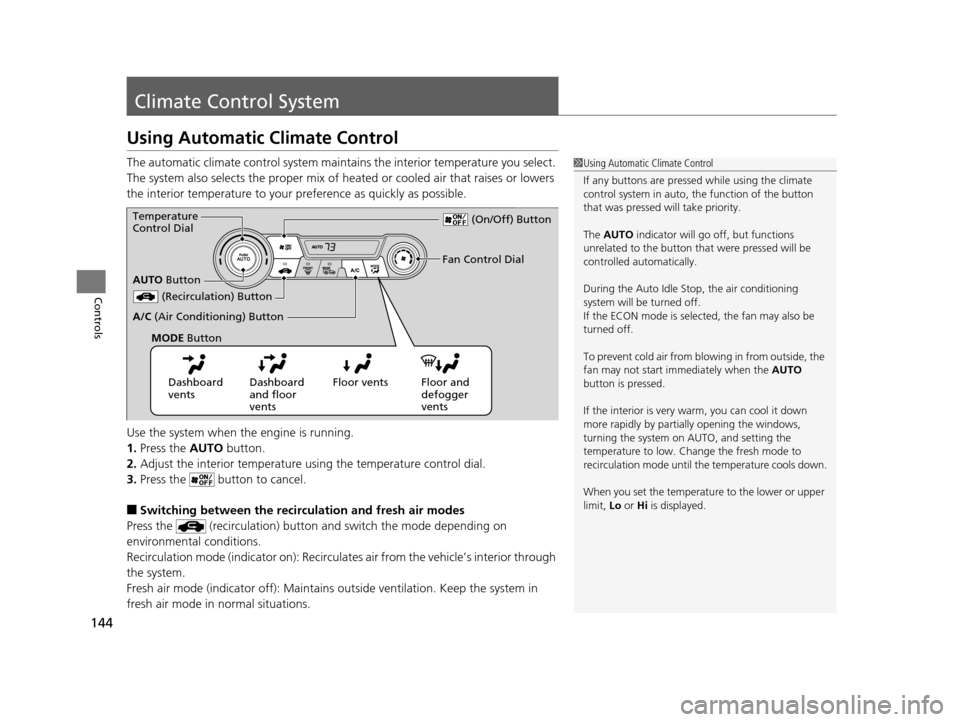
1. Press the AUTO button.
2. Adjust the interior temperature us ing the temperature control dial.
3. Press the butto n to cancel.
■Switching between the recirculation and fresh air modes
Press the (recirculation) button and switch the mode depending on
environmental conditions.
Recirculation mode (indicator on): Recirculat es air from the vehicle’s interior through
the system.
Fresh air mode (indicator off): Maintains out side ventilation. Keep the system in
fresh air mode in normal situations.
1 Using Automatic Climate Control
If any buttons are presse d while using the climate
control system in auto, the function of the button
that was pressed will take priority.
The AUTO indicator will go off, but functions
unrelated to the button that were pressed will be
controlled automatically.
During the Auto Idle Stop, the air conditioning
system will be turned off.
If the ECON mode is selected, the fan may also be
turned off.
To prevent cold air from bl owing in from outside, the
fan may not start i mmediately when the AUTO
button is pressed.
If the interior is very warm, you can cool it down
more rapidly by partial ly opening the windows,
turning the system on AUTO, and setting the
temperature to low. Change the fresh mode to
recirculation mode until the temperature cools down.
When you set the temperat ure to the lower or upper
limit, Lo or Hi is displayed.
Dashboard
vents Dashboard
and floor
vents Floor vents Floor and
defogger
vents
AUTO
Button
Temperature
Control Dial
(Recirculation) Button
A/C (Air Conditioning) Button Fan Control Dial
(On/Off) Button
MODE Button
14 CIVIC IMA-31TR26200.book 144 ページ 2013年12月23日 月曜日 午後4時9分
Page 148 of 377
147
Features
This chapter describes how to operate technology features.
Audio SystemAbout Your Audio System ................ 148
USB/HDMI ® Port ............................... 149
USB Adapter Cable .......................... 150
Audio System Theft Protection ......... 151
Audio Remote Controls .................... 152
Audio System Basic Operation ........ 154
Audio/Information Screen ................ 155
Adjusting the Sound ........................ 159
Display Setup ................................... 160
Playing AM/FM Radio ....................... 161
Playing XM ® Radio
*......................... 164 Playing a CD .................................... 167
Playing an iPod ................................ 170
Playing Internet Radio ...................... 173
Playing a USB Flash Drive ................. 175
Playing
Bluetooth ® Audio................. 178
Playing a Video Using the HDMI ®..... 180
Smartphone Apps ............................ 182
Siri Eyes Free .................................... 183
Audio Error Messages ...................... 184
General Information on the Audio System ............................................. 188
Customized Features ........................ 192 Bluetooth®
HandsFreeLink® ............. 205
* Not available on all models
14 CIVIC IMA-31TR26200.book 147 ページ 2013年12月23日 月曜日 午後4時9分
Page 150 of 377
149
uuAudio System uUSB/HDMI ® Port
Features
USB/HDMI ® Port
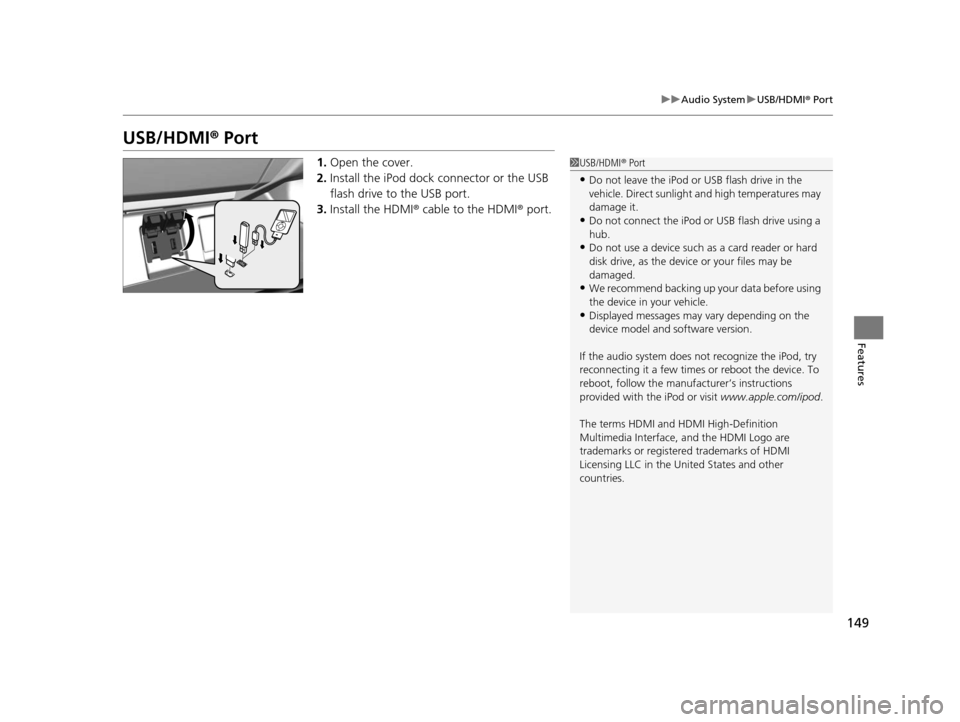
1. Open the cover.
2. Install the iPod dock connector or the USB
flash drive to the USB port.
3. Install the HDMI ® cable to the HDMI ® port.1USB/HDMI ® Port
•Do not leave the iPod or USB flash drive in the
vehicle. Direct sunlight and high temperatures may
damage it.
•Do not connect the iPod or USB flash drive using a
hub.
•Do not use a device such as a card reader or hard
disk drive, as the device or your files may be
damaged.
•We recommend backing up yo ur data before using
the device in your vehicle.
•Displayed messages may vary depending on the
device model and software version.
If the audio system does not recognize the iPod, try
reconnecting it a few times or reboot the device. To
reboot, follow the manufac turer’s instructions
provided with the iPod or visit www.apple.com/ipod.
The terms HDMI and HDMI High-Definition
Multimedia Interface, and the HDMI Logo are
trademarks or registered trademarks of HDMI
Licensing LLC in the United States and other
countries.
14 CIVIC IMA-31TR26200.book 149 ページ 2013年12月23日 月曜日 午後4時9分
Page 151 of 377
150
uuAudio System uUSB Adapter Cable
Features
USB Adapter Cable
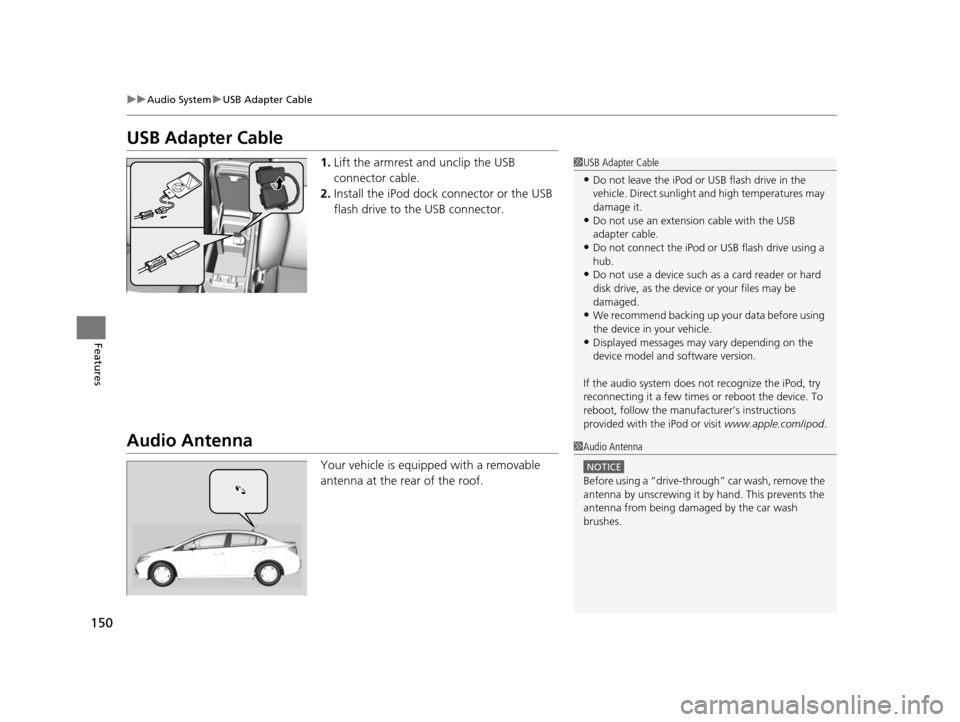
1. Lift the armrest and unclip the USB
connector cable.
2. Install the iPod dock connector or the USB
flash drive to the USB connector.
Audio Antenna
Your vehicle is equipped with a removable
antenna at the rear of the roof.
1USB Adapter Cable
•Do not leave the iPod or USB flash drive in the
vehicle. Direct sunlight and high temperatures may
damage it.
•Do not use an extension cable with the USB
adapter cable.
•Do not connect the iPod or USB flash drive using a
hub.
•Do not use a device such as a card reader or hard
disk drive, as the device or your files may be
damaged.
•We recommend backing up yo ur data before using
the device in your vehicle.
•Displayed messages may vary depending on the
device model and software version.
If the audio system does not recognize the iPod, try
reconnecting it a few times or reboot the device. To
reboot, follow the manufac turer’s instructions
provided with the iPod or visit www.apple.com/ipod.
1Audio Antenna
NOTICE
Before using a
Page 152 of 377
151
uuAudio System uAudio System Theft Protection
Features
Audio System Theft Protection
The audio system is disabled when it is disconnected from the power source, such as
when the battery is disconnected or goes dead. In certain conditions, the system
may display Enter Code. If this occurs, reactivate the audio system.
■Reactivating the audio system
1. Set the power mode to ON.
2. Turn on the audio system.
3. Press and hold the audio system powe r button for more than two seconds.
u The audio system is reac tivated when the audio co ntrol unit establishes a
connection with the vehicl e control unit. If the control unit fails to recognize
the audio unit, you must go to a dealer and have the audio unit checked.
14 CIVIC IMA-31TR26200.book 151 ページ 2013年12月23日 月曜日 午後4時9分
Page 155 of 377
154
Features
Audio System Basic Operation
To use the audio system function, the power mode must be in ACCESSORY or ON.
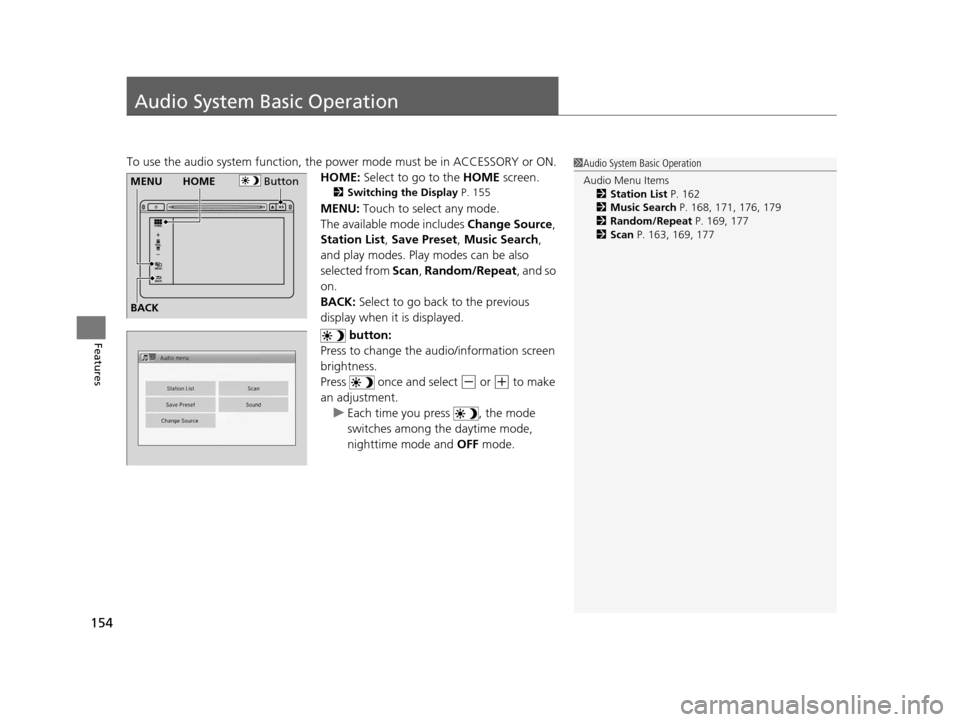
HOME: Select to go to the HOME screen.
2Switching the Display P. 155
MENU: Touch to select any mode.
The available mode includes Change Source ,
Station List , Save Preset , Music Search,
and play modes. Play modes can be also
selected from Scan , Random/Repeat , and so
on.
BACK: Select to go back to the previous
display when it is displayed.
button:
Press to change the audio/information screen
brightness.
Press once and select
(- or (+ to make
an adjustment. u Each time you press , the mode
switches among the daytime mode,
nighttime mode and OFF mode.
1Audio System Basic Operation
Audio Menu Items
2 Station List P. 162
2 Music Search P. 168, 171, 176, 179
2 Random/Repeat P. 169, 177
2 Scan P. 163, 169, 177
ButtonMENU
BACKHOME
14 CIVIC IMA-31TR26200.book 154 ページ 2013年12月23日 月曜日 午後4時9分
Page 156 of 377
155
uuAudio System Basic Operation uAudio/Information Screen
Continued
Features
Audio/Information Screen
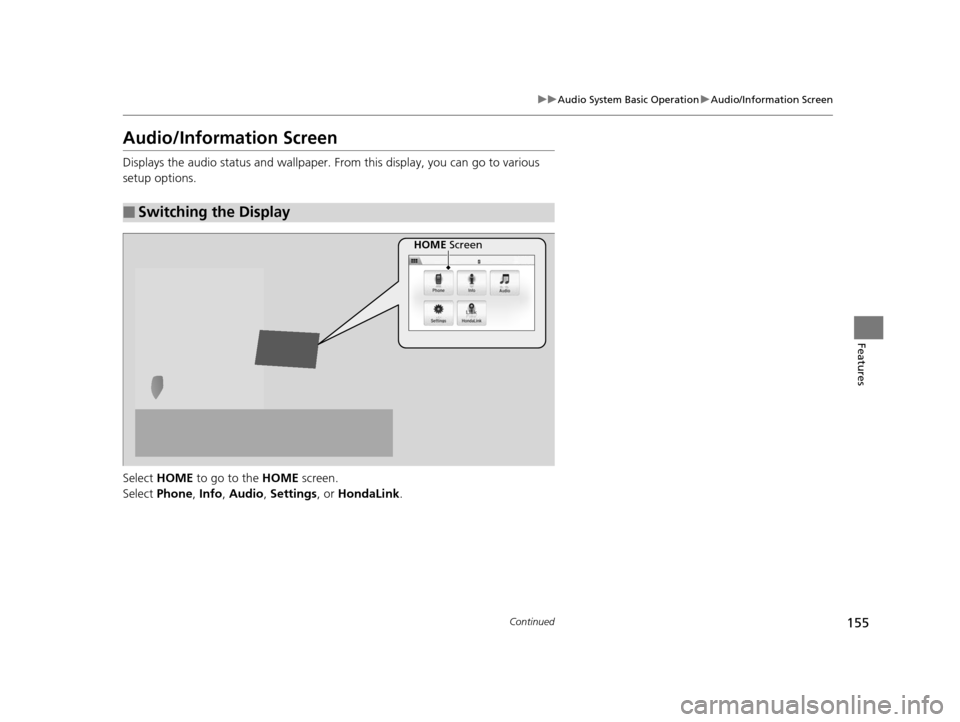
Displays the audio status and wallpaper. From this display, you can go to various
setup options.
Select HOME to go to the HOME screen.
Select Phone , Info , Audio , Settings , or HondaLink .
■Switching the Display
HOME Screen
14 CIVIC IMA-31TR26200.book 155 ページ 2013年12月23日 月曜日 午後4時9分
Page 158 of 377
Continued157
uuAudio System Basic Operation uAudio/Information Screen
Features
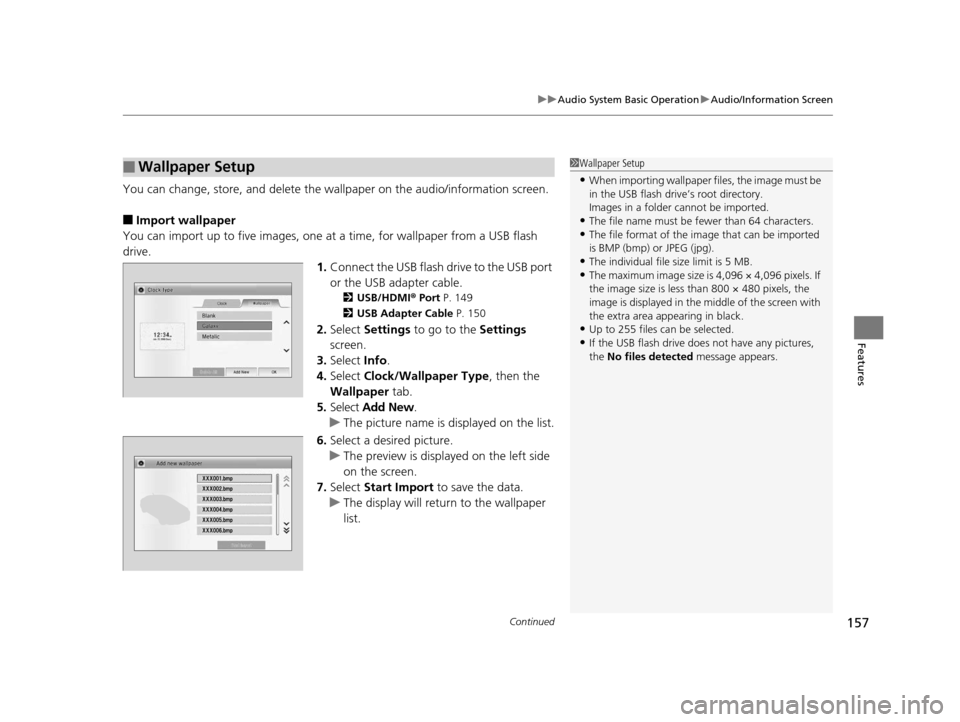
You can change, store, and delete the wallpaper on the audio/ information screen.
■Import wallpaper
You can import up to five images, one at a time, for wallpaper from a USB flash
drive. 1.Connect the USB flash drive to the USB port
or the USB adapter cable.
2 USB/HDMI ® Port P. 149
2 USB Adapter Cable P. 150
2.Select Settings to go to the Settings
screen.
3. Select Info.
4. Select Clock/Wallpaper Type , then the
Wallpaper tab.
5. Select Add New .
u The picture name is displayed on the list.
6. Select a desired picture.
u The preview is displayed on the left side
on the screen.
7. Select Start Import to save the data.
u The display will return to the wallpaper
list.
■Wallpaper Setup1Wallpaper Setup
•When importing wallpaper files, the image must be
in the USB flash driv e’s root directory.
Images in a folder cannot be imported.
•The file name must be fewer than 64 characters.•The file format of the im age that can be imported
is BMP (bmp) or JPEG (jpg).
•The individual file size limit is 5 MB.•The maximum image size is 4,096 × 4,096 pixels. If
the image size is less than 800 × 480 pixels, the
image is displayed in the middle of the screen with
the extra area appearing in black.
•Up to 255 files can be selected.
•If the USB flash drive doe s not have any pictures,
the No files detected message appears.
14 CIVIC IMA-31TR26200.book 157 ページ 2013年12月23日 月曜日 午後4時9分