jump start HONDA CLARITY ELECTRIC 2017 Owner's Manual (in English)
[x] Cancel search | Manufacturer: HONDA, Model Year: 2017, Model line: CLARITY ELECTRIC, Model: HONDA CLARITY ELECTRIC 2017Pages: 543, PDF Size: 24.2 MB
Page 5 of 543
Contents
Child Safety P. 65Safety Labels P. 78
Opening and Closing the Trunk P. 141 Security System P. 144 Opening and Closing the Windows P. 147
Adjusting the Mirrors P. 164 Adjusting the Seats P. 166
Climate Control System P. 183
Audio Error Messages P. 270 General Information on the Audio System P. 274
Bluetooth® HandsFreeLink ® P. 309
When Driving P. 350 Braking P. 404Parking Your Vehicle P. 419
Energy Economy P. 439
Maintenance Under the Hood P. 449 Replacing Light Bulbs P. 454
Checking and Maintaining Tires P. 459 12-Volt Battery P. 468 Remote Transmitter Care P. 470
Accessories and Modifications P. 478
Power System Won’t Start P. 495 Jump Starting P. 498 Overheating P. 501
Emergency Towing P. 515 When You Cannot Open the Charge Lid P. 516
When You Cannot Open the Trunk P. 518
Devices that Emit Radio Waves P. 523 Reporting Safety Defects P. 524
Customer Service Information P. 528
Quick Reference GuideP. 4
Safe DrivingP. 37
Instrument PanelP. 79
ControlsP. 127
FeaturesP. 191
DrivingP. 343
MaintenanceP. 441
Handling the UnexpectedP. 481
InformationP. 519
IndexP. 530
17 CLARITY BEV CSS-31TRV6000.book 3 ページ 2017年4月14日 金曜日 午前11時8分
Page 35 of 543
Quick Reference Guide
33
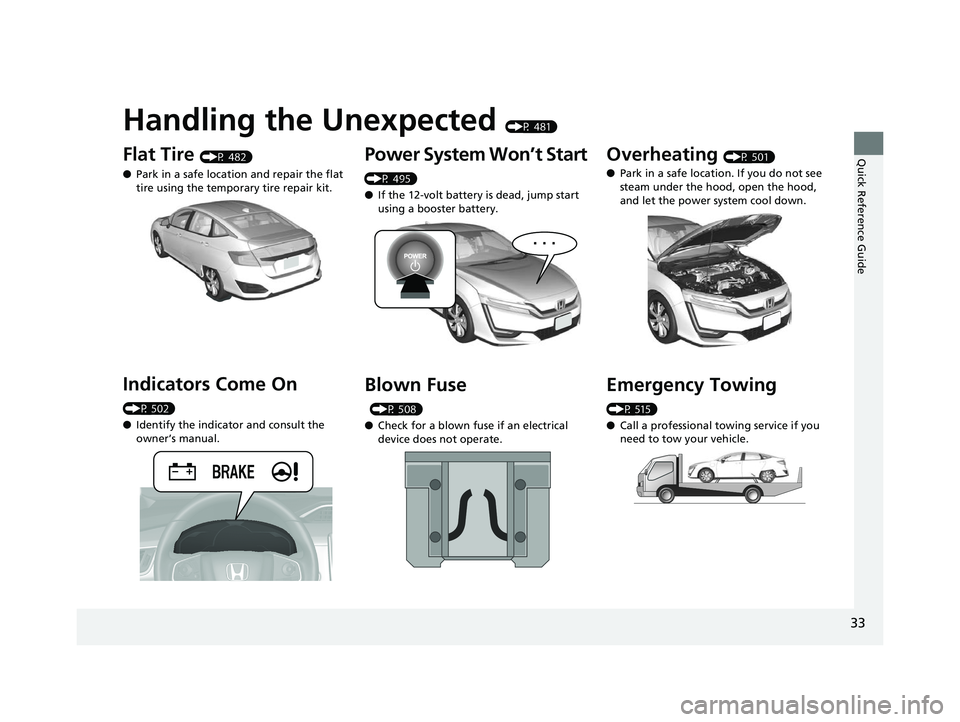
Handling the Unexpected (P 481)
Flat Tire (P 482)
● Park in a safe location and repair the flat
tire using the temporary tire repair kit.
Indicators Come On
(P 502)
●Identify the indica tor and consult the
owner’s manual.
Power System Won’t Start
(P 495)
● If the 12-volt battery is dead, jump start
using a booster battery.
Blown Fuse
(P 508)
● Check for a blown fuse if an electrical
device does not operate.
Overheating (P 501)
● Park in a safe location. If you do not see
steam under the hood, open the hood,
and let the power system cool down.
Emergency Towing
(P 515)
●Call a professional towing service if you
need to tow your vehicle.
17 CLARITY BEV CSS-31TRV6000.book 33 ページ 2017年4月14日 金曜日 午前11時 8分
Page 406 of 543
404
Driving
Braking
Brake System
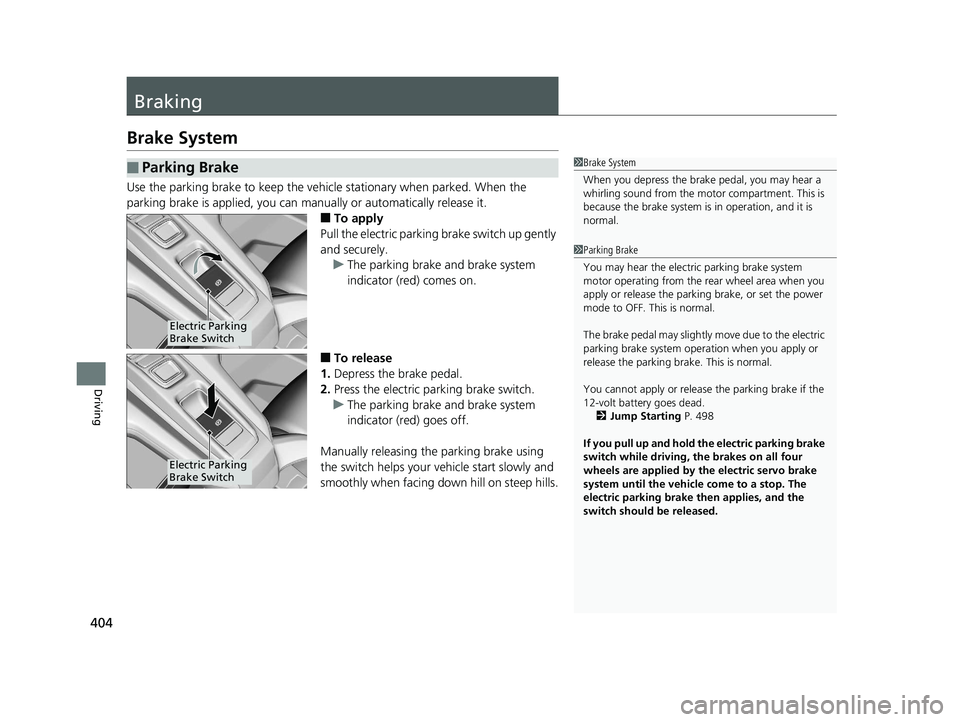
Use the parking brake to keep the vehicle stationary when parked. When the
parking brake is applied, you can manually or automatically release it.
■To apply
Pull the electric parkin g brake switch up gently
and securely. u The parking brake and brake system
indicator (red) comes on.
■To release
1. Depress the brake pedal.
2. Press the electric parking brake switch.
u The parking brake and brake system
indicator (red) goes off.
Manually releasing the parking brake using
the switch helps your ve hicle start slowly and
smoothly when facing down hill on steep hills.
■Parking Brake1 Brake System
When you depress the brak e pedal, you may hear a
whirling sound from the moto r compartment. This is
because the brake system is in operation, and it is
normal.
1 Parking Brake
You may hear the electric parking brake system
motor operating from the re ar wheel area when you
apply or release the parki ng brake, or set the power
mode to OFF. This is normal.
The brake pedal may slightly move due to the electric
parking brake system opera tion when you apply or
release the parking br ake. This is normal.
You cannot apply or release the parking brake if the
12-volt battery goes dead. 2 Jump Starting P. 498
If you pull up and hold the electric parking brake
switch while driving, the brakes on all four
wheels are applied by the electric servo brake
system until the vehicle come to a stop. The
electric parking brake then applies, and the
switch should be released.
Electric Parking
Brake Switch
Electric Parking
Brake Switch
17 CLARITY BEV CSS-31TRV6000.book 404 ページ 2017年4月14日 金曜日 午前11 時8分
Page 483 of 543
481
Handling the Unexpected
This chapter explains how to handle unexpected troubles.
If a Tire Goes FlatTemporarily Repairi ng a Flat Tire....... 482
Handling of the Jack ......................... 494
Power System Won’t Start Checking the Procedure ................... 495
If the Smart Entry Remote Battery is Weak .......................................... 496
Emergency Power System Off........... 497
Jump Starting .................................... 498
Overheating How to Handle Overheating ............. 501 Indicator, Coming On/Blinking
If the 12-Volt Battery Charging System Indicator Comes On ....................... 502
If the Brake System Indicator (Red) Comes On or Blinks ....................................... 503
If the Electric Power Steering (EPS) System
Indicator Comes On ........................... 504If the Brake System Indicator (Red) Comes On or Blinks at the Same Time
When the Brake System Indicator
(Amber) Comes On ...................... 505
If the Low Tire Pressure/TPMS Indicator
Comes On or Blinks........................ 506 If the Transmission System Indicator Blinks
along with the Warning Message .... 507
Fuses
Fuse Locations ................................. 508
Inspecting and Changing Fuses ........ 514
Emergency Towing ........................... 515
When You Cannot Open the Charge
Lid ................................................. 516
When You Cannot Disengage the Charging
Connector.................................................517When You Cannot Open the Trunk .. 518
17 CLARITY BEV CSS-31TRV6000.book 481 ページ 2017年4月14日 金曜日 午前11 時8分
Page 497 of 543
495
Handling the Unexpected
Power System Won’t Start
Checking the Procedure
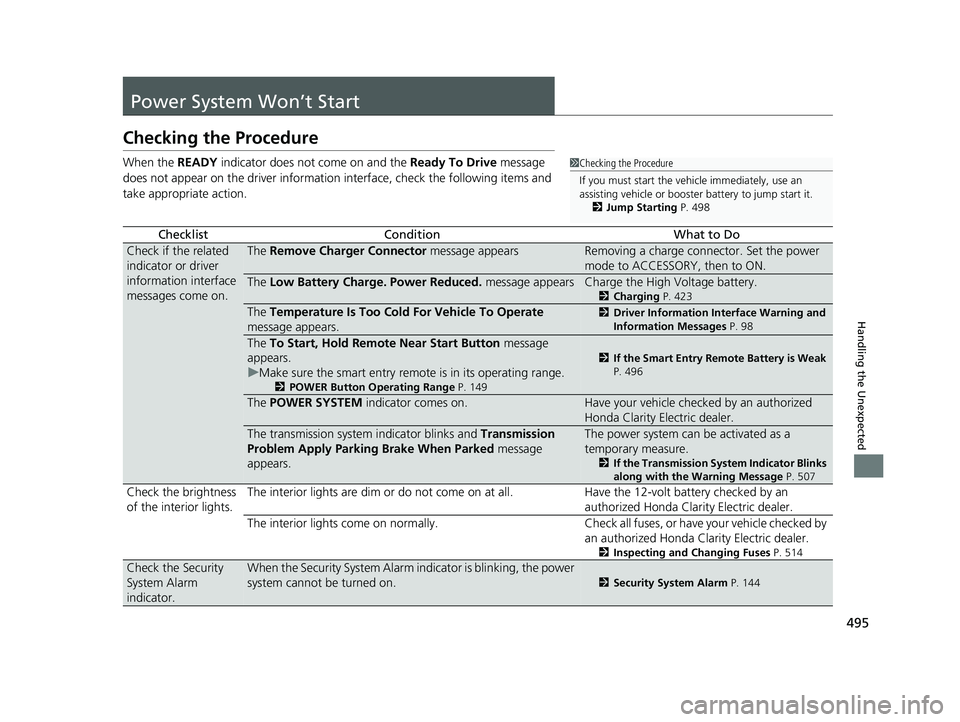
When the READY indicator does not come on and the Ready To Drive message
does not appear on the driver information interface, check the following items and
take appropriate action.
ChecklistConditionWhat to Do
Check if the related
indicator or driver
information interface
messages come on.The Remove Charger Connector message appearsRemoving a charge connector. Set the power
mode to ACCESSORY, then to ON.
The Low Battery Charge . Power Reduced. message appearsCharge the High Voltage battery.
2Charging P. 423
The Temperature Is Too Cold For Vehicle To Operate
message appears.2 Driver Information Interface Warning and
Information Messages P. 98
The To Start, Hold Remote Near Start Button message
appears.
u Make sure the smart entry remote is in its operating range.
2 POWER Button Operating Range P. 149
2If the Smart Entry Remote Battery is Weak
P. 496
The POWER SYSTEM indicator comes on.Have your vehicle checked by an authorized
Honda Clarity Electric dealer.
The transmission system indicator blinks and Transmission
Problem Apply Parking Brake When Parked message
appears.The power system can be activated as a
temporary measure.
2 If the Transmission System Indicator Blinks
along with the Warning Message P. 507
Check the brightness
of the interior lights. The interior lights are dim or do not come on at
all. Have the 12-volt battery checked by an
authorized Honda Clarity Electric dealer.
The interior lights come on normally. Check al l fuses, or have your vehicle checked by
an authorized Honda Clarity Electric dealer.
2 Inspecting and Changing Fuses P. 514
Check the Security
System Alarm
indicator.When the Security System Alarm in dicator is blinking, the power
system cannot be turned on.
2 Security System Alarm P. 144
1Checking the Procedure
If you must start the vehi cle immediately, use an
assisting vehicle or booster battery to jump start it.
2 Jump Starting P. 498
17 CLARITY BEV CSS-31TRV6000.book 495 ページ 2017年4月14日 金曜日 午前11 時8分
Page 500 of 543
498
Handling the Unexpected
Jump Starting
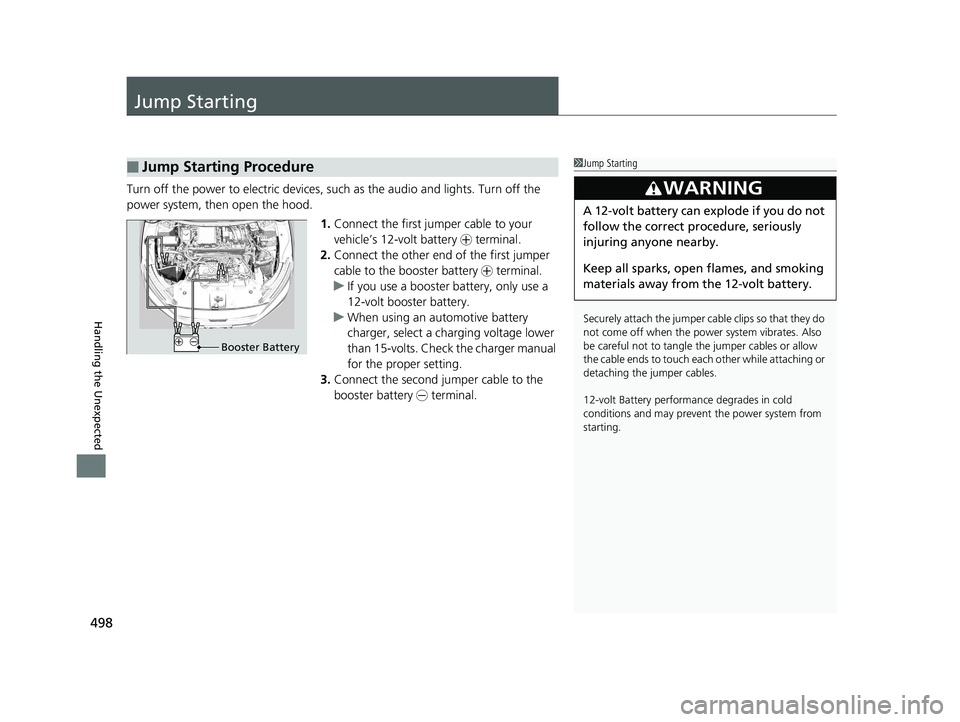
Turn off the power to electric devices, such as the audio and lights. Turn off the
power system, then open the hood.
1.Connect the first jump er cable to your
vehicle’s 12-volt battery + terminal.
2. Connect the other end of the first jumper
cable to the booster battery + terminal.
u If you use a booster battery, only use a
12-volt booster battery.
u When using an automotive battery
charger, select a charging voltage lower
than 15-volts. Check the charger manual
for the proper setting.
3. Connect the second jumper cable to the
booster battery - terminal.
■Jump Starting Procedure1Jump Starting
Securely attach the jumper cable clips so that they do
not come off when the power system vibrates. Also
be careful not to tangle the jumper cables or allow
the cable ends to touch eac h other while attaching or
detaching the jumper cables.
12-volt Battery performa nce degrades in cold
conditions and may prevent the power system from
starting.
3WARNING
A 12-volt battery can explode if you do not
follow the correct procedure, seriously
injuring anyone nearby.
Keep all sparks, open flames, and smoking
materials away from the 12-volt battery.
Booster Battery
17 CLARITY BEV CSS-31TRV6000.book 498 ページ 2017年4月14日 金曜日 午前11 時8分
Page 501 of 543
499
uuJump Starting u
Continued
Handling the Unexpected
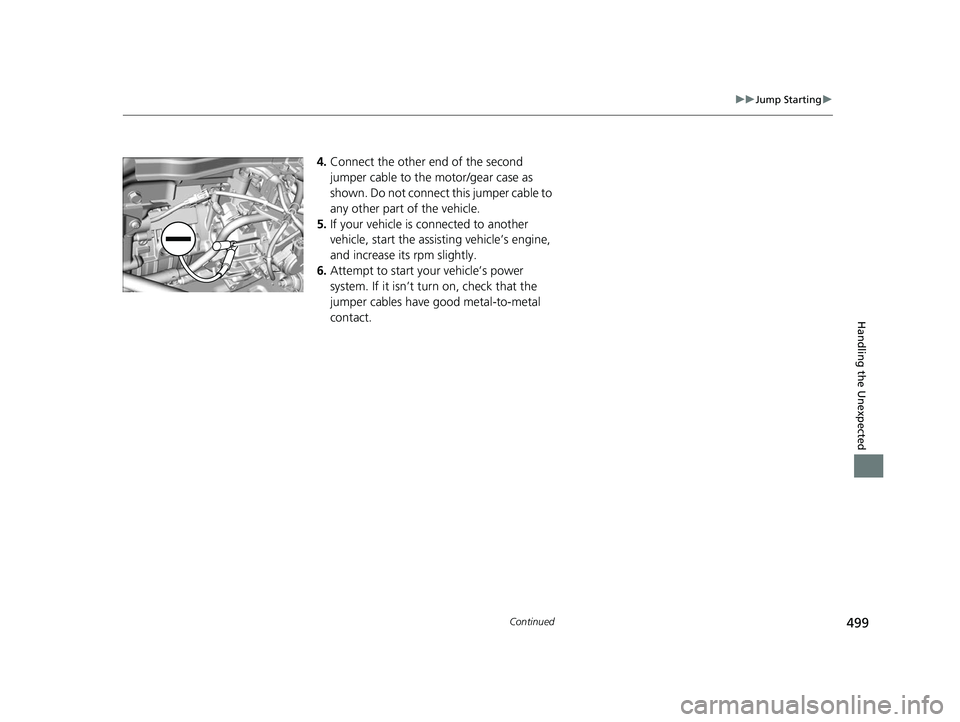
4.Connect the other end of the second
jumper cable to the motor/gear case as
shown. Do not connect this jumper cable to
any other part of the vehicle.
5. If your vehicle is connected to another
vehicle, start the assisting vehicle’s engine,
and increase its rpm slightly.
6. Attempt to start your vehicle’s power
system. If it isn’t turn on, check that the
jumper cables have good metal-to-metal
contact.
17 CLARITY BEV CSS-31TRV6000.book 499 ページ 2017年4月14日 金曜日 午前11 時8分
Page 502 of 543
uuJump Starting u
500
Handling the Unexpected
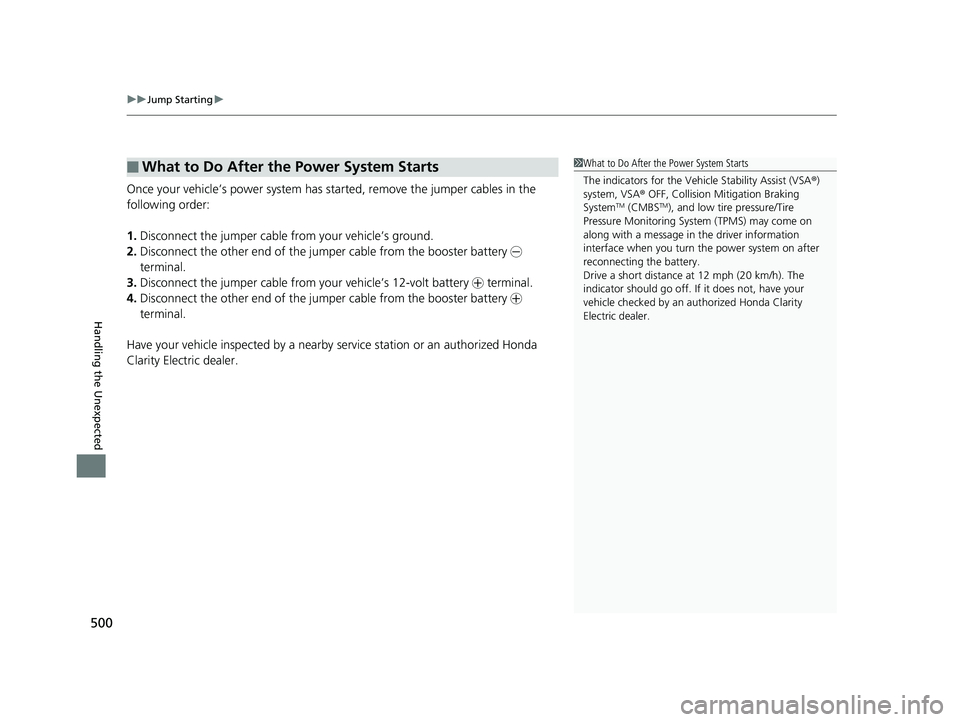
Once your vehicle’s power system has sta rted, remove the jumper cables in the
following order:
1. Disconnect the jumper cable from your vehicle’s ground.
2. Disconnect the other end of the jumper cable from the booster battery -
terminal.
3. Disconnect the jumper cable from your vehicle’s 12-volt battery + terminal.
4. Disconnect the other end of the jumper cable from the booster battery +
terminal.
Have your vehicle inspected by a nearby service station or an authorized Honda
Clarity Electric dealer.
■What to Do After the Power System Starts1 What to Do After the Power System Starts
The indicators for the Vehicle Stability Assist (VSA ®)
system, VSA ® OFF, Collision Mitigation Braking
System
TM (CMBSTM), and low tire pressure/Tire
Pressure Monitoring System (TPMS) may come on
along with a message in the driver information
interface when you turn the power system on after
reconnecting the battery.
Drive a short distance at 12 mph (20 km/h). The
indicator should go off. If it does not, have your
vehicle checked by an authorized Honda Clarity
Electric dealer.
17 CLARITY BEV CSS-31TRV6000.book 500 ページ 2017年4月14日 金曜日 午前11 時8分
Page 533 of 543
531
Index
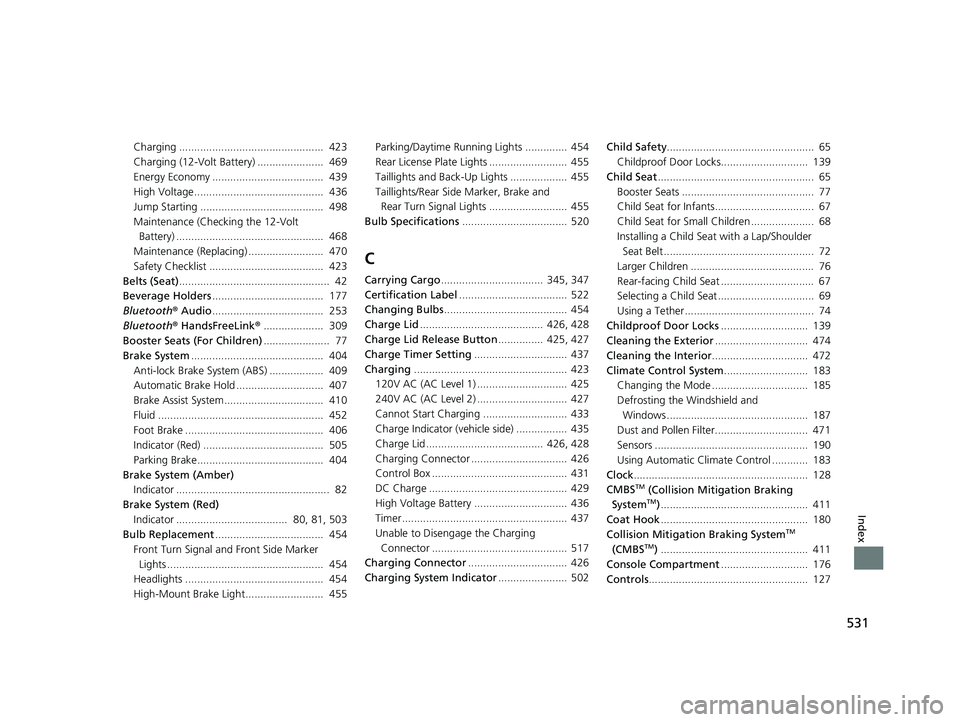
Charging ................................................ 423
Charging (12-Volt Battery) ...................... 469
Energy Economy ..................................... 439
High Voltage........................................... 436
Jump Starting ......................................... 498
Maintenance (Checking the 12-Volt Battery) ................................................. 468
Maintenance (Replacing) ......................... 470
Safety Checklist ...................................... 423
Belts (Seat) .................................................. 42
Beverage Holders ..................................... 177
Bluetooth ® Audio ..................................... 253
Bluetooth ® HandsFreeLink ®.................... 309
Booster Seats (For Children) ...................... 77
Brake System ............................................ 404
Anti-lock Brake System (ABS) .................. 409
Automatic Brake Hold ............................. 407
Brake Assist System................................. 410
Fluid ....................................................... 452
Foot Brake .............................................. 406
Indicator (Red) ........................................ 505
Parking Brake.......................................... 404
Brake System (Amber) Indicator ................................................... 82
Brake System (Red)
Indicator ..................................... 80, 81, 503
Bulb Replacement .................................... 454
Front Turn Signal and Front Side Marker
Lights .................................................... 454
Headlights .............................................. 454
High-Mount Brake Light.......................... 455 Parking/Daytime Running Lights .............. 454
Rear License Plate Lights .......................... 455
Taillights and Back-Up Lights ................... 455
Taillights/Rear Side
Marker, Brake and
Rear Turn Signal Lights .......................... 455
Bulb Specifications ................................... 520
C
Carrying Cargo.................................. 345, 347
Certification Label .................................... 522
Changing Bulbs ......................................... 454
Charge Lid ......................................... 426, 428
Charge Lid Release Button ............... 425, 427
Charge Timer Setting ............................... 437
Charging ................................................... 423
120V AC (AC Level 1) .............................. 425
240V AC (AC Level 2) .............................. 427
Cannot Start Charging ............................ 433
Charge Indicator (vehicle side) ................. 435
Charge Lid ....................................... 426, 428
Charging Connector ................................ 426
Control Box ............................................. 431
DC Charge .............................................. 429
High Voltage Battery ............................... 436
Timer ....................................................... 437
Unable to Disengage the Charging Connector ............................................. 517
Charging Connector ................................. 426
Charging System Indicator ....................... 502Child Safety
................................................. 65
Childproof Door Locks............................. 139
Child Seat .................................................... 65
Booster Seats ............................................ 77
Child Seat for Infants................................. 67
Child Seat for Small Children ..................... 68
Installing a Child Seat with a Lap/Shoulder
Seat Belt .................................................. 72
Larger Children ......................................... 76
Rear-facing Child Seat ............................... 67
Selecting a Child Seat ................................ 69
Using a Tether ........................................... 74
Childproof Door Locks ............................. 139
Cleaning the Exterior ............................... 474
Cleaning the Interior ................................ 472
Climate Control System ............................ 183
Changing the Mode ................................ 185
Defrosting the Windshield and Windows ............................................... 187
Dust and Pollen Filter............................... 471
Sensors ................................................... 190
Using Automatic Climate Control ............ 183
Clock .......................................................... 128
CMBS
TM (Collision Mitigation Braking
SystemTM) ................................................. 411
Coat Hook ................................................. 180
Collision Mitigation Braking System
TM
(CMBSTM) ................................................. 411
Console Compartment ............................. 176
Controls ..................................................... 127
17 CLARITY BEV CSS-31TRV6000.book 531 ページ 2017年4月14日 金曜日 午前11 時8分
Page 536 of 543
534
Index
Instant Energy Consumption................... 121
Instrument Panel ........................................ 79
Interior Lights ........................................... 173
Interior Rearview Mirror .......................... 164
Inverter Coolant ........................................ 451
Adding to the Reserve Tank ..................... 451
Overheating............................................. 501
iPod ............................................................ 241
J
Jacking Points ........................................... 494
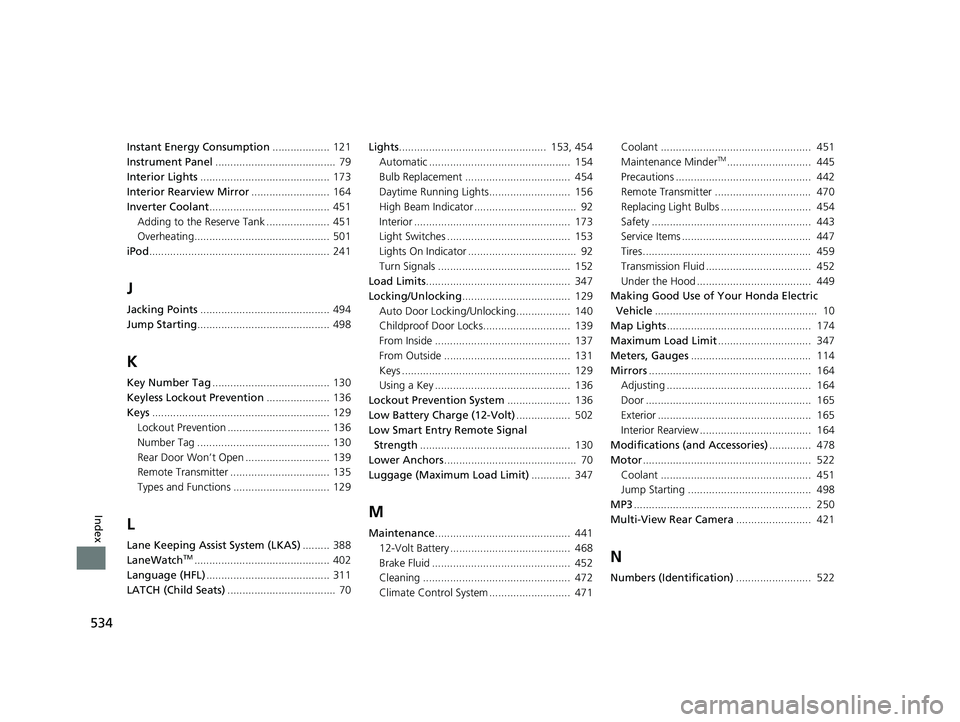
Jump Starting ............................................ 498
K
Key Number Tag ....................................... 130
Keyless Lockout Prevention ..................... 136
Keys ........................................................... 129
Lockout Prevention .................................. 136
Number Tag ............................................ 130
Rear Door Won’t Open ............................ 139
Remote Transmitter ................................. 135
Types and Functions ................................ 129
L
Lane Keeping Assist System (LKAS) ......... 388
LaneWatchTM............................................. 402
Language (HFL) ......................................... 311
LATCH (Child Seats) .................................... 70 Lights
................................................. 153, 454
Automatic ............................................... 154
Bulb Replacement ................................... 454
Daytime Running Lights........................... 156
High Beam Indicator .................................. 92
Interior .................................................... 173
Light Switches ......................................... 153
Lights On Indicator .................................... 92
Turn Signals ............................................ 152
Load Limits ................................................ 347
Locking/Unlocking .................................... 129
Auto Door Locking/Unlocking.................. 140
Childproof Door Locks............................. 139
From Inside ............................................. 137
From Outside .......................................... 131
Keys ........................................................ 129
Using a Key ............................................. 136
Lockout Prevention System ..................... 136
Low Battery Charge (12-Volt) .................. 502
Low Smart Entry Remote Signal Strength .................................................. 130
Lower Anchors ............................................ 70
Luggage (Maximum Load Limit) ............. 347
M
Maintenance............................................. 441
12-Volt Battery ........................................ 468
Brake Fluid .............................................. 452
Cleaning ................................................. 472
Climate Control System ........................... 471 Coolant .................................................. 451
Maintenance Minder
TM............................ 445
Precautions ............................................. 442
Remote Transmitter ................................ 470
Replacing Light Bulbs .............................. 454
Safety ..................................................... 443
Service Items ........................................... 447
Tires........................................................ 459
Transmission Fluid ................................... 452
Under the Hood ...................................... 449
Making Good Use of Your Honda Electric
Vehicle ...................................................... 10
Map Lights ................................................ 174
Maximum Load Limit ............................... 347
Meters, Gauges ........................................ 114
Mirrors ...................................................... 164
Adjusting ................................................ 164
Door ....................................................... 165
Exterior ................................................... 165
Interior Rearview ..................................... 164
Modifications (and Accessories) .............. 478
Motor ........................................................ 522
Coolant .................................................. 451
Jump Starting ......................................... 498
MP3 ........................................................... 250
Multi-View Rear Camera ......................... 421
N
Numbers (Identification)......................... 522
17 CLARITY BEV CSS-31TRV6000.book 534 ページ 2017年4月14日 金曜日 午前11 時8分