park assist HONDA CLARITY ELECTRIC 2019 Owner's Manual (in English)
[x] Cancel search | Manufacturer: HONDA, Model Year: 2019, Model line: CLARITY ELECTRIC, Model: HONDA CLARITY ELECTRIC 2019Pages: 559, PDF Size: 28.11 MB
Page 25 of 559
23
Quick Reference Guide
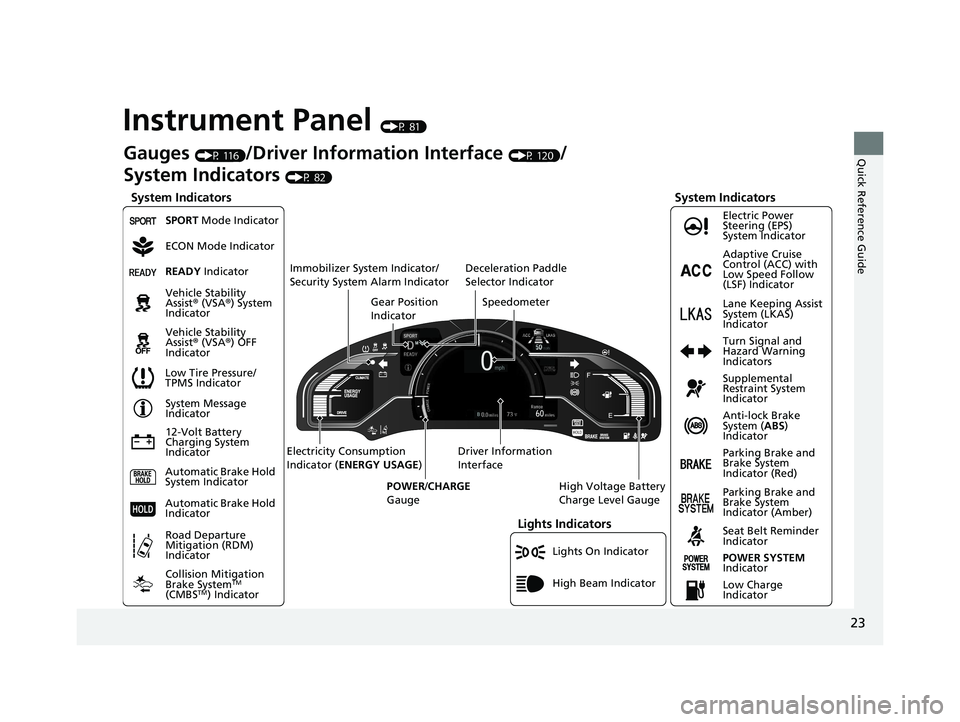
Instrument Panel (P 81)
Lights On Indicator
System Indicators
12-Volt Battery
Charging System
IndicatorAnti-lock Brake
System (
ABS)
Indicator
Vehicle Stability
Assist
® (VSA ®) System
Indicator
Vehicle Stability
Assist ® (VSA ®) OFF
Indicator Electric Power
Steering (EPS)
System Indicator
Lights Indicators
High Beam Indicator
Seat Belt Reminder
Indicator
System Indicators
System Message
Indicator
Parking Brake and
Brake System
Indicator (Red) Supplemental
Restraint System
Indicator
Gauges (P 116)/Driver Information Interface (P 120)/
System Indicators
(P 82)
Low Tire Pressure/
TPMS Indicator Turn Signal and
Hazard Warning
Indicators
Speedometer
Automatic Brake Hold
System Indicator Parking Brake and
Brake System
Indicator (Amber)
SPORT Mode Indicator
Collision Mitigation
Brake System
TM
(CMBSTM) Indicator
Road Departure
Mitigation (RDM)
Indicator
Immobilizer System Indicator/
Security System Alarm Indicator
Automatic Brake Hold
IndicatorREADY Indicator
POWER SYSTEM
Indicator
Gear Position
Indicator
High Voltage Battery
Charge Level Gauge
Driver Information
Interface
Electricity Consumption
Indicator (
ENERGY USAGE )
POWER /CHARGE
Gauge
Low Charge
Indicator Adaptive Cruise
Control (ACC) with
Low Speed Follow
(LSF) Indicator
Lane Keeping Assist
System (LKAS)
Indicator
Deceleration Paddle
Selector Indicator
ECON Mode Indicator
19 CLARITY BEV-31TRV6200.book 23 ページ 2018年10月29日 月曜日 午前10時54分
Page 86 of 559
84
uuIndicators u
Instrument Panel
IndicatorNameOn/BlinkingExplanationMessage
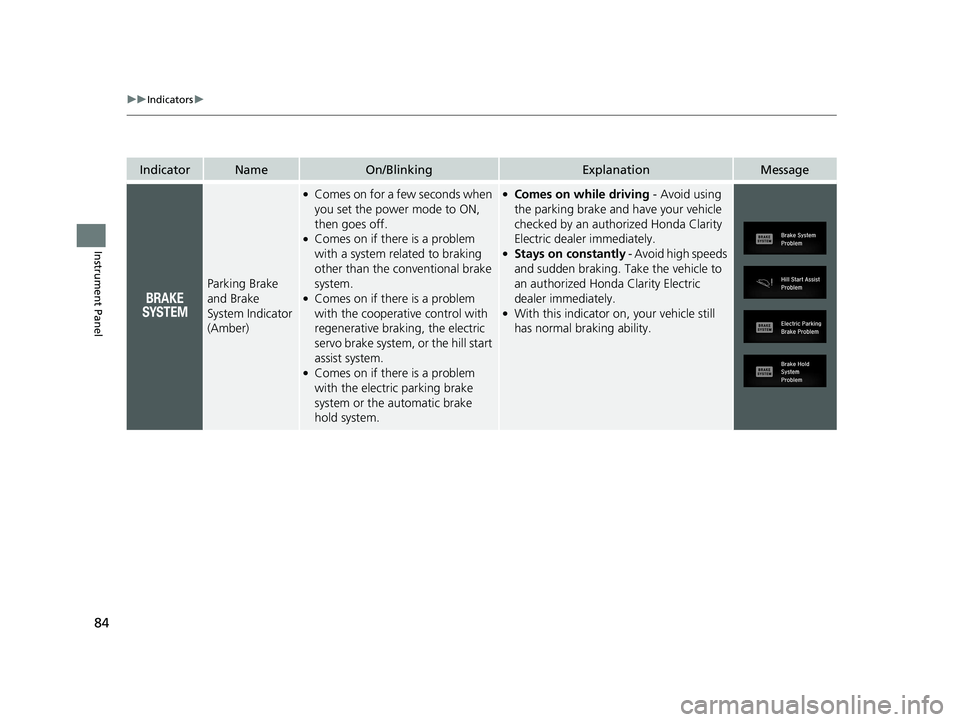
Parking Brake
and Brake
System Indicator
(Amber)
●Comes on for a few seconds when
you set the power mode to ON,
then goes off.
●Comes on if there is a problem
with a system related to braking
other than the conventional brake
system.
●Comes on if there is a problem
with the cooperative control with
regenerative braking, the electric
servo brake system, or the hill start
assist system.
●Comes on if there is a problem
with the electric parking brake
system or the automatic brake
hold system.
●Comes on while driving - Avoid using
the parking brake and have your vehicle
checked by an author ized Honda Clarity
Electric dealer immediately.
●Stays on constantly - Avoid high speeds
and sudden braking. Take the vehicle to
an authorized Honda Clarity Electric
dealer immediately.
●With this indicator on, your vehicle still
has normal braking ability.
19 CLARITY BEV-31TRV6200.book 84 ページ 2018年10月29日 月曜日 午前10時54分
Page 363 of 559
361
Driving
This chapter discusses driving and charging.
Before Driving................................... 362
Towing a Trailer ................................ 367
When Driving Turning on the Power ...................... 368
Precautions While Driving................. 371
Transmission .................................... 372
Shifting ............................................ 373
ECON Mode .................................... 379
SPORT Mode.................................... 380
Deceleration Paddle Selector ............ 381
Acoustic Vehicle Al erting System ...... 384
Front Sensor Camera ....................... 385
Road Departure Mi tigation (RDM)
System ........................................ 387
Adaptive Cruise Control (ACC) with Low
Speed Follow (LSF) ......................... 391
Lane Keeping Assist System (LKAS)...... 406Vehicle Stability Assist ® (VSA ®), aka
Electronic Stability Control (ESC),
System ....................................... 413
Agile Handling Assist ....................... 415Tire Pressure Monitoring System (TPMS) .. 416Tire Pressure Monitoring System (TPMS) -
Required Federal Explanation ......... 418
LaneWatchTM....................................... 420Braking Brake System ................................... 422
Anti-lock Brake System (ABS) ........... 428 Brake Assist System ......................... 429
Collision Mitigation Braking System
TM
(CMBSTM) ....................................... 430
Parking Your Vehicle When Stopped ................................ 438
Multi-View Rear Camera .................. 440
Charging ............................................ 442
Before Charging .............................. 442
Charge the High Voltage battery using a
Level 1, 2 or SAE J1772 DC charger ...443
Control Box ..................................... 450
High Voltage Battery........................ 455
Using a Timer .................................. 456
Energy Economy ............................... 458
19 CLARITY BEV-31TRV6200.book 361 ページ 2018年10月29日 月曜日 午前10時54分
Page 372 of 559
uuWhen Driving uTurning on the Power
370
Driving
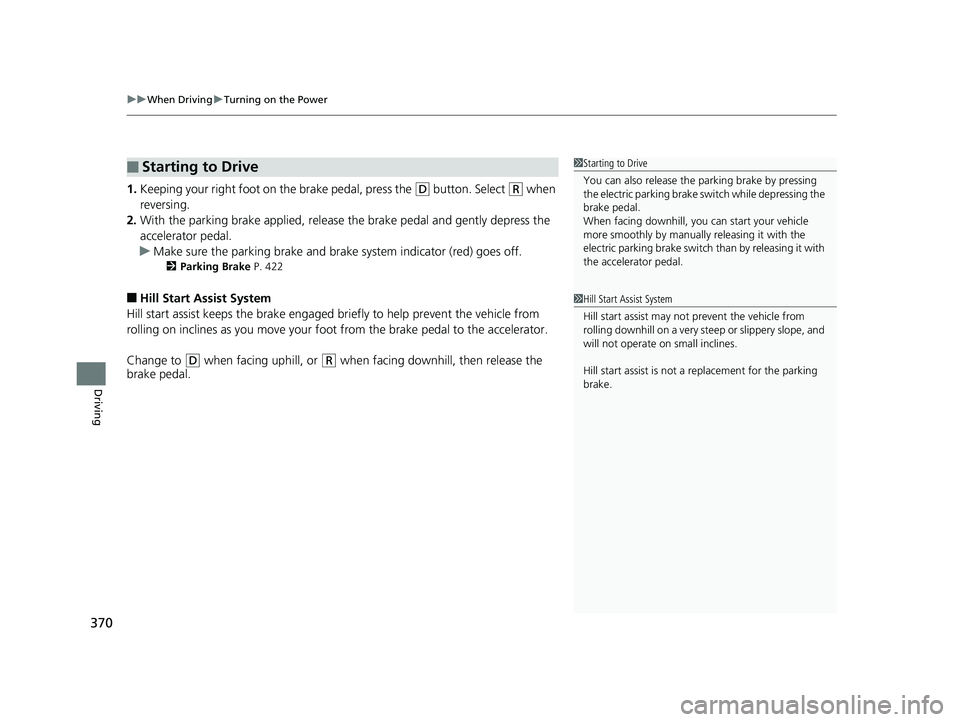
1. Keeping your right foot on the brake pedal, press the (D button. Select (R when
reversing.
2. With the parking brake applied, release the brake pedal and gently depress the
accelerator pedal.
u Make sure the parking brake and brake system indicator (red) goes off.
2 Parking Brake P. 422
■Hill Start Assist System
Hill start assist keeps the brake engaged br iefly to help prevent the vehicle from
rolling on inclines as you move your fo ot from the brake pedal to the accelerator.
Change to
(D when facing uphill, or (R when facing downhi ll, then release the
brake pedal.
■Starting to Drive1 Starting to Drive
You can also release the parking brake by pressing
the electric parking brake sw itch while depressing the
brake pedal.
When facing downhill, you can start your vehicle
more smoothly by manually releasing it with the
electric parking brake switch than by releasing it with
the accelerator pedal.
1 Hill Start Assist System
Hill start assist may not prevent the vehicle from
rolling downhill on a very steep or slippe ry slope, and
will not operate on small inclines.
Hill start assist is not a replacement for the parking
brake.
19 CLARITY BEV-31TRV6200.book 370 ページ 2018年10月29日 月曜日 午前10時54分
Page 388 of 559
uuWhen Driving uFront Sensor Camera
386
Driving
1Front Sensor Camera
If the Some Driver Assist Systems Cannot
Operate: Camera Temperature Too High message
appears:
•Use the climate control system to cool down the
interior and, if necessary, also use defroster mode
with the airflow directed towards the camera.
•Start driving the vehicle to lower the windshield
temperature, which cool s down the area around
the camera.
If the Some Driver Assist Systems Cannot
Operate: Clean Front Windshield message
appears:
•Park your vehicle in a sa fe place, and clean the
windshield. If the message does not disappear after
you have cleaned the winds hield and driven for a
while, have your vehicle checked by an authorized
Honda Clarity Electric dealer.
19 CLARITY BEV-31TRV6200.book 386 ページ 2018年10月29日 月曜日 午前10時54分
Page 394 of 559
uuWhen Driving uAdaptive Cruise Control (ACC) with Low Speed Follow (LSF)
392
Driving
■How to activate the system1Adaptive Cruise Control (ACC) with Low Speed Follow (LSF)
When the MAIN button is pressed, both ACC with
LSF and the Lane Keeping Assist System (LKAS) are
either turned on or off.
ACC with LSF may not work properly under certain
conditions. 2 ACC with LSF Conditions and Limitations
P. 397
When not using ACC with LSF: Turn off adaptive
cruise by pressing the MAIN button. This also will
turn off the Lane Keeping Assist System (LKAS).
Do not use ACC with LSF under the following
conditions:
•On roads with heavy traf fic or while driving in
continuous stop and go traffic.
•On roads with sharp turns.
•On roads with steep downhill sections, as the set
vehicle speed can be exceeded by coasting. In such
cases, ACC with LSF will not apply the brakes to
maintain the set speed.
•On roads with toll collection facilities or other
objects between lanes of traffic, or in parking
areas, or faci lities with driv e through access.
How to use
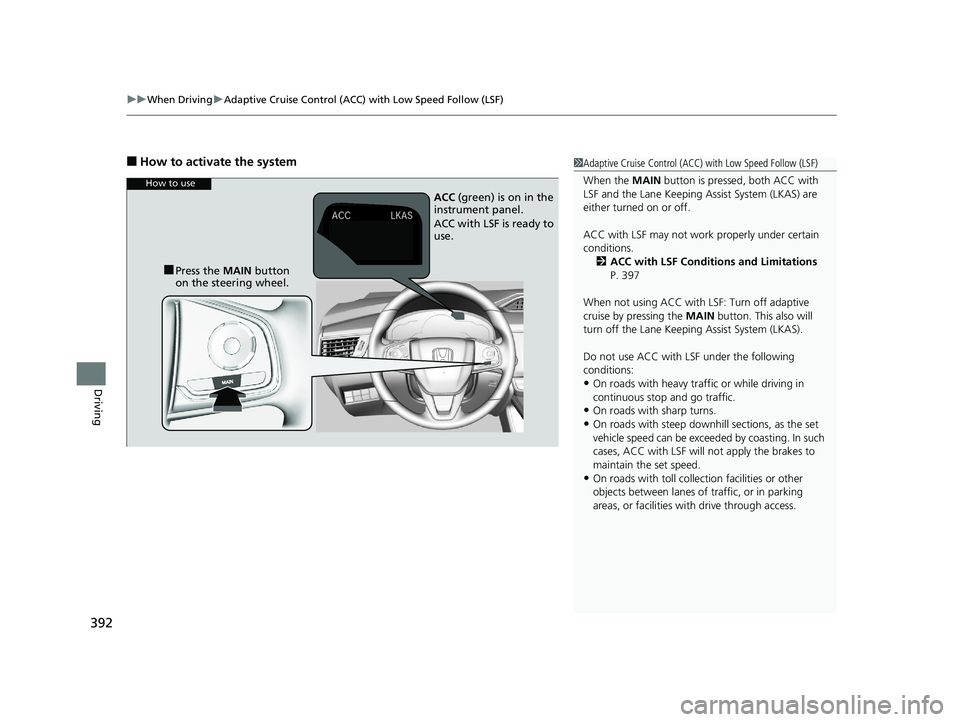
■Press the MAIN button
on the steering wheel. ACC
(green) is on in the
instrument panel.
ACC with LSF is ready to
use.
19 CLARITY BEV-31TRV6200.book 392 ページ 2018年10月29日 月曜日 午前10時54分
Page 502 of 559
500
Handling the Unexpected
If a Tire Goes Flat
Temporarily Repairing a Flat Tire
If the tire has a large cut or is otherwise severely damaged, you will need to have the
vehicle towed. If the tire only has a smal l puncture, from a nail for instance, you can
use the temporary tire repair kit so that you can drive to the nearest service station
for a more permanent repair.
If a tire goes flat while driving, grasp the steering wheel firmly, and brake gradually
to reduce speed. Then stop in a safe place.
1. Park the vehicle on a firm, level, and non-slippery surface and apply the parking
brake.
2. Change the gear position to
(P.
3. Turn on the hazard warning lights an d set the power mode to VEHICLE OFF
(LOCK).
1 Temporarily Repairing a Flat Tire
The kit should not be used in the following situations.
Instead, contact an authorized Honda Clarity Electric
dealer or a roadside assist ance to have the vehicle
towed.
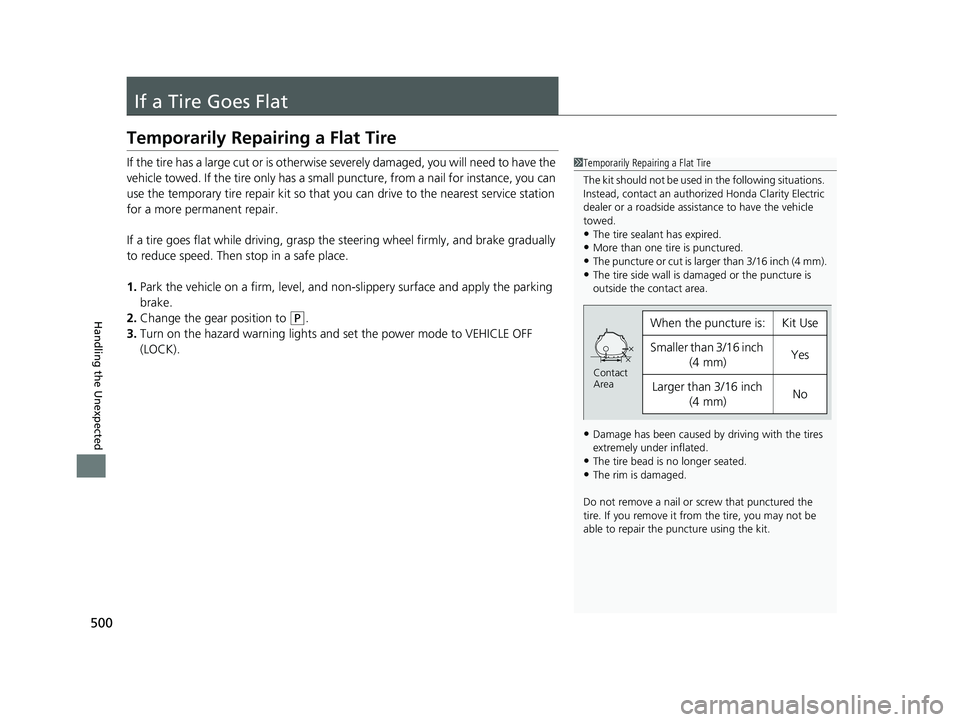
•The tire sealant has expired.•More than one tire is punctured.
•The puncture or cut is larger than 3/16 inch (4 mm).
•The tire side wall is da maged or the puncture is
outside the contact area.
•Damage has been caused by driving with the tires
extremely under inflated.
•The tire bead is no longer seated.•The rim is damaged.
Do not remove a nail or screw that punctured the
tire. If you remove it from the tire, you may not be
able to repair the puncture using the kit.
When the puncture is:Kit Use
Smaller than 3/16 inch (4 mm)Yes
Larger than 3/16 inch
(4 mm)No
Contact
Area
19 CLARITY BEV-31TRV6200.book 500 ページ 2018年10月29日 月曜日 午前10時54分
Page 515 of 559
513
Handling the Unexpected
Power System Won’t Start
Checking the Procedure
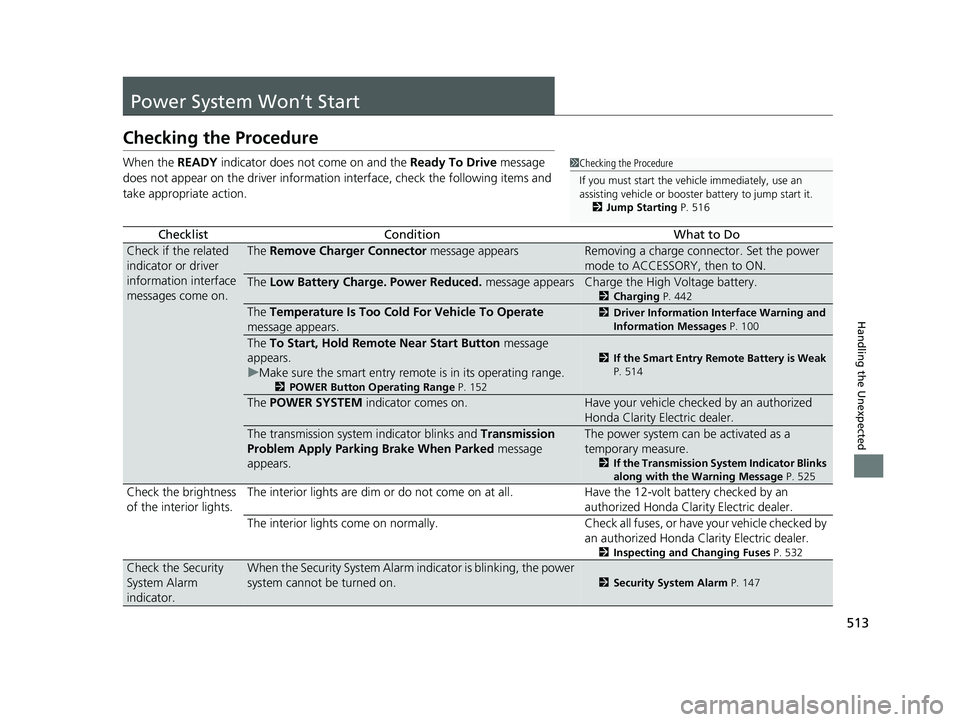
When the READY indicator does not come on and the Ready To Drive message
does not appear on the driver informatio n interface, check the following items and
take appropriate action.
ChecklistConditionWhat to Do
Check if the related
indicator or driver
information interface
messages come on.The Remove Charger Connector message appearsRemoving a charge connector. Set the power
mode to ACCESSORY, then to ON.
The Low Battery Charge . Power Reduced. message appearsCharge the High Voltage battery.
2Charging P. 442
The Temperature Is Too Cold For Vehicle To Operate
message appears.2 Driver Information Interface Warning and
Information Messages P. 100
The To Start, Hold Remote Near Start Button message
appears.
u Make sure the smart entry remote is in its operating range.
2 POWER Button Operating Range P. 152
2If the Smart Entry Remote Battery is Weak
P. 514
The POWER SYSTEM indicator comes on.Have your vehicle checked by an authorized
Honda Clarity Electric dealer.
The transmission system indicator blinks and Transmission
Problem Apply Parking Brake When Parked message
appears.The power system can be activated as a
temporary measure.
2 If the Transmission System Indicator Blinks
along with the Warning Message P. 525
Check the brightness
of the interior lights. The interior lights are dim or do not come on at
all. Have the 12-volt battery checked by an
authorized Honda Clarity Electric dealer.
The interior lights come on normally. Check al l fuses, or have your vehicle checked by
an authorized Honda Clarity Electric dealer.
2 Inspecting and Changing Fuses P. 532
Check the Security
System Alarm
indicator.When the Security System Alarm in dicator is blinking, the power
system cannot be turned on.
2 Security System Alarm P. 147
1Checking the Procedure
If you must start the vehi cle immediately, use an
assisting vehicle or booster battery to jump start it.
2 Jump Starting P. 516
19 CLARITY BEV-31TRV6200.book 513 ページ 2018年10月29日 月曜日 午前10時54分
Page 524 of 559
522
uuIndicator, Coming On/Blinking uIf the Electric Power Steering (EPS) System Indicator Comes On
Handling the Unexpected
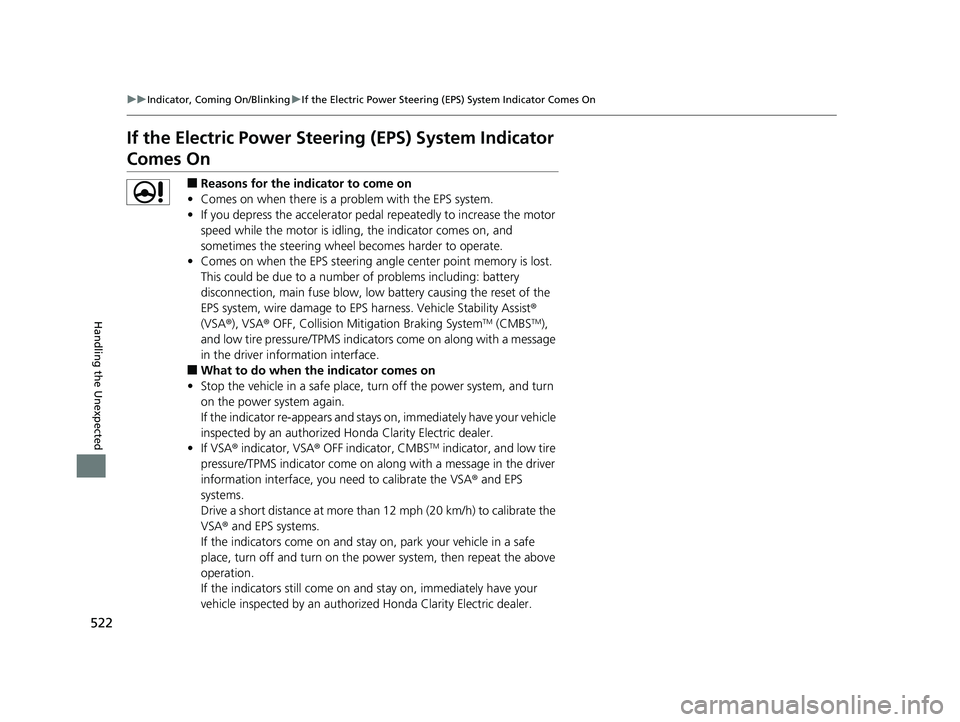
If the Electric Power Steeri ng (EPS) System Indicator
Comes On
■Reasons for the indicator to come on
• Comes on when there is a problem with the EPS system.
• If you depress the accelerator pedal repeatedly to increase the motor
speed while the motor is idling, the indicator comes on, and
sometimes the steering wheel becomes harder to operate.
• Comes on when the EPS st eering angle center point memory is lost.
This could be due to a number of problems including: battery
disconnection, main fuse blow, low battery causing the reset of the
EPS system, wire damage to EPS harness. Vehicle Stability Assist ®
(VSA ®), VSA ® OFF, Collision Mitigation Braking System
TM (CMBSTM),
and low tire pressure/TPMS indicato rs come on along with a message
in the driver information interface.
■What to do when the indicator comes on
• Stop the vehicle in a safe place, tu rn off the power system, and turn
on the power system again.
If the indicator re-appears and stays on, immediately have your vehicle
inspected by an authorized Ho nda Clarity Electric dealer.
• If VSA ® indicator, VSA ® OFF indicator, CMBS
TM indicator, and low tire
pressure/TPMS indicator come on alo ng with a message in the driver
information interface, you need to calibrate the VSA ® and EPS
systems.
Drive a short distance at more than 12 mph (20 km/h) to calibrate the
VSA ® and EPS systems.
If the indicators come on and stay on, park your vehicle in a safe
place, turn off and turn on the po wer system, then repeat the above
operation.
If the indicators still come on and stay on, immediately have your
vehicle inspected by an authorized Honda Clarity Electric dealer.
19 CLARITY BEV-31TRV6200.book 522 ページ 2018年10月29日 月曜日 午前10時54分
Page 551 of 559
549
Index
Charging ................................................ 442
Charging (12-Volt Battery) ...................... 487
Energy Economy ..................................... 458
High Voltage........................................... 455
Jump Starting ......................................... 516
Maintenance (Checking the 12-Volt Battery) ................................................. 486
Maintenance (Replacing) ......................... 488
Safety Checklist ...................................... 442
Belts (Seat) .................................................. 44
Beverage Holders ..................................... 180
Bluetooth ® Audio ..................................... 257
Bluetooth ® HandsFreeLink ®.................... 327
Booster Seats (For Children) ...................... 79
Brake System ............................................ 422
Anti-lock Brake System (ABS) .................. 428
Automatic Brake Hold ............................. 426
Brake Assist System................................. 429
Fluid ....................................................... 470
Foot Brake .............................................. 425
Indicator (Amber) .............................. 84, 523
Indicator (Red) .................... 82, 83, 521, 523
Parking Brake.......................................... 422
Bulb Replacement .................................... 472
Front Turn Signal and Front Side Marker
Lights .................................................... 472
Headlights .............................................. 472
High-Mount Brake Light.......................... 473
Parking/Daytime Running Lights .............. 472
Rear License Plate Lights ......................... 473
Taillights and Back-Up Lights................... 473 Taillights/Rear Side
Marker, Brake and
Rear Turn Signal Lights .......................... 473
Bulb Specifications ................................... 538
C
Carrying Cargo.................................. 363, 365
Certification Label .................................... 540
Changing Bulbs ......................................... 472
Charge Lid ......................................... 445, 447
Charge Lid Release Button ............... 444, 446
Charge Timer Setting ............................... 456
Charging ................................................... 442
120V AC (AC Level 1) .............................. 444
240V AC (AC Level 2) .............................. 446
Cannot Start Charging ............................ 452
Charge Indicator (vehicle side) ................. 454
Charge Lid ....................................... 445, 447
Charging Connector ................ 445, 447, 449
Control Box ............................................. 450
DC Charge .............................................. 448
High Voltage Battery ............................... 455
Timer ....................................................... 456
Unable to Disengage the Charging Connector ............................................. 535
Charging Cable Bag .................................. 444
Charging Connector ................. 445, 447, 449
Charging System Indicator ................. 86, 520
Child Safety ................................................. 67
Childproof Door Locks ............................. 142 Child Seat
.................................................... 67
Booster Seats ............................................ 79
Child Seat for Infants................................. 69
Child Seat for Small Children ..................... 70
Installing a Child Seat with a Lap/
Shoulder Seat Belt ................................... 74
Larger Children ......................................... 78
Rear-facing Child Seat ............................... 69
Selecting a Child Seat ................................ 71
Using a Tether ........................................... 76
Childproof Door Locks ............................. 142
Cleaning the Exterior ............................... 492
Cleaning the Interior ................................ 490
Climate Control System ............................ 186
Changing the Mode ................................ 188
Defrosting the Windshield and Windows ............................................... 190
Dust and Pollen Filter............................... 489
Sensors ................................................... 194
Using Automatic Climate Control ............ 186
Clock .......................................................... 130
CMBS
TM (Collision Mitigation Braking
SystemTM) ................................................. 430
Coat Hook ................................................. 183
Collision Mitigation Braking System
TM
(CMBSTM) ................................................. 430
Console Compartment ............................. 179
Controls ..................................................... 129
Cooling System ......................................... 469
Coolant ................................................... 469
Overheating ............................................ 519
19 CLARITY BEV-31TRV6200.book 549 ページ 2018年10月29日 月曜日 午前10時54分