clock setting HONDA CLARITY PLUG IN HYBRID 2018 Owners Manual
[x] Cancel search | Manufacturer: HONDA, Model Year: 2018, Model line: CLARITY PLUG IN HYBRID, Model: HONDA CLARITY PLUG IN HYBRID 2018Pages: 591, PDF Size: 24.66 MB
Page 26 of 591
24
Quick Reference Guide Controls (P 135)
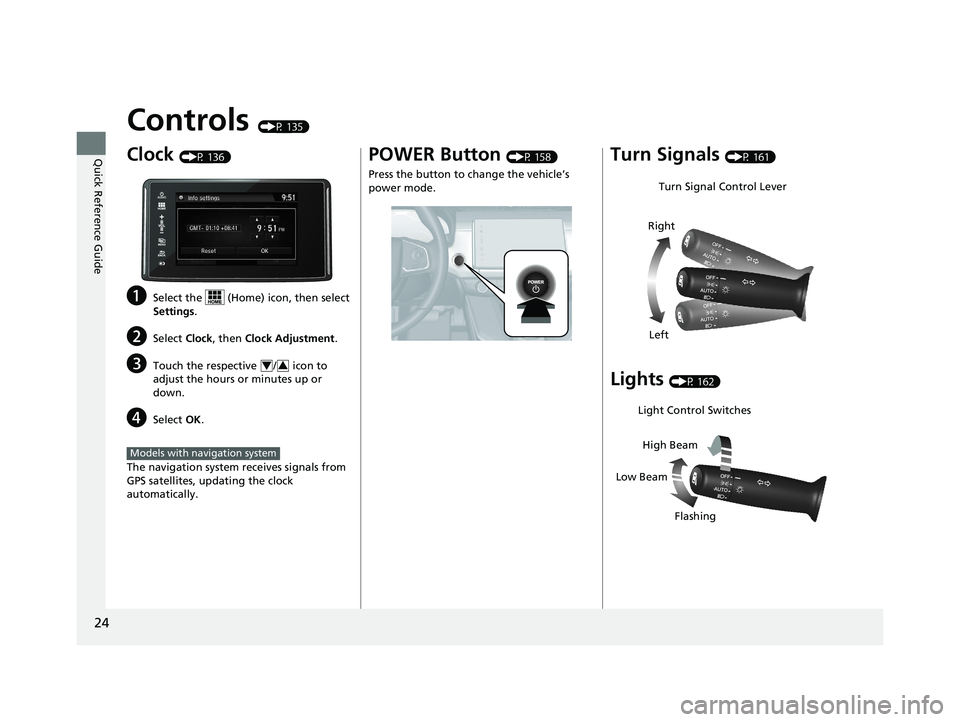
Clock (P 136)
a Select the (Home) icon, then select
Settings .
b Select Clock , then Clock Adjustment .
c Touch the respective / icon to
adjust the hours or minutes up or
down.
d Select OK .
The navigation system receives signals from
GPS satellites, updating the clock
automatically. 4 3
Models with navigation system POWER Button (P 158)
Press the button to change the vehicle’s
power mode.
Turn Signals (P 161)
Lights (P 162)Turn Signal Control Lever
Right
Left
Light Control Switches
Low Beam High Beam
Flashing18 CLARITY PHEV CSS-31TRW6000.book 24 ページ 2017年8月31日 木曜日 午後2時 49分
Page 138 of 591
136
Controls Clock Adjusting the Clock You can adjust the time manually in the audio/information scr een, with the power
mode in ON.
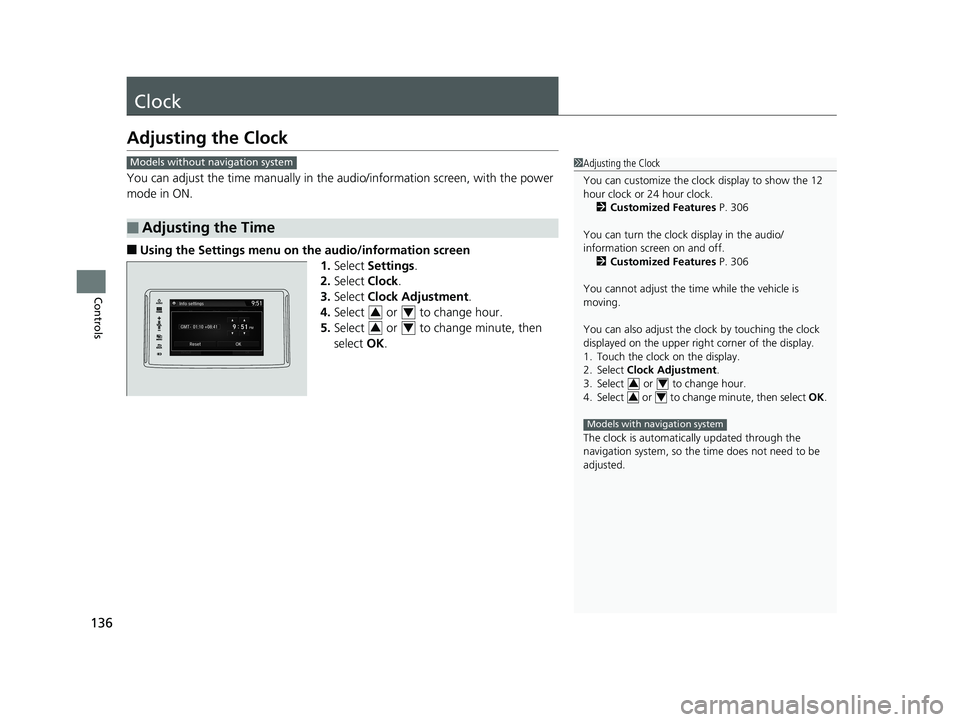
■ Using the Settings menu on th e audio/information screen
1. Select Settings .
2. Select Clock .
3. Select Clock Adjustment .
4. Select or to change hour.
5. Select or to change minute, then
select OK .
■ Adjusting the Time 1 Adjusting the Clock
You can customize the clock display to show the 12
hour clock or 24 hour clock.
2 Customized Features P. 306
You can turn the clock display in the audio/
information screen on and off.
2 Customized Features P. 306
You cannot adjust the time while the vehicle is
moving.
You can also adjust the clock by touching the clock
displayed on the upper right corner of the display.
1. Touch the clock on the display.
2. Select Clock Adjustment .
3. Select or to change hour.
4. Select or to change minute, then select OK .
The clock is automatica lly updated through the
navigation system, so the ti me does not need to be
adjusted. 3 4
3 4
Models with navigation systemModels without navigation system
3 4
3 418 CLARITY PHEV CSS-31TRW6000.book 136 ページ 2017年8月31日 木曜日 午後2時49分
Page 215 of 591
Continued
213uu Audio System Basic Operation u Audio/Information Screen
Features
■ Info
Displays Trip Computer or Clock/Wallpaper . Select on the Info Menu screen
to see all available options: Trip Computer , Voice Info , Clock/Wallpaper ,
System/Device Information and Vehicle energy .
Trip Computer :
• Current Drive tab: Displays the current trip information.
• History of Trip A tab: Displays information for the three previous drives. The
information is stored every time you reset Trip A.
To delete the history manually, select Delete history on the History of Trip A
tab. The confirmation message appears on the screen, then select Yes .
Voice Info : Displays a list of all voice commands.
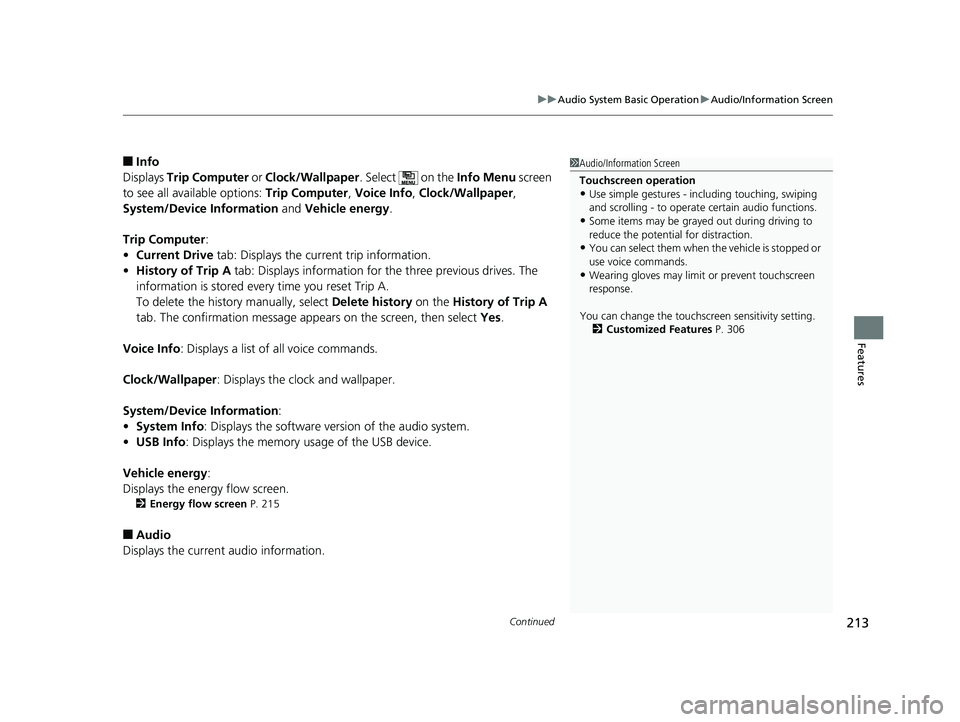
Clock/Wallpaper : Displays the clock and wallpaper.
System/Device Information :
• System Info : Displays the software version of the audio system.
• USB Info : Displays the memory usage of the USB device.
Vehicle energy :
Displays the ener gy flow screen.2 Energy flow screen P. 215
■ Audio
Displays the current audio information. 1 Audio/Information Screen
Touchscreen operation
• Use simple gestures - in cluding touching, swiping
and scrolling - to operate certain audio functions.
• Some items may be grayed out during driving to
reduce the potential for distraction.
• You can select them when the vehicle is stopped or
use voice commands.
• Wearing gloves may limit or prevent touchscreen
response.
You can change the touchs creen sensitivity setting.
2 Customized Features P. 30618 CLARITY PHEV CSS-31TRW6000.book 213 ページ 2017年8月31日 木曜日 午後2時49分
Page 225 of 591
Continued
223uu Audio System Basic Operation u Audio/Information Screen
Features
You can change, store, and delete the wa llpaper on the audio/information screen.
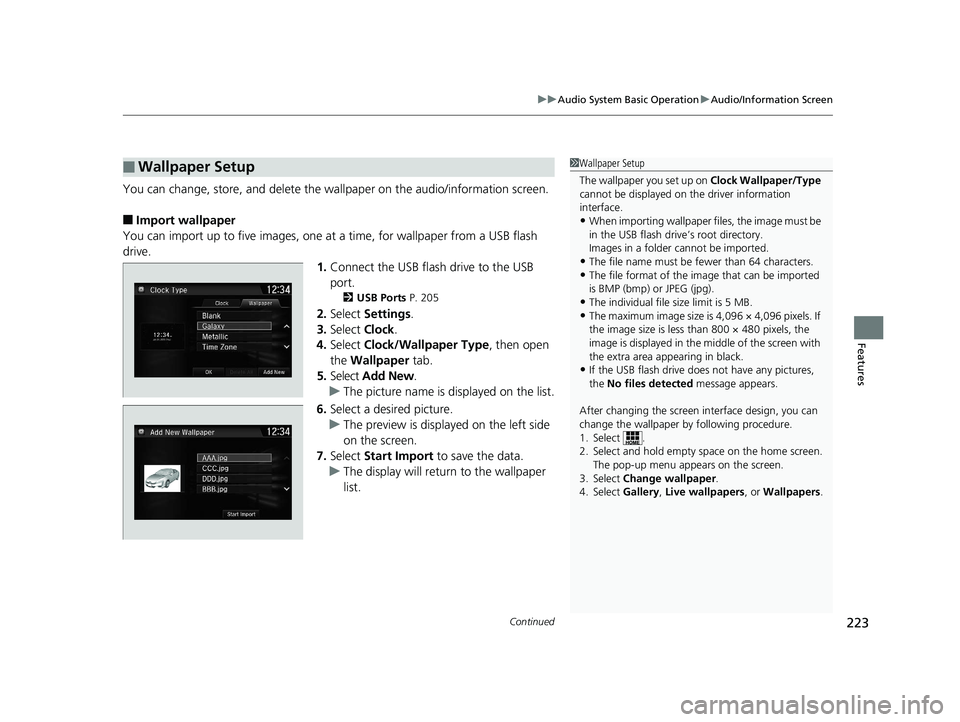
■ Import wallpaper
You can import up to five images, one at a time, for wallpaper from a USB flash
drive.
1. Connect the USB flash drive to the USB
port. 2 USB Ports P. 205
2. Select Settings .
3. Select Clock .
4. Select Clock/Wallpaper Type , then open
the Wallpaper tab.
5. Select Add New .
u The picture name is displayed on the list.
6. Select a desired picture.
u The preview is displayed on the left side
on the screen.
7. Select Start Import to save the data.
u The display will return to the wallpaper
list.■ Wallpaper Setup 1 Wallpaper Setup
The wallpaper you set up on Clock Wallpaper/Type
cannot be displayed on th e driver information
interface.
• When importing wallpaper files, the image must be
in the USB flash driv e’s root directory.
Images in a folder cannot be imported.
• The file name must be fewer than 64 characters.
• The file format of the im age that can be imported
is BMP (bmp) or JPEG (jpg).
• The individual file size limit is 5 MB.
• The maximum image size is 4,096 × 4,096 pixels. If
the image size is less than 800 × 480 pixels, the
image is displayed in the middle of the screen with
the extra area appearing in black.
• If the USB flash drive doe s not have any pictures,
the No files detected message appears.
After changing the screen interface design, you can
change the wallpaper by following procedure.
1. Select .
2. Select and hold empty space on the home screen.
The pop-up menu appears on the screen.
3. Select Change wallpaper .
4. Select Gallery , Live wallpapers , or Wallpapers .18 CLARITY PHEV CSS-31TRW6000.book 223 ページ 2017年8月31日 木曜日 午後2時49分
Page 226 of 591
uu Audio System Basic Operation u Audio/Information Screen
224
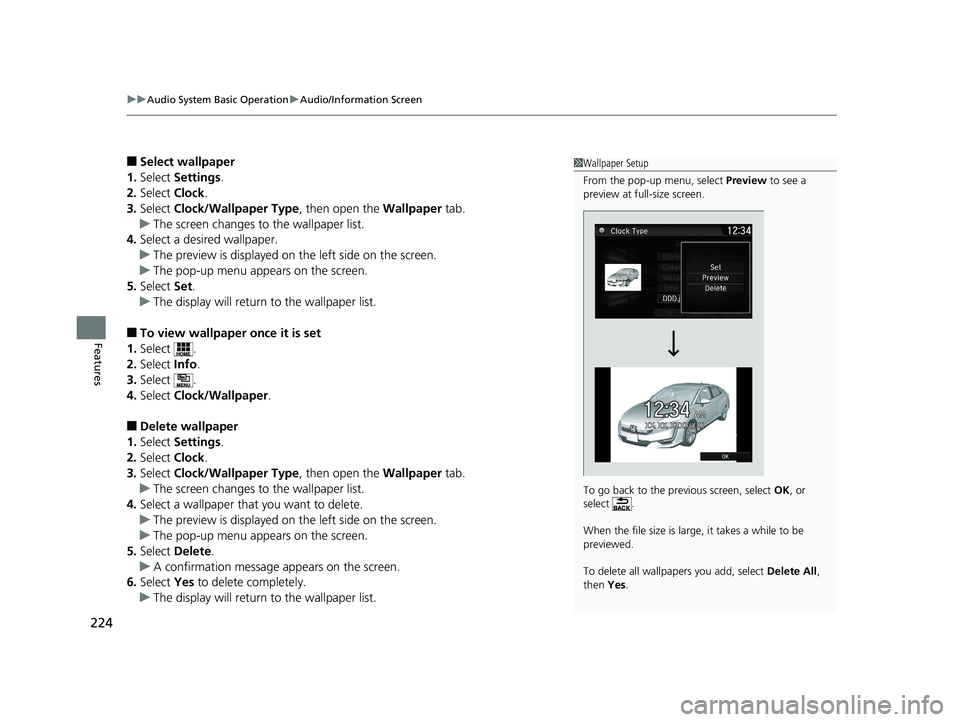
Features ■ Select wallpaper
1. Select Settings .
2. Select Clock .
3. Select Clock/Wallpaper Type , then open the Wallpaper tab.
u The screen changes to the wallpaper list.
4. Select a desired wallpaper.
u The preview is displayed on the left side on the screen.
u The pop-up menu appears on the screen.
5. Select Set .
u The display will return to the wallpaper list.
■ To view wallpaper once it is set
1. Select .
2. Select Info .
3. Select .
4. Select Clock/Wallpaper .
■ Delete wallpaper
1. Select Settings .
2. Select Clock .
3. Select Clock/Wallpaper Type , then open the Wallpaper tab.
u The screen changes to the wallpaper list.
4. Select a wallpaper that you want to delete.
u The preview is displayed on the left side on the screen.
u The pop-up menu appears on the screen.
5. Select Delete .
u A confirmation message appears on the screen.
6. Select Yes to delete completely.
u The display will return to the wallpaper list. 1 Wallpaper Setup
From the pop-up menu, select Preview to see a
preview at full-size screen.
To go back to the previous screen, select OK , or
select .
When the file size is large, it takes a while to be
previewed.
To delete all wallpapers you add, select Delete All ,
then Yes .18 CLARITY PHEV CSS-31TRW6000.book 224 ページ 2017年8月31日 木曜日 午後2時49分
Page 309 of 591
307 uu Customized Features u
Continued
Features
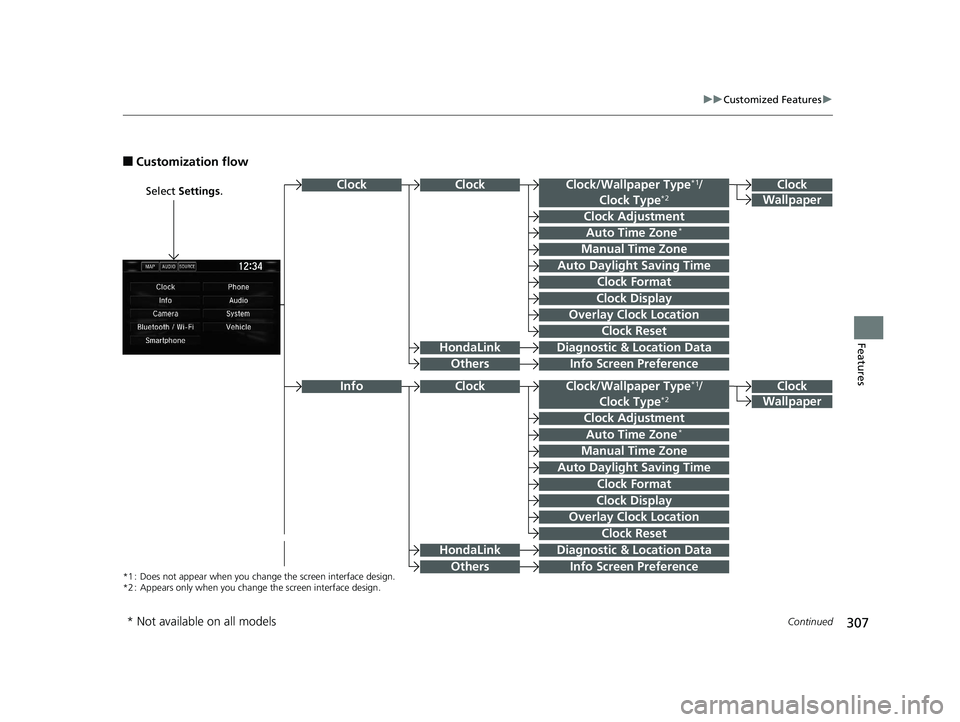
■ Customization flow Select Settings .
Clock
WallpaperClock/Wallpaper Type *1
/
Clock Type *2
Clock Adjustment
Clock FormatClockClock
Auto Time Zone *
Manual Time Zone
Auto Daylight Saving Time
Clock Display
Overlay Clock Location
Info Screen Preference
Clock
WallpaperClock/Wallpaper Type *1
/
Clock Type *2
Clock Adjustment
Clock FormatAuto Time Zone *
Manual Time Zone
Auto Daylight Saving Time
Clock Display
Overlay Clock Location
Clock Reset
Info Screen PreferenceInfo
*1 : Does not appear when you chan ge the screen interface design.
*2 : Appears only when you change the screen interface design. Diagnostic & Location Data
Diagnostic & Location DataHondaLink
Others
HondaLink
Others Clock Clock Reset
* Not available on all models 18 CLARITY PHEV CSS-31TRW6000.book 307 ページ 2017年8月31日 木曜日 午後2時49分
Page 316 of 591
314 uu Customized Features u
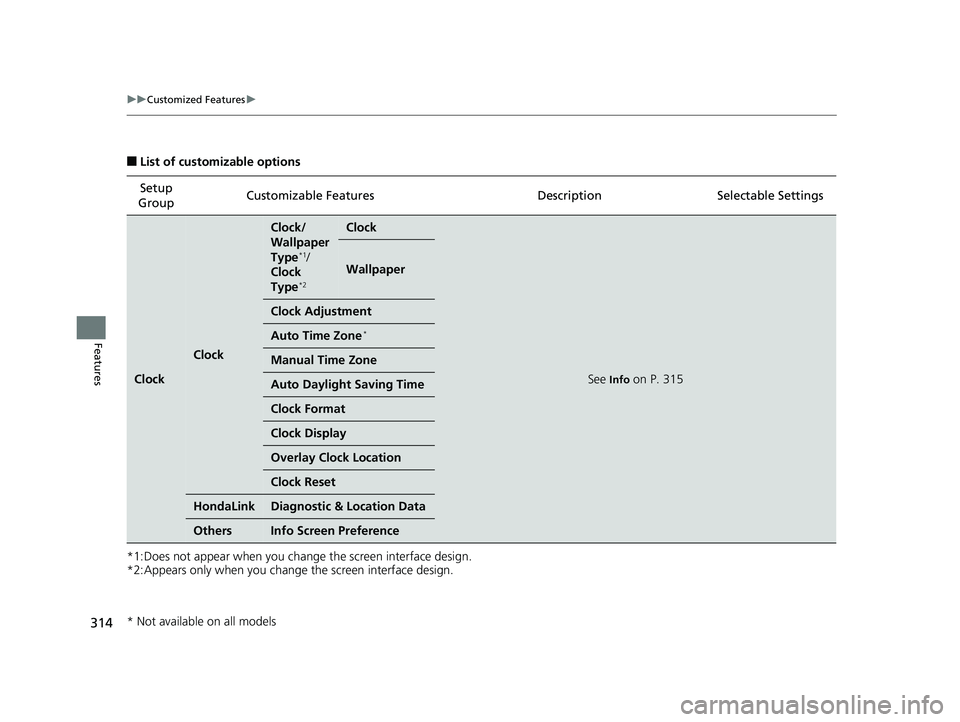
Features ■ List of customizable options
*1:Does not appear when you change the screen interface design.
*2:Appears only when you change the screen interface design. Setup
Group Customizable Features Descri ption Selectable Settings
Clock Clock Clock/
Wallpaper
Type *1
/
Clock
Type *2
Clock
See Info
on P. 315Wallpaper
Clock Adjustment
Auto Time Zone *
Manual Time Zone
Auto Daylight Saving Time
Clock Format
Clock Display
Overlay Clock Location
Clock Reset
HondaLink Diagnostic & Location Data
Others Info Screen Preference
* Not available on all models 18 CLARITY PHEV CSS-31TRW6000.book 314 ページ 2017年8月31日 木曜日 午後2時49分
Page 317 of 591
315 uu Customized Features u
Continued
Features
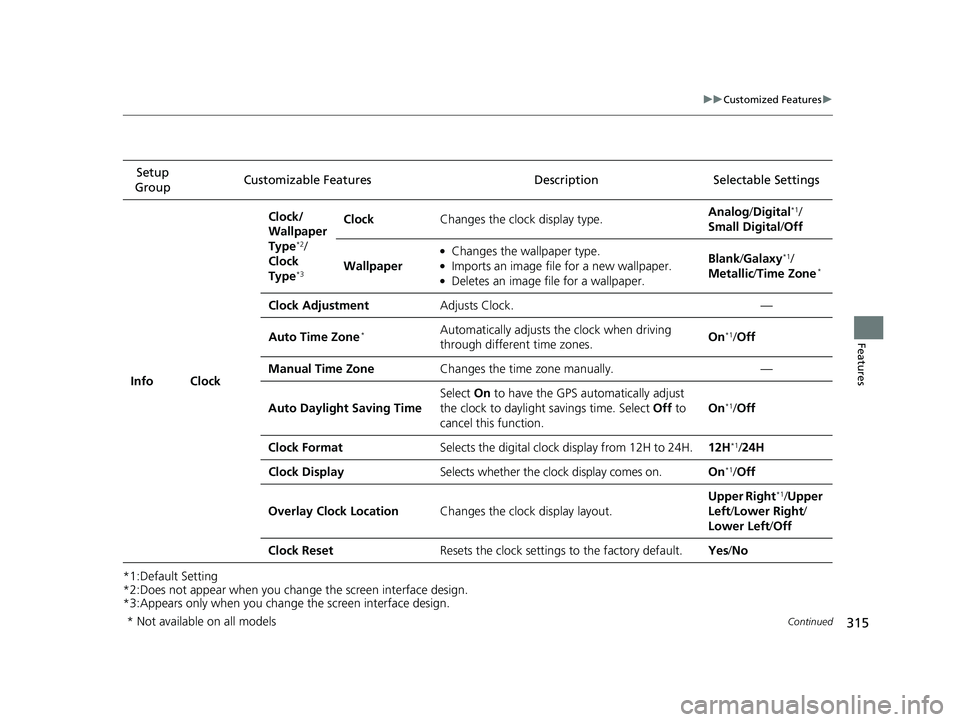
*1:Default Setting
*2:Does not appear when you chan ge the screen interface design.
*3:Appears only when you change the screen interface design.Setup
Group Customizable Features Description Selectable Settings
Info Clock Clock/
Wallpaper
Type *2
/
Clock
Type *3
Clock Changes the clock display type. Analog / Digital *1
/
Small Digital / Off
Wallpaper ●
Changes the wallpaper type. ●
Imports an image file for a new wallpaper. ●
Deletes an image file for a wallpaper. Blank / Galaxy *1
/
Metallic / Time Zone *
Clock Adjustment Adjusts Clock. —
Auto Time Zone *
Automatically adjusts the clock when driving
through different time zones. On *1
/ Off
Manual Time Zone Changes the time zone manually. —
Auto Daylight Saving Time Select On to have the GPS automatically adjust
the clock to daylight savings time. Select Off to
cancel this function. On *1
/ Off
Clock Format Selects the digital clock display from 12H to 24H. 12H *1
/ 24H
Clock Display Selects whether the cl ock display comes on. On *1
/ Off
Overlay Clock Location Changes the clock display layout. Upper Right *1
/ Upper
Left / Lower Right /
Lower Left / Off
Clock Reset Resets the clock settings to the factory default. Yes / No
* Not available on all models 18 CLARITY PHEV CSS-31TRW6000.book 315 ページ 2017年8月31日 木曜日 午後2時49分
Page 326 of 591
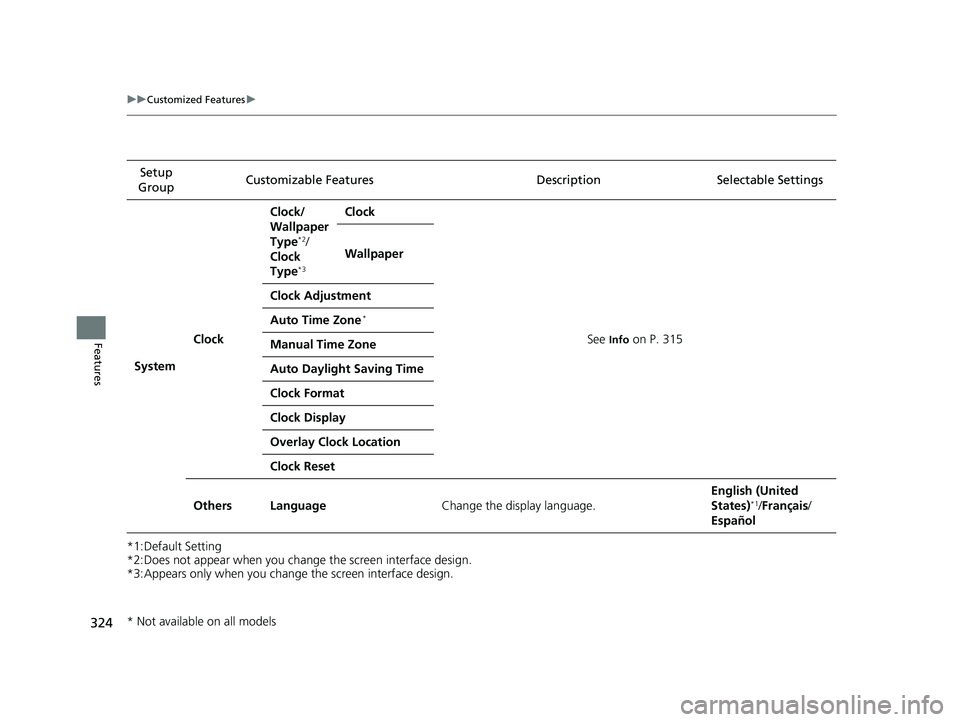
324 uu Customized Features u
Features *1:Default Setting
*2:Does not appear when you change the screen interface design.
*3:Appears only when you change the screen interface design. Setup
Group Customizable Features Description Selectable Settings
System Clock Clock/
Wallpaper
Type *2
/
Clock
Type *3
Clock
See Info
on P. 315Wallpaper
Clock Adjustment
Auto Time Zone *
Manual Time Zone
Auto Daylight Saving Time
Clock Format
Clock Display
Overlay Clock Location
Clock Reset
Others Language Change the display language. English (United
States) *1
/ Français /
Español
* Not available on all models 18 CLARITY PHEV CSS-31TRW6000.book 324 ページ 2017年8月31日 木曜日 午後2時49分
Page 582 of 591
580
Index B Battery ....................................................... 466
12-Volt .................................................... 508
12-Volt Battery Charging System
Indicator .......................................... 90, 546
Charging (12-Volt Battery) ....................... 509
Charging (High Voltage Battery) .............. 454
High Voltage ........................................... 466
Jump Starting .......................................... 539
Maintenance (Checking the 12-Volt
Battery) .................................................. 508
Maintenance (Replacing).......................... 510
Belts (Seat) .................................................. 47
Beverage Holders ...................................... 187
Bluetooth ® Audio ..................................... 267
Bluetooth ® HandsFreeLink ® ..................... 335
Booster Seats (For Children) ....................... 81
Brake System ............................................. 431
Anti-lock Brake System (ABS) ................... 437
Automatic Brake Hold.............................. 435
Brake Assist System ................................. 438
Fluid ........................................................ 492
Foot Brake ............................................... 433
Indicator (Red) ......................................... 550
Parking Brake .......................................... 431
Brake System (Amber)
Indicator .................................................... 88
Brake System (Red)
Indicator ...................................... 86, 87, 548 Bulb Replacement .................................... 494
Front Turn Signal and Front Side Marker
Lights .................................................... 494
Headlights ............................................... 494
High-Mount Brake Light .......................... 495
Parking/Daytime Running Lights .............. 494
Rear License Plate Lights .......................... 495
Taillights and Back-Up Lights ................... 495
Taillights/Rear Side Marker, Brake and
Rear Turn Signal Lights .......................... 495
Bulb Specifications ................................... 566
C Carbon Monoxide Gas ............................... 82
Carrying Cargo ................................. 371, 373
Certification Label .................................... 568
Changing Bulbs ........................................ 494
Charge Connector ............................ 457, 460
Charge Lid ......................................... 457, 460
Charge Lid Release Button .............. 456, 459
Charge Timer Setting ............................... 467
Charging (High Voltage Battery) ............ 454
120V AC (AC Level 1).............................. 456
240V AC (AC Level 2).............................. 459
Cannot Start Charging ............................ 463
Charge Connector........................... 457, 460
Charge Indicator (vehicle side) ................. 465
Charge Lid ...................................... 457, 460
Control Box ............................................. 461
High Voltage Battery ............................... 466 Timer ...................................................... 467
Charging System Indicator ...................... 546
Child Safety ................................................ 69
Childproof Door Locks ............................ 148
Child Seat ................................................... 69
Booster Seats ............................................ 81
Child Seat for Infants ................................ 71
Child Seat for Small Children .................... 72
Installing a Child Seat with a Lap/Shoulder
Seat Belt ................................................. 76
Larger Children ......................................... 80
Rear-facing Child Seat............................... 71
Selecting a Child Seat ............................... 73
Using a Tether .......................................... 78
Childproof Door Locks ............................. 148
Cleaning the Exterior ............................... 515
Cleaning the Interior ............................... 513
Climate Control System ........................... 193
Changing the Mode................................ 195
Defrosting the Windshield and
Windows .............................................. 197
Dust and Pollen Filter .............................. 512
Sensors ................................................... 201
Using Automatic Climate Control............ 193
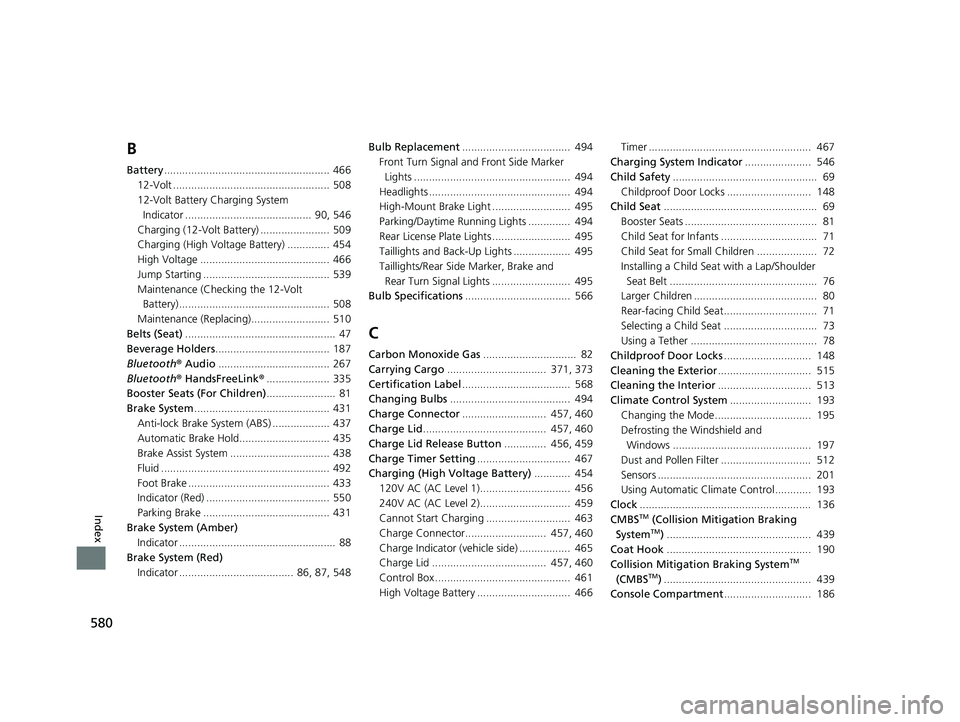
Clock ......................................................... 136
CMBS TM
(Collision Mitigation Braking
System TM
) ................................................ 439
Coat Hook ................................................ 190
Collision Mitigation Braking System TM
(CMBS TM
) ................................................. 439
Console Compartment ............................. 18618 CLARITY PHEV CSS-31TRW6000.book 580 ページ 2017年8月31日 木曜日 午後2時49分