Windows HONDA CR-V 2000 RD1-RD3 / 1.G Owners Manual
[x] Cancel search | Manufacturer: HONDA, Model Year: 2000, Model line: CR-V, Model: HONDA CR-V 2000 RD1-RD3 / 1.GPages: 322, PDF Size: 4.64 MB
Page 28 of 322
Protectin
g Childre n
I f Yo u Mus t Driv e wit h Severa l
Childre n
You r vehicl e ha s thre e seatin g
position s i n th e bac k sea t wher e
childre n ca n b e properl y restrained .
I f yo u eve r hav e t o carr y mor e tha n
thre e childre n in you r vehicle : Plac
e th e larges t chil d in th e fron t
seat , provide d th e chil d is larg e
enoug h to wea r a sea t bel t
properl y (se e pag e 3 7 ) . Mov
e th e vehicl e sea t a s fa r t o th e
rea r a s possibl e (se e pag e 1 2 ) .
Hav e th e chil d si t uprigh t an d wel l
bac k in th e sea t (se e pag e 1 8 ) . Mak
e sur e th e sea t bel t i s properl y
positione d an d secure d (se e pag e
15 ).
I
f a Chil d Require s Clos e
Attentio n
Man y parent s sa y the y prefe r t o pu t
a n infan t o r smal l chil d in th e fron t
passenge r sea t s o the y ca n watc h th e
child , o r becaus e th e chil d require s
attention .
Placin g a chil d in th e fron t sea t
expose s th e chil d t o hazard s fro m
th e airbag , an d payin g clos e
attentio n t o a chil d distract s th e
drive r fro m th e importan t tas k o f
driving , placin g bot h o f yo u a t risk .
I f a chil d require s physica l attentio n
o r frequen t visua l contact , w e
strongl y recommen d tha t anothe r
adul t rid e wit h th e chil d in th e bac k
seat . Th e bac k sea t i s fa r safe r fo r a
chil d tha n th e front . Additiona
l Safet y Precaution s
Use childproof door locks to
prevent children from opening the
doors. Usin g thi s featur e wil l
preven t childre n fro m openin g th e
door s an d accidentall y fallin g ou t
(se e pag e 7 5 ) .
Use the main power window
switch to prevent children from
opening the rear windows. Usin g
thi s featur e wil l preven t childre n
fro m playin g wit h th e windows ,
whic h coul d expos e the m to
hazard s o r distrac t th e drive r (se e
pag e 8 4 ) .
Drive r an d Passenge r Safet y
Page 55 of 322
Instrument
s an d Control s
Thi s sectio n give s informatio n abou t
th e control s an d display s tha t
contribut e to th e dail y operatio n o f
you r Honda . Al l th e essentia l
control s ar e withi n eas y reach .
Contro l Locations........................... . 5 2
Indicato r Lights............................... . 5 3
Gauges............................................. . 5 6
Speedometer............................... . 5 6
Tachometer................................. . 5 6
Odometer..................................... . 5 6
Tri p Meter................................... . 5 6
Fue l Gauge.................................. . 5 7
Temperatur e Gauge................... . 5 7
Maintenanc e Require d
Indicator................................... . 5 8
Control s Nea r th e Steerin g
Wheel....................................... . 5 9
Headlights................................... . 6 0 Daytim
e Runnin g Lights............ . 6 0
Instrumen t Pane l Brightness.... . 6 1
Tur n Signals................................ . 6 1
Windshiel d Wipers..................... . 6 2
Windshiel d Washers.................. . 6 2
Rea r Windo w Wipe r an d
Washer..................................... . 6 3
Hazar d Warning.......................... . 6 3
Rea r Windo w Defogger............. . 6 3
Steerin g Whee l Adjustment...... . 6 4
Steerin g Whee l Control s ............... . 6 6
Cruis e Control............................. . 6 6
Key s an d Locks............................... . 6 9
Keys.............................................. 69
Ignitio n Switch............................ . 6 9
Doo r Locks.................................. . 7 0
Powe r Doo r Locks...................... . 7 1
Remot e Transmitter................... . 7 2
Childproo f Doo r Locks.............. . 7 5
Tailgate........................................ . 7 5
Glov e Box.................................... . 7 7
Seats................................................. . 7 7
Fron t Sea t Adjustments............. . 7 7
Driver' s Sea t Heigh t
Adjustment.............................. . 7 8
Hea d Restraints.......................... . 7 9
Rea
r Seat-bac k Adjustment....... . 8 0
Rea r Sea t Armrest...................... . 8 0
Reclinin g th e Fron t an d
Rea r Seat-backs...................... . 8 1
Foldin g Rea r Seat....................... . 8 2
Powe r Windows.............................. . 8 4
Mirrors............................................. . 8 5
Adjustin g th e Powe r Mirrors.... . 8 6
Parkin g Brake................................. . 8 6
Digita l Clock.................................... . 8 7
Cente r Table.................................... . 8 7
Beverag e Holder............................. . 8 8
Built-i n Table................................... .
89
Cente r Pocket................................. .
9
1
Storag e Box..................................... . 9 1
Carg o Floo r Pockets....................... . 9 2
Accessor y Powe r Socket............... . 9 2
Tailgat e Pocket............................... . 9 3
Carg o Hooks...........,.,,..,,,.,...,,,........ . 9 3
Ashtrays........................................... . 9 4
Interio r Lights................................. . 9 4
Ceilin g Light................................ . 9 4
Spotlights..................................... 95
Carg o Are a Light........................ . 9 5
Ignitio n Switc h Light.................. . 9 5
Instrument s an d Control s
Page 88 of 322
Seats
, Powe r Window s
Mak e sur e an y item s store d in th e
carg o are a ar e secured . Loos e item s
ca n fl y forwar d an d caus e injur y i f
yo u hav e t o brak e hard . Powe
r Window s
You r vehicle' s window s ar e electri -
cally-powered . Tur n th e ignitio n
switc h t o O N (II ) t o rais e o r lowe r
an y window .
Eac h doo r ha s a switc h tha t control s
it s window . T o ope n th e window ,
pus h th e switc h dow n an d hol d it -
Releas e th e switc h whe n yo u wan t
th e windo w to stop . Clos e th e
windo w b y pushin g th e switc h u p
an d holdin g it .
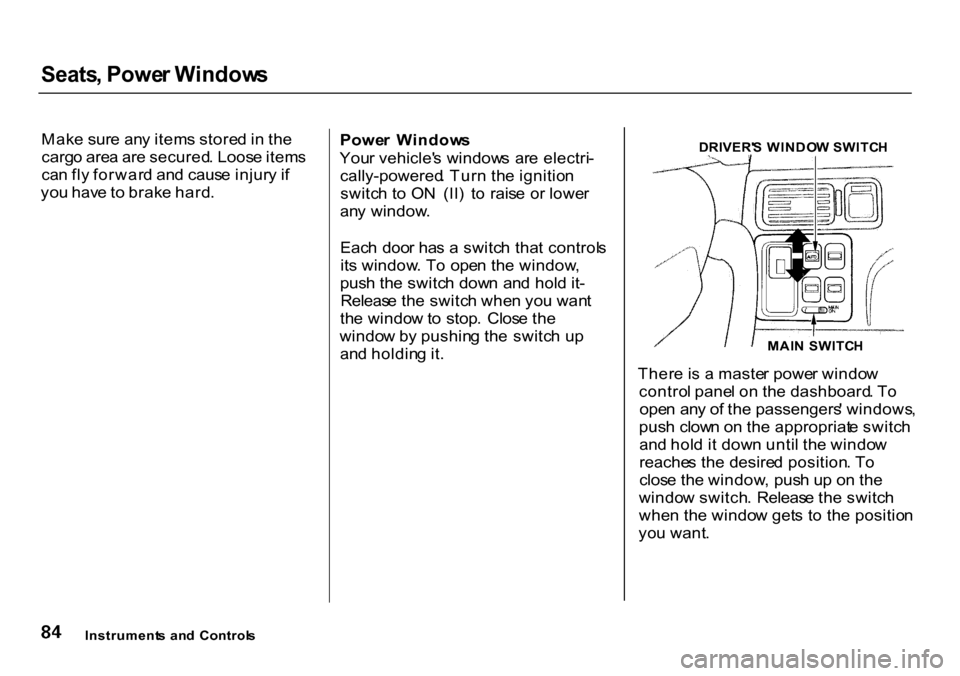
There is a maste r powe r windo w
contro l pane l o n th e dashboard . T o
ope n an y o f th e passengers ' windows ,
pus h clow n o n th e appropriat e switc h
an d hol d i t dow n unti l th e windo w
reache s th e desire d position . T o
clos e th e window , pus h u p o n th e
windo w switch . Releas e th e switc h
whe n th e windo w get s t o th e positio n
yo u want .
Instrument s an d Control s DRIVER'
S WINDO W SWITC H
MAI N SWITC H
Page 89 of 322
Powe
r Windows , Mirror s
Th e maste r contro l pane l als o con -
tain s thes e extr a features :
AUT O — To ope n th e driver' s
windo w fully , pus h th e windo w
switc h firml y dow n an d releas e it .
Th e windo w automaticall y goe s al l
th e wa y down . T o sto p th e windo w
fro m goin g al l th e wa y down , pus h
th e windo w switc h u p briefly .
T o ope n th e driver' s windo w onl y
partially , pus h th e windo w switc h
dow n lightl y an d hol d it . Th e windo w
wil l sto p a s soo n a s yo u releas e th e
switch .
Th
e AUT O functio n onl y work s t o
lowe r th e driver' s window . T o rais e
th e window , yo u mus t pus h th e
windo w switc h u p an d hol d it unti l
th e windo w reache s th e desire d
position .
Th e MAI N switc h control s powe r t o
th e passengers ' windows . Wit h thi s
switc h off , th e passengers ' window s
canno t b e raise d o r lowered . Th e
MAI N switc h doe s no t affec t th e
driver' s window . Kee p th e MAI N
switc h of f whe n yo u hav e childre n in
th e vehicl e s o the y d o no t injur e
themselve s b y operatin g th e
window s unintentionally .
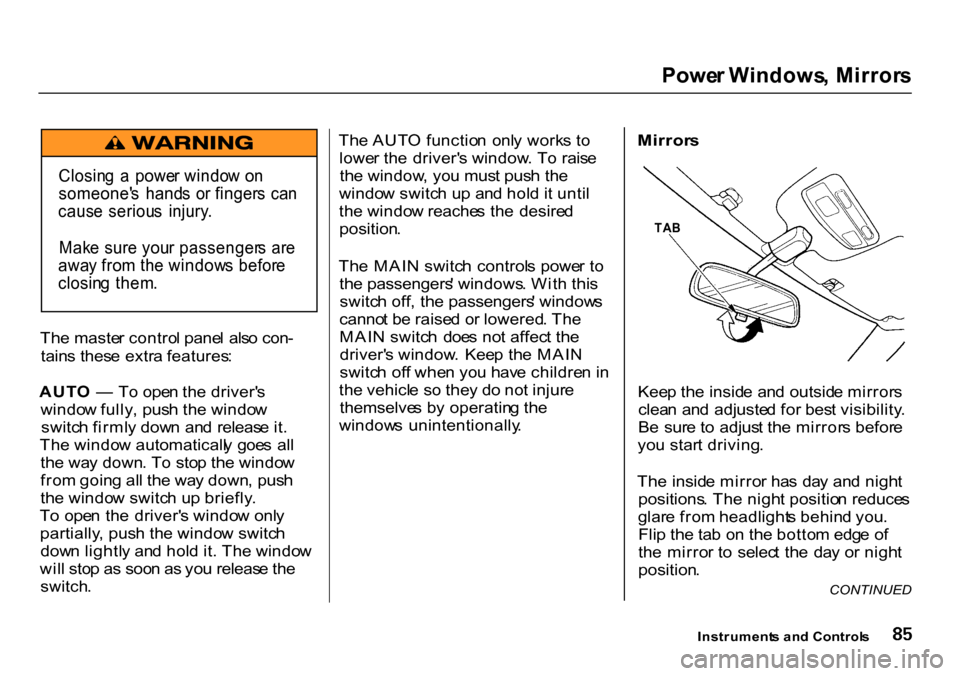
Mirror
s
Kee p th e insid e an d outsid e mirror s
clea n an d adjuste d fo r bes t visibility .
B e sur e t o adjus t th e mirror s befor e
yo u star t driving .
Th e insid e mirro r ha s da y an d nigh t
positions . Th e nigh t positio n reduce s
glar e fro m headlight s behin d you .
Fli p th e ta b o n th e botto m edg e o f
th e mirro r t o selec t th e da y o r nigh t
position .
Instrument s an d Control s
Closin
g a powe r windo w o n
someone' s hand s o r finger s ca n
caus e seriou s injury .
Mak e sur e you r passenger s ar e
awa y fro m th e window s befor e
closin g them .
CONTINUED
TA
B
Page 107 of 322
Heatin
g an d Coolin g
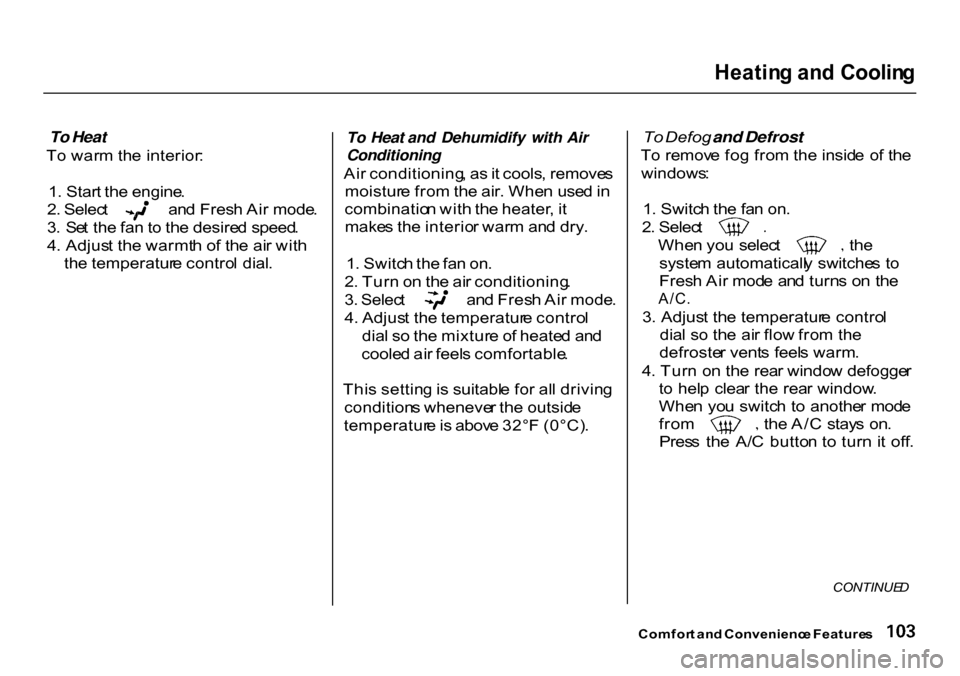
To Heat
T o war m th e interior :
1 . Star t th e engine .2
. Selec t an d Fres h Ai r mode .
3 . Se t th e fa n to th e desire d speed .
4 . Adjus t th e warmt h o f th e ai r wit h
th e temperatur e contro l dial .
To Heat and Dehumidify with Air
Conditioning
Ai r conditioning , a s it cools , remove s
moistur e fro m th e air . Whe n use d in
combinatio n wit h th e heater , i t
make s th e interio r war m an d dry .
1 . Switc h th e fa n on .
2 . Tur n o n th e ai r conditioning .
3
. Selec t
an d Fres h Ai r mode .
4 . Adjus t th e temperatur e contro l
dia l s o th e mixtur e o f heate d an d
coole d ai r feel s comfortable .
Thi s settin g is suitabl e fo r al l drivin g
condition s wheneve r th e outsid e
temperatur e is abov e 32° F (0°C) .
To
Defog and Defrost
T o remov e fo g fro m the insid e o f th e
windows :
1 . Switc h th e fa n on . 2
. Selec t Whe
n yo u selec t the
syste m automaticall y switche s t o
Fres h Ai r mod e an d turn s o n th e
A/C .
3 . Adjus t th e temperatur e contro l
dia l s o th e ai r flo w fro m th e
defroste r vent s feel s warm .
4 . Tur n o n th e rea r windo w defogge r
t o hel p clea r the rea r window .
Whe n yo u switc h t o anothe r mod e fro
m the A/C stay s on .
Pres s th e A/ C butto n t o tur n it off .
CONTINUE D
Comfor t an d Convenienc e Feature s
Page 108 of 322
Heatin
g an d Coolin g
T o remov e exterio r fros t o r ic e fro m
th e windshiel d an d sid e window s
afte r the vehicl e ha s bee n sittin g ou t
i n col d weather :
1 . Star t the engine .2
. Selec t Whe
n yo u selec t th e
syste m automaticall y switche s t o
Fres h Ai r mod e an d turn s o n th e
A/C .
3 . Switc h th e fa n an d temperatur e
control s t o maximum .
T o rapidl y remov e exterio r fros t o r
ic e fro m the windshiel d (o n ver y col d
days) , firs t selec t th e Recirculatio n
mode . Onc e th e windshiel d is clear ,
selec t th e Fres h Ai r mod e t o avoi d
foggin g th e windows .
Comfor t an d Convenienc e Feature s
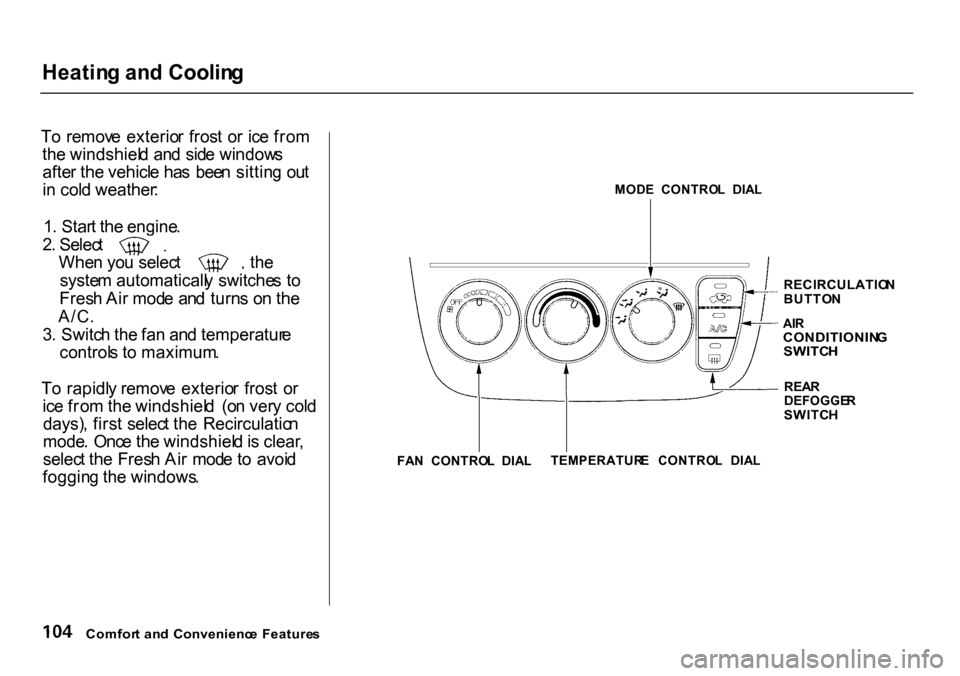
MOD
E CONTRO L DIA L
RECIRCULATIO N
BUTTO N
AI R
CONDITIONIN G
SWITC H
REA R
DEFOGGE R
SWITC H
TEMPERATUR E CONTRO L DIA L
FA N CONTRO L DIA L
Page 157 of 322
Preparin
g to Driv e
Yo u shoul d d o th e followin g check s
an d adjustment s ever y da y befor e
yo u driv e you r vehicle .
1 . Mak e sur e al l windows , mirrors ,
an d outsid e light s ar e clea n an d
unobstructed . Remov e frost , snow ,
o r ice .
2 . Chec k tha t th e hoo d an d tailgat e
ar e full y closed .
3 . Visuall y chec k th e tires . I f a tir e
look s low , us e a gaug e to chec k it s
pressure .
4 . Chec k tha t an y item s yo u ma y b e
carryin g wit h yo u insid e ar e store d
properl y o r fastene d clow n
securely .
5
. Chec k th e adjustmen t o f th e sea t
(se e pag e 7 7 ) .
6 . Chec k th e adjustmen t o f th e
insid e an d outsid e mirror s (se e
pag e 8 5 ) .
7 . Chec k th e adjustmen t o f th e
steerin g whee l (se e pag e 64 ).
8 . Mak e sur e th e door s ar e securel y
close d an d locked .
9 . Faste n you r sea t belt . Chec k tha t
you r passenger s hav e fastene d
thei r sea l belt s (se e pag e 1 5 ) .
10.Tur
n th e ignitio n switc h O N (II) .
Chec k th e indicato r light s i n th e
instrumen t panel .
11.Star t th e engin e (se e pag e 15 4 ) .
12.Chec k the gauge s an d indicato r
light s in th e instrumen t pane l (se e
pag e 5 3 ).
Driving
Page 245 of 322
Appearanc
e Car e
Regula r cleanin g an d polishin g o f
you r Hond a help s t o kee p it "new "
looking . Thi s sectio n give s yo u hint s
o n ho w to clea n you r vehicl e an d
preserv e it s appearance : th e paint ,
brightwork , wheel s an d interior . Als o
include d ar e severa l thing s yo u ca n
d o to hel p preven t corrosion . Exterio
r Care................................. . 24 2
Washing..................................... 24 2
Waxing....................................... . 24 3
Aluminu m Wheels.................... . 24 3
Pain t Touch-up.......................... . 24 4
Interio r Care.................................. . 24 5
Carpeting................................... . 24 5
Fabric......................................... . 24 5
Vinyl........................................... 24 5
Sea t Belts.................................. 24 6
Windows.................................... .
24
6
Ai r Fresheners.......................... . 24 6
Corrosio n Protection.................... . 24 7
Bod y Repairs................................. . 24 8
Appearanc e Car e
Page 250 of 322
Interio
r Car e
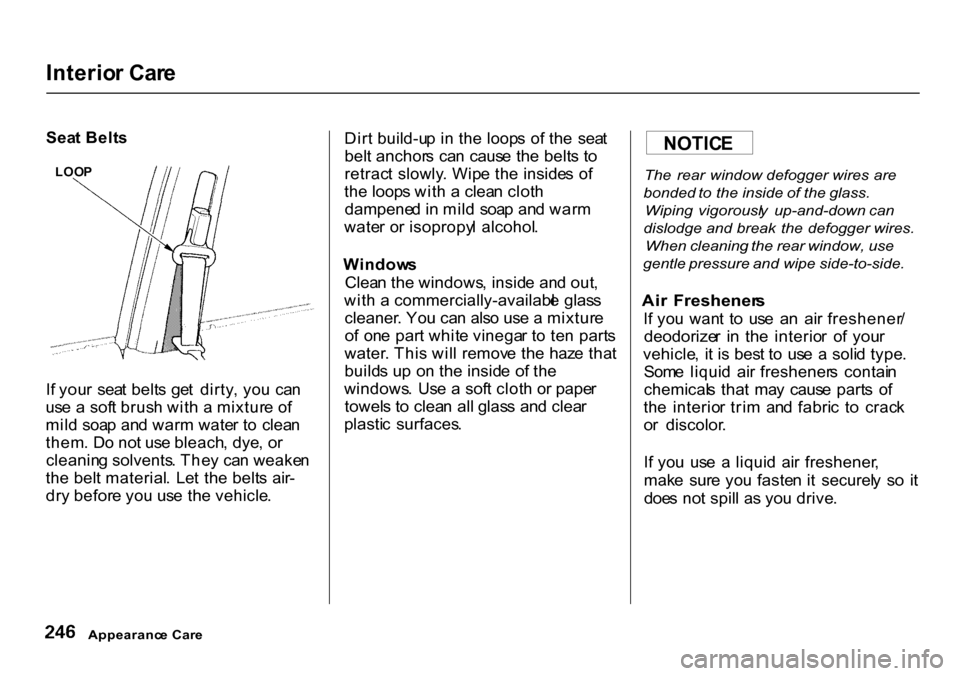
Sea t Belt s
I f you r sea t belt s ge t dirty , yo u ca n
us e a sof t brus h wit h a mixtur e o f
mil d soa p an d war m wate r t o clea n
them . D o no t us e bleach , dye , o r
cleanin g solvents . The y ca n weake n
th e bel t material . Le t th e belt s air -
dr y befor e yo u us e th e vehicle . Dir
t build-u p i n th e loop s o f th e sea t
bel t anchor s ca n caus e th e belt s t o
retrac t slowly . Wip e th e inside s o f
th e loop s wit h a clea n clot h
dampene d in mil d soa p an d war m
wate r o r isopropy l alcohol .
Window s
Clea n th e windows , insid e an d out ,
wit h a commercially-availabl e glas s
cleaner . Yo u ca n als o us e a mixtur e
o f on e par t whit e vinega r t o te n part s
water . Thi s wil l remov e th e haz e tha t
build s u p o n th e insid e o f th e
windows . Us e a sof t clot h o r pape r
towel s t o clea n al l glas s an d clea r
plasti c surfaces .
The
rear window defogger wires are
bonded to the inside of the glass.
Wiping vigorousl y up-and-down can
dislodge and break the defogger wires.
When cleaning the rear window, use
gentle pressure and wipe side-to-side.
Ai r Freshener s
I f yo u wan t t o us e a n ai r freshener /
deodorize r i n th e interio r o f you r
vehicle , i t i s bes t t o us e a soli d type .
Som e liqui d ai r freshener s contai n
chemical s tha t ma y caus e part s o f
th e interio r tri m an d fabri c t o crac k
o r discolor .
I f yo u us e a liqui d ai r freshener ,
mak e sur e yo u faste n i t securel y s o i t
doe s no t spil l a s yo u drive .
Appearanc e Car e
LOO
P
NOTIC
E
Page 269 of 322
Chargin
g Syste m Indicato r
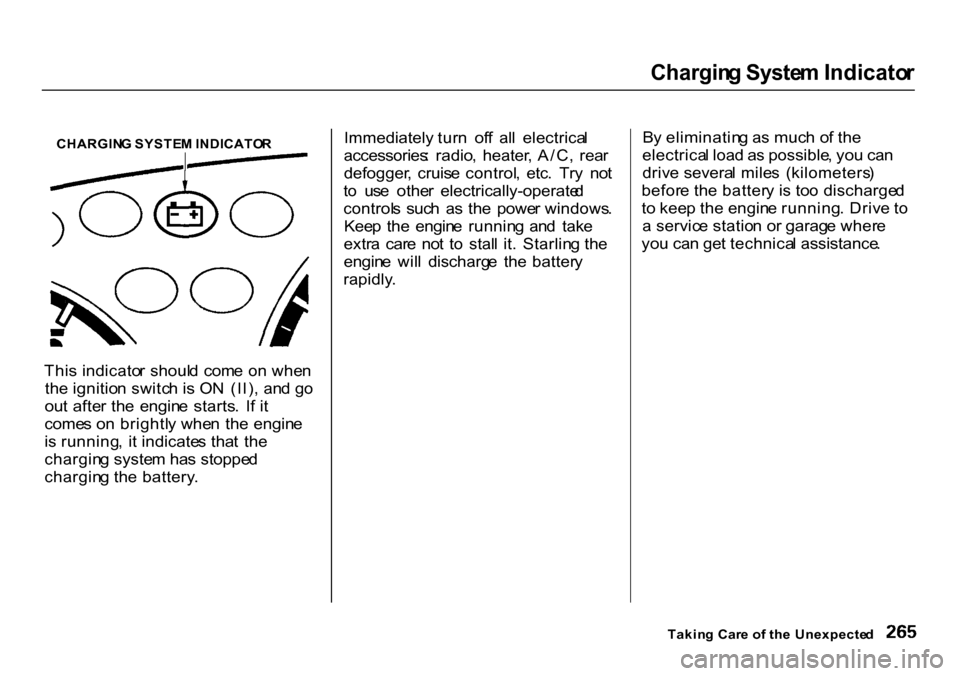
CHARGIN G SYSTE M INDICATO R
Thi s indicato r shoul d com e o n whe n
th e ignitio n switc h is O N (II) , an d g o
ou t afte r th e engin e starts . I f i t
come s o n brightl y whe n th e engin e
i s running , i t indicate s tha t th e
chargin g syste m ha s stoppe d
chargin g th e battery . Immediately
turn of f al l electrica l
accessories : radio , heater , A/C , rea r
defogger , cruis e control , etc . Tr y no t
t o us e othe r electrically-operate d
control s suc h a s th e powe r windows .
Kee p the engin e runnin g an d tak e
extr a car e no t t o stal l it . Starlin g th e
engin e wil l discharg e the batter y
rapidly . B
y eliminatin g a s muc h o f th e
electrica l loa d a s possible , yo u ca n
driv e severa l mile s (kilometers )
befor e th e batter y i s to o discharge d
t o kee p th e engin e running . Driv e t o
a servic e statio n o r garag e wher e
yo u ca n ge t technica l assistance .
Takin g Car e o f th e Unexpecte d