lights HONDA CR-V 2002 RD4-RD7 / 2.G User Guide
[x] Cancel search | Manufacturer: HONDA, Model Year: 2002, Model line: CR-V, Model: HONDA CR-V 2002 RD4-RD7 / 2.GPages: 372, PDF Size: 4.49 MB
Page 93 of 372
CONT INUED
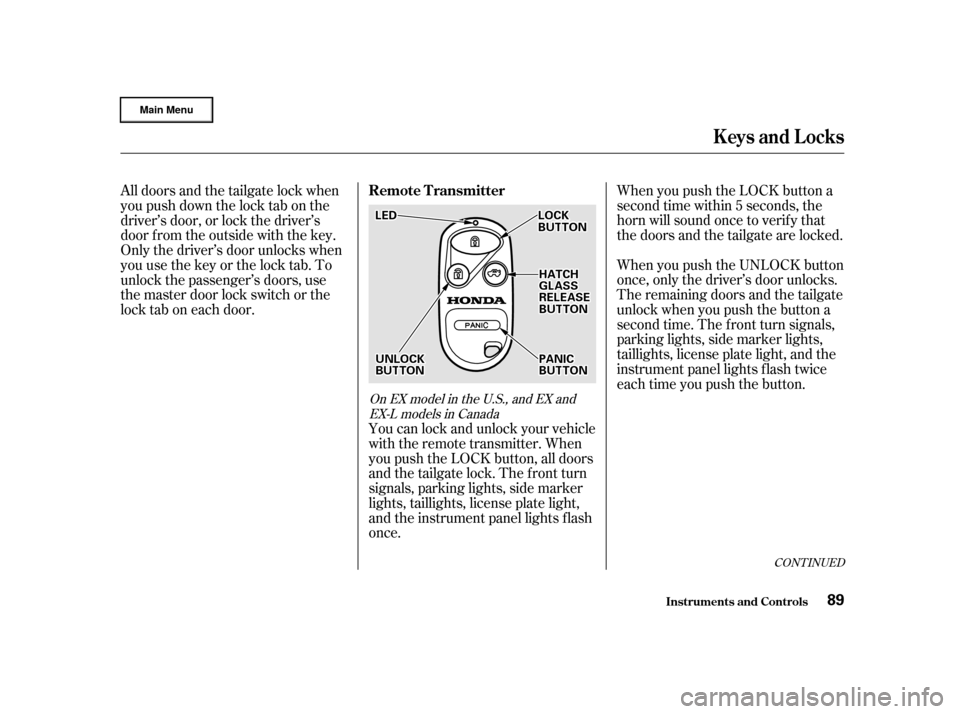
When you push the LOCK button a
second time within 5 seconds, the
horn will sound once to verif y that
thedoorsandthetailgatearelocked.
When you push the UNLOCK button
once, only the driver’s door unlocks.
The remaining doors and the tailgate
unlock when you push the button a
second time. The f ront turn signals,
parking lights, side marker lights,
taillights, license plate light, and the
instrument panel lights f lash twice
each time you push the button.
All doors and the tailgate lock when
youpushdownthelocktabonthe
driver’s door, or lock the driver’s
door from the outside with the key.
Only the driver’s door unlocks when
you use the key or the lock tab. To
unlock the passenger’s doors, use
the master door lock switch or the
locktaboneachdoor.
You can lock and unlock your vehicle
with the remote transmitter. When
you push the LOCK button, all doors
and the tailgate lock. The f ront turn
signals, parking lights, side marker
lights, taillights, license plate light,
and the instrument panel lights f lash
once.
On EX model in the U.S., and EX andEX-L models in Canada
Keys and Locks
Inst rument s and Cont rols
Remote Transmitter
89
U UN NLLOOC CKK
B
BU UT TT
TO
ON N P
P
A
A N
NI ICC
B
BU UT TT
TO
ON N
L
LO
OC CKK
B
BU UT TT
TO
ON N
H
H A
AT
TC
CH H
G
GL LAA S
SSS
R
RE EL
LEE A
A S
SEE
B
BU UT TT
TO
ON N
L
LE
E D
D
Page 94 of 372

The ceiling light (if the light switch
is in the center position) will come
on when you press the UNLOCK
button. If you do not open any of the
doors or the tailgate, the light will
f ade out in about 30 seconds, the
doors and the tailgate automatically
relock. If you relock the doors and
the tailgate with the remote
transmitter before 30 seconds have
elapsed, the light will go of f
immediately.
You cannot lock the doors and the
tailgate with the remote transmitter
if any door or the tailgate is not f ully
closed. You cannot lock or unlock
thedoorsandthetailgatewiththe
key in the ignition switch.To open the hatch glass, push the
Hatch Glass Release button for
about two seconds. The hatch glass
willnotopenif thekeyisinthe
ignition switch.
Even if the hatch glass is opened, the
tailgate can be locked with the
remote transmitter. Make sure to
check the hatch glass manually.
Panic mode allows you to remotely
activate your vehicle’s horn and
lights to attract attention. When
activated, the horn will sound, and
the headlights, parking lights, side
marker lights, taillights and
instrument panel lights will f lash f or
about 30 seconds. To activate panic
mode,pressandholdthePANIC
button f or about one second.
To cancel Panic mode bef ore 30
seconds, press any button on the
remote transmitter. You can also
turn the ignition switch to ON (II).
Panic mode will not activate if the
ignition switch is in the ON (II)
position.
Keys and Locks
Inst rument s and Cont rols
Panic Mode
90
Page 100 of 372
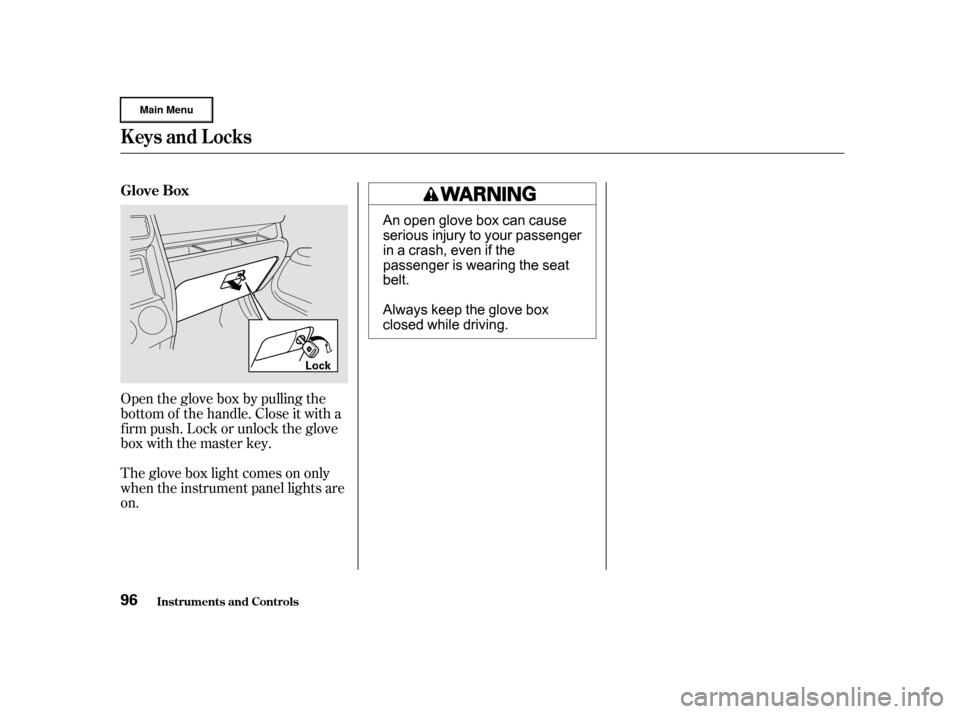
Open the glove box by pulling the
bottom of the handle. Close it with a
f irm push. Lock or unlock the glove
box with the master key.
The glove box light comes on only
when the instrument panel lights are
on. Glove Box
Keys and Locks
Inst rument s and Cont rols96
L Loo c
ckk
An open glove box can cause
serious injury to your passenger
inacrash,evenifthe
passenger is wearing the seat
belt.
Always keep the glove box
closed while driving.
Page 113 of 372
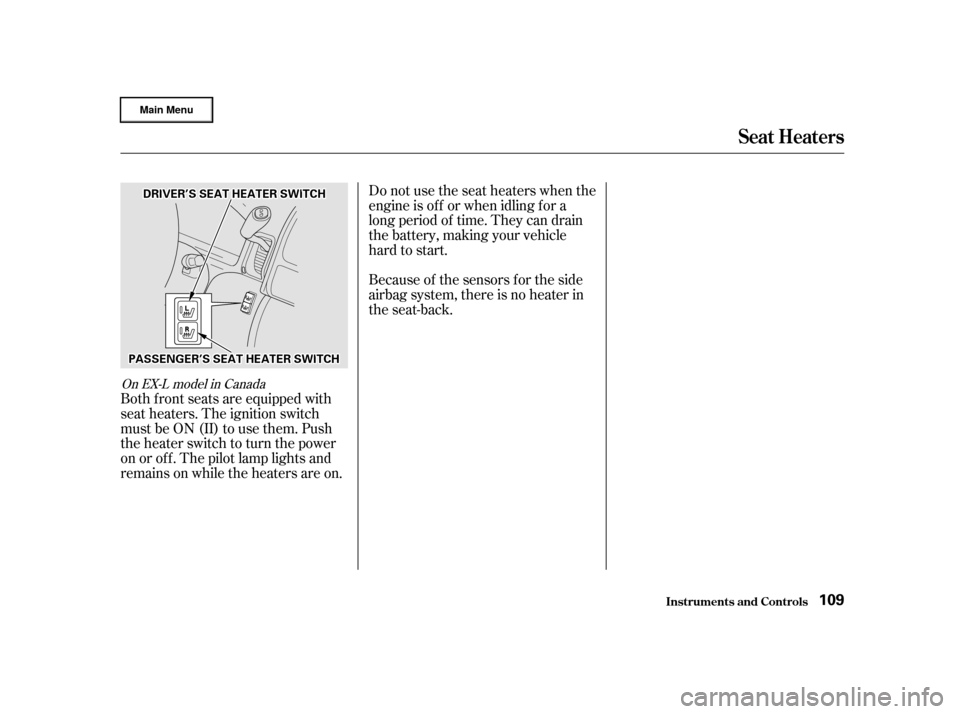
Both f ront seats are equipped with
seat heaters. The ignition switch
must be ON (II) to use them. Push
the heater switch to turn the power
on or of f . The pilot lamp lights and
remains on while the heaters are on.Do not use the seat heaters when the
engine is of f or when idling f or a
long period of time. They can drain
the battery, making your vehicle
hard to start.
Because of the sensors f or the side
airbag system, there is no heater in
the seat-back.
On EX-L model in Canada
Seat Heaters
Inst rument s and Cont rols109
P P
A
A S
SSSEEN
NG GEER
R’ ’SS S
SEEA
A T
T H
HE
EA
A T
TE
ER
R S
SWWI ITT C
CH H
D
D
R
RIIVV E
ER
R’ ’SS S
SEEA
A T
T H
HE
EA
A T
TE
ER
R S
SWWI ITT C
CH H
Page 118 of 372
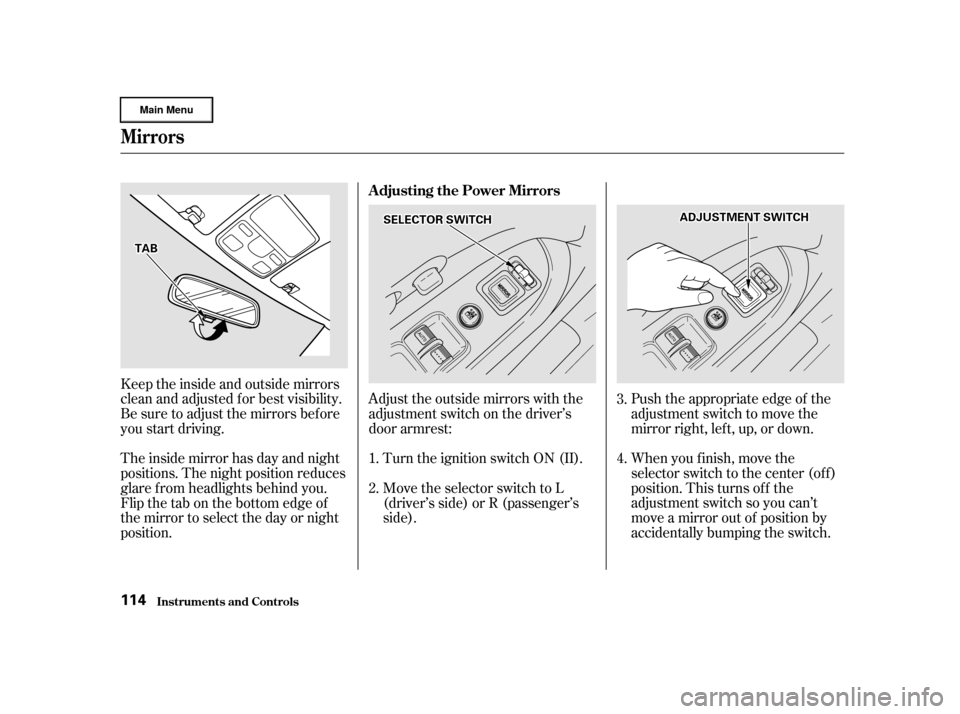
Push the appropriate edge of the
adjustment switch to move the
mirrorright,left,up,ordown.
When you f inish, move the
selector switch to the center (off)
position. This turns of f the
adjustment switch so you can’t
move a mirror out of position by
accidentally bumping the switch.
Keeptheinsideandoutsidemirrors
clean and adjusted f or best visibility.
Be sure to adjust the mirrors bef ore
you start driving.
The inside mirror has day and night
positions. The night position reduces
glare f rom headlights behind you.
Flip the tab on the bottom edge of
the mirror to select the day or night
position.
Adjust the outside mirrors with the
adjustment switch on the driver’s
door armrest:
Turn the ignition switch ON (II).
Move the selector switch to L
(driver’s side) or R (passenger’s
side). 3.
4.
1.
2.
Inst rument s and Cont rols
Mirrors
Adjusting the Power Mirrors
114
S SE EL
LEE C
CT TO
OR R S
SWWI ITT C
CH H
T
T A
A B
B A
A
D
DJ
JUUS STTM
M E
EN
NT T S
SWWI ITT C
CH H
Page 124 of 372
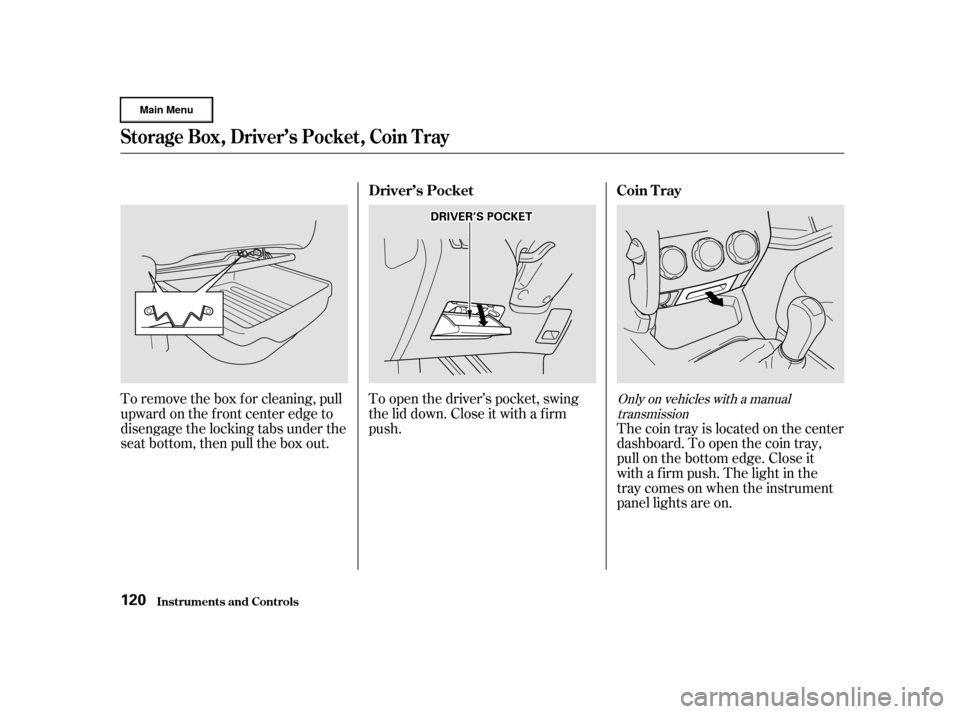
To remove the box f or cleaning, pull
upward on the f ront center edge to
disengage the locking tabs under the
seat bottom, then pull the box out.To open the driver’s pocket, swing
the lid down. Close it with a f irm
push.
The coin tray is located on the center
dashboard. To open the coin tray,
pull on the bottom edge. Close it
with a f irm push. The light in the
traycomesonwhentheinstrument
panel lights are on.Only on vehicles with a manual
transmission
Driver’s Pocket Coin T ray
St orage Box, Driver’s Pocket , Coin T ray
Inst rument s and Cont rols120
D DR
RIIVV E
ER
R’ ’SS P
PO
OC CKKEET
T
Page 128 of 372
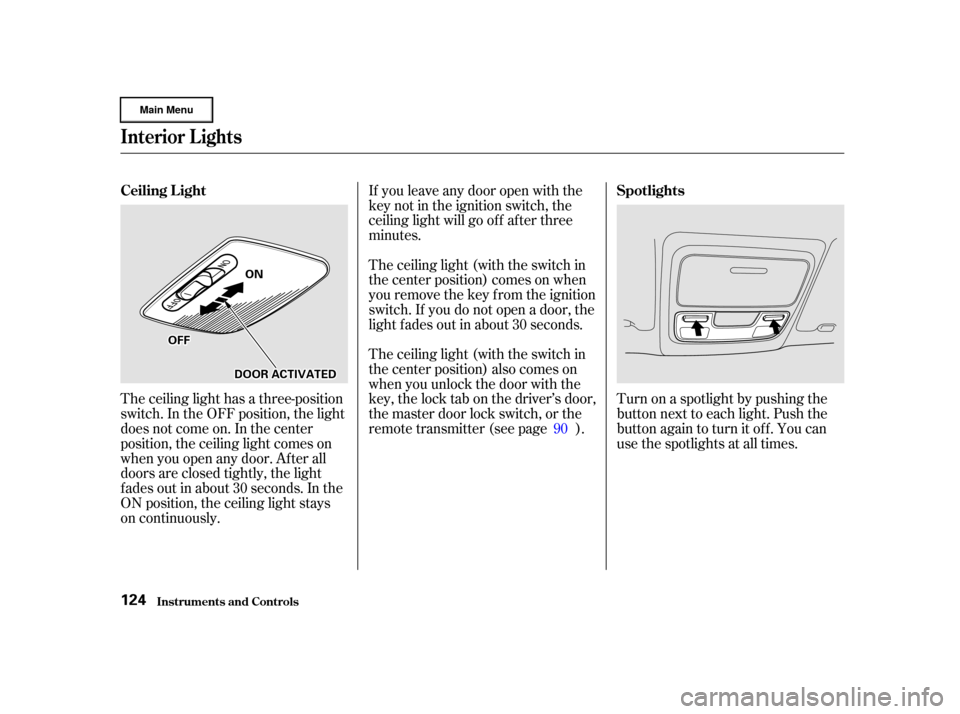
If you leave any door open with the
keynotintheignitionswitch,the
ceiling light will go of f af ter three
minutes.
The ceiling light (with the switch in
the center position) comes on when
you remove the key f rom the ignition
switch. If you do not open a door, the
light f ades out in about 30 seconds.
The ceiling light (with the switch in
the center position) also comes on
when you unlock the door with the
key, the lock tab on the driver’s door,
the master door lock switch, or the
remote transmitter (see page ).Turn on a spotlight by pushing the
button next to each light. Push the
button again to turn it off. You can
use the spotlights at all times.
The ceiling light has a three-position
switch. In the OFF position, the light
does not come on. In the center
position, the ceiling light comes on
when you open any door. Af ter all
doors are closed tightly, the light
f ades out in about 30 seconds. In the
ON position, the ceiling light stays
on continuously. 90
Inst rument s and Cont rols
Interior Lights
Ceiling L ight
Spotlights
124
O OFFFF O
ON
N
D
D O
OO ORR A
AC
CTTI
IVV A
AT
TE
ED
D
Page 129 of 372
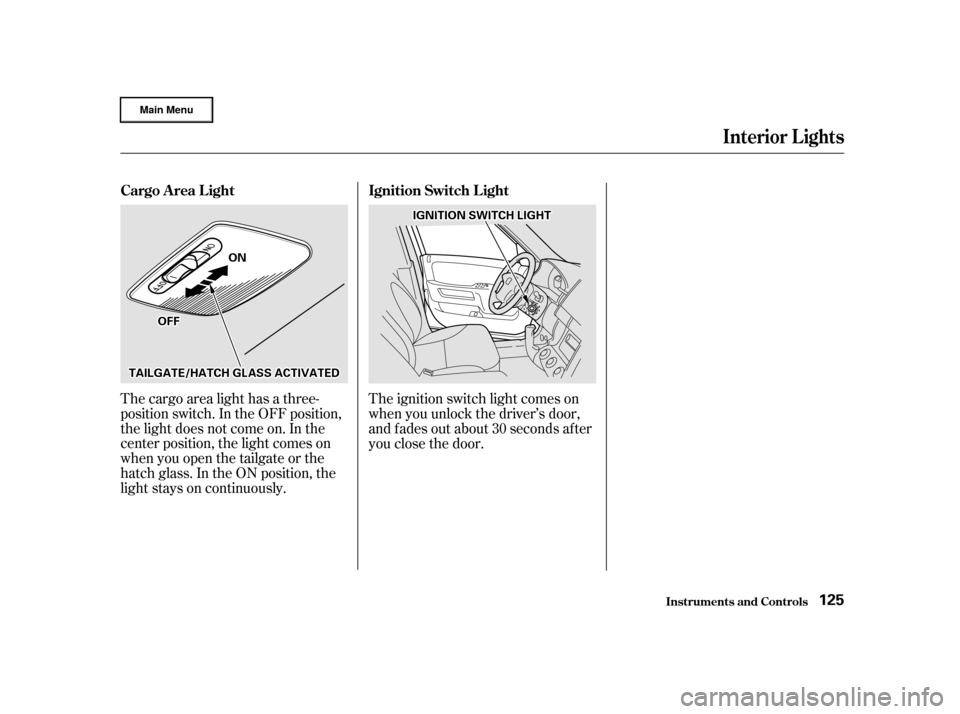
The cargo area light has a three-
position switch. In the OFF position,
the light does not come on. In the
center position, the light comes on
when you open the tailgate or the
hatch glass. In the ON position, the
light stays on continuously.The ignition switch light comes on
when you unlock the driver’s door,
and f ades out about 30 seconds af ter
you close the door.
Interior Lights
Inst rument s and Cont rols
Cargo A rea L ight
Ignition Switch L ight
125
O OFFFF O
ON
N
T
T A
A I
ILLG GA AT
TE
E/
/H
H A
AT
TC
CH H G
GLLAA S
SSS A
AC
CTTI
IVV A
AT
TE
ED
D I
IG
GN NIITT I
IOON N S
SWWI ITT C
CH H L
LIIGGH HT
T
Page 132 of 372
Proper use of the Heating and
Cooling system can make the
interior dry and comf ortable, and
keep the windows clear f or best
visibility.
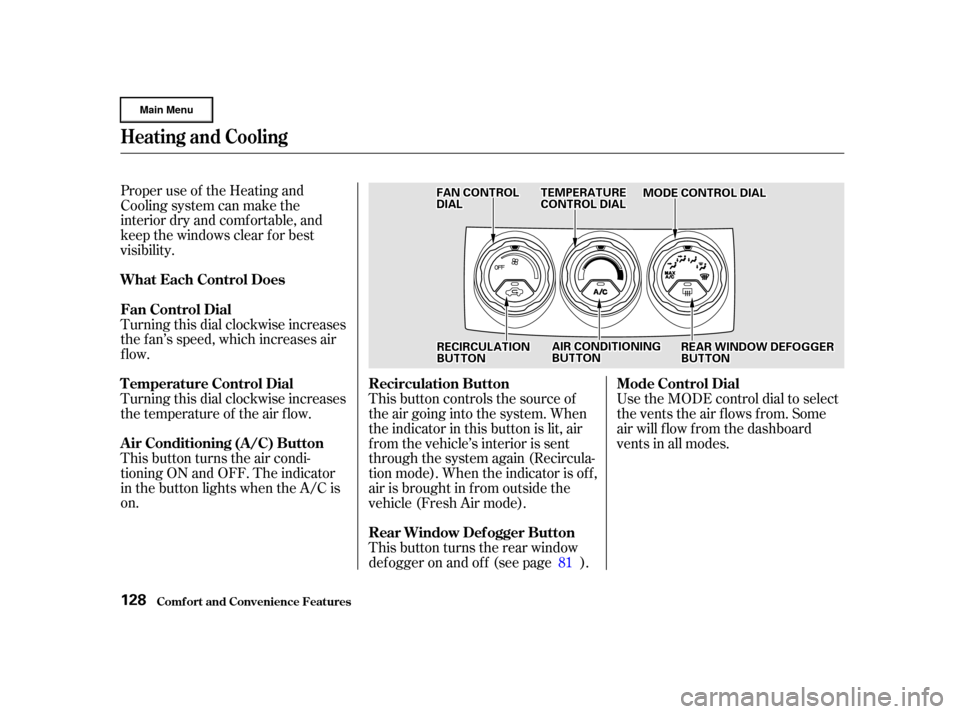
Turning this dial clockwise increases
the f an’s speed, which increases air
flow.
Turning this dial clockwise increases
the temperature of the air flow.
This button turns the air condi-
tioning ON and OFF. The indicator
in the button lights when the A/C is
on.This button controls the source of
the air going into the system. When
the indicator in this button is lit, air
f rom the vehicle’s interior is sent
through the system again (Recircula-
tion mode). When the indicator is off,
air is brought in f rom outside the
vehicle (Fresh Air mode).
This button turns the rear window
def ogger on and of f (see page ).Use the MODE control dial to select
the vents the air flows from. Some
air will f low f rom the dashboard
vents in all modes.
81
Comf ort and Convenience Feat ures
Heating and Cooling
What Each Control Does
Fan Control Dial
T emperature Control Dial
Air Conditioning (A/C) Button Recirculation Button
Rear Window Def ogger ButtonMode Control Dial
128
R RE
EC
CI IRRC CUUL LAA T
TI
IOON N
B
BU UT TT
TO
ON N M
M
O
ODDE
E C
COON NTTR
RO OL L D
DI
IAA L
L
F
FA
A N
N C
COON NTTR
RO OL L
D
D I
IAA L
L T
T
E
EM
M P
PE
ER
RA A T
TU
UR REE
C
CO ON NTTR
RO OL L D
DI
IAA L
L
R
REEA
A R
R W
WI INND DO
OW W D
DE
EF
FOOG GGGEER
R
B
BU UT TT
TO
ON N
A
A
I
IRR C
COON NDDI
ITT I
IOON NIINNG G
B
BU UT TT
TO
ON N
Page 148 of 372
You can use the instrument panel
brightness control knob to adjust the
illumination of the audio system (see
page ). The audio system
illuminates when the parking lights
are on, even if the radio is turned of f .
For inf ormation, See page .The audio system display usually
shows the time when the ignition
switch is in ACCESSORY (I) or ON
(II). It shows the operation mode of
the radio, cassette player, CD player,
or optional CD changer when you
operate them, then goes back to the
time display af ter f ive seconds.
If an error occurs while operating
the CD player or optional CD
changer, the display will keep
showing the error code and will not
switch to the time display until the
error is corrected (see pages and
).
You can set the time only when the
clock is displayed. To set the time, press the CLOCK
(SCAN/RPT) button until you hear a
beep. The displayed time begins to
blink.
Press and hold the H (Preset 4)
button until the hour advances to the
desired time.
Press and hold the M (Preset 5)
button until the minutes advance to
the desired time.
Press the CLOCK (SCAN/RPT)
button again to enter the set time.
160
148
150
77
Audio System
Comf ort and Convenience Feat ures
A udio System L ighting
Radio Frequencies and Reception
Digital Clock
144