maintenance schedule HONDA CR-V 2002 RD4-RD7 / 2.G Owner's Manual
[x] Cancel search | Manufacturer: HONDA, Model Year: 2002, Model line: CR-V, Model: HONDA CR-V 2002 RD4-RD7 / 2.GPages: 372, PDF Size: 4.49 MB
Page 252 of 372
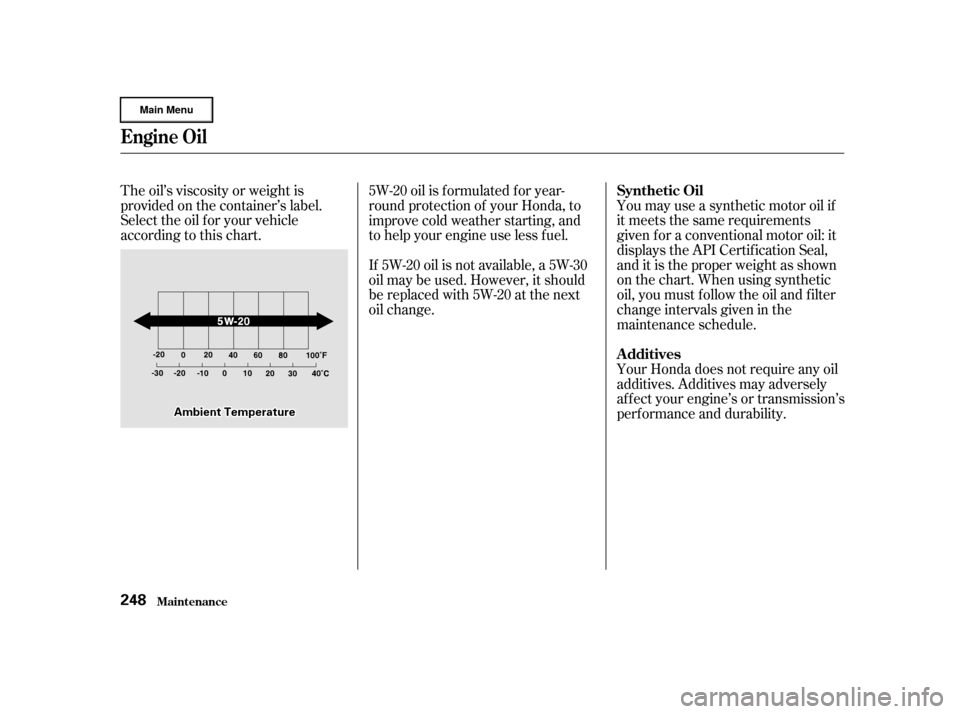
The oil’s viscosity or weight is
provided on the container’s label.
Select the oil f or your vehicle
according to this chart.You may use a synthetic motor oil if
it meets the same requirements
given f or a conventional motor oil: it
displays the API Certif ication Seal,
and it is the proper weight as shown
on the chart. When using synthetic
oil, you must f ollow the oil and f ilter
change intervals given in the
maintenance schedule.
Your Honda does not require any oil
additives. Additives may adversely
af f ect your engine’s or transmission’s
perf ormance and durability.
5W-20 oil is f ormulated f or year-
round protection of your Honda, to
improve cold weather starting, and
to help your engine use less f uel.
If 5W-20 oil is not available, a 5W-30
oil may be used. However, it should
be replaced with 5W-20 at the next
oil change.
Engine Oil
Maint enance
Synthetic Oil
A dditives
248
A A
m
m b
bi
ieen n t
t T
Te
emm p
pe
erraat tuu r
ree
Page 253 of 372
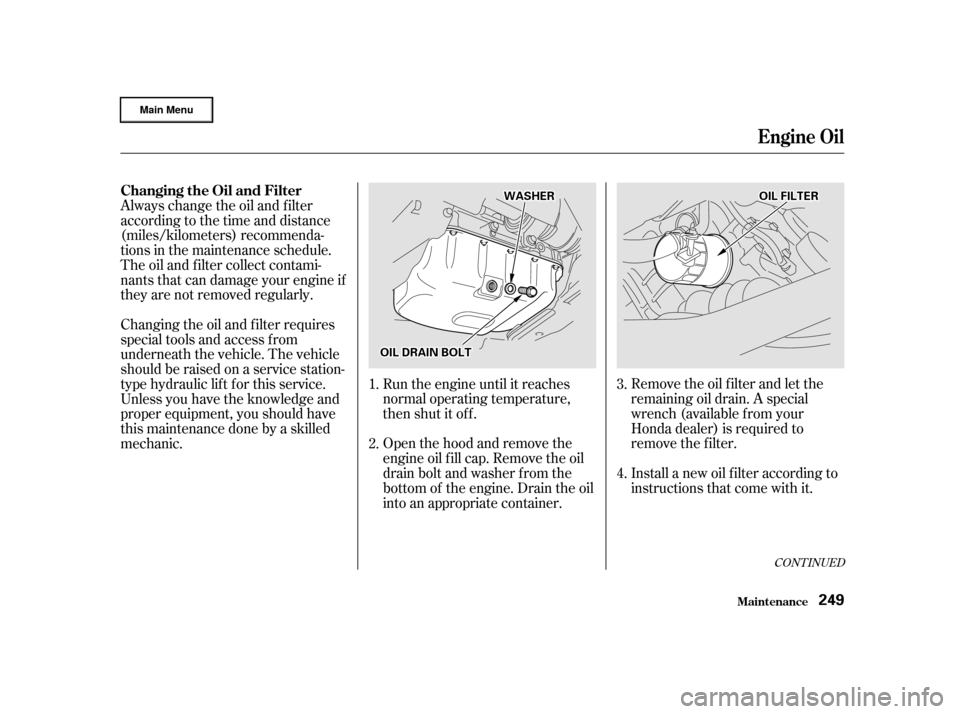
Remove the oil f ilter and let the
remaining oil drain. A special
wrench (available from your
Honda dealer) is required to
remove the f ilter.
Install a new oil f ilter according to
instructions that come with it.
Run the engine until it reaches
normal operating temperature,
then shut it off.
Open the hood and remove the
engine oil f ill cap. Remove the oil
drain bolt and washer f rom the
bottom of the engine. Drain the oil
into an appropriate container.
Always change the oil and f ilter
accordingtothetimeanddistance
(miles/kilometers) recommenda-
tions in the maintenance schedule.
The oil and f ilter collect contami-
nants that can damage your engine if
they are not removed regularly.
Changing the oil and f ilter requires
special tools and access f rom
underneath the vehicle. The vehicle
should be raised on a service station-
type hydraulic lif t f or this service.
Unless you have the knowledge and
proper equipment, you should have
this maintenance done by a skilled
mechanic.
1.
2.
4. 3.
CONT INUED
Changing the Oil and Filter
Engine Oil
Maint enance249
O OIILL D
DR
RAA I
INN B
BOOL LTT W
WA
AS
SHH E
ER
R
O
OIILL F
FIILLT T E
ER
R
Page 257 of 372
CONT INUED
Thecoolingsystemshouldbe
completely drained and ref illed with
new coolant according to the time
and distance recommendations in
the maintenance schedule. Only use
Honda All Season Antif reeze/
Coolant Type 2.
Draining the coolant requires access
to the underside of the vehicle.
Unless you have the tools and
knowledge, you should have this
maintenance done by a skilled
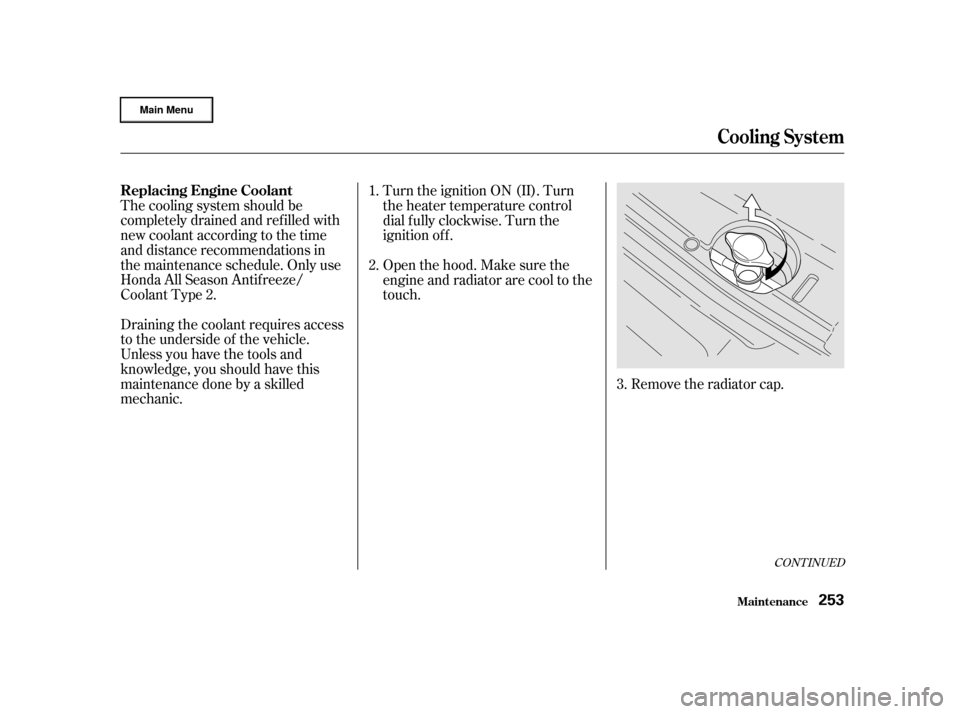
mechanic.Remove the radiator cap.
Turn the ignition ON (II). Turn
the heater temperature control
dial f ully clockwise. Turn the
ignition of f .
Openthehood.Makesurethe
engine and radiator are cool to the
touch.
1.
2.
3.
Replacing Engine Coolant
Cooling Syst em
Maint enance253
Page 265 of 372
Insert the dipstick all the way back
into the transmission securely as
shown in the illustration.
The transmission should be drained
and ref illed with new f luid according
to the time and distance recommen-
dations in the maintenance schedule.
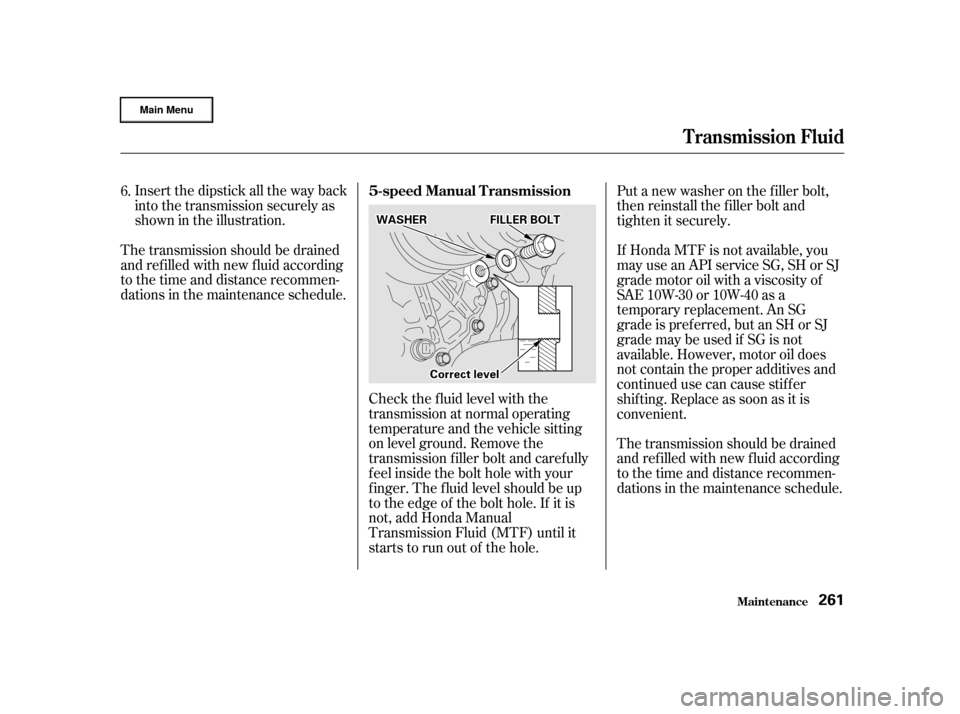
Check the f luid level with the
transmission at normal operating
temperature and the vehicle sitting
on level ground. Remove the
transmission f iller bolt and caref ully
f eel inside the bolt hole with your
f inger. The f luid level should be up
to the edge of the bolt hole. If it is
not, add Honda Manual
Transmission Fluid (MTF) until it
starts to run out of the hole.The transmission should be drained
and ref illed with new f luid according
to the time and distance recommen-
dations in the maintenance schedule. If Honda MTF is not available, you
may use an API service SG, SH or SJ
grade motor oil with a viscosity of
SAE 10W-30 or 10W-40 as a
temporary replacement. An SG
grade is pref erred, but an SH or SJ
grade may be used if SG is not
available. However, motor oil does
not contain the proper additives and
continued use can cause stif f er
shif ting. Replace as soon as it is
convenient. Put a new washer on the f iller bolt,
then reinstall the f iller bolt and
tighten it securely.
6.
5-speed Manual Transmission
T ransmission Fluid
Maint enance261
F FIILLL LEE R
R B
BOOL LTT
C
Co or
rrreec ctt l
leev veell
W
WA
AS
SHH E
ER
R
Page 267 of 372
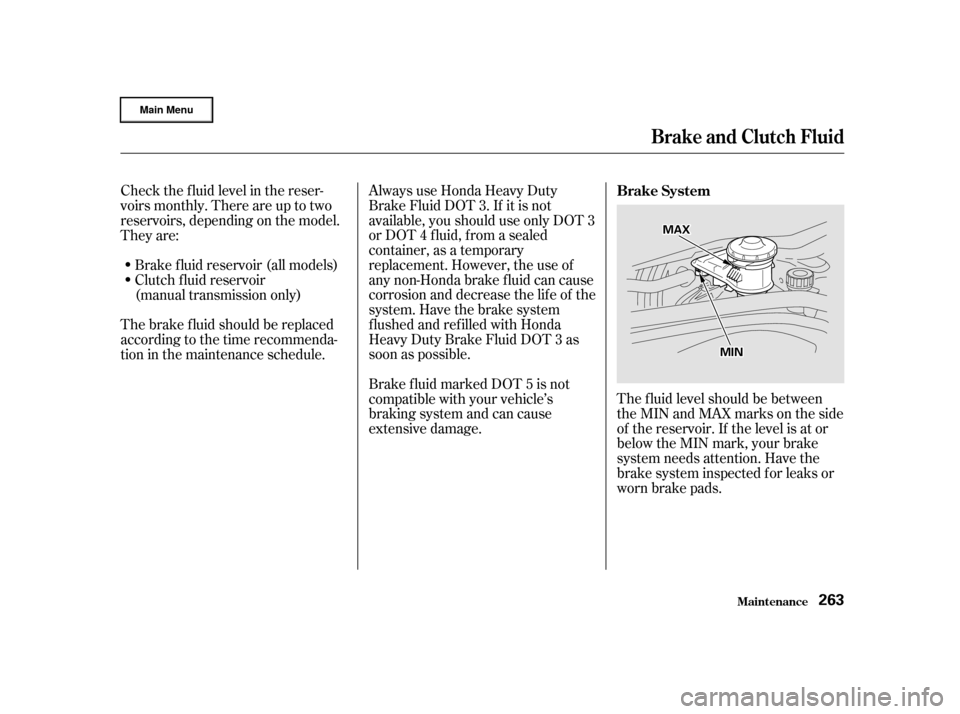
The f luid level should be between
theMINandMAXmarksontheside
of the reservoir. If the level is at or
below the MIN mark, your brake
system needs attention. Have the
brake system inspected f or leaks or
worn brake pads.
Always use Honda Heavy Duty
Brake Fluid DOT 3. If it is not
available, you should use only DOT 3
or DOT 4 f luid, f rom a sealed
container, as a temporary
replacement. However, the use of
any non-Honda brake fluid can cause
corrosion and decrease the lif e of the
system. Have the brake system
f lushed and ref illed with Honda
Heavy Duty Brake Fluid DOT 3 as
soon as possible.
Check the f luid level in the reser-
voirs monthly. There are up to two
reservoirs, depending on the model.
They are:
Brake f luid reservoir (all models)
Clutch f luid reservoir
(manual transmission only)
The brake f luid should be replaced
according to the time recommenda-
tion in the maintenance schedule. Brake f luid marked DOT 5 is not
compatible with your vehicle’s
braking system and can cause
extensive damage.Brake System
Brake and Clutch Fluid
Maint enance263
M M
A
AX
X
M
MI
INN
Page 269 of 372
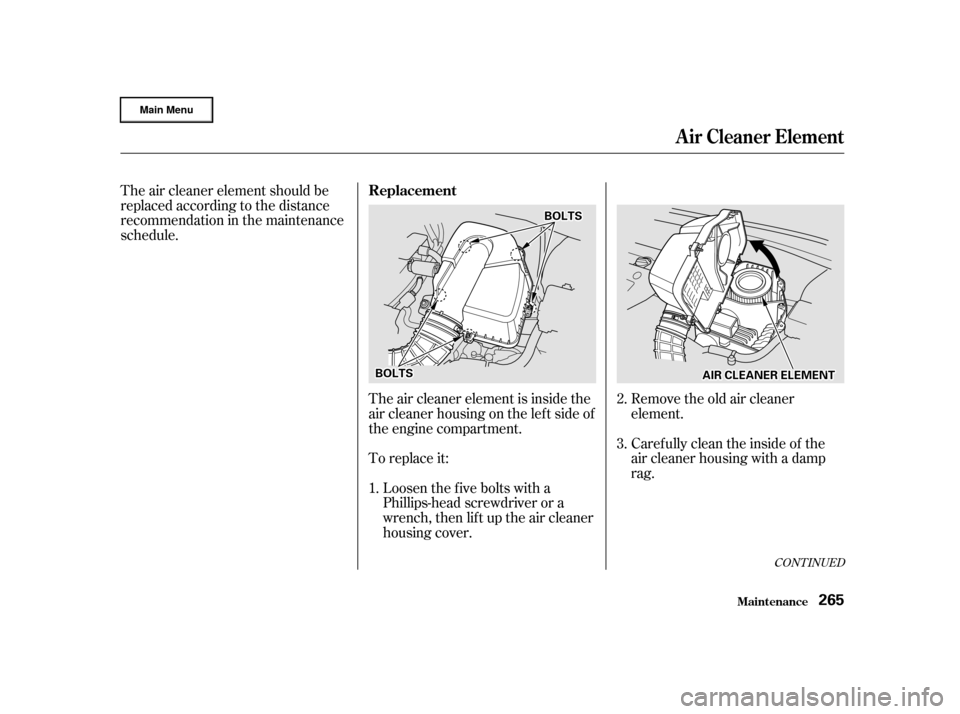
To replace it:
The air cleaner element should be
replaced according to the distance
recommendation in the maintenance
schedule.
The air cleaner element is inside the
air cleaner housing on the lef t side of
the engine compartment.Loosen the five bolts with a
Phillips-head screwdriver or a
wrench, then lif t up the air cleaner
housing cover. Remove the old air cleaner
element.
Caref ully clean the inside of the
air cleaner housing with a damp
rag.
1. 2.
3.
CONT INUED
Replacement
A ir Cleaner Element
Maint enance265
B BO
OL LTT S
S
A
AI
IRR C
CLLEE A
A N
NE ER
R E
EL
LEE M
M E
EN
NT T
B
BO
OL LTT S
S
Page 270 of 372
Place the new air cleaner element
in the air cleaner housing.
Reinstall the air cleaner housing
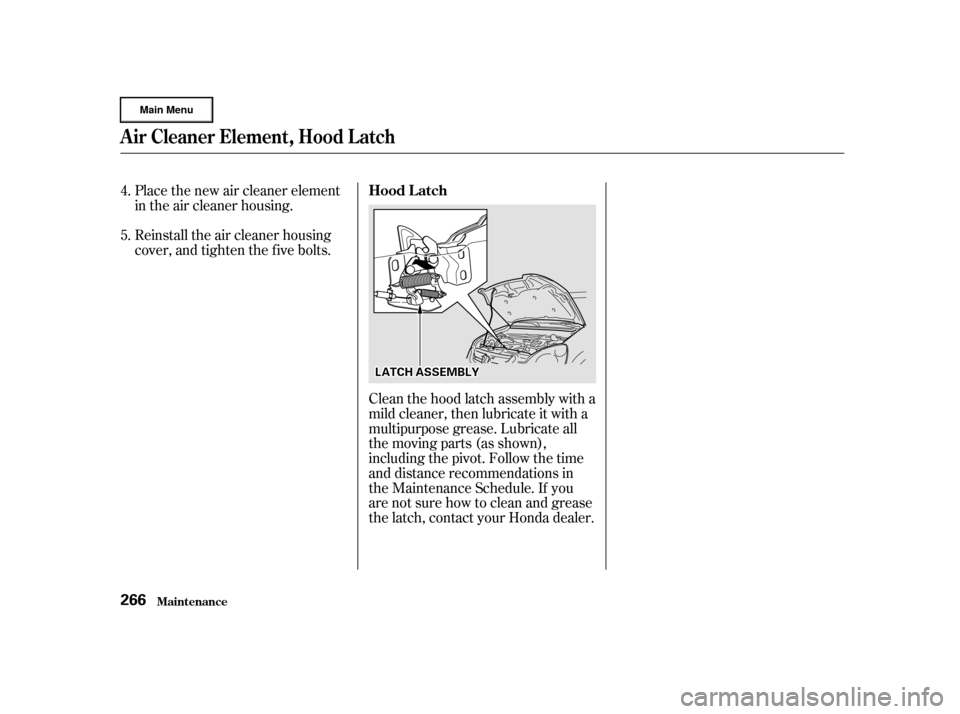
cover, and tighten the five bolts.Clean the hood latch assembly with a
mild cleaner, then lubricate it with a
multipurpose grease. Lubricate all
the moving parts (as shown),
including the pivot. Follow the time
and distance recommendations in
the Maintenance Schedule. If you
are not sure how to clean and grease
the latch, contact your Honda dealer.
4.
5.
A ir Cleaner Element, Hood L atch
Maint enance
Hood L atch
266
L LA
A T
TC
CH H A
AS
SSSEEM
M B
BLLYY
Page 271 of 372
CONT INUED
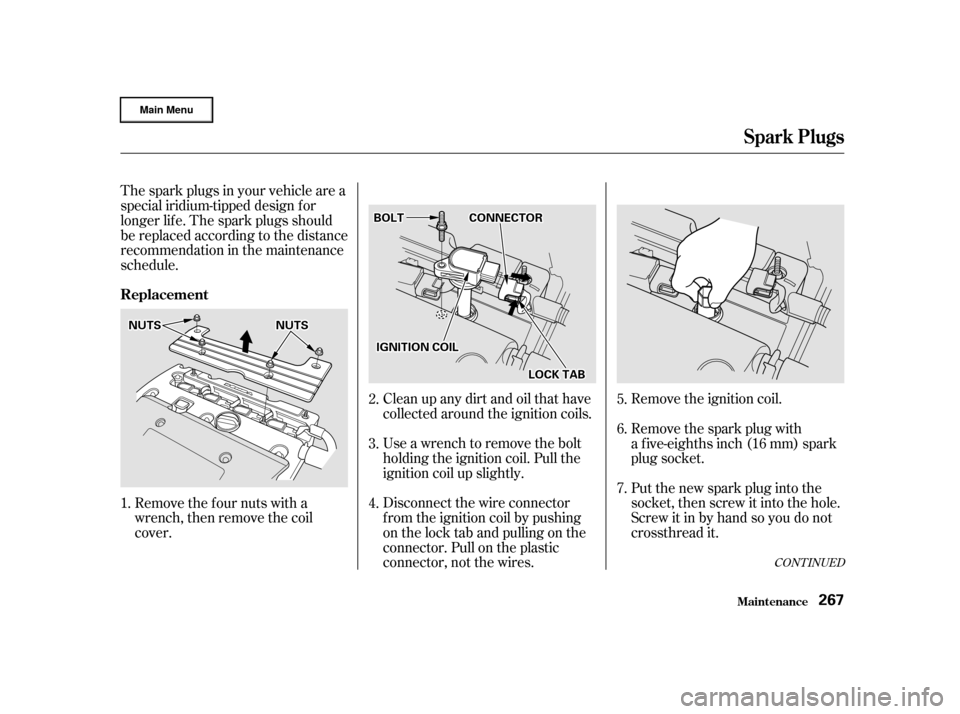
Clean up any dirt and oil that have
collected around the ignition coils.
Use a wrench to remove the bolt
holding the ignition coil. Pull the
ignition coil up slightly.
Disconnect the wire connector
f rom the ignition coil by pushing
on the lock tab and pulling on the
connector. Pull on the plastic
connector, not the wires.Remove the ignition coil.
Remove the spark plug with
a f ive-eighths inch (16 mm) spark
plug socket.
Put the new spark plug into the
socket, then screw it into the hole.
Screw it in by hand so you do not
crossthread it.
Remove the f our nuts with a
wrench, then remove the coil
cover.
The spark plugs in your vehicle are a
special iridium-tipped design f or
longer lif e. The spark plugs should
be replaced according to the distance
recommendation in the maintenance
schedule.
1.
6.
7. 5.
2.
4. 3.
Maint enance
Spark Plugs
Replacement
267
B BO OL LTT
I
IG GN NIITT I
IOON N C
COOI ILL
N
NU
UTTS
S N
NUUTTS
S C
CO
ON NNNEEC
CT TO
OR R
L
LO OC CKK T
TA
A B
B
Page 281 of 372
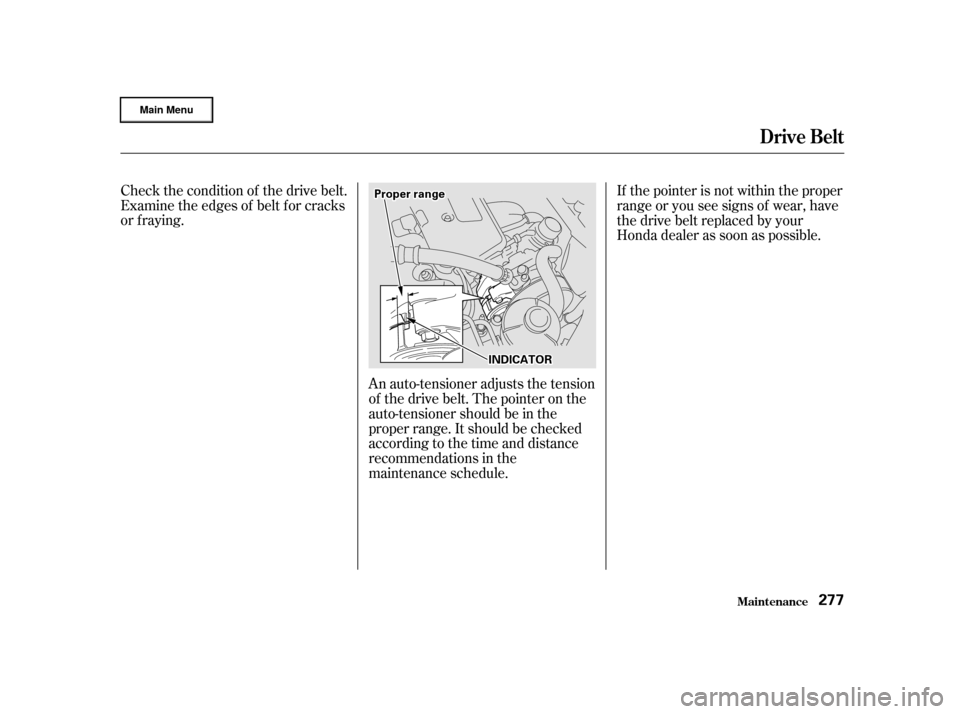
Check the condition of the drive belt.
Examine the edges of belt for cracks
or f raying.An auto-tensioner adjusts the tension
of the drive belt. The pointer on the
auto-tensioner should be in the
proper range. It should be checked
accordingtothetimeanddistance
recommendations in the
maintenance schedule.If the pointer is not within the proper
range or you see signs of wear, have
the drive belt replaced by your
Honda dealer as soon as possible.
Drive Belt
Maint enance277
I IN
ND DI
ICCA A T
TO
OR R
P
P
r
roo p
pe
err r
raan n g
ge
e
Page 299 of 372
If you need to park your vehicle f or
an extended period (more than one
month), there are several things you
should do to prepare it f or storage.
Proper preparation helps prevent
deterioration and makes it easier to
get your vehicle back on the road. If
possible, store your vehicle indoors.Block the rear wheels.
If the vehicle is to be stored f or a
longer period, it should be
supported on jackstands so the
tires are of f the ground.
Leave one window open slightly (if
the vehicle is being stored
indoors).Cover the vehicle with a
‘‘breathable’’ cover, one made
f rom a porous material such as
cotton. Nonporous materials, such
as plastic sheeting, trap moisture,
which can damage the paint.
Fill the f uel tank.
Change the engine oil and f ilter
(see page ).
Wash and dry the exterior
completely.
Cleantheinterior.Makesurethe
carpeting, floor mats, etc. are
completely dry. To minimize sticking, apply a
silicone spray lubricant to all door
and tailgate seals. Also, apply a
vehiclebodywaxtothepainted
surfaces that mate with the door
and tailgate seals. Support the f ront and rear wiper
blade arms with a f olded towel or
ragsotheydonottouchthe
windshield. Disconnect the battery.
Leave the parking brake off. Put
the transmission in Reverse
(5-speed manual) or Park
(automatic). If possible, run the engine f or a
while periodically (pref erably once
amonth).
If you store your vehicle f or 12
months or longer, have your Honda
dealer perf orm the inspections called
f or in the 24 months maintenance
schedule (Normal Conditions) as
soon as you take it out of storage
(see page ). The replacements
called f or in the maintenance
schedule are not needed unless the
vehicle has actually reached that
time or mileage.
249
238
Maint enance
St oring Your Vehicle
295