ECO mode HONDA CR-V 2003 RD4-RD7 / 2.G Owner's Manual
[x] Cancel search | Manufacturer: HONDA, Model Year: 2003, Model line: CR-V, Model: HONDA CR-V 2003 RD4-RD7 / 2.GPages: 374, PDF Size: 4.46 MB
Page 172 of 374

The cassette player picks up dirt and
oxides f rom the tape. This contami-
nation builds up over time and
causes the sound quality to degrade.
To prevent this, you should clean the
player af ter every 30 hours of use.
Your dealer has a cleaning kit
available.
If you do not clean the cassette
player regularly, it may eventually
become impossible to remove the
contamination with a normal
cleaning kit.
Use 100-minute or shorter cassettes.
Cassettes longer than that use
thinner tape that may break or jam
the drive.Look at the cassette before you
insert it. If the tape is loose, tighten
it by turning a hub with a pencil or
your f inger.
Never try to insert f oreign objects
into the cassette player. When they are not in use, store
cassettes in their cases to protect
them f rom dust and moisture. Never
place cassettes where they will be
exposed to direct sunlight, high heat,
or high humidity. If a cassette is
exposed to extreme heat or cold, let
it reach a moderate temperature
bef ore inserting it in the player. If the label is peeling of f , remove it
from the cassette or it could cause
the cassette to jam in the player.
Never try to insert a warped or
damaged cassette in the player.
If you see the error indication
‘‘ ’’ on U.S. EX, and Canadian
EX and EX-L models/‘‘ ’’ on
LX model on the display, press the
TAPE EJECT button to remove the
cassette from the unit. Make sure
thetapeisnotdamaged.If the
cassette will not eject or the error
indication stays on after the cassette
ejects, take the vehicle to your
Honda dealer.
Audio System
Comf ort and Convenience Feat ures
Caring f or the Cassette Player
168
Page 178 of 374
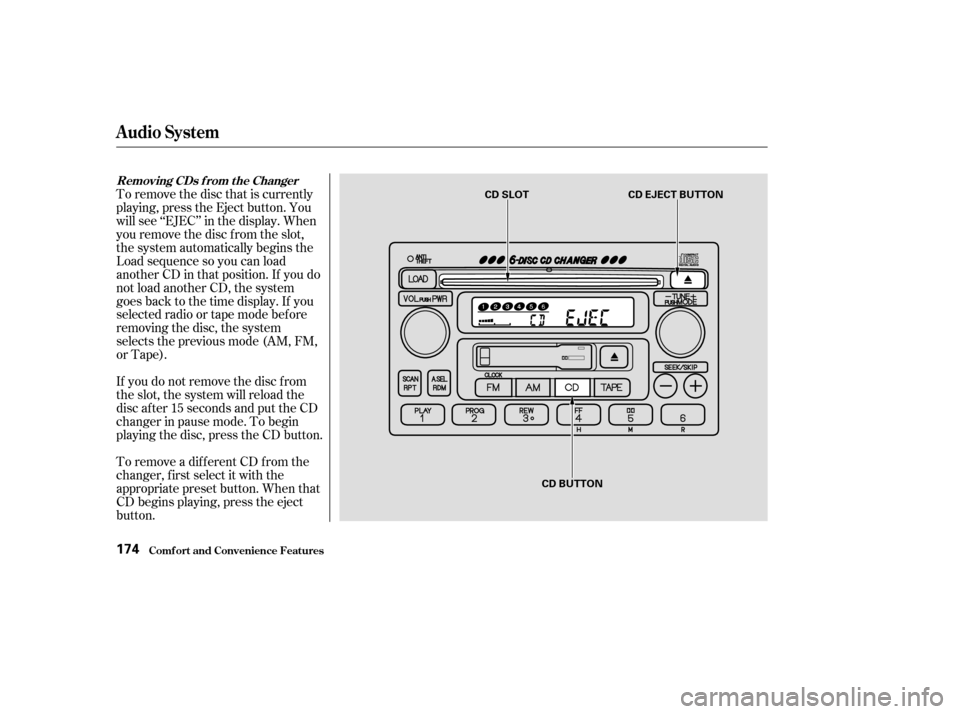
If you do not remove the disc f rom
the slot, the system will reload the
disc af ter 15 seconds and put the CD
changer in pause mode. To begin
playing the disc, press the CD button.
To remove a different CD from the
changer,firstselectitwiththe
appropriate preset button. When that
CD begins playing, press the eject
button. To remove the disc that is currently
playing, press the Eject button. You
will see ‘‘EJEC’’ in the display. When
you remove the disc f rom the slot,
the system automatically begins the
Load sequence so you can load
another CD in that position. If you do
not load another CD, the system
goes back to the time display. If you
selected radio or tape mode bef ore
removing the disc, the system
selects the previous mode (AM, FM,
or Tape).
Removing CDs f rom t he Changer
Comf ort and Convenience Feat ures
Audio System
174
CD SLOTCD EJECT BUTTON
CD BUTTON
Page 188 of 374

Help assure your vehicle’s f uture
reliability and perf ormance by paying
extra attention to how you drive
during the f irst 600 miles (1,000 km).
During this period:Your Honda is designed to operate
on unleaded gasoline with a pump
octane number of 86 or higher. Use
of a lower octane gasoline can cause
a persistent, heavy metallic rapping
noise in the engine that can lead to
mechanical damage.
We recommend gasolines containing
detergent additives that help prevent
f uel system and engine deposits.
Using gasoline containing lead will
damage your vehicle’s emissions
controls. This contributes to air
pollution.In Canada, some gasolines contain
an octane-enhancing additive called
MMT. If you use such gasolines,
your emission control system
perf ormance may deteriorate and
the Malf unction Indicator Lamp on
your instrument panel may turn on.
If this happens, contact your
authorized Honda dealer f or service.
Youshouldfollowthesesamere-
commendations with an overhauled
or exchanged engine, or when the
brakes are relined. Do not change the oil until the
recommended time or mileage
intervalshowninthemaintenance
schedule. Avoidhardbraking.Newbrakes
need to be broken-in by moderate
use f or the f irst 200 miles (300
km). Avoid full-throttle starts and rapid
acceleration.
Break-in Period, Gasoline
Bef ore Driving
Break-in Period
Gasoline
184
Page 194 of 374

Always maintain your vehicle accord-
ing to the maintenance schedule.
This will keep it in top operating
condition.You can improve f uel economy by
driving moderately. Rapid acceler-
ation, abrupt cornering, and hard
braking use more f uel.
The condition of your vehicle and
your driving habits are the two most
important things that affect the fuel
mileage you get.
A cold engine uses more f uel than a
warm engine. It is not necessary to
‘‘warm-up’’ a cold engine by letting it
idle f or a long time. You can drive
away in about a minute, no matter
how cold it is outside. The engine
will warm up f aster, and you get
better f uel economy. To cut down on
the number of ‘‘cold starts,’’ try to
combine several short trips into one.
The air conditioning puts an extra
load on the engine which makes it
usemorefuel.Turnoff theA/Cto
cut down on air conditioning use.
Use the f low-through ventilation
when the outside air temperature is
moderate.
Always drive in the highest gear that
allows the engine to run and acceler-
ate smoothly.
In winter, the build-up of snow on
your vehicle’s underside adds weight
and rolling resistance. Frequent
cleaning helps your f uel mileage and
reduces the chance of corrosion. Depending on traf f ic conditions, try
to maintain a constant speed. Every
time you slow down and speed up,
your vehicle uses extra f uel. Use the
cruise control, when appropriate, to
increase f uel economy.
An important part of that mainte-
nance is the
(see page ). For
example, an underinf lated tire
causes more ‘‘rolling resistance,’’
which uses f uel. It also wears out
f aster, so check the tire pressure at
least monthly. 245
Vehicle Condition
Driving Habits
Owner Maintenance
Checks
Fuel Economy
Bef ore Driving190
Page 202 of 374

Your CR-V has higher ground
clearance than a passenger vehicle
designed only f or use on pavement.
Higher ground clearance has many
advantages for off-highway driving.
It allows you to travel over bumps
and unpaved roads. It also provides
good visibility so you can anticipate
problems earlier.
Theseadvantagescomeatsomecost.
Because your vehicle is taller and
rides higher of f the ground, it has a
high center of gravity. This means
that your vehicle can tip or roll over
if you make abrupt turns. Utility
vehicles have a signif icantly higher
rollover rate than other types of
vehicles.Avoid sharp turns and abrupt
maneuvers whenever possible.
Do not modif y your vehicle in any
way that would raise the center of
gravity.
Do not carry heavy cargo on the
roof .
Your CR-V is equipped with a unique
f our-wheel drive (4WD) system.
Normally, power is delivered only to
the f ront wheels. When the system
senses a loss of f ront-wheel traction,
it automatically transfers some
power to the rear wheels. This gives
you better traction and mobility.
While this system can provide
increasedtractiononslippery
surf aces, you still need to exercise
thesamecarewhenaccelerating,
steering, and braking that you would
in a two-wheel drive vehicle.
To prevent the risk of rollover or
loss of control: Take corners at slower speeds
than you would with a passenger
vehicle.
See page f or additional guidelinesf or driving of f -highway.
Four-wheel Drive Models
226
Driving Guidelines
Driving198
Page 266 of 374
Put a new washer on the f iller bolt,
then reinstall the f iller bolt and
tighten it securely.
Only use Honda Dual Pump Fluid.
Do not use Automatic Transmission
Fluid (ATF).
The rear dif f erential should be
drained and ref illed with new f luid
accordingtothetimeanddistance
recommendations in the mainte-
nance schedule.
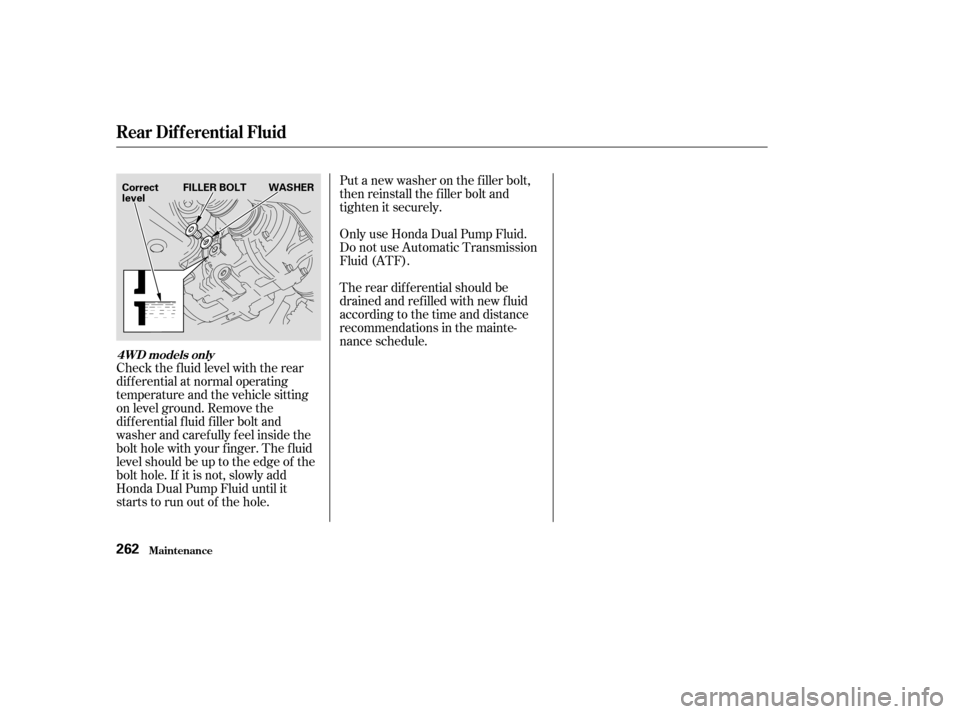
Check the f luid level with the rear
dif f erential at normal operating
temperature and the vehicle sitting
on level ground. Remove the
dif f erential f luid f iller bolt and
washer and caref ully f eel inside the
bolt hole with your f inger. The f luid
level should be up to the edge of the
bolt hole. If it is not, slowly add
Honda Dual Pump Fluid until it
starts to run out of the hole.
Rear Dif f erential Fluid
Maint enance
4WD models only
262
Correct
level FILLER BOLT WASHER
Page 267 of 374
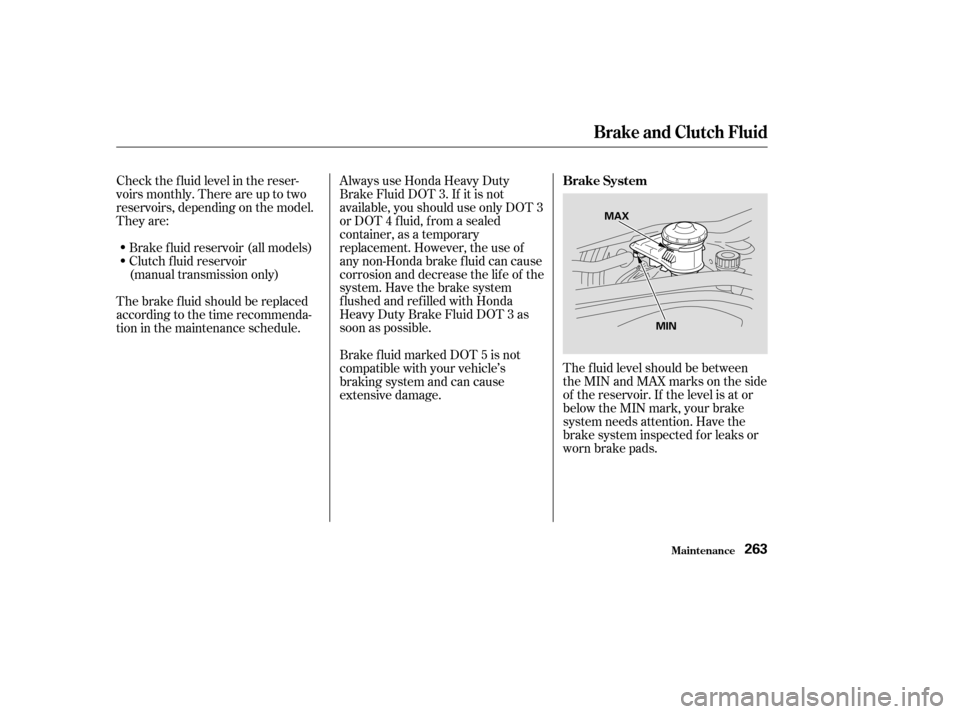
The f luid level should be between
theMINandMAXmarksontheside
of the reservoir. If the level is at or
below the MIN mark, your brake
system needs attention. Have the
brake system inspected f or leaks or
worn brake pads.
Always use Honda Heavy Duty
Brake Fluid DOT 3. If it is not
available, you should use only DOT 3
or DOT 4 f luid, f rom a sealed
container, as a temporary
replacement. However, the use of
any non-Honda brake fluid can cause
corrosion and decrease the lif e of the
system. Have the brake system
f lushed and ref illed with Honda
Heavy Duty Brake Fluid DOT 3 as
soon as possible.
Check the f luid level in the reser-
voirs monthly. There are up to two
reservoirs, depending on the model.
They are:
Brake f luid reservoir (all models)
Clutch f luid reservoir
(manual transmission only)
The brake f luid should be replaced
according to the time recommenda-
tion in the maintenance schedule. Brake f luid marked DOT 5 is not
compatible with your vehicle’s
braking system and can cause
extensive damage.Brake System
Brake and Clutch Fluid
Maint enance263
MAX
MIN
Page 319 of 374
CONT INUED
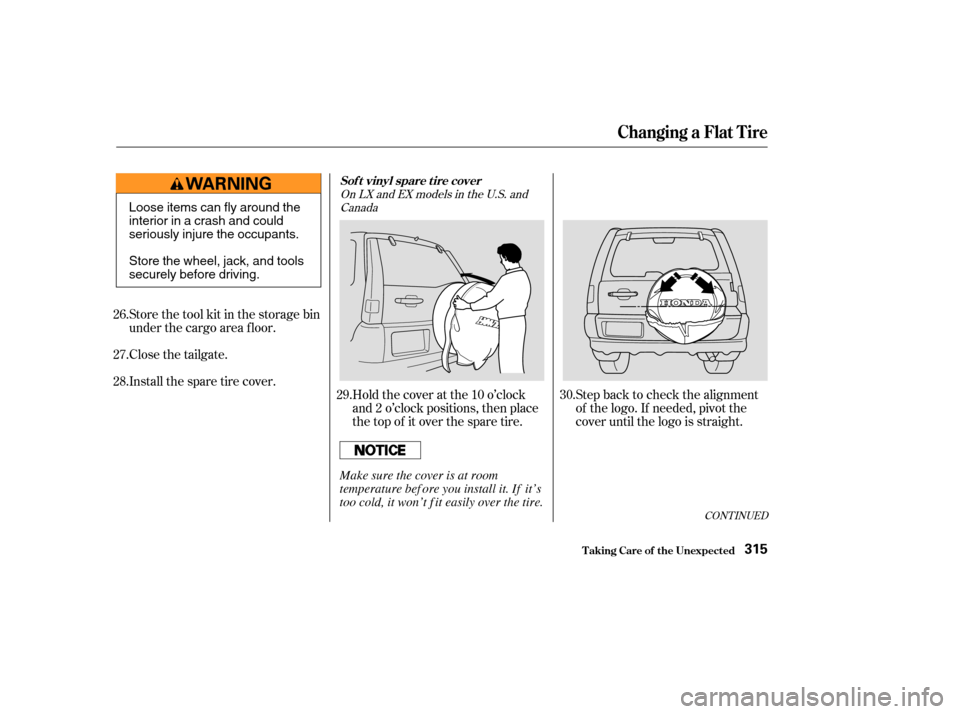
Step back to check the alignment
of the logo. If needed, pivot the
cover until the logo is straight.
Holdthecoveratthe10o’clock
and 2 o’clock positions, then place
the top of it over the spare tire.
Store the tool kit in the storage bin
under the cargo area f loor.
Close the tailgate.
Install the spare tire cover.
26.
27.
28.
29.30.
OnLXandEXmodelsintheU.S.and
Canada
Changing a Flat T ire
T aking Care of t he Unexpect ed
Sof t vinyl spare t ire cover
315
Loose items can fly around the
interior in a crash and could
seriously injure the occupants.
Store the wheel, jack, and tools
securely before driving.
Make sure the cover is at room
temperature bef ore you install it. If it’s
too cold, it won’t f it easily over the tire.
Page 331 of 374
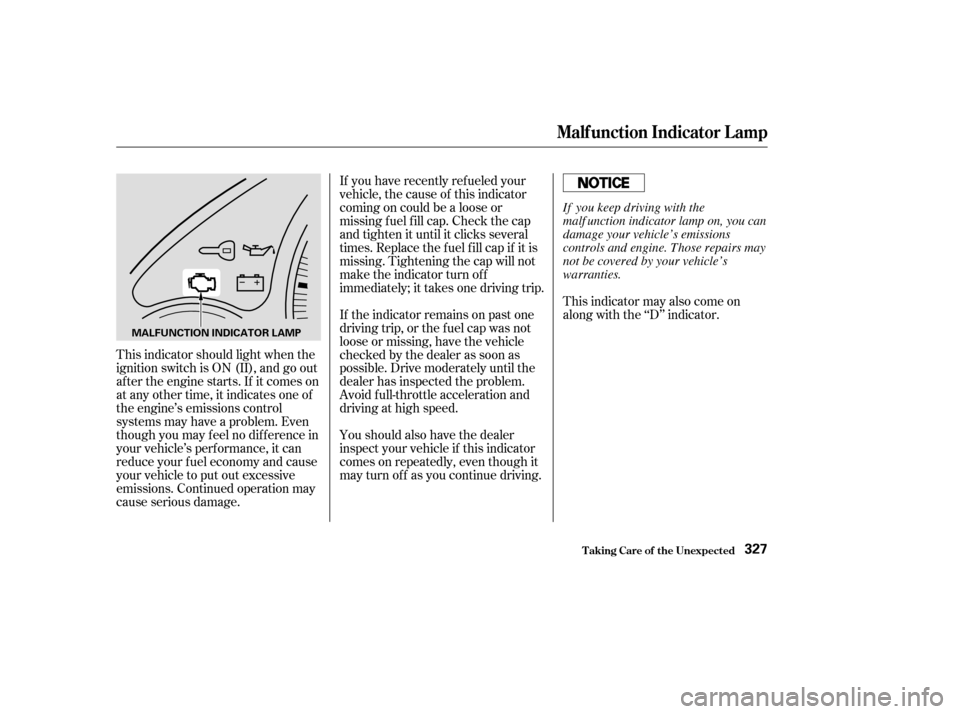
This indicator should light when the
ignition switch is ON (II), and go out
af ter the engine starts. If it comes on
at any other time, it indicates one of
the engine’s emissions control
systems may have a problem. Even
though you may f eel no dif f erence in
your vehicle’s perf ormance, it can
reduce your f uel economy and cause
your vehicle to put out excessive
emissions. Continued operation may
cause serious damage.If you have recently ref ueled your
vehicle, the cause of this indicator
coming on could be a loose or
missing f uel f ill cap. Check the cap
and tighten it until it clicks several
times. Replace the f uel f ill cap if it is
missing. Tightening the cap will not
make the indicator turn of f
immediately; it takes one driving trip.
If the indicator remains on past one
driving trip, or the f uel cap was not
loose or missing, have the vehicle
checked by the dealer as soon as
possible. Drive moderately until the
dealer has inspected the problem.
Avoid full-throttle acceleration and
driving at high speed.
Youshouldalsohavethedealer
inspect your vehicle if this indicator
comes on repeatedly, even though it
may turn of f as you continue driving.
This indicator may also come on
along with the ‘‘D’’ indicator.
Malf unction Indicator L amp
T aking Care of t he Unexpect ed327
MALFUNCTION INDICATOR LAMP
If you keep driving with the
malf unction indicator lamp on, you can
damage your vehicle’s emissions
controls and engine. Those repairs may
not be covered by your vehicle’s
warranties.