wheel HONDA CR-V 2007 RD1-RD5, RE7 / 3.G Owner's Manual
[x] Cancel search | Manufacturer: HONDA, Model Year: 2007, Model line: CR-V, Model: HONDA CR-V 2007 RD1-RD5, RE7 / 3.GPages: 352, PDF Size: 5.77 MB
Page 245 of 352
VSA is turned on every time you
start the engine, even if you turn ed it
off the last time you drove the
vehicle.
When VSA is off, the VSA activation
indicator comes on as a reminder.
Press and hold the switch again
turns the system back on. In
certain unusual conditions when
your vehicle gets stuck in shallow
mud or fresh snow, it may be easier
to free it with the VSA temporarily
switched off. When the VSA system
is off, the traction control system is
also off.Youshouldonlyattemptto
free your vehicle with the VSA off if
you are not able to free it when the
VSA is on.
Immediately after freeing your
vehicle, be sure to switch the VSA on
again. We do not recommend driving
your vehicle with the VSA and
traction control systems switched off.Driving
with varying tire or wheel
sizes may cause the VSA to
malf unction. When replacing tires,
make sure they are the same size
and type as your original tires (see
page ).
If you install winter tires, make sure
they are the same size as those that
were originally supplied with your
vehicle. Exercise the same caution
during winter driving as you would if
your vehicle was not equipped with
VSA.
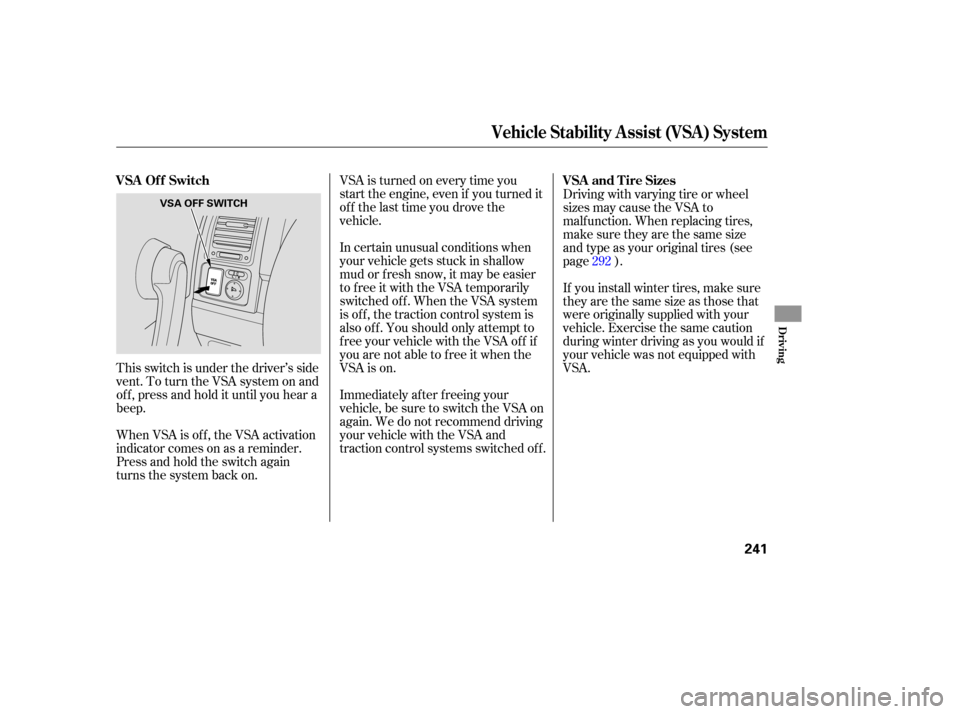
This switch is under the driver’s side
vent. To turn the VSA system on and
of f , press and hold it until you hear a
beep. 292
Vehicle Stability Assist (VSA) System
VSA Of f Switch
VSA and Tire Sizes
Driving
241
VSA OFF SWITCH
Page 248 of 352

As required by the FCC:
This device complies with Part 15 of the
FCC rules. Operation is subject to the
following two conditions: (1) This device
may not cause harmful interference, and
(2) this device must accept any
interference received, including
interference that may cause undesired
operation.
Changes or modifications not expressly
approved by the party responsible for
compliance could void the user’s
au thority to operate the equipment.
This device complies with Industry
Canada Standard RSS-210.
Operation is subject to the following two
conditions: (1) this device may not cause
interference, and (2) this device must
accept any interference that may cause
undesired operation of the device.
If you have a flat tire, the low tire
pressure indicator will come on.
Replace the flat tire with the
compact spare tire (see page ). Never use a puncture-repairing agent
in a f lat tire. If used, you will have to
replace the tire pressure sensor.
Havetheflattirerepairedbyyour
dealer as soon as possible.
Each wheel (except the compact
sparetirewheel)isequippedwitha
tire pressure sensor mounted inside
the tire behind the valve stem. You
must use TPMS specif ic wheels. It is
recommended that you always have
your tires serviced by your dealer or
qualif ied technician.
Af ter you replace the f lat tire, the
low tire pressure indicator stays on.
This is normal; the system is not
monitoring the spare tire pressure.
Manually check the spare tire
pressure to be sure it is correct. 298
Tire Pressure Monitoring System (TPMS)
Changing a T ire with T PMS
244
Page 254 of 352

Your vehicle can be towed behind a
motorhome at legal highway speeds
up to 65 mph (100 km/h). Do not
exceed 65 mph (100 km/h).
Otherwise, severe transmission
damage will occur. To avoid damage
to the 4WD system, your vehicle
must be towed with all four wheels
on the ground (flat towing).
Wh en purchasing a tow bar, make
sure you select a reputable
manufacturer and installer. Follow
the manufacturer’s attachment
instru ctions carefully.
Perform the following procedure
every day imme diately before you
begin towing. Otherwise severe
automatic transmission damage will
occur.
Al
ways drive slowly and have
someone guide you when backing up.
Grip the of the steering
wheel; then turn the wheel to the left
to get the trailer to move to the left,
andturnthewheel righttomovethe
trailer to the right.
Follow all norm al precau tions when
parking, including firmly setting the
parking brake and putting the
tran smission in Park. Also, place
wheel chocks at each of the trailer’s
tires.
When you stop towing your vehic le
and shift out of the neutral position,
you may not be able to move the
shift lever from neutral to reverse or
Park.Ifthishappens,press the
brake pedal and turn the ignition
switch to the ON (II) position, then
shift out of neutral.
Leave
the ignition switch in the
ACCESSORY (I) position so the
steering wheel does not lock.
Make sure the radio and any items
plugged into the accessory power
sockets are turned off so you do
not run down the battery.
Release the parking brake. ShifttoD,thentoN.Letthe
engine run f or 3 minutes, then
turn it off. Press on the brake pedal. Move
the shif t lever through all its
positions. Check the transmission f luid level
(see page ).
Start the engine.
273
bottom Do not overf ill.
T owing a T railer, T owing Your Vehicle Behind a Motorhome
Towing Your Vehicle Behind a
MotorhomeBacking Up
Parking
250
Page 255 of 352
If you tow more than 8 hours in one
day, you should repeat the above
procedure at least every 8 hours
(when you stop f or f uel, etc.)Only remove the fuse after you have
perf ormed the transmission shif ting
procedure, and the key is in the
ACCESSORY (I) position. Store the
f use in an obvious location (center
tray, coin pockets, etc) as a reminder
to re-install the fuse before drivingthe vehicle.
If you tow a CR-V behind a
motorhome, the transmission fluid
must be changed every 2 years or
30,000 miles (48,000 km), whichever
comes f irst.
Ext ended T owing
Towing Your Vehicle Behind a Motorhome
Driving
251
INTERIOR FUSE BOX
ACCESSORY RADIO FUSE
The steering system can be damaged if
the steering wheel is locked. Leave the
ignition switch in the ACCESSORY (I)
position, and make sure the steering
wheel turns f reely bef ore you begin
towing.
Failure to f ollow the recommended
instructions exactly will result in severe
automatic transmission damage. If you
cannot shif t the transmission or start
the engine, your vehicle must be
transported on a f lat-bed truck or
trailer. Severe transmission damage will occur
if the vehicle is shif ted f rom reverse to
neutral and then towed with the drive
wheels on the ground.
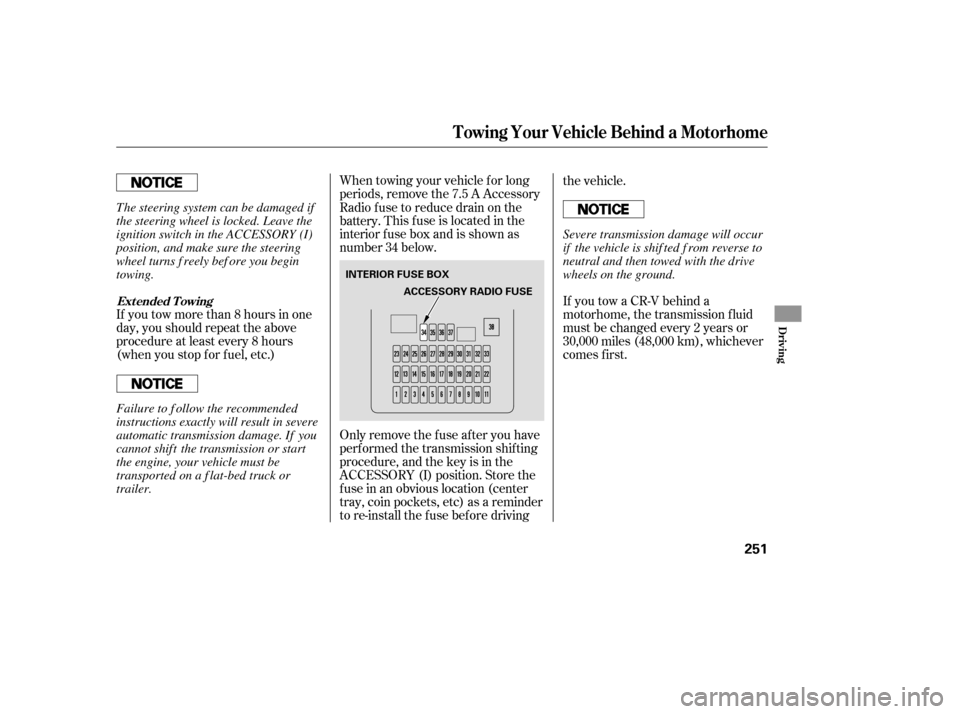
Radio f use to reduce drain on the
battery. T
his f
u
se is located in the
When towing your vehicle f or long
interior f use box a
nd is shown as
periods, remove the 7.5 A Accessory
number 34 below.
Page 257 of 352

Before you leave the pavement, be
sure to do all scheduled maintenance
and service, and inspect your vehicle
f or any problems. Pay special
attention to the condition of the tires,
and check the tire pressures.
After you return to the pavement,
caref ully inspect your vehicle to
make sure there is no damage that
could make driving it unsaf e.
Recheck the condition of the tires
and the tire pressures.
The route presents limits (too steep
or bumpy roads). You have limits
(driving skill and comfort). And your
vehicle has limits (traction, stability,
and power).
Driving of f -highway can be
hazardous if you f ail to recognize
limits and take the proper
precautions.Forbettertractiononallsurfaces,
accelerate slowly and gradually build
up speed. If you try to start too fast
on wet soil, mud, snow, or ice, you
might not have enough traction to
get underway, and you may dig
yourself a hole. Starting with the
shif t lever in second (2) gear will
help you have a smoother start on
snow or ice.
Keep in mind that you will usually
need more time and distance to
brake to a stop on unpaved surf aces.
Avoid hard braking. Do not ‘‘pump’’
the brakes; let the anti-lock braking
system pump them f or you.
Debris in the road can damage your
suspension or other components.
Because your vehicle has a high
center of gravity, driving over a large
obstacle, or allowing a wheel to drop
into a deep hole can cause your
vehicle to tip or roll over.
If you can’t clearly see all conditions
or obstacles on a slope, walk the
slope bef ore you drive on it. If you
have any doubt whether or not you
can saf ely drive on the slope, don’t
do it. Find another route.
If you are driving up a hill and f ind
that you cannot continue,
. Your vehicle could roll
over. Slowly back down the hill,
f ollowing the same route you took up
the hill.
do not try to
turn around
Check Out Your Vehicle
Remember A ccelerating and Braking A voiding Obstacles
Driving on Slopes
Of f -Highway Driving Guidelines
Driving
253
Page 258 of 352

Avoid driving through deep water. If
you encounter water in your route (a
small stream or large puddle, f or
example), evaluate it carefully before
going ahead. Make sure it is shallow,
f lowing slowly, and has f irm ground
underneath. If you are not sure of
the depth or the ground, turn around
andfindanotherroute.
Driving through deep water can also
damage your vehicle. The water can
get into the transmission and
dif f erential, diluting the lubricant
and causing an eventual failure. It
can also wash the grease out of the
wheel bearings.Avoid driving on sof t sand, deep mud,
or other surf aces where you could
get stuck. If you do happen to get
stuck because of inclement weather
or other conditions, choose a saf e
and appropriate course of action.
You should never use a jack to try
getting unstuck. A jack only works
on f irm, level ground. Also, your
vehicle could easily slip of f the jack
and hurt you or someone else.
If you spin the wheels excessively
trying to get unstuck, you may
overheat the components of the
4-wheel drive system. If this happens,
the 4-wheel drive system shuts off
and only the f ront wheels receive
power. If this happens, stop and
allow everything to cool down. The
4-wheel drive system will work again
after its temperature drops.
If you slip the clutch f or a long time
while trying to get unstuck, you may
overheat and damage it.
If You Get Stuck
Crossing a Stream
4-Wheel Drive Vehicles
Of f -Highway Driving Guidelines
254
Page 259 of 352

This section explains why it is
important to keep your vehicle well
maintained and how to follow basic
maintenance safety precautions.
If you have the skills and tools to
perform more complex maintenance
tasks on your vehicle, you may want
to purchase the service manual. See
page f or inf ormation on how to
obtain a copy, or see your dealer. This section also includes
instructions on how to read the
maintenance minder messages on
the information display, a
maintenance record, and instructions
for simple maintenance tasks you
may want to take care of yourself. ......................
Maintenance Saf ety .256
....................
Maintenance Minder .257
....................
Maintenance Record .264
..............................
Fluid Locations .266
........................
Adding Engine Oil .267
Changing the Engine Oil and
...........................................
Filter .268
..............................
Engine Coolant .270
....................
Windshield Washers .272
....
Automatic Transmission Fluid .273
.................
Rear Dif f erential Fluid .275
....................................
Brake Fluid .275
....................
Power Steering Fluid .276
.............................................
Lights .277
................
Cleaning the Seat Belts .283
.....................................
Floor Mats .283
..............................
Audio Antenna .284
..................
Dust and Pollen Filter .284
.................................
Wiper Blades .285
...............................................
Tires .288
...........................................
Wheels .293
...................
Checking the Battery .294
.............................
Vehicle Storage .295
337
Maintenance
Maint enance
255
Page 280 of 352
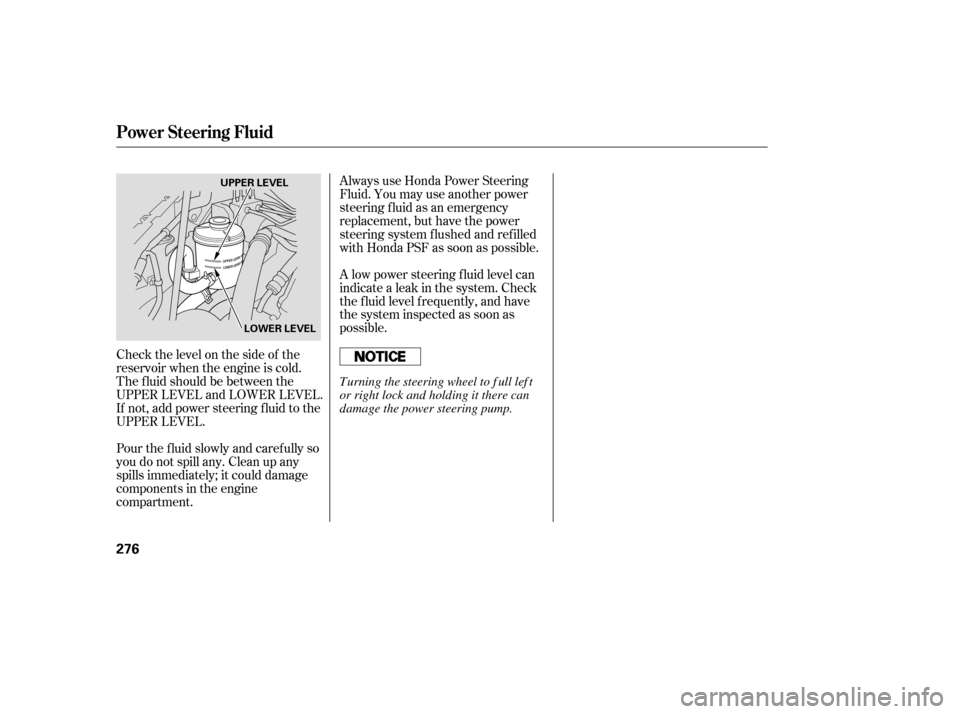
Check the level on the side of the
reservoir when the engine is cold.
The f luid should be between the
UPPER LEVEL and LOWER LEVEL.
If not, add power steering f luid to the
UPPER LEVEL.
Pour the f luid slowly and caref ully so
you do not spill any. Clean up any
spills immediately; it could damage
components in the engine
compartment.Always use Honda Power Steering
Fluid. You may use another power
steering f luid as an emergency
replacement, but have the power
steering system f lushed and ref illed
with Honda PSF as soon as possible.
A low power steering f luid level can
indicate a leak in the system. Check
the f luid level f requently, and have
the system inspected as soon as
possible.
Power Steering Fluid
276
LOWER LEVEL
UPPER LEVEL
Turning the steering wheel to f ull lef t
or right lock and holding it there can
damage the power steering pump.
Page 294 of 352
Every time you check inf lation, you
should also examine the tires f or
damage, f oreign objects, and wear.
Youshouldlookfor:Bumps or bulges in the tread or
side of the tire. Replace the tire if
youfindeitherof theseconditions.
Cuts, splits, or cracks in the side
of the tire. Replace the tire if you
can see f abric or cord.
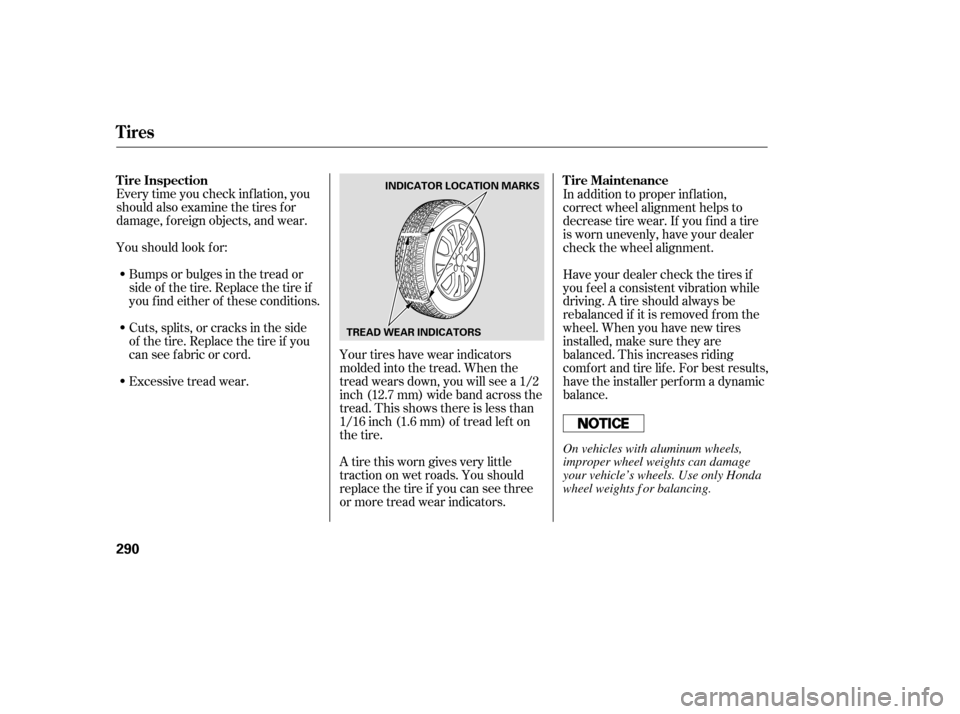
Excessive tread wear. Your tires have wear indicators
molded into the tread. When the
tread wears down, you will see a 1/2
inch (12.7 mm) wide band across the
tread. This shows there is less than
1/16 inch (1.6 mm) of tread lef t on
the tire.
A tire this worn gives very little
traction on wet roads. You should
replace the tire if you can see three
or more tread wear indicators. In addition to proper inf lation,
correct wheel alignment helps to
decrease tire wear. If you f ind a tire
is worn unevenly, have your dealer
check the wheel alignment.
Have your dealer check the tires if
you f eel a consistent vibration while
driving. A tire should always be
rebalanced if it is removed f rom the
wheel. When you have new tires
installed, make sure they are
balanced. This increases riding
comf ort and tire lif e. For best results,
have the installer perform a dynamic
balance.
Tires
Tire Inspection
Tire Maintenance
290
INDICATOR LOCATION MARKS
TREAD WEAR INDICATORS
On vehicles with aluminum wheels,
improper wheel weights can damage
your vehicle’s wheels. Use only Honda
wheel weights f or balancing.
Page 295 of 352
CONT INUED
When the tires are rotated, make
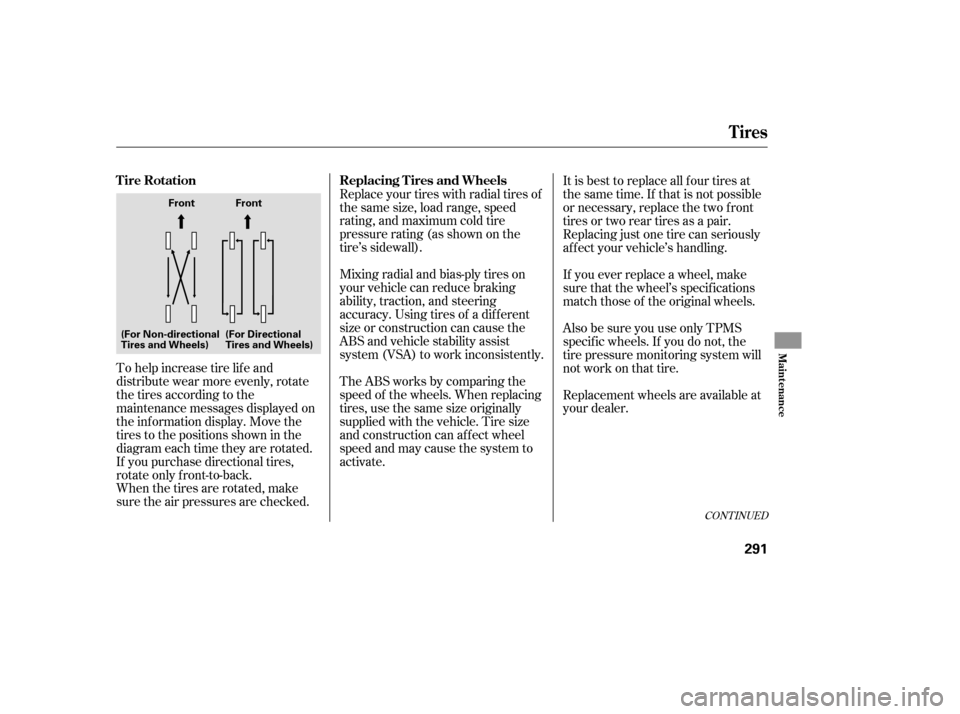
sure the air pressures are checked. To help increase tire lif e and
distribute wear more evenly, rotate
the tires according to the
maintenance messages displayed on
the information display. Move the
tires to the positions shown in the
diagram each time they are rotated.
If you purchase directional tires,
rotate only front-to-back.Replace your tires with radial tires of
the same size, load range, speed
rating, and maximum cold tire
pressure rating (as shown on the
tire’s sidewall).
Mixing radial and bias-ply tires on
your vehicle can reduce braking
ability, traction, and steering
accuracy. Using tires of a dif f erent
size or construction can cause the
ABS and vehicle stability assist
system (VSA) to work inconsistently.
TheABSworksbycomparingthe
speed of the wheels. When replacing
tires, use the same size originally
supplied with the vehicle. Tire size
and construction can affect wheel
speed and may cause the system to
activate.It is best to replace all f our tires at
thesametime.If thatisnotpossible
or necessary, replace the two f ront
tires or two rear tires as a pair.
Replacing just one tire can seriously
af f ect your vehicle’s handling.
If you ever replace a wheel, make
sure that the wheel’s specif ications
match those of the original wheels.
Also be sure you use only TPMS
specif ic wheels. If you do not, the
tire pressure monitoring system will
notworkonthattire.
Replacement wheels are available at
your dealer.
Tires
T ire Rotation
Replacing T ires and Wheels
Maint enance
291
Front Front
(For Non-directional
Tires and Wheels) (For Directional
Tires and Wheels)