open HONDA CR-V 2010 RD1-RD5, RE7 / 3.G Owner's Manual
[x] Cancel search | Manufacturer: HONDA, Model Year: 2010, Model line: CR-V, Model: HONDA CR-V 2010 RD1-RD5, RE7 / 3.GPages: 441, PDF Size: 8.12 MB
Page 132 of 441
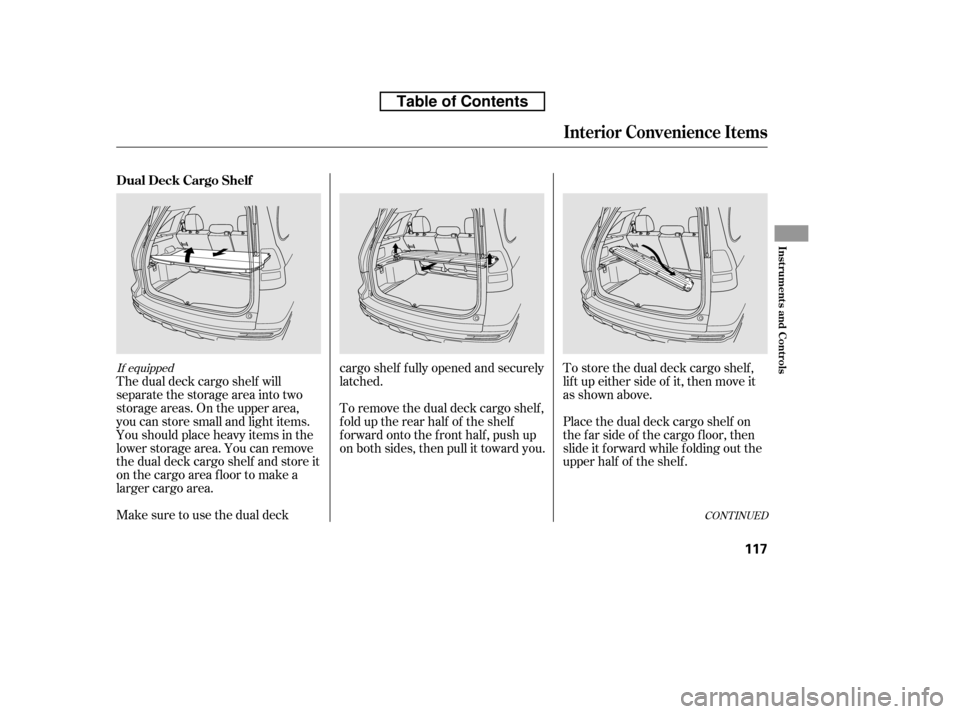
The dual deck cargo shelf will
separate the storage area into two
storage areas. On the upper area,
you can store small and light items.
Youshouldplaceheavyitemsinthe
lower storage area. You can remove
the dual deck cargo shelf and store it
on the cargo area f loor to make a
larger cargo area.To store the dual deck cargo shelf ,
lif t up either side of it, then move it
as shown above.
Make sure to use the dual deck cargo shelf f ully opened and securely
latched.
To remove the dual deck cargo shelf ,
f old up the rear half of the shelf
forward onto the front half, push up
on both sides, then pull it toward you.
Place the dual deck cargo shelf on
the f ar side of the cargo f loor, then
slide it f orward while f olding out the
upperhalfoftheshelf.
If equipped
CONT INUED
Dual Deck Cargo Shelf
Interior Convenience Items
Inst rument s and Cont rols
117
Table of Contents
Page 134 of 441
On vehicles with rear seat armrest
On Canadian models
On U.S. models
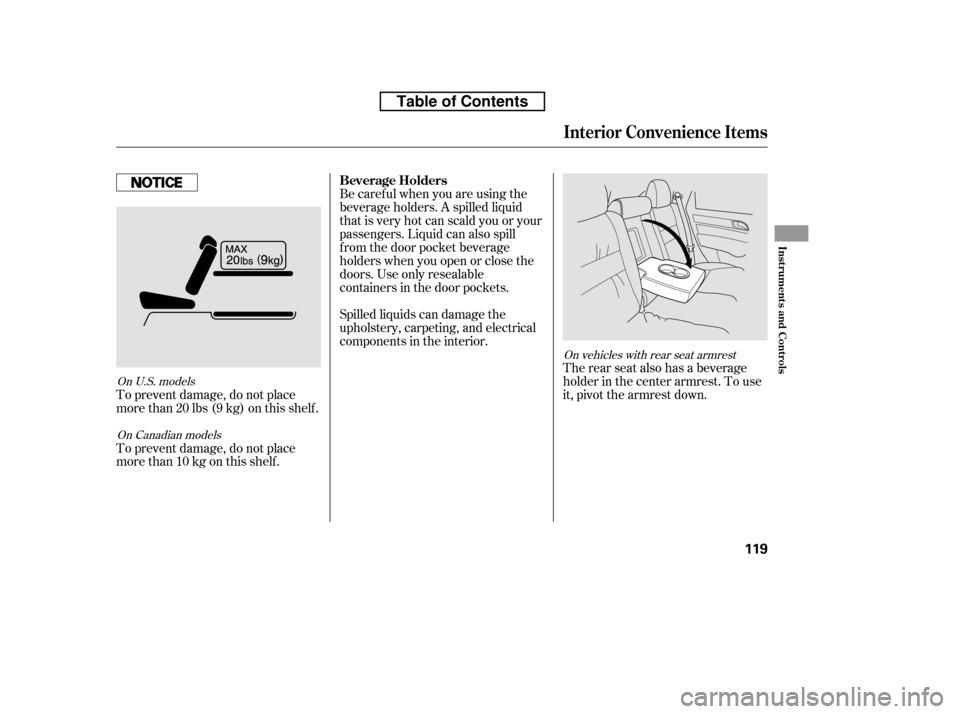
The rear seat also has a beverage
holder in the center armrest. To use
it, pivot the armrest down.
Be caref ul when you are using the
beverage holders. A spilled liquid
that is very hot can scald you or your
passengers. Liquid can also spill
f rom the door pocket beverage
holders when you open or close the
doors. Use only resealable
containers in the door pockets.
Spilled liquids can damage the
upholstery, carpeting, and electrical
components in the interior.
To prevent damage, do not place
more than 20 lbs (9 kg) on this shelf.
To prevent damage, do not place
more than 10 kg on this shelf. Beverage Holders
Interior Convenience Items
Inst rument s and Cont rols
119
Table of Contents
Page 135 of 441
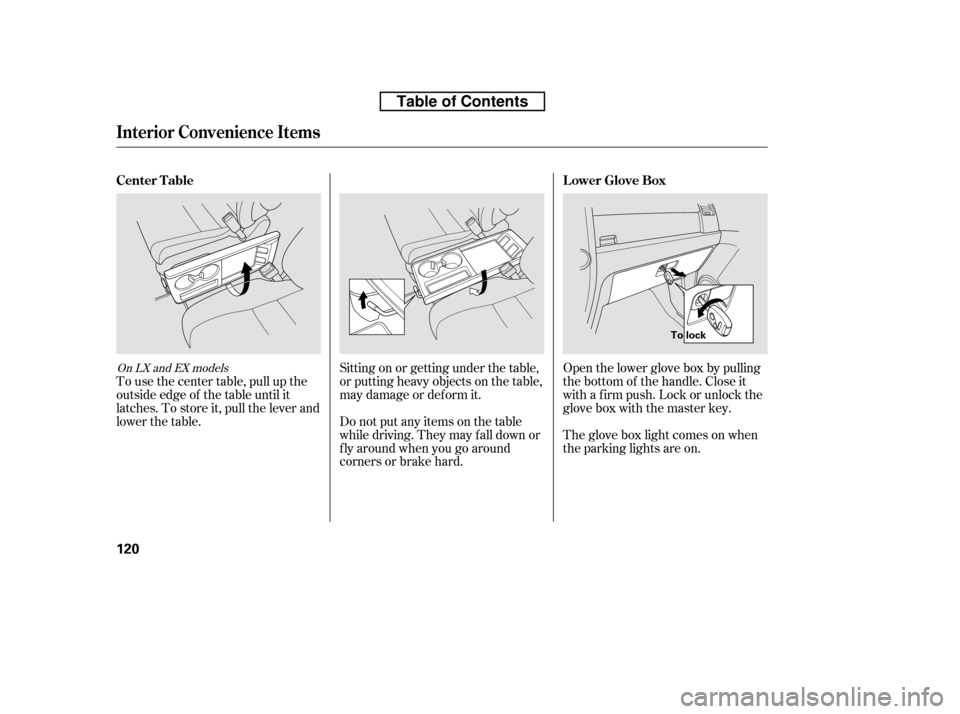
Open the lower glove box by pulling
the bottom of the handle. Close it
with a f irm push. Lock or unlock the
glove box with the master key.
The glove box light comes on when
the parking lights are on.
Sitting on or getting under the table,
or putting heavy objects on the table,
may damage or deform it.
Do not put any items on the table
while driving. They may f all down or
f ly around when you go around
corners or brake hard.
To use the center table, pull up the
outside edge of the table until it
latches. To store it, pull the lever and
lower the table.On LX and EX models
Lower Glove Box
Center Table
Interior Convenience Items
120
To lock
Table of Contents
Page 136 of 441
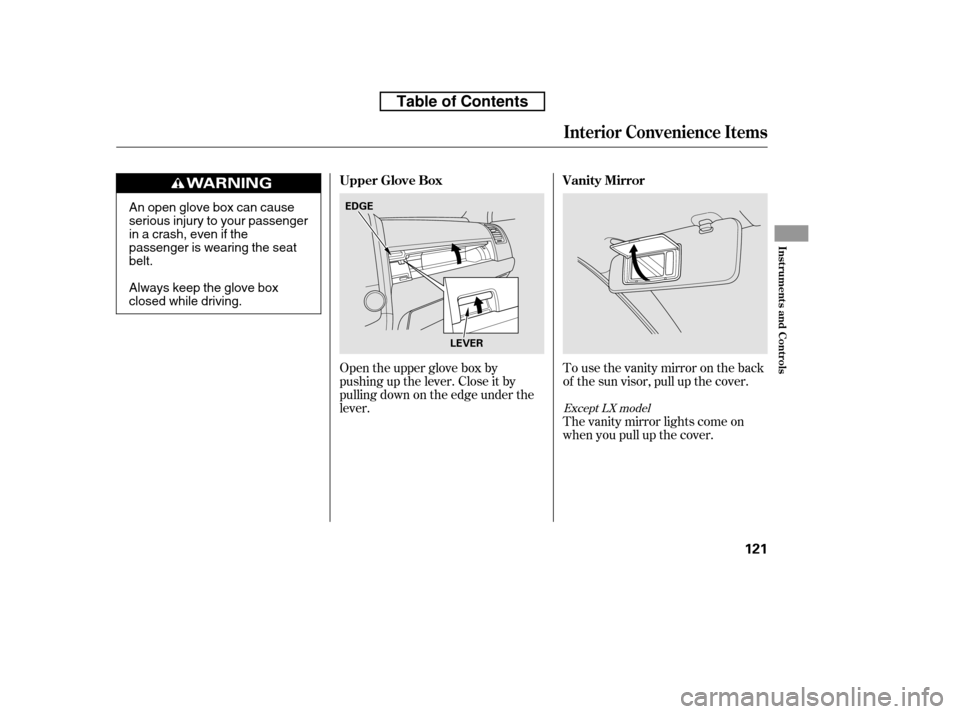
To use the vanity mirror on the back
of the sun visor, pull up the cover.
Open the upper glove box by
pushing up the lever. Close it by
pulling down on the edge under the
lever.
The vanity mirror lights come on
when you pull up the cover.
Except LX model
Vanity Mirror
Upper Glove Box
Interior Convenience Items
Inst rument s and Cont rols
121
EDGE
LEVERAn open glove box can cause
serious injury to your passenger
inacrash,evenifthe
passenger is wearing the seatbelt.
Always keep the glove box
closed while driving.
Table of Contents
Page 137 of 441

Some larger styles of sunglasses
may not f it in the holder.
You may also store small items in
thisholder.Makesuretheyare
small enough to let the holder close
and latch, and that they are not
heavy enough to cause the holder to
pop open while driving.
To open the sunglasses holder, push
then release the raised detent. It will
unlatch and swing down. To close it,
push it until it latches. Make sure the
holder is closed while you are driving.
To use the sun visor, pull it down.
Whenusingthesunvisorforthe
side window, remove the support rod
f rom the clip, and swing it out.
Make sure you put the sun visor
back in place when you are getting
into or out of the vehicle. Sunglasses Holder
Sun Visor
Interior Convenience Items
122
Push
SUNGLASSES HOLDER
SUN VISOR
Table of Contents
Page 138 of 441
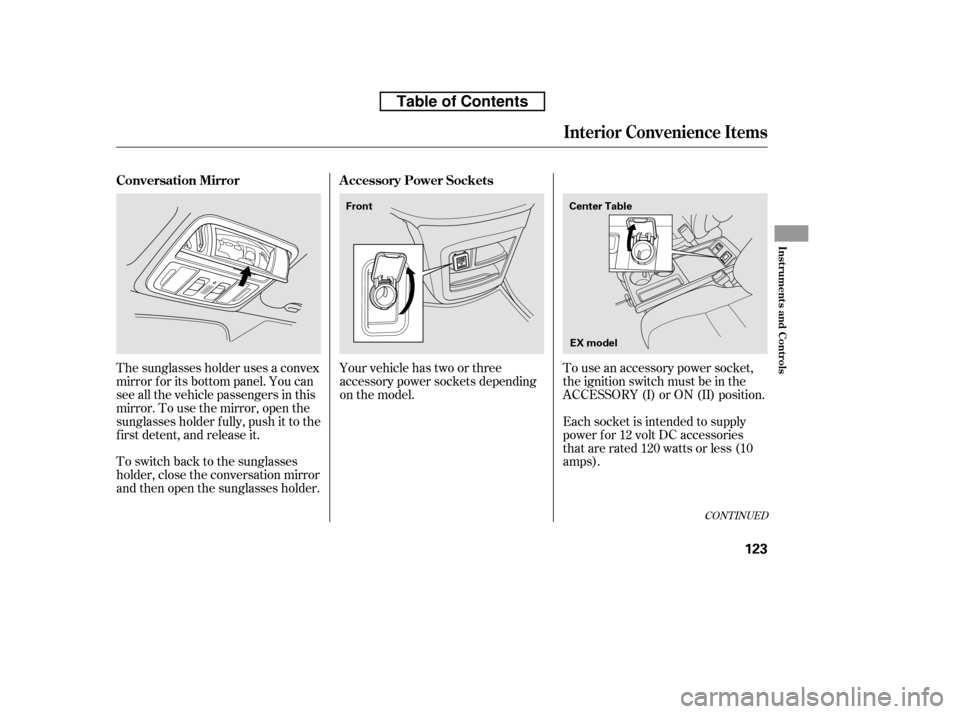
To use an accessory power socket,
the ignition switch must be in the
ACCESSORY (I) or ON (II) position.
Each socket is intended to supply
power f or 12 volt DC accessories
that are rated 120 watts or less (10
amps).
Your vehicle has two or three
accessory power sockets depending
on the model.
The sunglasses holder uses a convex
mirror f or its bottom panel. You can
see all the vehicle passengers in this
mirror. To use the mirror, open the
sunglasses holder f ully, push it to the
f irst detent, and release it.
To switch back to the sunglasses
holder, close the conversation mirror
and then open the sunglasses holder.
CONT INUED
A ccessory Power Sockets
Conversation Mirror
Interior Convenience Items
Inst rument s and Cont rols
123
EX model
Center Table
Front
Table of Contents
Page 139 of 441
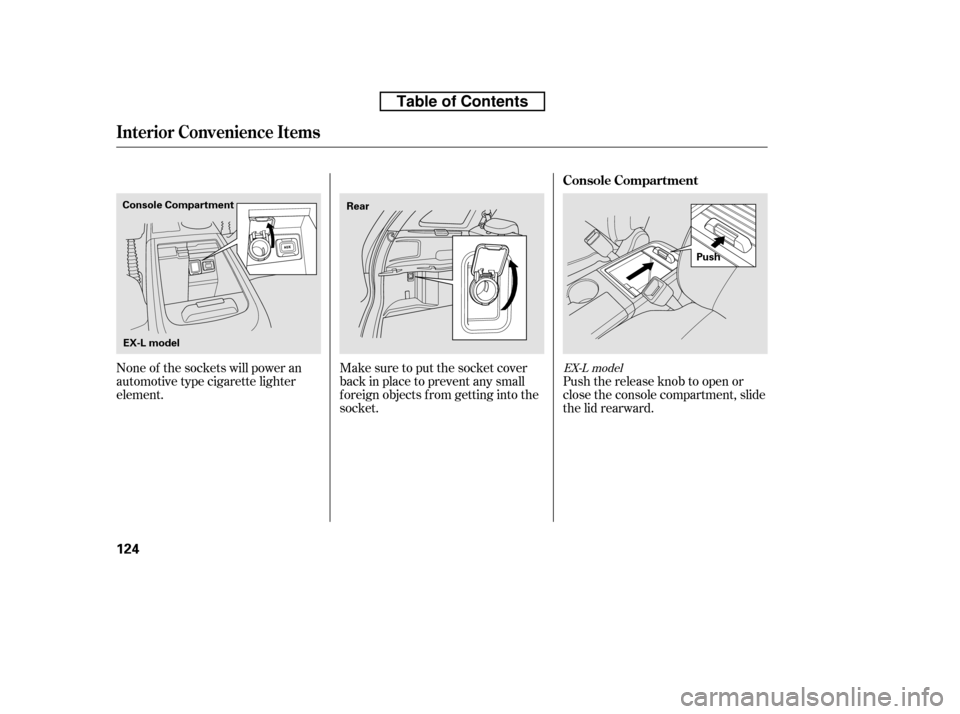
Push the release knob to open or
close the console compartment, slide
the lid rearward.
Make sure to put the socket cover
back in place to prevent any small
foreign objects from getting into the
socket.
None of the sockets will power an
automotive type cigarette lighter
element.
EX-L model
Console Compartment
Interior Convenience Items
124
Push
EX-L model
Console Compartment
Rear
Table of Contents
Page 141 of 441
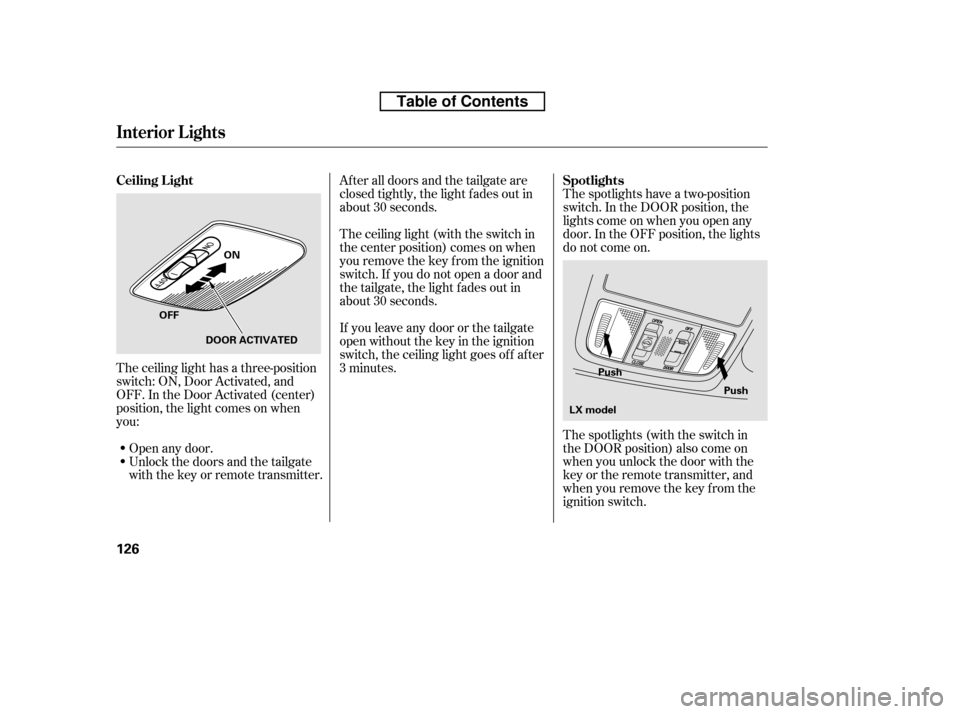
The spotlights have a two-position
switch. In the DOOR position, the
lights come on when you open any
door. In the OFF position, the lights
do not come on.
The spotlights (with the switch in
the DOOR position) also come on
when you unlock the door with the
key or the remote transmitter, and
when you remove the key f rom the
ignition switch.
Af ter all doors and the tailgate are
closed tightly, the light fades out in
about 30 seconds.
The ceiling light (with the switch in
the center position) comes on when
you remove the key f rom the ignition
switch. If you do not open a door and
the tailgate, the light f ades out in
about 30 seconds.
If you leave any door or the tailgate
open without the key in the ignition
switch, the ceiling light goes of f af ter
3 minutes.
The ceiling light has a three-position
switch: ON, Door Activated, and
OFF. In the Door Activated (center)
position, the light comes on when
you:
Unlock the doors and the tailgate
with the key or remote transmitter.
Open any door.
Interior Lights
Spotlights
Ceiling L ight
126
Push
Push
ON
OFF DOOR ACTIVATED
LX model
Table of Contents
Page 142 of 441
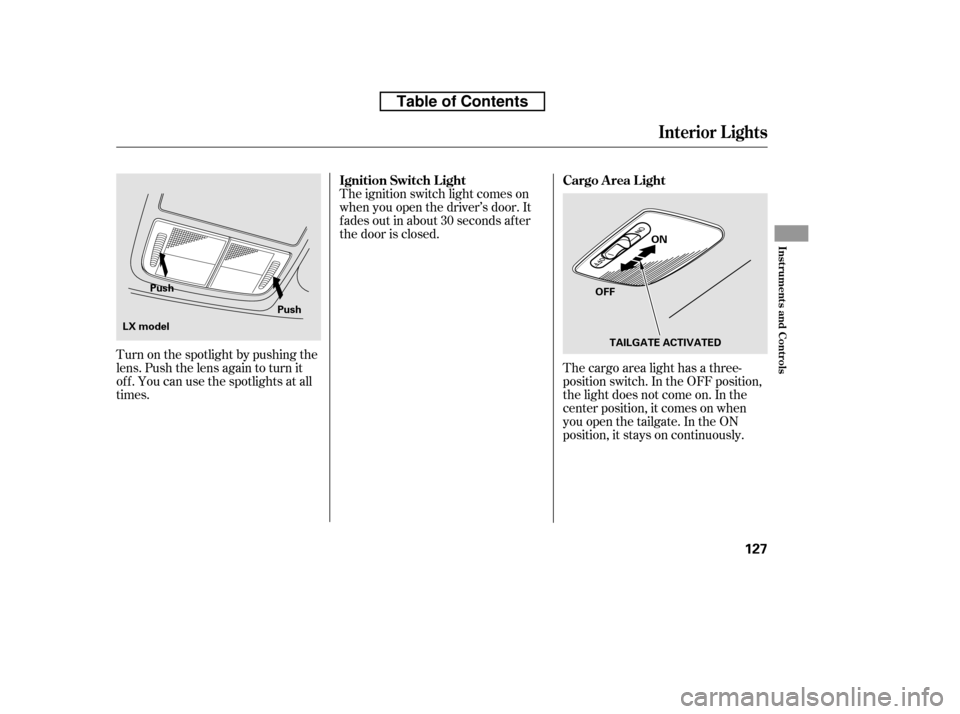
The cargo area light has a three-
position switch. In the OFF position,
the light does not come on. In the
center position, it comes on when
you open the tailgate. In the ON
position, it stays on continuously.
The ignition switch light comes on
when you open the driver’s door. It
f ades out in about 30 seconds af ter
the door is closed.
Turn on the spotlight by pushing the
lens. Push the lens again to turn it
of f . You can use the spotlights at all
times.
Interior Lights
Cargo Area Light
Ignition Switch L ight
Inst rument s and Cont rols
127
OFF ON
TAILGATE ACTIVATED
Push
Push
LX model
Table of Contents
Page 148 of 441

Air conditioning places an extra load
on the engine. Watch the engine
coolant temperature gauge (see page). If it moves near the red zone,
turn of f the A/C until the gauge
reading returns to normal.
Turn on the A/C by pressing the
button. The indicator in the button
comesonwhenafanspeedis
selected.
Make sure the temperature is set
to maximum cool.
Select .
If the outside air is humid, select
recirculation mode. If the outside
air is dry, select f resh air mode.
Set the f an to the desired speed. you can
cool it down more rapidly by partially
opening the windows, turning on the
air conditioning, and setting the f an
to maximum speed in f resh air mode.
To cool the interior with MAX A/C: Set the f an to the desired speed.
Select MAX A/C.
The system automatically turns on
the A/C, selects , and
switches to recirculation mode.
Make sure the temperature is set
to maximum cool. Air conditioning, as it cools, removes
moisture from the air. When used in
combination with the heater, it
makes the interior warm and dry and
can prevent the windows f rom
f ogging up.
This setting is suitable f or all driving
conditions whenever the outside
temperature is above 32°F (0°C).
Turn the fan on.
Turn on the air conditioning.
Select and fresh air mode.
Adjust the temperature to your
pref erence.
1. 2. 3. 4. 5. 1. 2.3.4.
1.2. 3.
71
If the interior is very warm,Dehumidif y the Interior
Using the A /C
Vents, Heating, and A/C
Features
133
Table of Contents