HONDA CR-V 2012 RM1, RM3, RM4 / 4.G Owners Manual
Manufacturer: HONDA, Model Year: 2012, Model line: CR-V, Model: HONDA CR-V 2012 RM1, RM3, RM4 / 4.GPages: 361, PDF Size: 7.25 MB
Page 181 of 361
uuRear Entertainment System*uOperating the System
180
Features
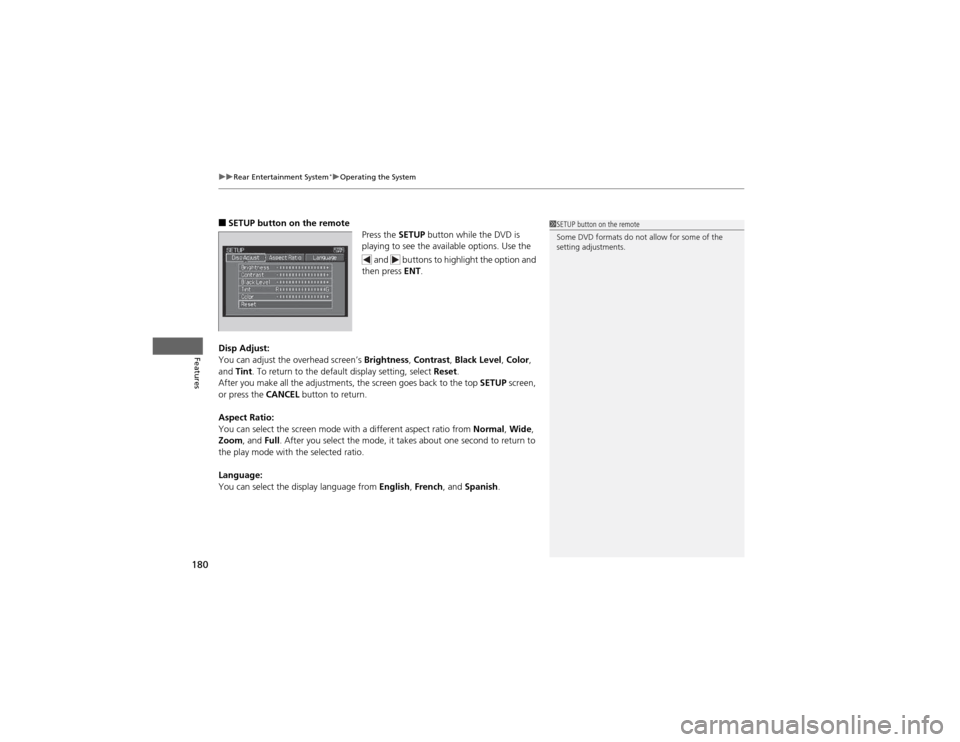
■ SETUP button on the remote
Press the SETUP button while the DVD is
playing to see the available options. Use the
and buttons to highlight the option and
then press ENT.
Disp Adjust:
You can adjust the overhead screen’s Brightness, Contrast , Black Level , Color ,
and Tint. To return to the default display setting, select Reset.
After you make all the adjustments, the screen goes back to the top SETUP screen,
or press the CANCEL button to return.
Aspect Ratio:
You can select the screen mode with a different aspect ratio from Normal, Wide ,
Zoom , and Full. After you select the mode, it takes about one second to return to
the play mode with the selected ratio.
Language:
You can select the display language from English, French , and Spanish .1SETUP button on the remote
Some DVD formats do not allow for some of the
setting adjustments.
Page 182 of 361
Continued181
uuRear Entertainment System*uOperating the System
Features
Initial Settings -
Press the
SETUP button to configure the initial Language, Dynamic Range, and
Angle Mark settings before playing a DVD.
Language Settings:
Select the language for the DVD’s displayed menus (Menu Language), the DVD’s
audio (Audio Language), and the DVD’s subtitle (Subtitle Language). 1. Select the language setting.
2. Select the language from English, French, Spanish, Arabic, German, Italian,
Dutch, Chinese, Korean, Thai, Japanese, and other .
3. If you select other, you need to enter the four digit language code to configure
the language that is not listed. Select Yes to go to the number input screen.
uTo return to the Language Settings screen, select No.
4. Press the ENT button each time you input a digit.
uIf you want to delete a number, select DEL.
5. The cursor automatically goes to ENT after you input four digits. Press the ENT
button to command.
Dynamic Range:
This feature reduces the difference between the loud and quiet sound levels. Select ON or OFF .
Angle Mark:
You can select whether to display the angle mark appearing in the upper right
corner of the screen when you change the view angle while the DVD is playing. Select ON or OFF .
When the DVD is not playing1SETUP button on the remote
Initial Settings:
The prior language varies by disc. You may not be
able to configure your selected language setting.
Page 183 of 361
182
uuRear Entertainment System*uOperating the System
Features
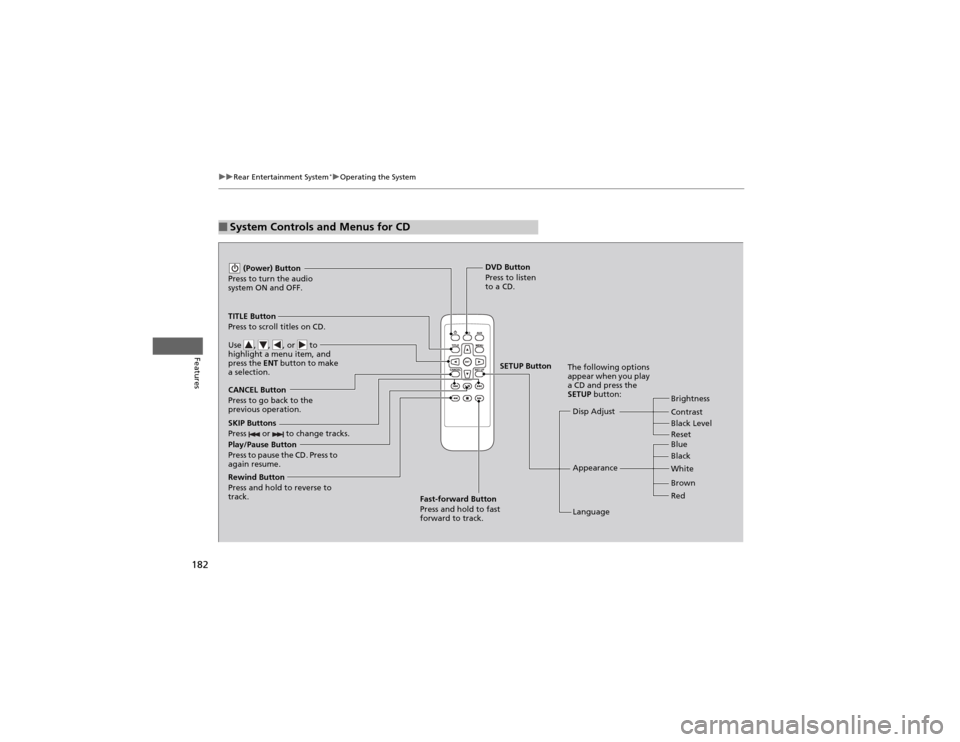
■System Controls and Menus for CD
Play/Pause Button
Press to pause the CD. Press to
again resume. (Power) Button
Press to turn the audio
system ON and OFF.
DVD Button
Press to listen
to a CD.
TITLE Button
Press to scroll titles on CD.
Use , , , or to
highlight a menu item, and
press the ENT button to make
a selection.
CANCEL Button
Press to go back to the
previous operation. Disp Adjust
LanguageBrightness
Contrast
Black Level
Appearance Black
Blue
Brown
White Red
The following options
appear when you play
a CD and press the SETUP
button:
SKIP Buttons
Press or to change tracks.
Rewind Button
Press and hold to reverse to
track. Fast-forward Button
Press and hold to fast forward to track.
SETUP Button
Reset
Page 184 of 361
183
uuRear Entertainment System*uOperating the System
Features
■
Playing a CD
Press the DVD button.
The available options appear on the overhead screen are Repeat, Random, and Scan.
These functions are the same as those of the playing a DVD. 2 Playing a DVD P. 177
To scroll your audio data title, press the TITLE button for five seconds.
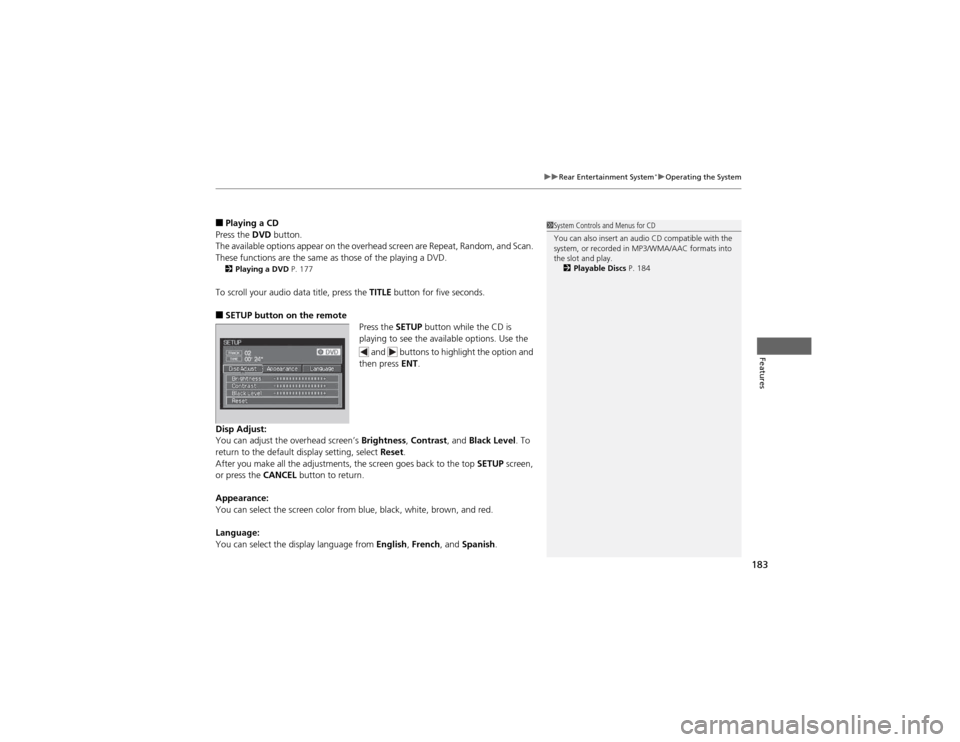
■ SETUP button on the remote
Press the SETUP button while the CD is
playing to see the available options. Use the
and buttons to highlight the option and
then press ENT.
Disp Adjust:
You can adjust the overhead screen’s Brightness, Contrast , and Black Level . To
return to the default display setting, select Reset.
After you make all the adjustments, the screen goes back to the top SETUP screen,
or press the CANCEL button to return.
Appearance:
You can select the screen color from blue, black, white, brown, and red.
Language:
You can select the display language from English, French , and Spanish .1System Controls and Menus for CD
You can also insert an audio CD compatible with the
system, or recorded in MP3/WMA/AAC formats into
the slot and play.
2 Playable Discs P. 184
Page 185 of 361
184
uuRear Entertainment System*uPlayable Discs
Features
Playable Discs
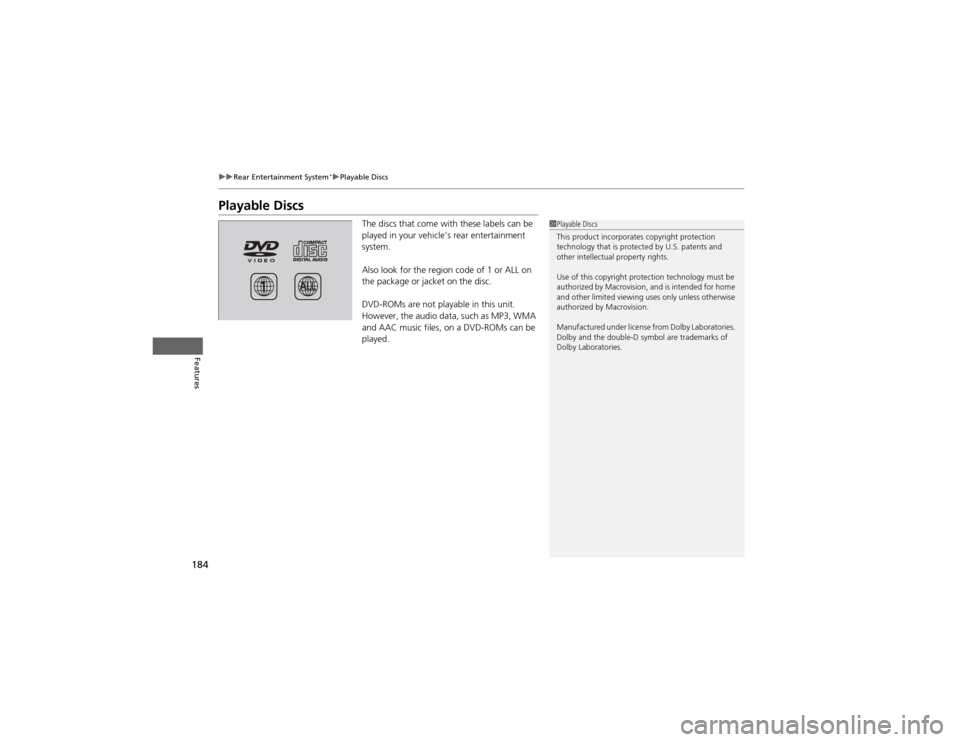
The discs that come with these labels can be
played in your vehicle’s rear entertainment system.
Also look for the region code of 1 or ALL on
the package or jacket on the disc.
DVD-ROMs are not playable in this unit.
However, the audio data, such as MP3, WMA
and AAC music files, on a DVD-ROMs can be
played.
1Playable Discs
This product incorporates copyright protection
technology that is protected by U.S. patents and
other intellectual property rights.
Use of this copyright protection technology must be
authorized by Macrovision, and is intended for home
and other limited viewing uses only unless otherwise
authorized by Macrovision.
Manufactured under license from Dolby Laboratories.
Dolby and the double-D symbol are trademarks of Dolby Laboratories.
Page 186 of 361
185
Features
Audio Error Messages
CD Player
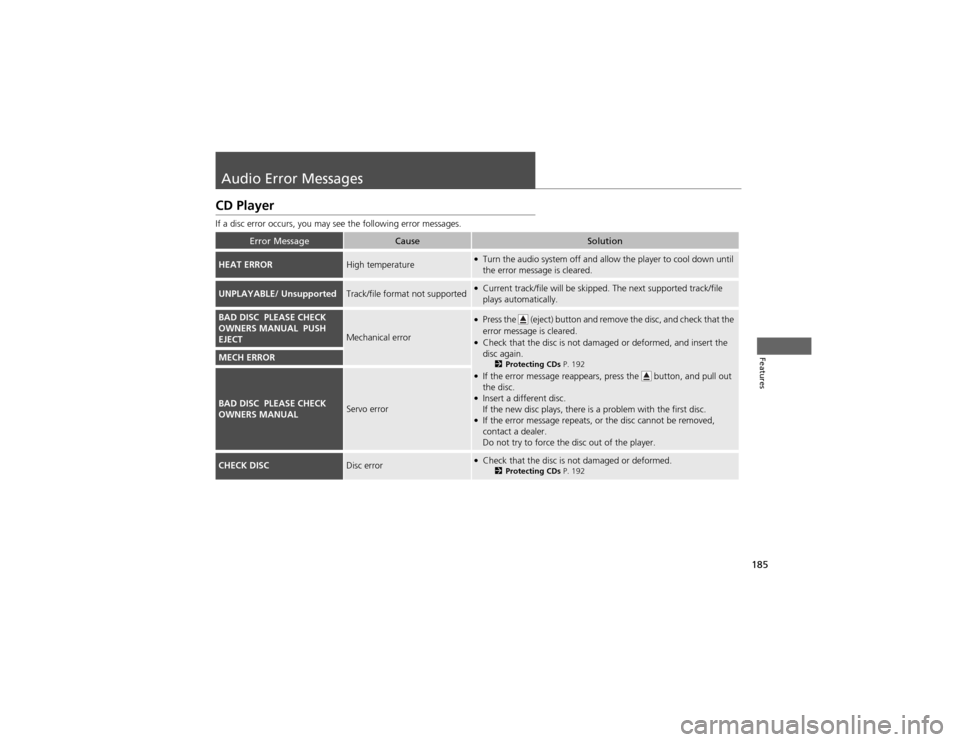
If a disc error occurs, you may see the following error messages.
Error MessageCauseSolution
HEAT ERRORHigh temperature●Turn the audio system off and allow the player to cool down until
the error message is cleared.
UNPLAYABLE/ UnsupportedTrack/file format not supported●Current track/file will be skipped. The next supported track/file plays automatically.
BAD DISC PLEASE CHECK
OWNERS MANUAL PUSH
EJECT
Mechanical error
●Press the (eject) button and remove the disc, and check that the
error message is cleared.
● Check that the disc is not damaged or deformed, and insert the disc again.
2Protecting CDs P. 192
● If the error message reappears, press the button, and pull out the disc.
● Insert a different disc.
If the new disc plays, there is a problem with the first disc.
● If the error message repeats, or the disc cannot be removed,
contact a dealer.
Do not try to force the disc out of the player.
MECH ERROR
BAD DISC PLEASE CHECK
OWNERS MANUALServo error
CHECK DISCDisc error●
Check that the disc is not damaged or deformed.
2Protecting CDs P. 192
Page 187 of 361
186
uuAudio Error MessagesuiPod®/USB Flash Drive
Features
iPod ®/USB Flash Drive
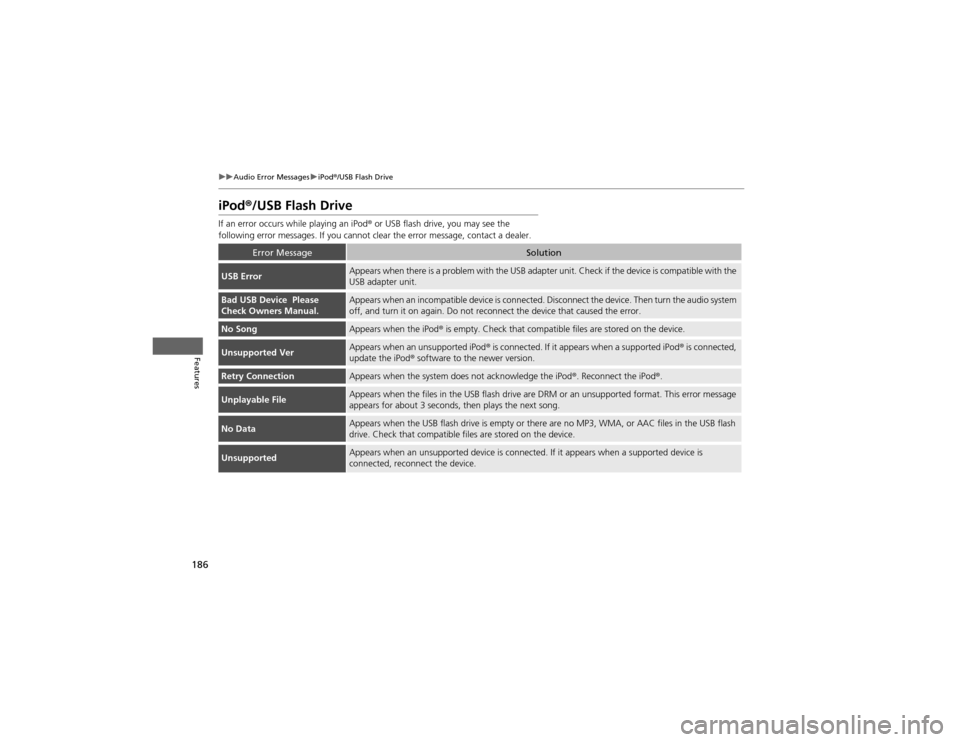
If an error occurs while playing an iPod ® or USB flash drive, you may see the
following error messages. If you cannot clear the error message, contact a dealer.
Error MessageSolution
USB ErrorAppears when there is a problem with the USB adapter unit. Check if the device is compatible with the USB adapter unit.
Bad USB Device Please
Check Owners Manual.Appears when an incompatible device is connected. Disconnect the device. Then turn the audio system
off, and turn it on again. Do not reconnect the device that caused the error.
No SongAppears when the iPod ® is empty. Check that compatible files are stored on the device.
Unsupported VerAppears when an unsupported iPod ® is connected. If it appears when a supported iPod ® is connected,
update the iPod ® software to the newer version.
Retry ConnectionAppears when the system does not acknowledge the iPod ®. Reconnect the iPod ®.
Unplayable FileAppears when the files in the USB flash drive are DRM or an unsupported format. This error message
appears for about 3 seconds, then plays the next song.
No DataAppears when the USB flash drive is empty or there are no MP3, WMA, or AAC files in the USB flash
drive. Check that compatible files are stored on the device.
UnsupportedAppears when an unsupported device is connected. If it appears when a supported device is
connected, reconnect the device.
Page 188 of 361
187
uuAudio Error MessagesuPandora®
Features
Pandora ®
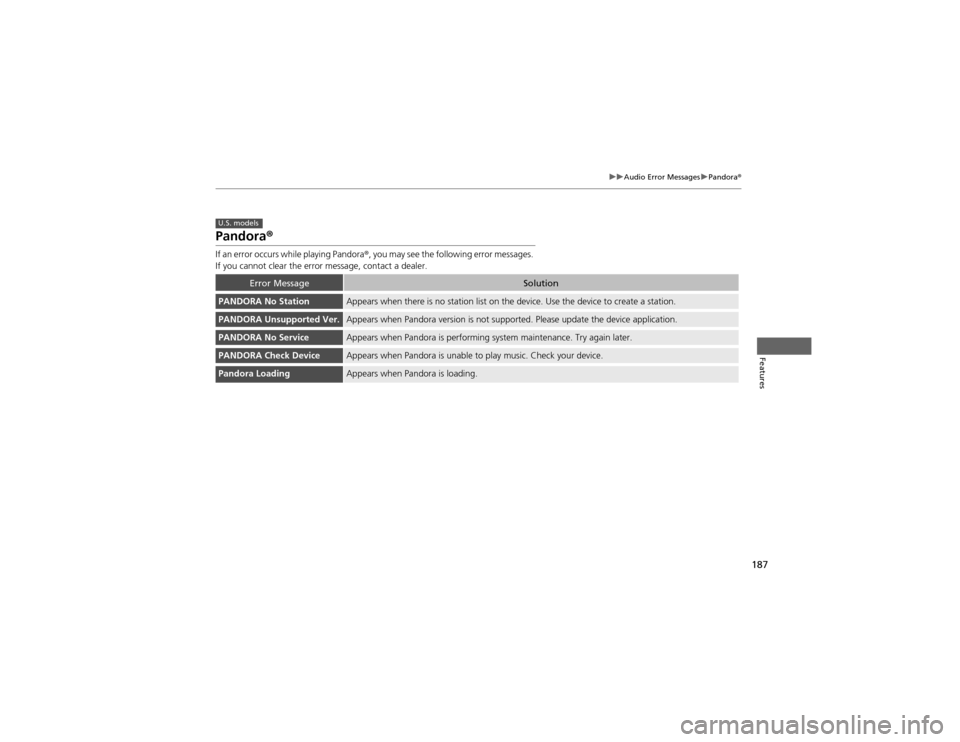
If an error occurs while playing Pandora ®, you may see the following error messages.
If you cannot clear the error message, contact a dealer.
Error MessageSolution
PANDORA No StationAppears when there is no station list on the device. Use the device to create a station.
PANDORA Unsupported Ver.Appears when Pandora version is not supported. Please update the device application.
PANDORA No ServiceAppears when Pandora is performing system maintenance. Try again later.
PANDORA Check DeviceAppears when Pandora is unable to play music. Check your device.
Pandora LoadingAppears when Pandora is loading.
U.S. models
Page 189 of 361
188
uuAudio Error MessagesuDVD Player Error Messages
Features
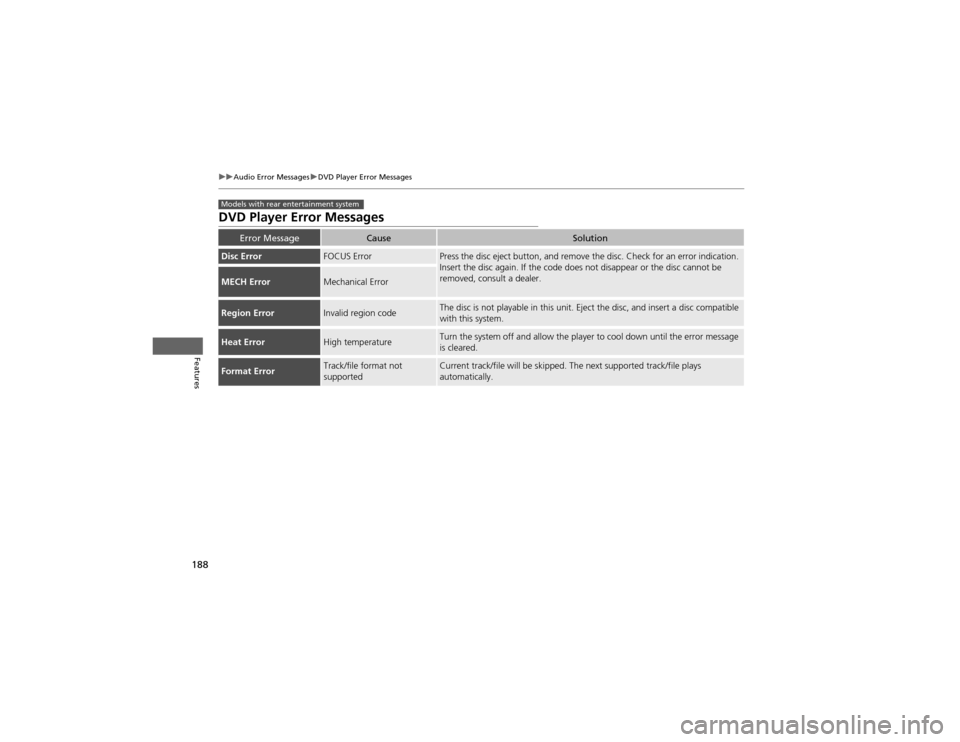
DVD Player Error Messages
Error MessageCauseSolution
Disc ErrorFOCUS ErrorPress the disc eject button, and remove the disc. Check for an error indication.
Insert the disc again. If the code does not disappear or the disc cannot be
removed, consult a dealer.
MECH ErrorMechanical Error
Region ErrorInvalid region codeThe disc is not playable in this unit. Eject the disc, and insert a disc compatible
with this system.
Heat ErrorHigh temperatureTurn the system off and allow the player to cool down until the error message
is cleared.
Format ErrorTrack/file format not
supportedCurrent track/file will be skipped. The next supported track/file plays automatically.
Models with rear entertainment system
Page 190 of 361
189
Features
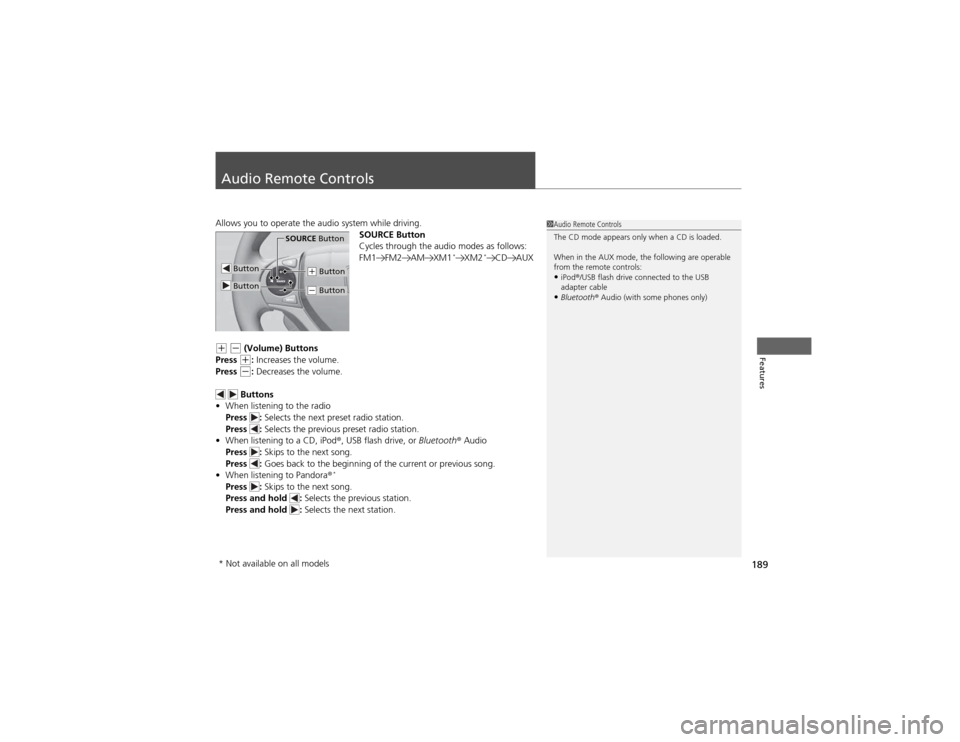
Audio Remote Controls
Allows you to operate the audio system while driving.SOURCE Button
Cycles through the audio modes as follows:
FM1 FM2 AM XM1*
XM2 *
CD AUX
(+ (- (Volume) Buttons
Press (+ : Increases the volume.
Press (- : Decreases the volume.
Buttons
• When listening to the radio
Press : Selects the next preset radio station.
Press : Selects the previous preset radio station.
• When listening to a CD, iPod ®, USB flash drive, or Bluetooth® Audio
Press : Skips to the next song.
Press : Goes back to the beginning of the current or previous song.
• When listening to Pandora ®*
Press : Skips to the next song.
Press and hold : Selects the previous station.
Press and hold : Selects the next station.
1Audio Remote Controls
The CD mode appears only when a CD is loaded.
When in the AUX mode, the following are operable
from the remote controls:
• iPod ®/USB flash drive connected to the USB
adapter cable
• Bluetooth ® Audio (with some phones only)
Button
SOURCE Button
Button
(+ Button
(- Button
* Not available on all models