ECU HONDA CR-V 2012 RM1, RM3, RM4 / 4.G User Guide
[x] Cancel search | Manufacturer: HONDA, Model Year: 2012, Model line: CR-V, Model: HONDA CR-V 2012 RM1, RM3, RM4 / 4.GPages: 361, PDF Size: 7.25 MB
Page 59 of 361
uuChild SafetyuSafety of Infants and Small Children
58
Safe Driving
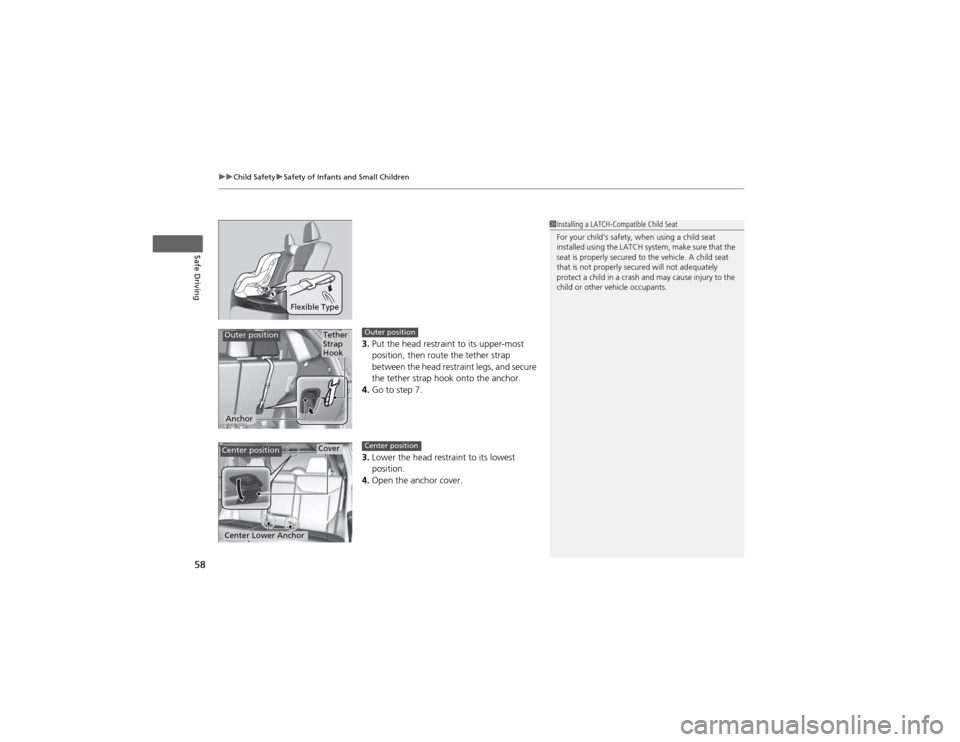
3. Put the head restraint to its upper-most
position, then route the tether strap
between the head restraint legs, and secure
the tether strap hook onto the anchor.
4. Go to step 7.
3. Lower the head restraint to its lowest
position.
4. Open the anchor cover.
Flexible Type
1Installing a LATCH-Compatible Child Seat
For your child's safety, when using a child seat
installed using the LATCH system, make sure that the
seat is properly secured to the vehicle. A child seat
that is not properly secured will not adequately
protect a child in a crash and may cause injury to the
child or other vehicle occupants.
Tether
Strap
Hook
Anchor
Outer positionOuter position
Cover
Center Lower Anchor
Center positionCenter position
Page 60 of 361
59
uuChild SafetyuSafety of Infants and Small Children
Continued
Safe Driving
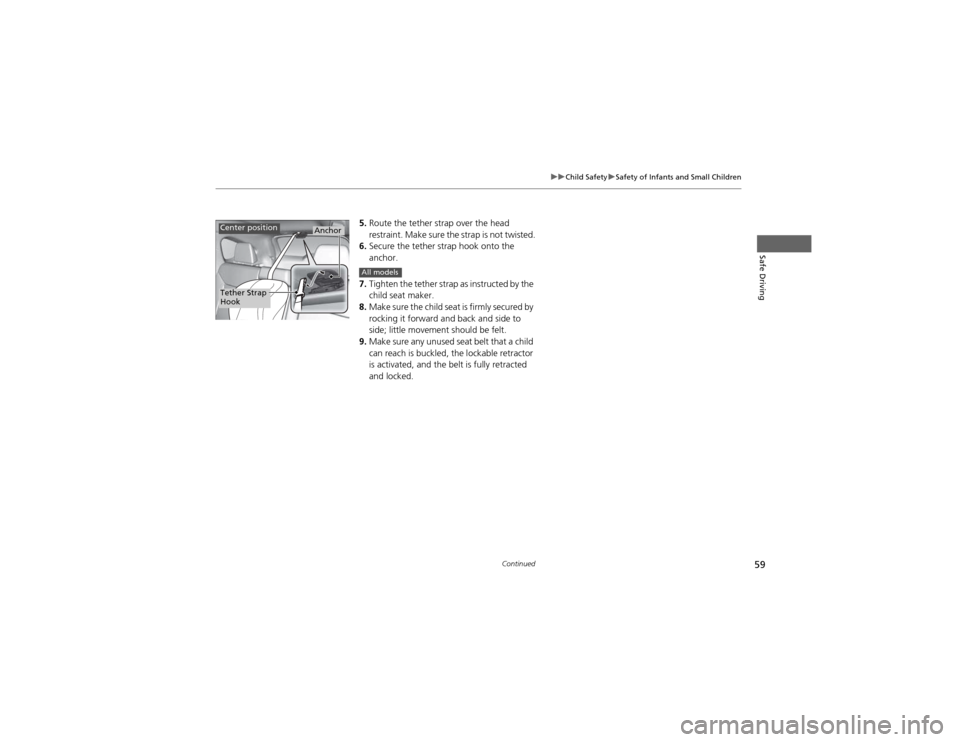
5.Route the tether strap over the head
restraint. Make sure the strap is not twisted.
6. Secure the tether strap hook onto the anchor.
7. Tighten the tether strap as instructed by the
child seat maker.
8. Make sure the child seat is firmly secured by
rocking it forward and back and side to
side; little movement should be felt.
9. Make sure any unused seat belt that a child
can reach is buckled, the lockable retractor
is activated, and the belt is fully retracted and locked.
Tether Strap
Hook
AnchorCenter position
All models
Page 61 of 361
uuChild SafetyuSafety of Infants and Small Children
60
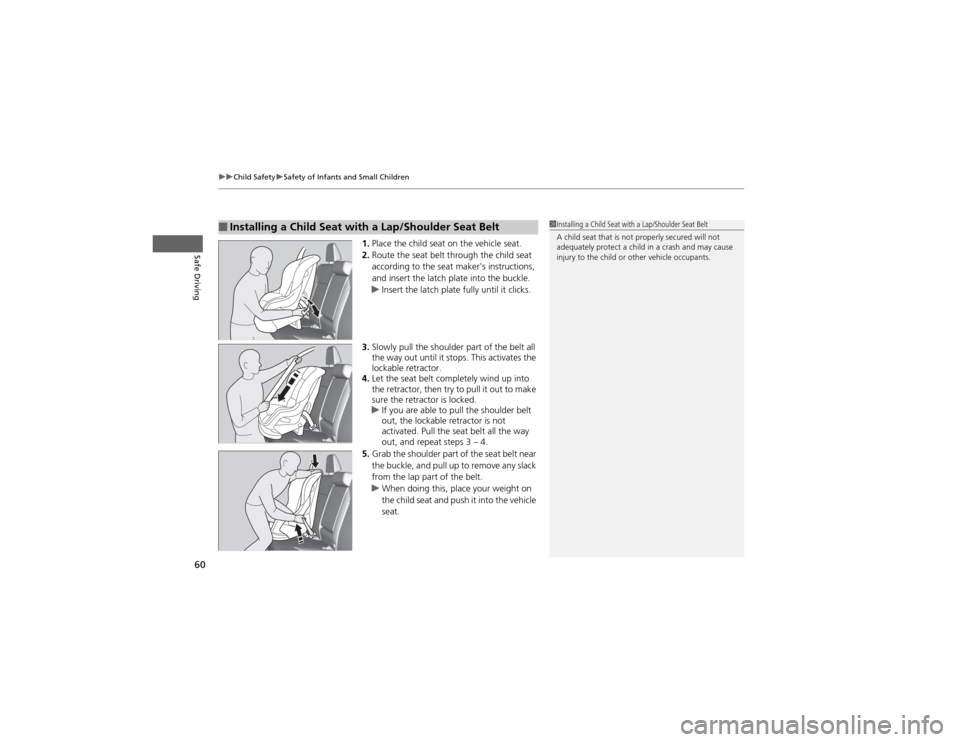
Safe Driving1. Place the child seat on the vehicle seat.
2. Route the seat belt through the child seat
according to the seat maker's instructions,
and insert the latch plate into the buckle.
uInsert the latch plate fully until it clicks.
3. Slowly pull the shoulder part of the belt all
the way out until it stops. This activates the
lockable retractor.
4. Let the seat belt completely wind up into
the retractor, then try to pull it out to make
sure the retractor is locked.
uIf you are able to pull the shoulder belt
out, the lockable retractor is not
activated. Pull the seat belt all the way
out, and repeat steps 3 – 4.
5. Grab the shoulder part of the seat belt near
the buckle, and pull up to remove any slack
from the lap part of the belt.
uWhen doing this, place your weight on
the child seat and push it into the vehicle seat.
■Installing a Child Seat with a Lap/Shoulder Seat Belt1Installing a Child Seat with a Lap/Shoulder Seat Belt
A child seat that is not properly secured will not
adequately protect a child in a crash and may cause
injury to the child or other vehicle occupants.
Page 62 of 361
Continued61
uuChild SafetyuSafety of Infants and Small Children
Safe Driving
6.Make sure the child seat is firmly secured by
rocking it forward and back and side to
side; little movement should be felt.
7. Make sure any unused seat belt that a child
can reach is buckled, the lockable retractor
is activated, and the belt is fully retracted and locked.
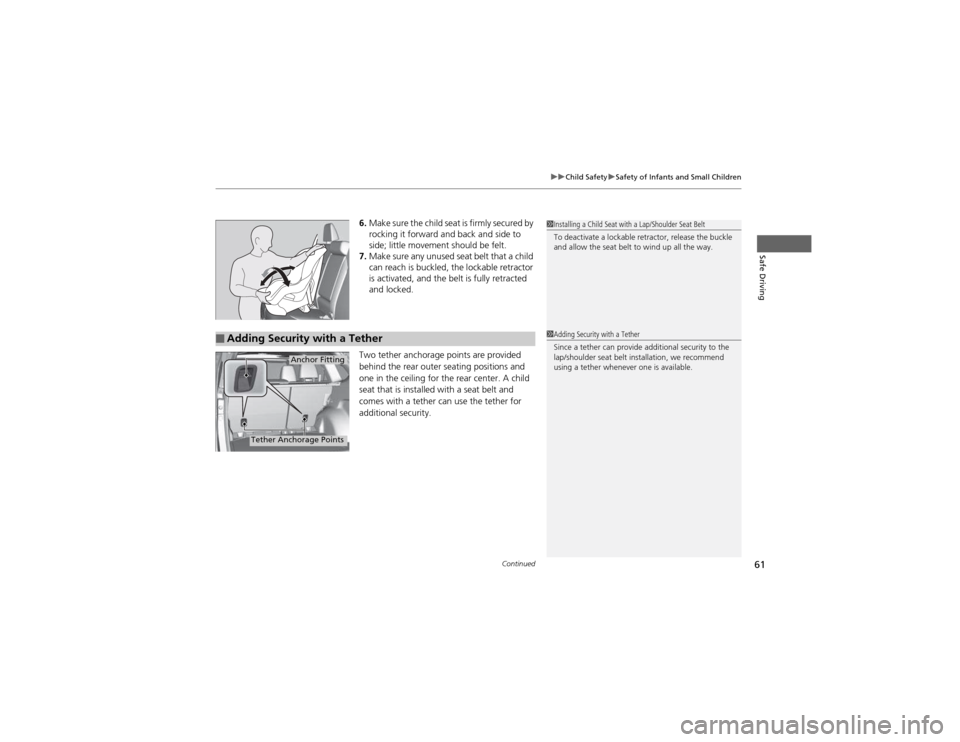
Two tether anchorage points are provided
behind the rear outer seating positions and
one in the ceiling for the rear center. A child
seat that is installed with a seat belt and
comes with a tether can use the tether for additional security.1Installing a Child Seat with a Lap/Shoulder Seat Belt
To deactivate a lockable retractor, release the buckle
and allow the seat belt to wind up all the way.
■Adding Security with a Tether
Tether Anchorage Points
Anchor Fitting
1Adding Security with a Tether
Since a tether can provide additional security to the
lap/shoulder seat belt installation, we recommend
using a tether whenever one is available.
Page 63 of 361
62
uuChild SafetyuSafety of Infants and Small Children
Safe Driving
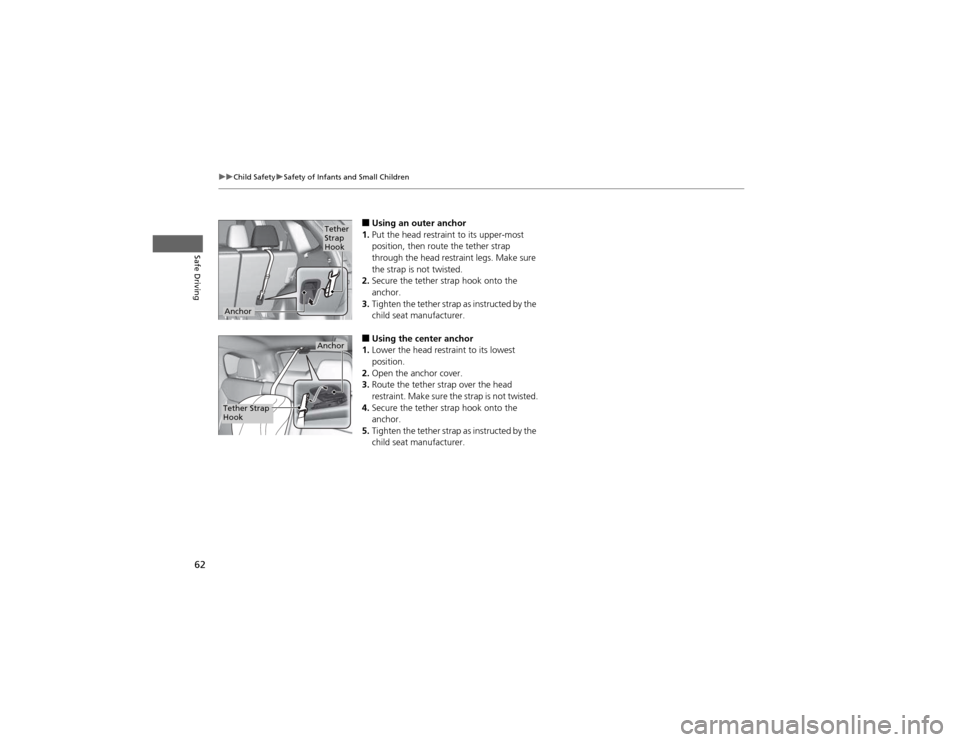
■Using an outer anchor
1. Put the head restraint to its upper-most
position, then route the tether strap
through the head restraint legs. Make sure
the strap is not twisted.
2. Secure the tether strap hook onto the anchor.
3. Tighten the tether strap as instructed by the
child seat manufacturer.
■ Using the center anchor
1. Lower the head restraint to its lowest
position.
2. Open the anchor cover.
3. Route the tether strap over the head
restraint. Make sure the strap is not twisted.
4. Secure the tether strap hook onto the anchor.
5. Tighten the tether strap as instructed by the
child seat manufacturer.Tether
Strap
Hook
Anchor
Tether Strap
Hook
Anchor
Page 64 of 361
63
uuChild SafetyuSafety of Larger Children
Continued
Safe Driving
Safety of Larger Children
The following pages give instructions on how to check proper seat belt fit, what kind
of booster seat to use if one is needed, and important precautions for a child who
must sit in front.
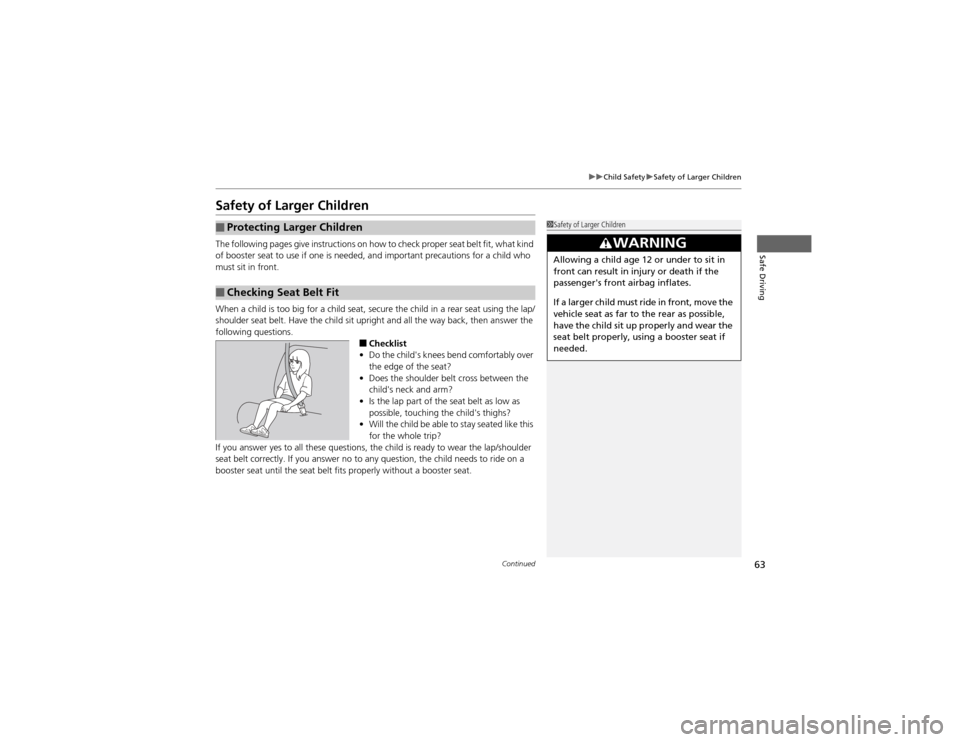
When a child is too big for a child seat, secure the child in a rear seat using the lap/
shoulder seat belt. Have the child sit upright and all the way back, then answer the
following questions.■Checklist
• Do the child's knees bend comfortably over
the edge of the seat?
• Does the shoulder belt cross between the
child's neck and arm?
• Is the lap part of the seat belt as low as
possible, touching the child's thighs?
• Will the child be able to stay seated like this
for the whole trip?
If you answer yes to all these questions, the child is ready to wear the lap/shoulder
seat belt correctly. If you answer no to any question, the child needs to ride on a
booster seat until the seat belt fits properly without a booster seat.
■Protecting Larger Children
■Checking Seat Belt Fit
1Safety of Larger Children
3WARNING
Allowing a child age 12 or under to sit in
front can result in injury or death if the
passenger's front airbag inflates.
If a larger child must ride in front, move the
vehicle seat as far to the rear as possible,
have the child sit up properly and wear the
seat belt properly, using a booster seat if
needed.
Page 65 of 361
uuChild SafetyuSafety of Larger Children
64
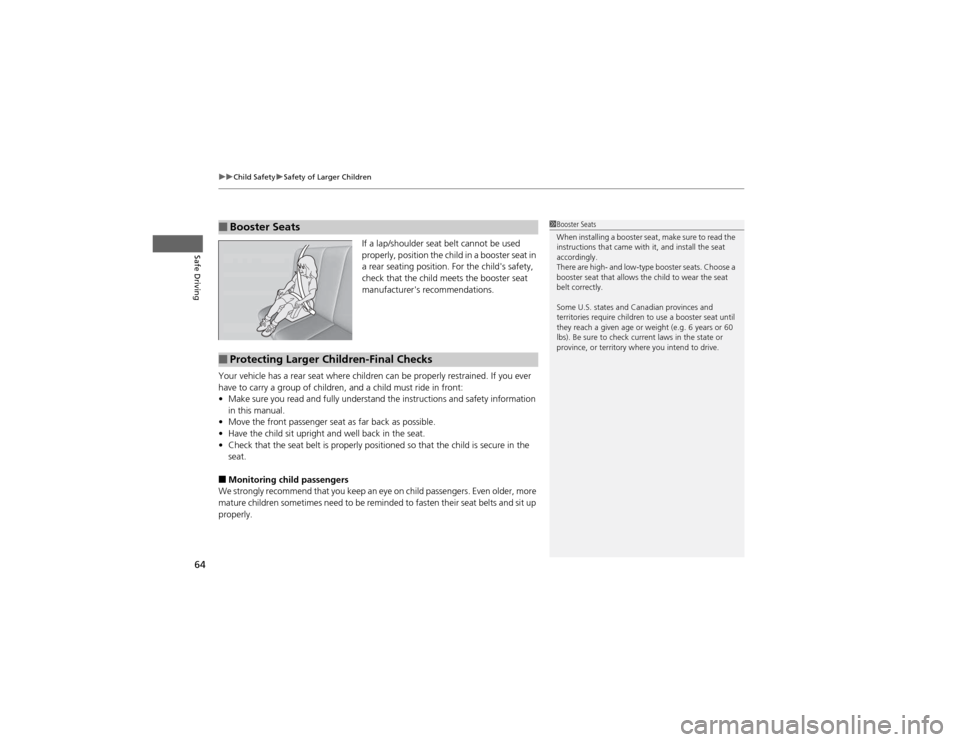
Safe DrivingIf a lap/shoulder seat belt cannot be used
properly, position the child in a booster seat in
a rear seating position. For the child's safety,
check that the child meets the booster seat
manufacturer's recommendations.
Your vehicle has a rear seat where children can be properly restrained. If you ever
have to carry a group of children, and a child must ride in front: • Make sure you read and fully understand the instructions and safety information
in this manual.
• Move the front passenger seat as far back as possible.
• Have the child sit upright and well back in the seat.
• Check that the seat belt is properly positioned so that the child is secure in the seat.
■ Monitoring child passengers
We strongly recommend that you keep an eye on child passengers. Even older, more
mature children sometimes need to be reminded to fasten their seat belts and sit up
properly.
■Booster Seats1Booster Seats
When installing a booster seat, make sure to read the
instructions that came with it, and install the seat
accordingly.
There are high- and low-type booster seats. Choose a
booster seat that allows the child to wear the seat
belt correctly.
Some U.S. states and Canadian provinces and
territories require children to use a booster seat until
they reach a given age or weight (e.g. 6 years or 60
lbs). Be sure to check current laws in the state or
province, or territory where you intend to drive.
■Protecting Larger Children-Final Checks
Page 76 of 361
75
uuIndicatorsu
Continued
Instrument Panel
IndicatorNameOn/BlinkingExplanation
Immobilizer
System Indicator
●Comes on briefly when you turn the ignition
switch to ON
(w , then goes off.
● Comes on if the immobilizer system cannot
recognize the key information.
● Blinks - You cannot start the engine. Turn the ignition
switch to LOCK
(0 , pull the key out, and then insert
the key and turn it to ON (w again.
● Repeatedly blinks - The system may be
malfunctioning. Have the vehicle checked by a dealer.
● Do not attempt to alter this system or add other
devices to it. Electrical problems can occur.
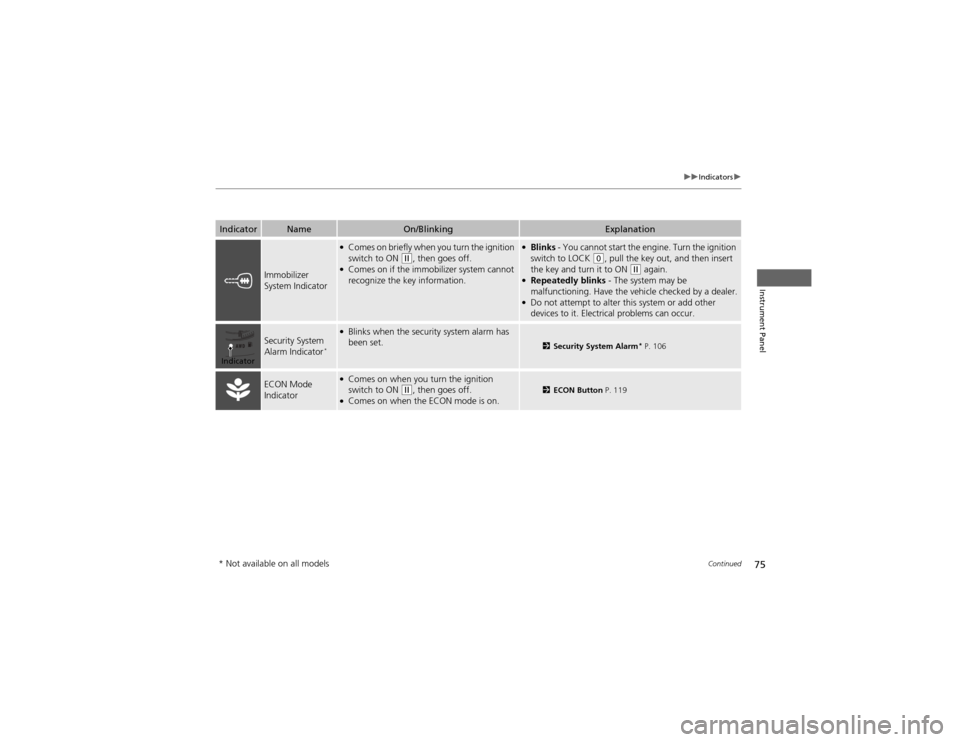
Security System Alarm Indicator *●
Blinks when the security system alarm has
been set.
2 Security System Alarm *
P. 106
ECON Mode
Indicator● Comes on when you turn the ignition
switch to ON
(w , then goes off.
● Comes on when the ECON mode is on.2 ECON Button P. 119
Indicator
* Not available on all models
Page 87 of 361
86
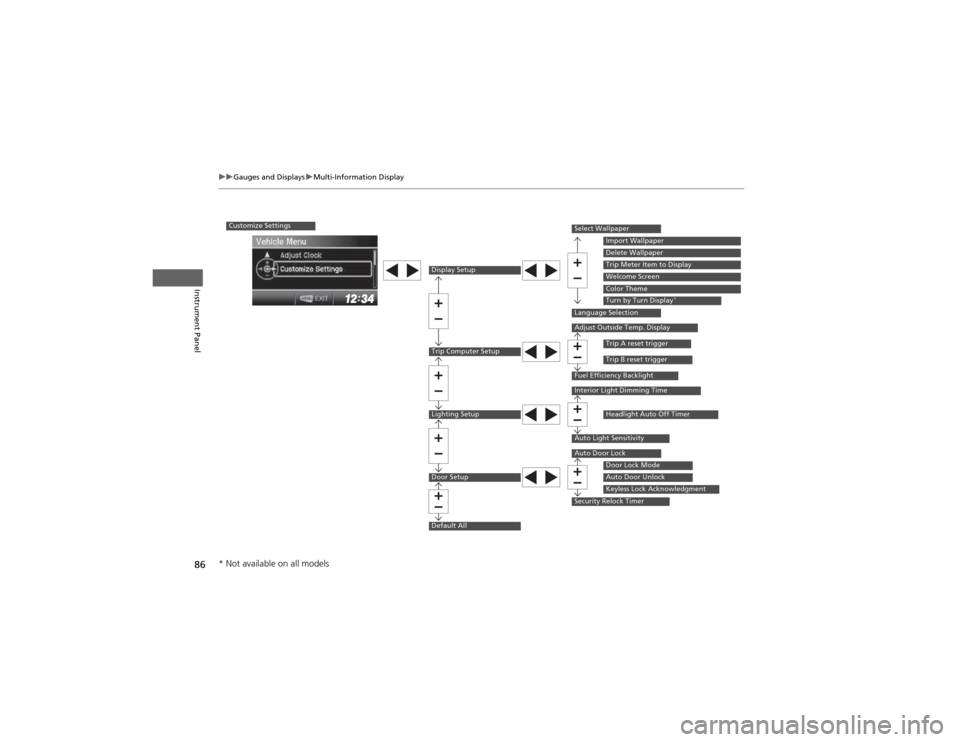
uuGauges and DisplaysuMulti-Information Display
Instrument Panel
Customize Settings
Display Setup
Trip Computer Setup
Lighting Setup
Door Setup
Default All
Select Wallpaper
Language Selection
Adjust Outside Temp. Display
Fuel Efficiency Backlight
Interior Light Dimming Time
Auto Light Sensitivity
Auto Door Lock
Security Relock Timer
Import WallpaperDelete WallpaperTrip Meter Item to DisplayWelcome ScreenColor ThemeTurn by Turn Display*
Trip A reset trigger
Trip B reset trigger
Headlight Auto Off Timer
Door Lock ModeAuto Door UnlockKeyless Lock Acknowledgment
* Not available on all models
Page 90 of 361
89
uuGauges and DisplaysuMulti-Information Display
Continued
Instrument Panel
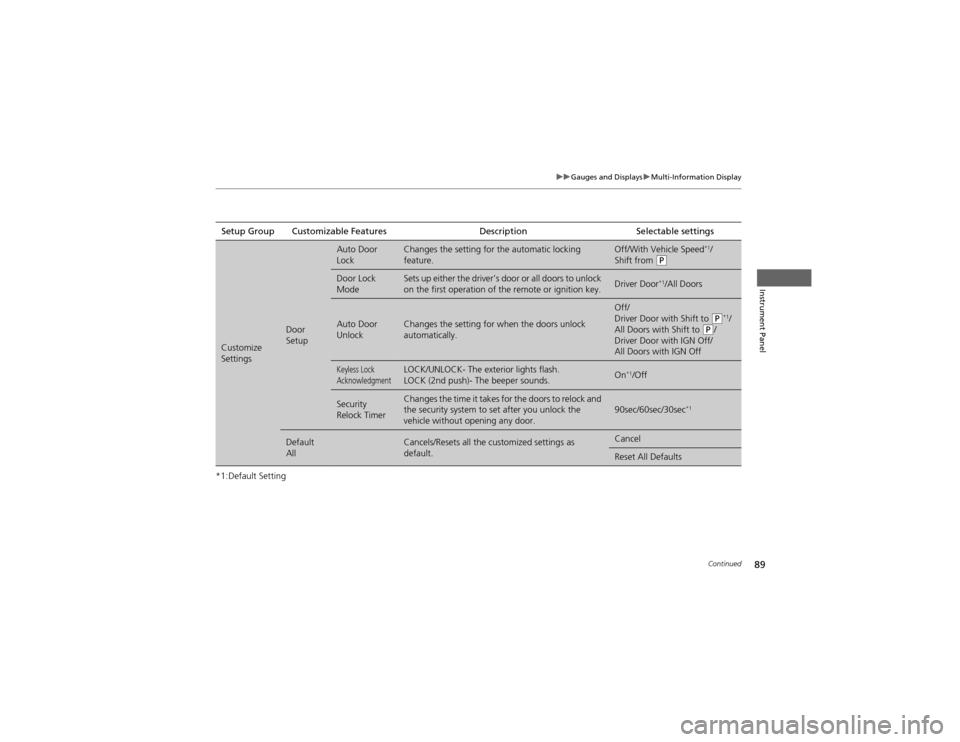
*1:Default SettingSetup Group Customizable Features Description Selectable settings
Customize
Settings
Door Setup
Auto Door
LockChanges the setting for the automatic locking
feature.Off/With Vehicle Speed
*1
/
Shift from (P
Door Lock
ModeSets up either the driver’s door or all doors to unlock
on the first operation of the remote or ignition key.Driver Door *1
/All Doors
Auto Door UnlockChanges the setting for when the doors unlock automatically.
Off/
Driver Door with Shift to (P *1
/
All Doors with Shift to (P /
Driver Door with IGN Off/
All Doors with IGN Off
Keyless Lock
AcknowledgmentLOCK/UNLOCK- The exterior lights flash.
LOCK (2nd push)- The beeper sounds.On *1
/Off
Security
Relock TimerChanges the time it takes for the doors to relock and
the security system to set after you unlock the
vehicle without opening any door.90sec/60sec/30sec *1
Default AllCancels/Resets all the customized settings as default.Cancel
Reset All Defaults