audio HONDA CR-V 2012 RM1, RM3, RM4 / 4.G Workshop Manual
[x] Cancel search | Manufacturer: HONDA, Model Year: 2012, Model line: CR-V, Model: HONDA CR-V 2012 RM1, RM3, RM4 / 4.GPages: 361, PDF Size: 7.25 MB
Page 196 of 361
195
uuBluetooth® HandsFreeLink ®uUsing HFL
Features
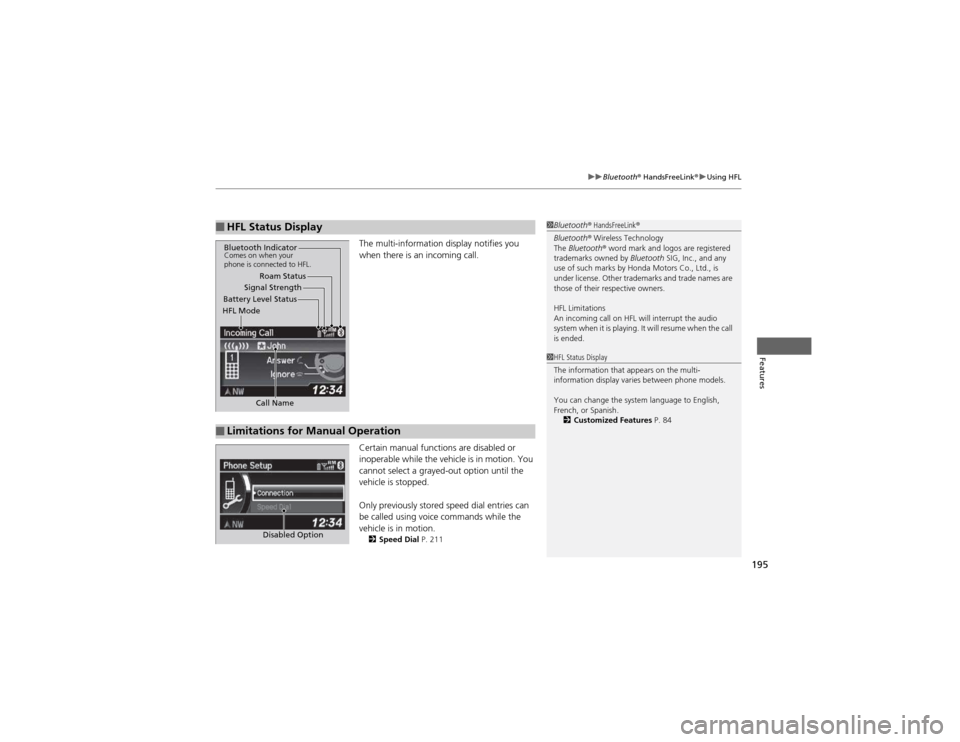
The multi-information display notifies you
when there is an incoming call.
Certain manual functions are disabled or
inoperable while the vehicle is in motion. You
cannot select a grayed-out option until the
vehicle is stopped.
Only previously stored speed dial entries can
be called using voice commands while the vehicle is in motion.
2 Speed Dial P. 211
■HFL Status Display1Bluetooth® HandsFreeLink ®
Bluetooth ® Wireless Technology
The Bluetooth ® word mark and logos are registered
trademarks owned by Bluetooth SIG, Inc., and any
use of such marks by Honda Motors Co., Ltd., is
under license. Other trademarks and trade names are
those of their respective owners.
HFL Limitations
An incoming call on HFL will interrupt the audio
system when it is playing. It will resume when the call is ended.
Signal Strength
HFL Mode Battery Level Status Roam Status
Call Name
Bluetooth IndicatorComes on when your
phone is connected to HFL.
■Limitations for Manual Operation
1HFL Status Display
The information that appears on the multi-
information display varies between phone models.
You can change the system language to English,
French, or Spanish. 2 Customized Features P. 84
Disabled Option
Page 202 of 361
Continued201
uuBluetooth® HandsFreeLink ®uHFL Menus
Features
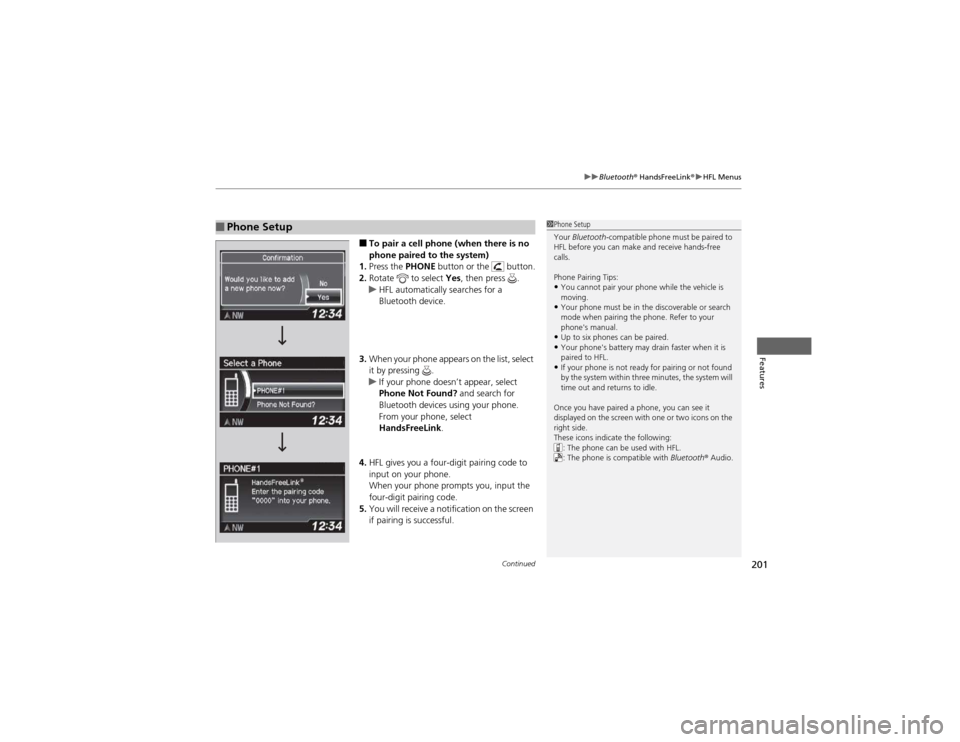
■To pair a cell phone (when there is no
phone paired to the system)
1. Press the PHONE button or the button.
2. Rotate to select Yes, then press .
uHFL automatically searches for a
Bluetooth device.
3. When your phone appears on the list, select
it by pressing .
uIf your phone doesn’t appear, select
Phone Not Found? and search for
Bluetooth devices using your phone.
From your phone, select
HandsFreeLink .
4. HFL gives you a four-digit pairing code to
input on your phone.
When your phone prompts you, input the
four-digit pairing code.
5. You will receive a notification on the screen
if pairing is successful.
■Phone Setup1Phone Setup
Your Bluetooth -compatible phone must be paired to
HFL before you can make and receive hands-free calls.
Phone Pairing Tips:
• You cannot pair your phone while the vehicle is
moving.
• Your phone must be in the discoverable or search
mode when pairing the phone. Refer to your
phone's manual.
• Up to six phones can be paired.
• Your phone's battery may drain faster when it is
paired to HFL.
• If your phone is not ready for pairing or not found
by the system within three minutes, the system will
time out and returns to idle.
Once you have paired a phone, you can see it
displayed on the screen with one or two icons on the
right side.
These icons indicate the following: : The phone can be used with HFL.
: The phone is compatible with Bluetooth® Audio.
Page 212 of 361
Continued211
uuBluetooth® HandsFreeLink ®uHFL Menus
Features
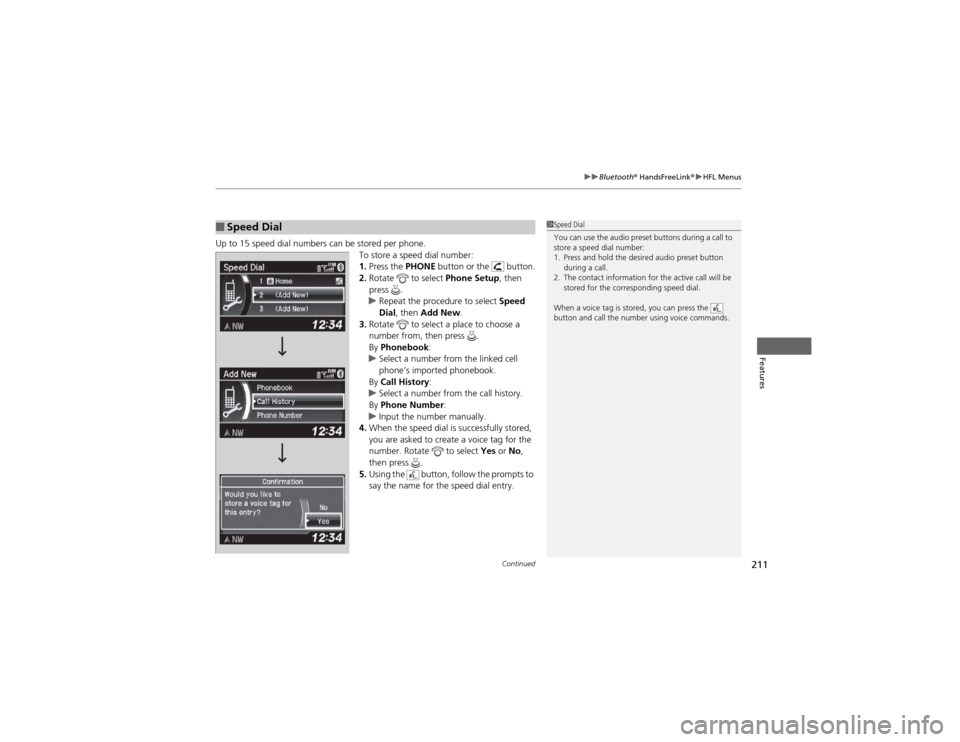
Up to 15 speed dial numbers can be stored per phone.
To store a speed dial number: 1.Press the PHONE button or the button.
2. Rotate to select Phone Setup, then
press .
uRepeat the procedure to select Speed
Dial , then Add New .
3. Rotate to select a place to choose a
number from, then press .
By Phonebook :
uSelect a number from the linked cell
phone’s imported phonebook.
By Call History :
uSelect a number from the call history.
By Phone Number :
uInput the number manually.
4. When the speed dial is successfully stored,
you are asked to create a voice tag for the
number. Rotate to select Yes or No,
then press .
5. Using the button, follow the prompts to
say the name for the speed dial entry.
■Speed Dial1Speed Dial
You can use the audio preset buttons during a call to
store a speed dial number:
1. Press and hold the desired audio preset button
during a call.
2. The contact information for the active call will be stored for the corresponding speed dial.
When a voice tag is stored, you can press the
button and call the number using voice commands.
Page 214 of 361
Continued213
uuBluetooth® HandsFreeLink ®uHFL Menus
Features
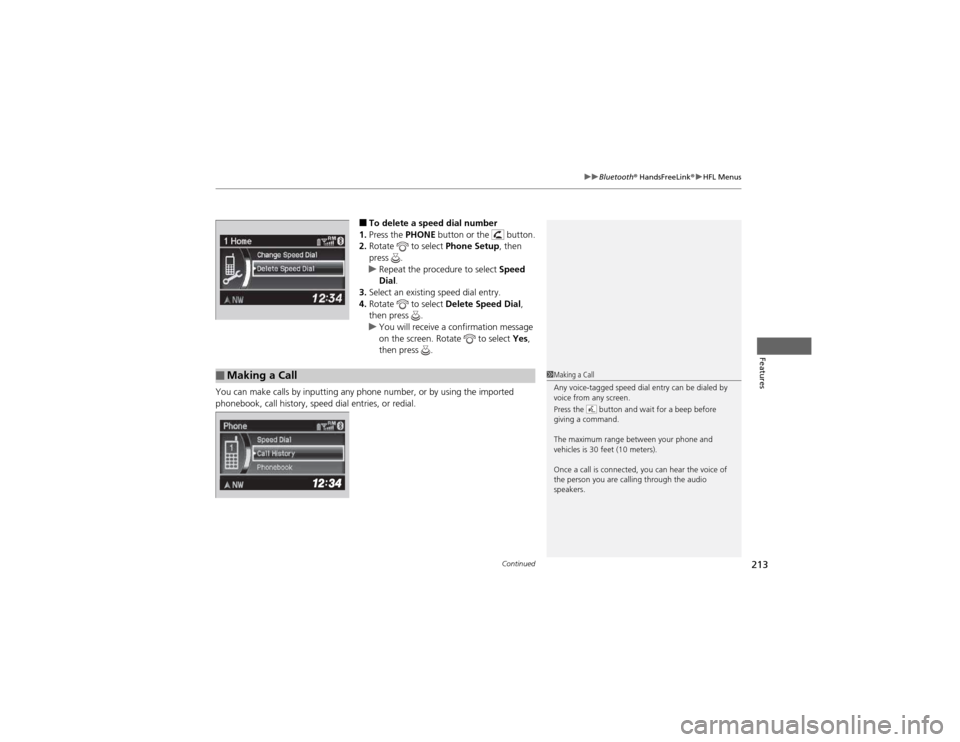
■To delete a speed dial number
1. Press the PHONE button or the button.
2. Rotate to select Phone Setup, then
press .
uRepeat the procedure to select Speed
Dial .
3. Select an existing speed dial entry.
4. Rotate to select Delete Speed Dial,
then press .
uYou will receive a confirmation message
on the screen. Rotate to select Yes,
then press .
You can make calls by inputting any phone number, or by using the imported
phonebook, call history, speed dial entries, or redial.
■Making a Call1Making a Call
Any voice-tagged speed dial entry can be dialed by
voice from any screen.
Press the button and wait for a beep before
giving a command.
The maximum range between your phone and
vehicles is 30 feet (10 meters).
Once a call is connected, you can hear the voice of
the person you are calling through the audio
speakers.
Page 216 of 361
Continued215
uuBluetooth® HandsFreeLink ®uHFL Menus
Features
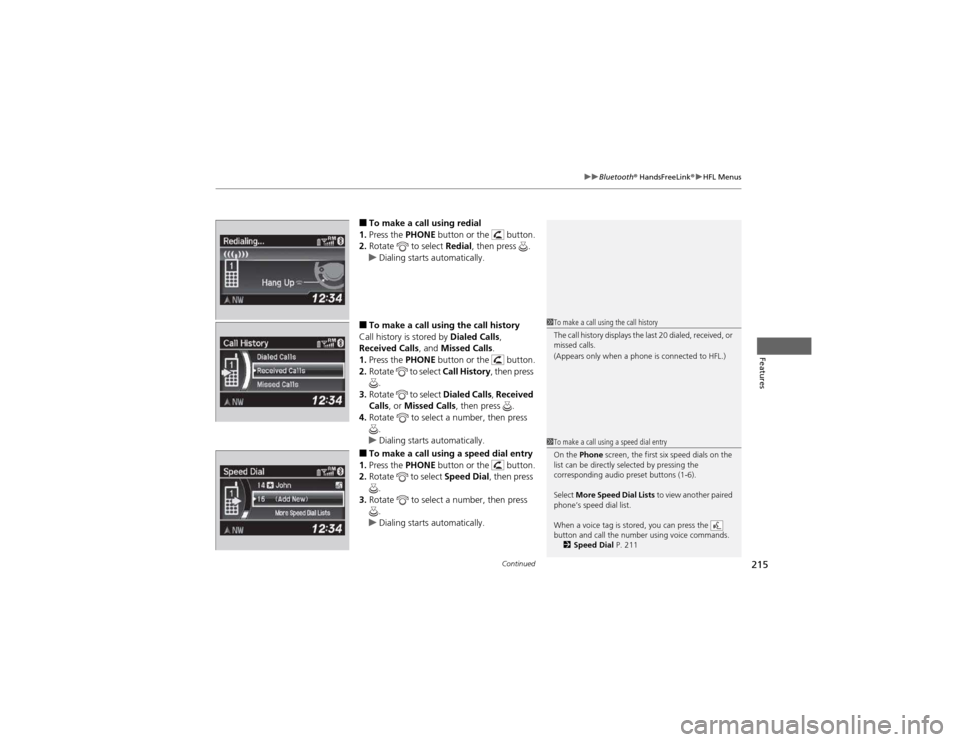
■To make a call using redial
1. Press the PHONE button or the button.
2. Rotate to select Redial, then press .
uDialing starts automatically.
■ To make a call using the call history
Call history is stored by Dialed Calls,
Received Calls , and Missed Calls .
1. Press the PHONE button or the button.
2. Rotate to select Call History, then press
.
3. Rotate to select Dialed Calls, Received
Calls , or Missed Calls , then press .
4. Rotate to select a number, then press
.
uDialing starts automatically.
■ To make a call using a speed dial entry
1. Press the PHONE button or the button.
2. Rotate to select Speed Dial, then press
.
3. Rotate to select a number, then press
.
uDialing starts automatically.
1To make a call using the call history
The call history displays the last 20 dialed, received, or
missed calls.
(Appears only when a phone is connected to HFL.)
1To make a call using a speed dial entry
On the Phone screen, the first six speed dials on the
list can be directly selected by pressing the
corresponding audio preset buttons (1-6).
Select More Speed Dial Lists to view another paired
phone’s speed dial list.
When a voice tag is stored, you can press the
button and call the number using voice commands. 2 Speed Dial P. 211
Page 225 of 361
224
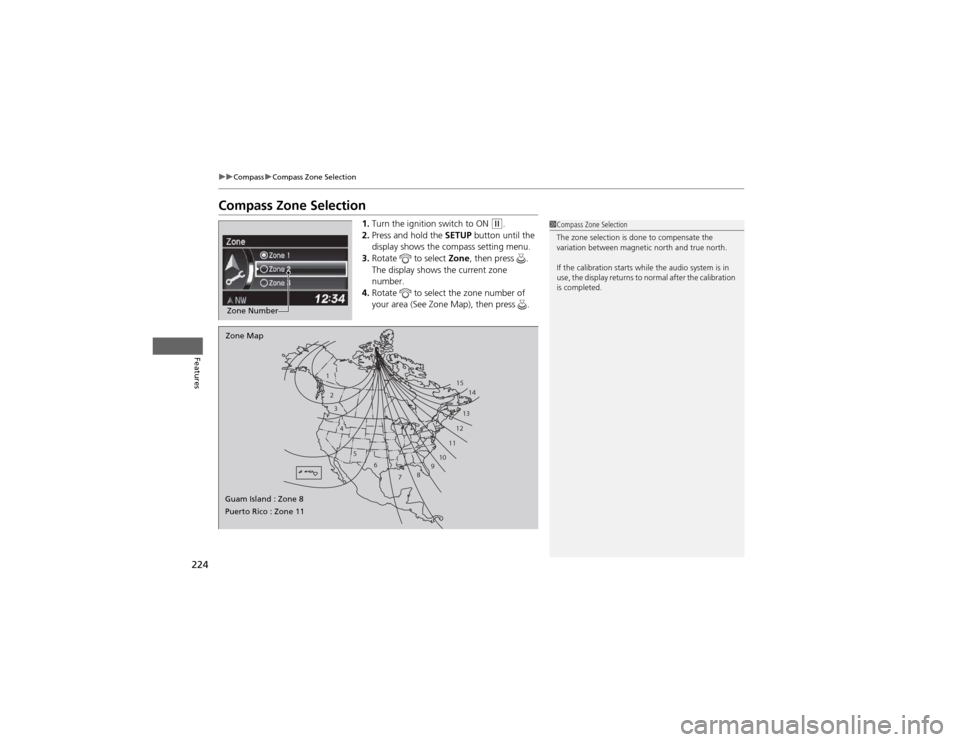
uuCompassuCompass Zone Selection
Features
Compass Zone Selection1.Turn the ignition switch to ON
(w .
2. Press and hold the SETUP button until the
display shows the compass setting menu.
3. Rotate to select Zone, then press .
The display shows the current zone number.
4. Rotate to select the zone number of
your area (See Zone Map), then press .
Zone Number
1
23
4
5 6
78910 11121314
15
Zone Map
Guam Island : Zone 8
Puerto Rico : Zone 11
1Compass Zone Selection
The zone selection is done to compensate the
variation between magnetic north and true north.
If the calibration starts while the audio system is in
use, the display returns to normal after the calibration is completed.
Page 306 of 361
305
Maintenance
Battery
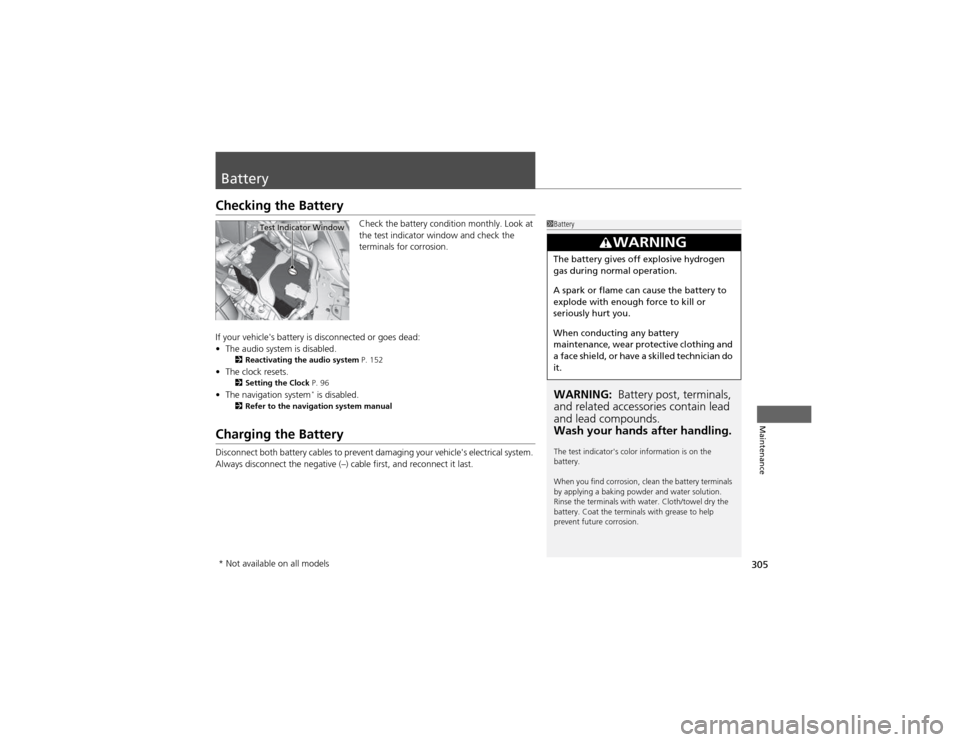
Checking the BatteryCheck the battery condition monthly. Look at
the test indicator window and check the
terminals for corrosion.
If your vehicle's battery is disconnected or goes dead: • The audio system is disabled.
2 Reactivating the audio system P. 152
• The clock resets.
2 Setting the Clock P. 96
• The navigation system *
is disabled.
2 Refer to the navigation system manual
Charging the Battery
Disconnect both battery cables to prevent damaging your vehicle's electrical system.
Always disconnect the negative (–) cable first, and reconnect it last.
1Battery
WARNING: Battery post, terminals,
and related accessories contain lead and lead compounds.
Wash your hands after handling.
The test indicator's color information is on the battery.
When you find corrosion, clean the battery terminals
by applying a baking powder and water solution.
Rinse the terminals with water. Cloth/towel dry the
battery. Coat the terminals with grease to help
prevent future corrosion.
3WARNING
The battery gives off explosive hydrogen
gas during normal operation.
A spark or flame can cause the battery to
explode with enough force to kill or
seriously hurt you.
When conducting any battery
maintenance, wear protective clothing and
a face shield, or have a skilled technician do it.
Test Indicator Window
* Not available on all models
Page 311 of 361
310
Maintenance
Cleaning
Interior Care
Use a damp cloth with a mixture of mild detergent and warm water to remove dirt.
Use a clean cloth to remove detergent residue.
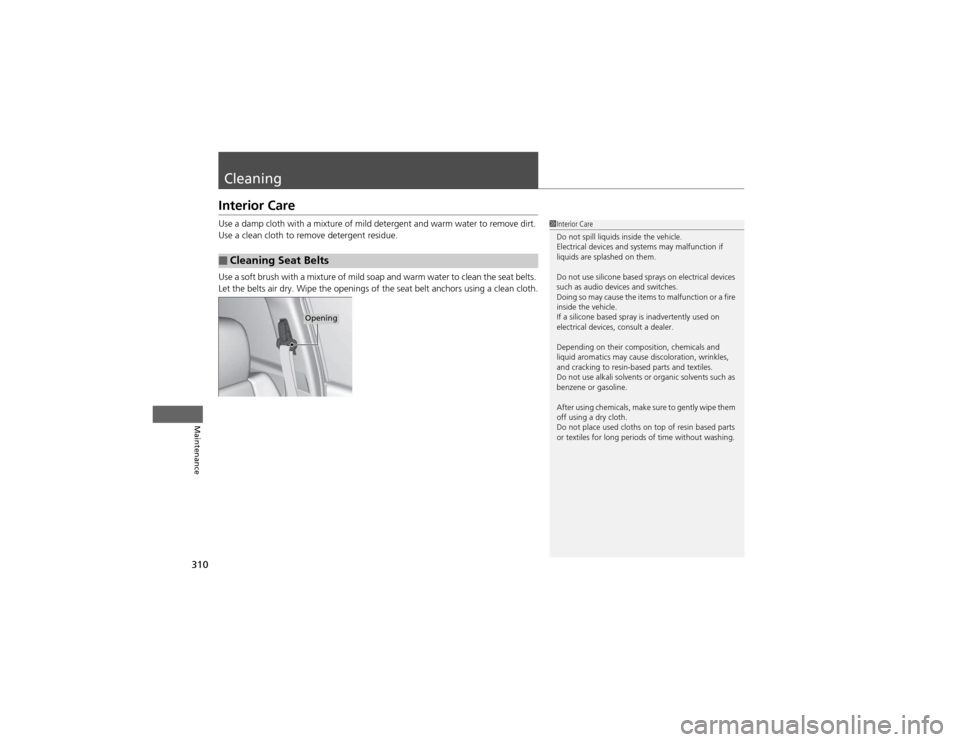
Use a soft brush with a mixture of mild soap and warm water to clean the seat belts.
Let the belts air dry. Wipe the openings of the seat belt anchors using a clean cloth.
■Cleaning Seat Belts
1Interior Care
Do not spill liquids inside the vehicle.
Electrical devices and systems may malfunction if
liquids are splashed on them.
Do not use silicone based sprays on electrical devices
such as audio devices and switches.
Doing so may cause the items to malfunction or a fire
inside the vehicle.
If a silicone based spray is inadvertently used on
electrical devices, consult a dealer.
Depending on their composition, chemicals and
liquid aromatics may cause discoloration, wrinkles,
and cracking to resin-based parts and textiles.
Do not use alkali solvents or organic solvents such as
benzene or gasoline.
After using chemicals, make sure to gently wipe them
off using a dry cloth.
Do not place used cloths on top of resin based parts
or textiles for long periods of time without washing.
Opening
Page 313 of 361
312
uuCleaninguExterior Care
Maintenance
Exterior Care
Dust off the vehicle body after you drive.
Regularly inspect your vehicle for scratches on painted surfaces. A scratch on a
painted surface can result in body rust. If you find a scratch, promptly repair it.
Wash the vehicle regularly. Wash more frequently when driving in the following
conditions: •If driving on roads with road salt.
• If driving in coastal areas.
• If tar, soot, bird droppings, insects, or tree sap are stuck to painted surfaces.
• Remove the audio antenna.
2 Audio Antenna P. 152
• Fold in the door mirrors.
Make sure to follow the instructions indicated on the automated vehicle wash. • Keep sufficient distance between the cleaning nozzle and the vehicle body.
• Take particular care around the windows. Standing too close may cause water to
enter the vehicle interior. Do not spray water into the engine compartment.
■Washing the Vehicle
■Using an Automated Vehicle Wash
■Using High Pressure Cleaners
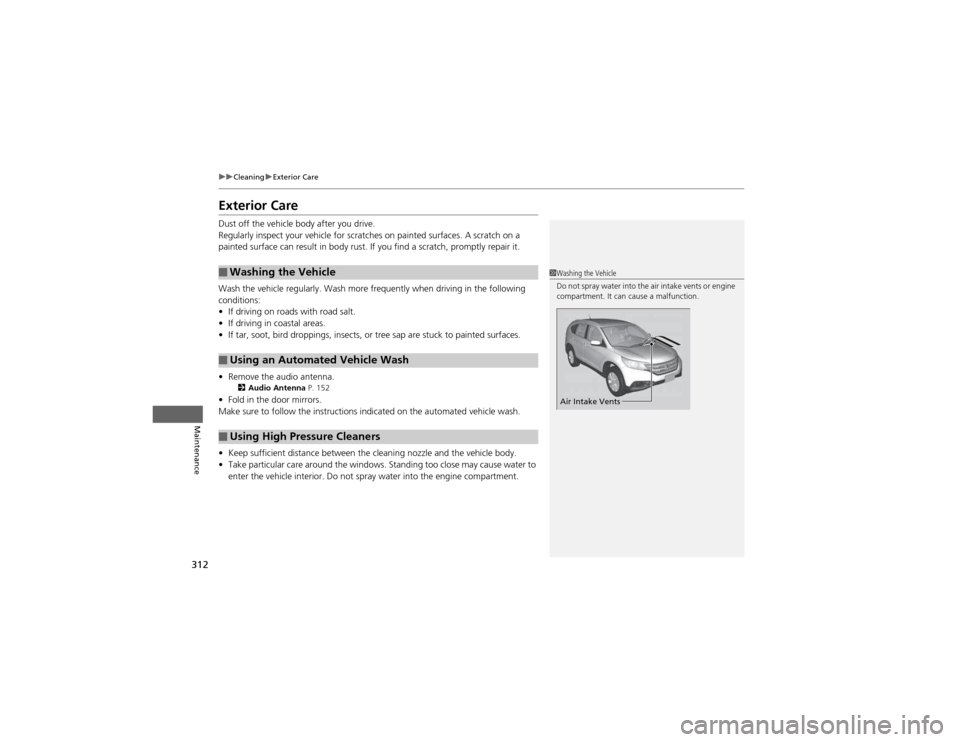
1Washing the Vehicle
Do not spray water into the air intake vents or engine
compartment. It can cause a malfunction.
Air Intake Vents
Page 325 of 361
324
Handling the Unexpected
Jump Starting
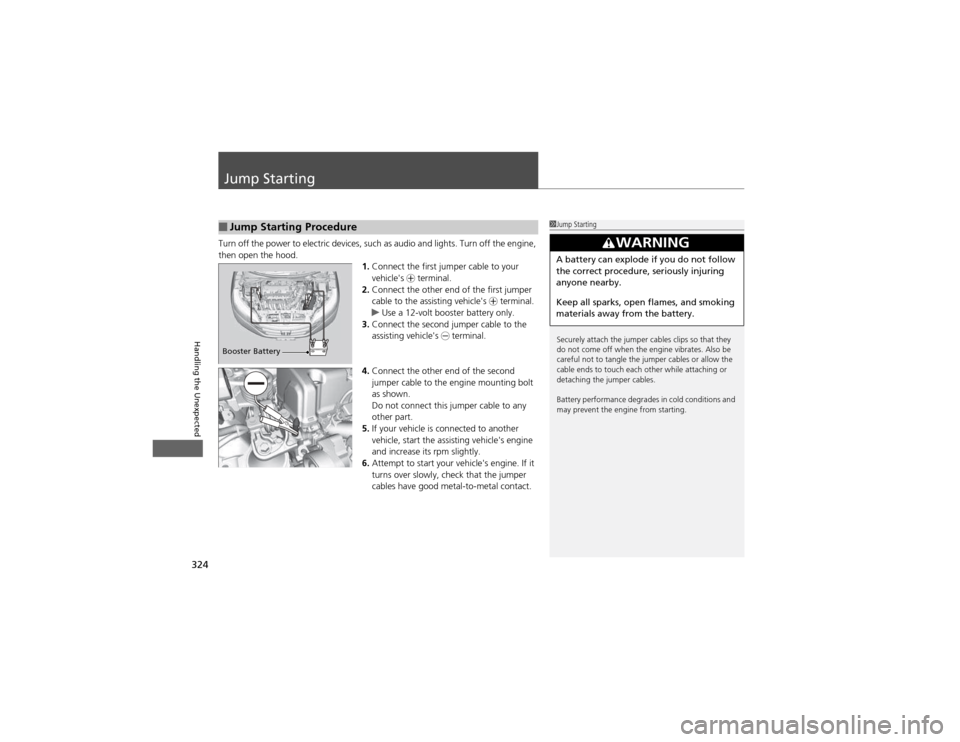
Turn off the power to electric devices, such as audio and lights. Turn off the engine,
then open the hood.1.Connect the first jumper cable to your vehicle's + terminal.
2. Connect the other end of the first jumper
cable to the assisting vehicle's + terminal.
uUse a 12-volt booster battery only.
3. Connect the second jumper cable to the
assisting vehicle's - terminal.
4. Connect the other end of the second
jumper cable to the engine mounting bolt
as shown.
Do not connect this jumper cable to any
other part.
5. If your vehicle is connected to another
vehicle, start the assisting vehicle's engine
and increase its rpm slightly.
6. Attempt to start your vehicle's engine. If it
turns over slowly, check that the jumper
cables have good metal-to-metal contact.
■Jump Starting Procedure1Jump Starting
Securely attach the jumper cables clips so that they
do not come off when the engine vibrates. Also be
careful not to tangle the jumper cables or allow the
cable ends to touch each other while attaching or
detaching the jumper cables.
Battery performance degrades in cold conditions and
may prevent the engine from starting.
3WARNING
A battery can explode if you do not follow
the correct procedure, seriously injuring
anyone nearby.
Keep all sparks, open flames, and smoking
materials away from the battery.
Booster Battery