fuse box location HONDA CR-V 2013 RM1, RM3, RM4 / 4.G Owners Manual
[x] Cancel search | Manufacturer: HONDA, Model Year: 2013, Model line: CR-V, Model: HONDA CR-V 2013 RM1, RM3, RM4 / 4.GPages: 361, PDF Size: 6.58 MB
Page 336 of 361

335Continued
Handling the Unexpected
Fuses
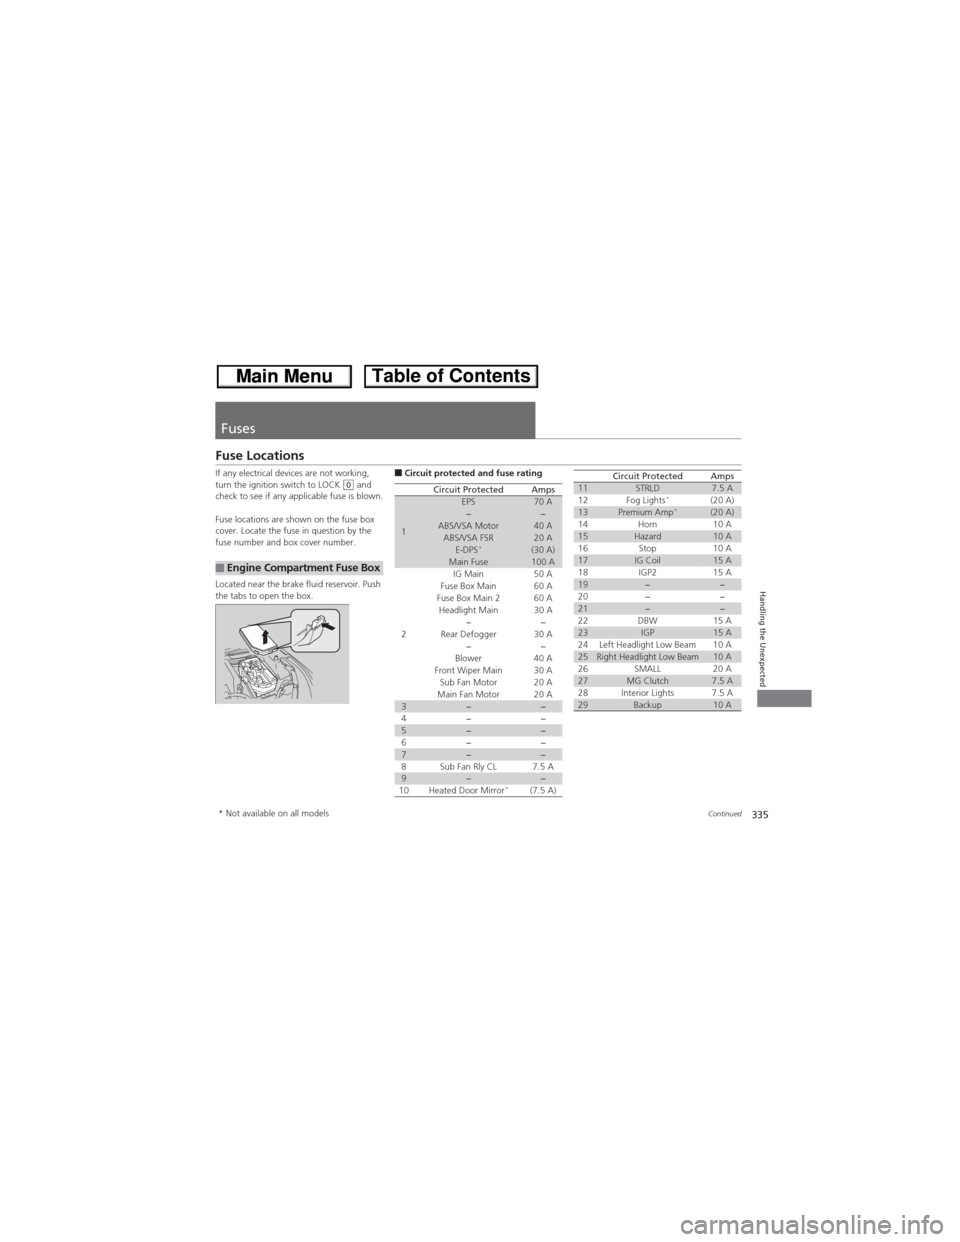
Fuse Locations
If any electrical devices are not working,
turn the ignition switch to LOCK (0 and
check to see if any applicable fuse is blown.
Fuse locations are shown on the fuse box
cover. Locate the fuse in question by the
fuse number and box cover number.
Located near the brake fluid reservoir. Push
the tabs to open the box.
■Engine Compartment Fuse Box
■Circuit protected and fuse rating
Circuit ProtectedAmps
1
EPS70 A−−ABS/VSA Motor40 AABS/VSA FSR20 AE-DPS*(30 A)Main Fuse100 A
2
IG Main50 A
Fuse Box Main 60 A
Fuse Box Main 260 A
Headlight Main 30 A
−−
Rear Defogger 30 A
−−
Blower 40 A
Front Wiper Main 30 A
Sub Fan Motor 20 A
Main Fan Motor 20 A
3−−
4− −
5−−
6− −
7−−
8 Sub Fan Rly CL 7.5 A
9−−
10 Heated Door Mirror*(7.5 A)
11STRLD7.5 A
12 Fog Lights*(20 A)13Premium Amp*(20 A)
14 Horn 10 A
15Hazard10 A
16 Stop 10 A
17IG Coil15 A
18 IGP2 15 A
19−−
20 − −
21−−
22 DBW 15 A
23IGP15 A
24 Left Headlight Low Beam 10 A
25Right Headlight Low Beam10 A
26 SMALL 20 A
27MG Clutch7.5 A
28 Interior Lights 7.5 A
29Backup10 A
Circuit ProtectedAmps
* Not available on all models
Page 337 of 361

336
uuFusesuFuse Locations
Handling the Unexpected
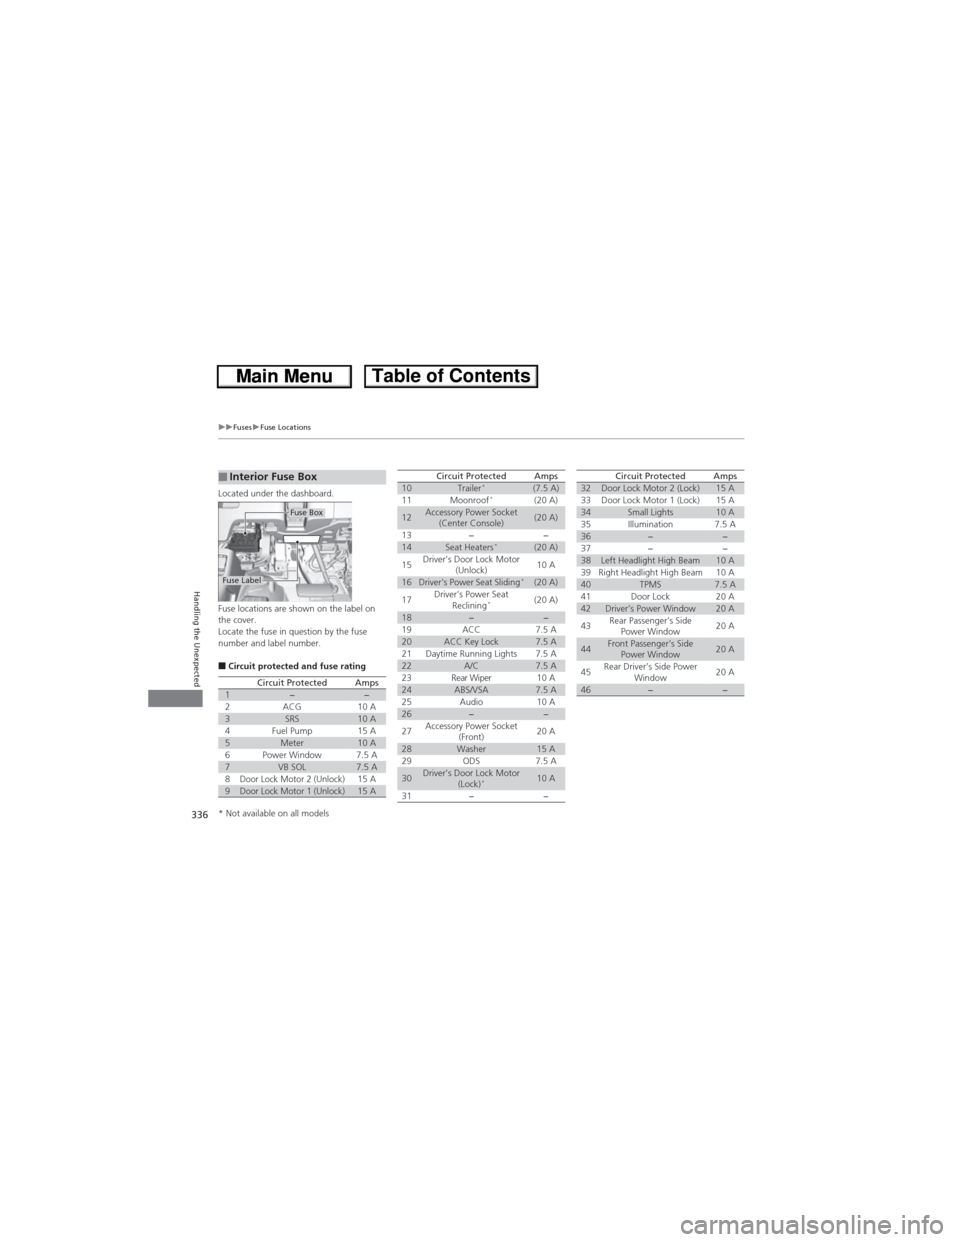
Located under the dashboard.
Fuse locations are shown on the label on
the cover.
Locate the fuse in question by the fuse
number and label number.
■Circuit protected and fuse rating
■Interior Fuse Box
Fuse Label
Fuse Box
Circuit ProtectedAmps1−−2ACG10 A3SRS10 A4Fuel Pump15 A5Meter10 A6Power Window7.5 A7VB SOL7.5 A8Door Lock Motor 2 (Unlock)15 A9Door Lock Motor 1 (Unlock)15 A
10Trailer*(7.5 A)
11 Moonroof*(20 A)
12Accessory Power Socket
(Center Console)(20 A)
13 − −
14Seat Heaters*(20 A)
15Driver’s Door Lock Motor
(Unlock)10 A
16Driver's Power Seat Sliding*(20 A)
17Driver's Power Seat
Reclining
*(20 A)
18−−
19 ACC 7.5 A
20ACC Key Lock7.5 A
21 Daytime Running Lights 7.5 A
22A/C7.5 A
23 Rear Wiper 10 A
24ABS/VSA7.5 A
25 Audio 10 A
26−−
27Accessory Power Socket
(Front)20 A
28Washer15 A
29 ODS 7.5 A
30Driver’s Door Lock Motor
(Lock)*10 A
31 − −
Circuit ProtectedAmps32Door Lock Motor 2 (Lock)15 A
33 Door Lock Motor 1 (Lock) 15 A
34Small Lights10 A
35 Illumination 7.5 A
36−−
37 − −
38Left Headlight High Beam10 A
39 Right Headlight High Beam 10 A
40TPMS7.5 A
41 Door Lock 20 A
42Driver’s Power Window20 A
43Rear Passenger’s Side
Power Window20 A
44Front Passenger’s Side
Power Window20 A
45Rear Driver’s Side Power
Window20 A
46−−
Circuit ProtectedAmps
* Not available on all models
Page 338 of 361

337
uuFusesuInspecting and Changing Fuses
Handling the Unexpected
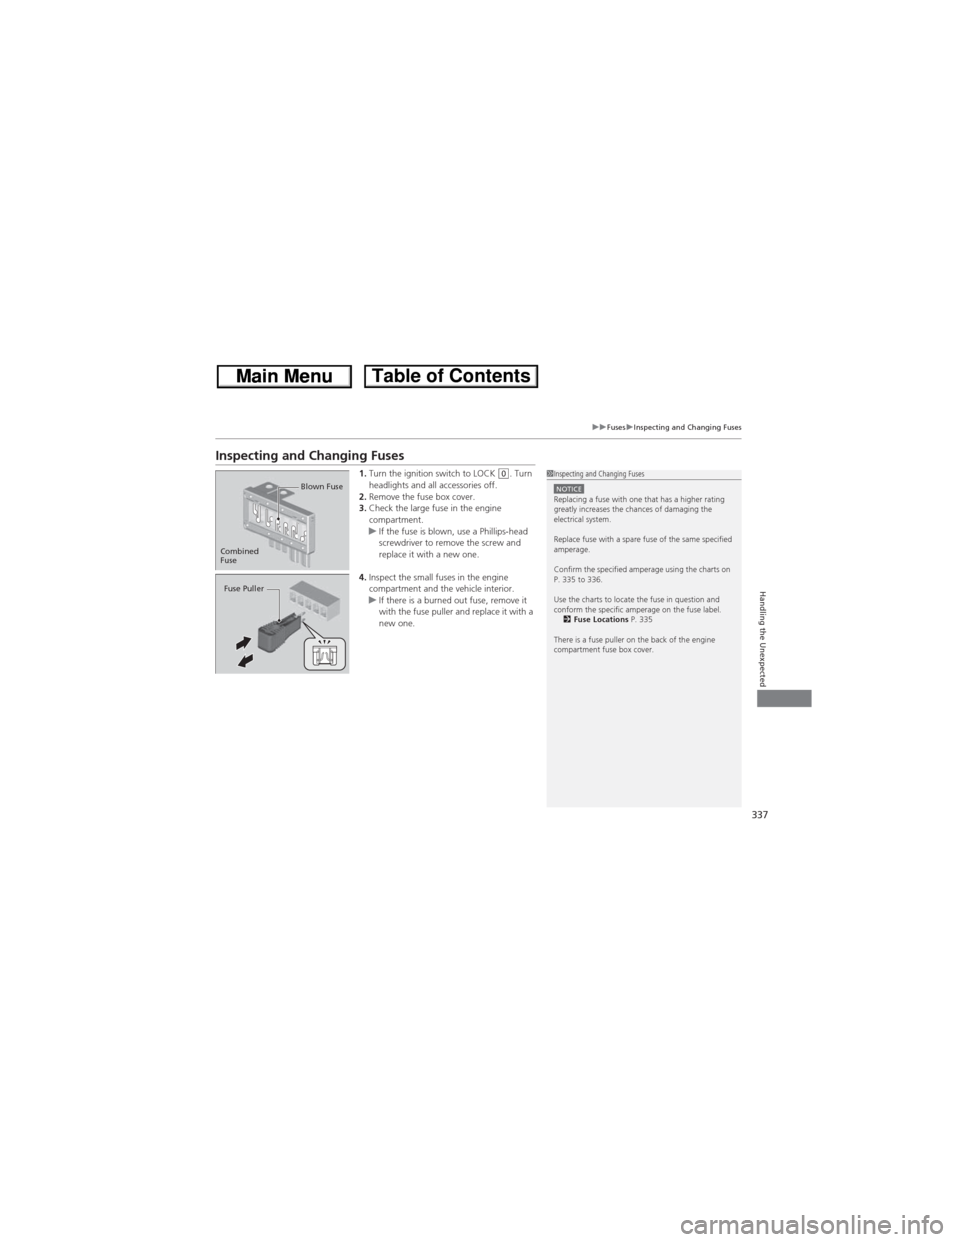
Inspecting and Changing Fuses
1.Turn the ignition switch to LOCK (0. Turn
headlights and all accessories off.
2.Remove the fuse box cover.
3.Check the large fuse in the engine
compartment.
uIf the fuse is blown, use a Phillips-head
screwdriver to remove the screw and
replace it with a new one.
4.Inspect the small fuses in the engine
compartment and the vehicle interior.
uIf there is a burned out fuse, remove it
with the fuse puller and replace it with a
new one.1Inspecting and Changing FusesNOTICEReplacing a fuse with one that has a higher rating
greatly increases the chances of damaging the
electrical system.
Replace fuse with a spare fuse of the same specified
amperage.
Confirm the specified amperage using the charts on
P. 335 to 336.
Use the charts to locate the fuse in question and
conform the specific amperage on the fuse label.
2Fuse Locations P. 335
There is a fuse puller on the back of the engine
compartment fuse box cover.
Combined
FuseBlown Fuse
Fuse Puller