power steering HONDA CR-V 2016 RM1, RM3, RM4 / 4.G User Guide
[x] Cancel search | Manufacturer: HONDA, Model Year: 2016, Model line: CR-V, Model: HONDA CR-V 2016 RM1, RM3, RM4 / 4.GPages: 532, PDF Size: 22.94 MB
Page 160 of 532
159
uuOperating the Switches Around the Steering Wheel uLight Switches
Continued
Controls
Light Switches
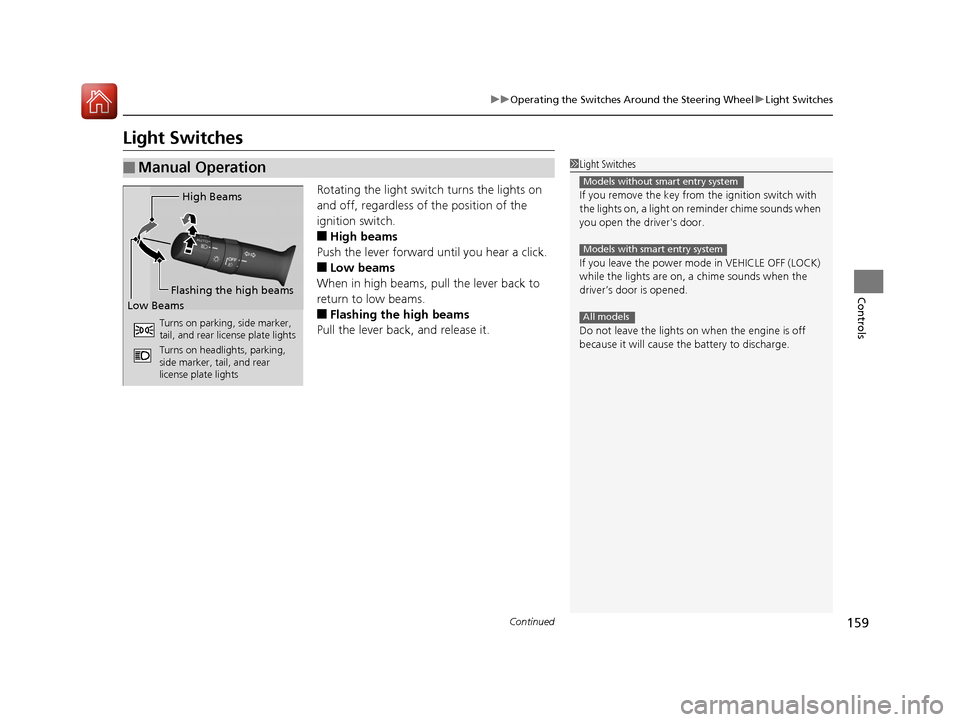
Rotating the light switch turns the lights on
and off, regardless of the position of the
ignition switch.
■High beams
Push the lever forward until you hear a click.
■Low beams
When in high beams, pull the lever back to
return to low beams.
■Flashing the high beams
Pull the lever back, and release it.
■Manual Operation1 Light Switches
If you remove the key from the ignition switch with
the lights on, a light on reminder chime sounds when
you open the driver's door.
If you leave the power mode in VEHICLE OFF (LOCK)
while the lights are on, a chime sounds when the
driver’s door is opened.
Do not leave the lights on when the engine is off
because it will cause the battery to discharge.
Models without smart entry system
Models with smart entry system
All models
High Beams
Flashing the high beams
Low Beams
Turns on parking, side marker,
tail, and rear license plate lights
Turns on headlights, parking,
side marker, tail, and rear
license plate lights
15 CR-V-31T0A6300.book 159 ページ 2015年2月2日 月曜日 午前10時35分
Page 161 of 532
uuOperating the Switches Around the Steering Wheel uLight Switches
160
Controls
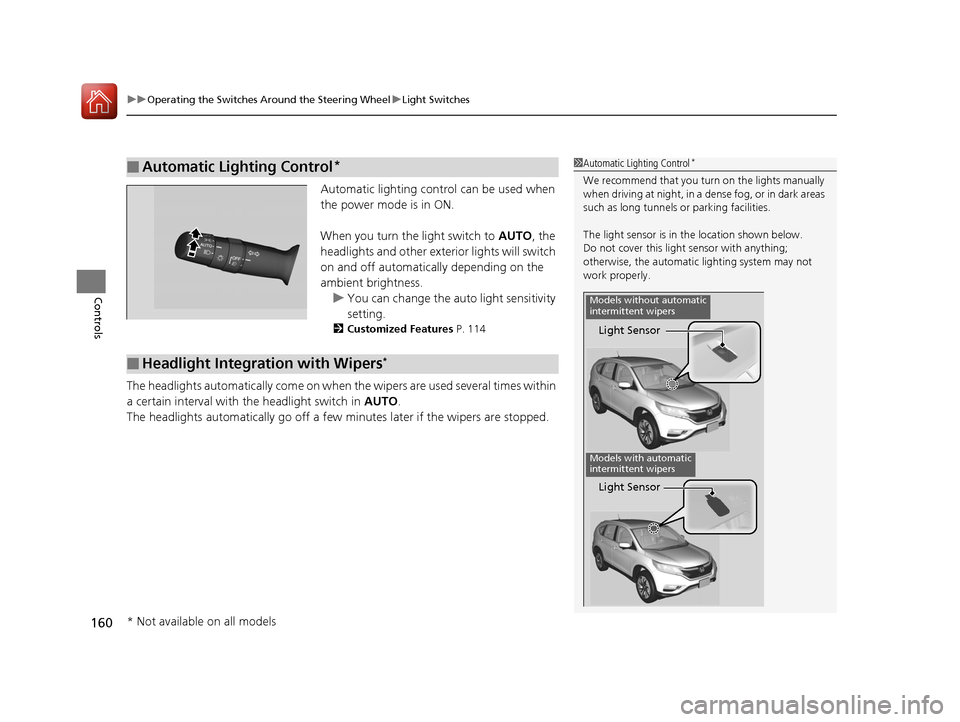
Automatic lighting control can be used when
the power mode is in ON.
When you turn the light switch to AUTO, the
headlights and other exterior lights will switch
on and off automatica lly depending on the
ambient brightness. u You can change the au to light sensitivity
setting.
2 Customized Features P. 114
The headlights automatically co me on when the wipers are used several times within
a certain interval with the headlight switch in AUTO.
The headlights automatically go off a few minutes later if the wipers are stopped.
■Automatic Lighting Control*1Automatic Lighting Control*
We recommend that you tu rn on the lights manually
when driving at night, in a dense fog, or in dark areas
such as long tunnels or parking facilities.
The light sensor is in the location shown below.
Do not cover this light sensor with anything;
otherwise, the automatic lighting system may not
work properly.
Light Sensor
Models without automatic
intermittent wipers
Models with automatic
intermittent wipers
Light Sensor
■Headlight Integration with Wipers*
* Not available on all models
15 CR-V-31T0A6300.book 160 ページ 2015年2月2日 月曜日 午前10時35分
Page 162 of 532
161
uuOperating the Switches Around the Steering Wheel uLight Switches
Controls
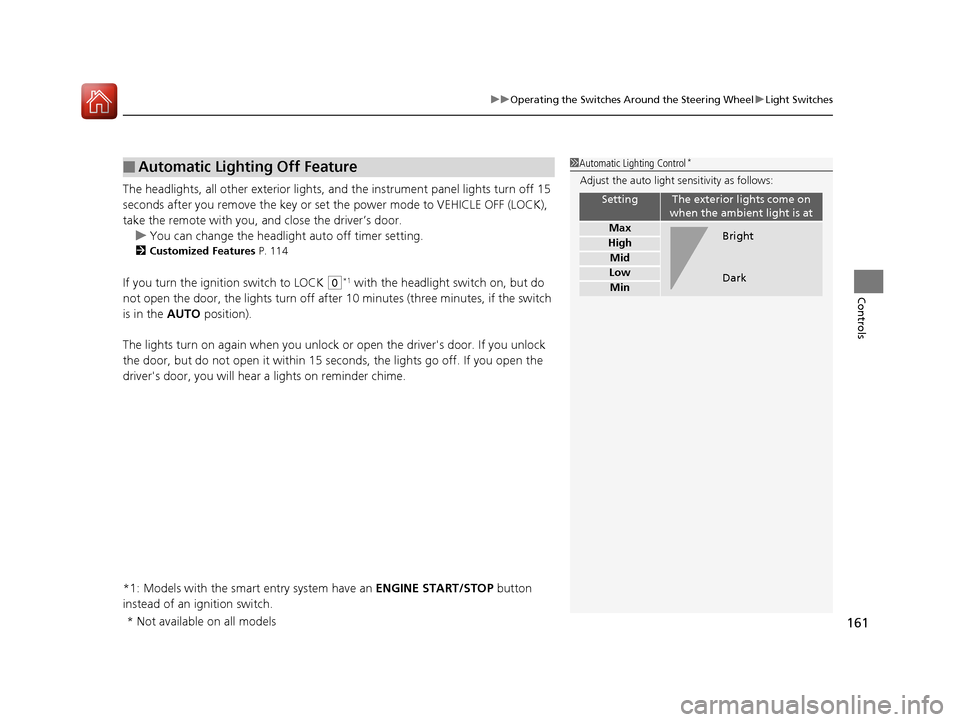
The headlights, all other exterior lights, a nd the instrument panel lights turn off 15
seconds after you remove the key or set the power mode to VEHICLE OFF (LOCK),
take the remote with you, and close the driver’s door.
u You can change the headlight auto off timer setting.
2Customized Features P. 114
If you turn the ignition switch to LOCK (0*1 with the headlight switch on, but do
not open the door, the lights turn off afte r 10 minutes (three minutes, if the switch
is in the AUTO position).
The lights turn on again when you unlock or open the driver's door. If you unlock
the door, but do not open it within 15 seconds, the lights go off. If you open the
driver's door, you will hear a lights on reminder chime.
*1: Models with the smart entry system have an ENGINE START/STOP button
instead of an ignition switch.
■Automatic Lighting Off Feature1 Automatic Lighting Control*
Adjust the auto light sensitivity as follows:
SettingThe exterior lights come on
when the ambient light is at
Max
High
Mid
Low
Min
Bright
Dark
* Not available on all models
15 CR-V-31T0A6300.book 161 ページ 2015年2月2日 月曜日 午前10時35分
Page 164 of 532
163
uuOperating the Switches Around the Steering Wheel uDaytime Running Lights
Controls
Daytime Running Lights
The high beam headlights come on slight ly dimmer than normal when the following
conditions have been met:
• The ignition switch is in ON
(w.
• The headlight switch is off.
• The parking brake is released.
The lights remain on even if you set th e parking brake. Turning off the ignition
switch will turn off the daytime running lights.
The high beam headlights return to the original brightness once the headlight
switch is turned on.
The daytime running lights come on when th e following conditions have been met:
• The power mode is set to ON.
• The headlight switch is off.
• The parking brake is released.
The lights remain on even if you set th e parking brake. Setting the power mode to
VEHICLE OFF turns off the daytime running lights.
The daytime running lights are off the headlig ht switch is turned on, or when the
headlight switch is in AUTO and it is getting darker outside.
Models without smart entry system
Models with smart entry system
15 CR-V-31T0A6300.book 163 ページ 2015年2月2日 月曜日 午前10時35分
Page 166 of 532
Continued165
uuOperating the Switches Around the Steering Wheel uWipers and Washers
Controls
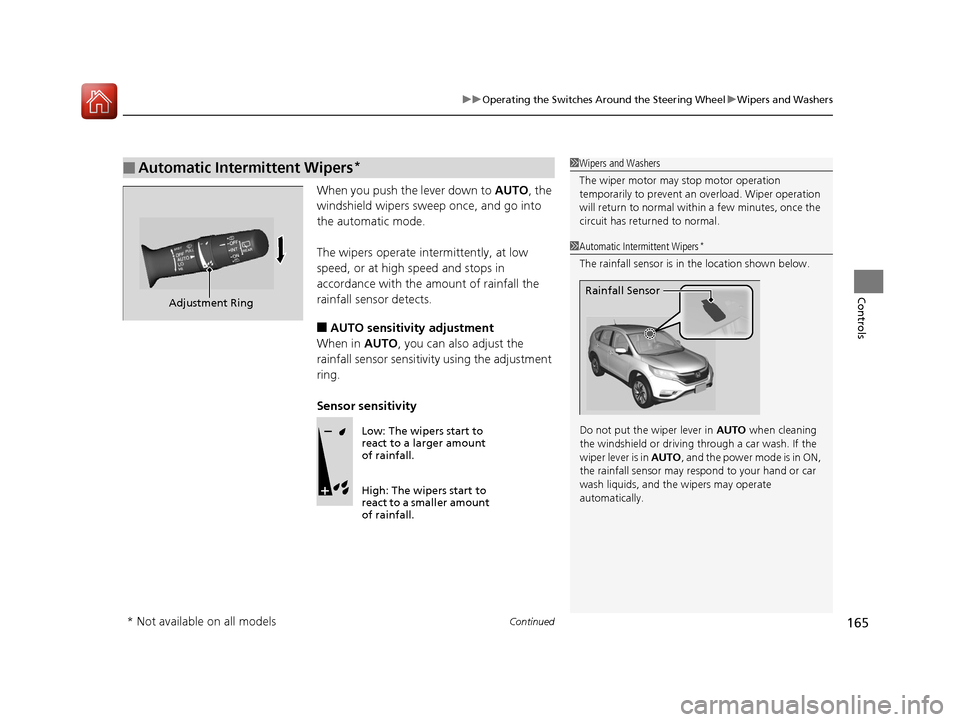
When you push the lever down to AUTO, the
windshield wipers sweep once, and go into
the automatic mode.
The wipers operate intermittently, at low
speed, or at high speed and stops in
accordance with the amount of rainfall the
rainfall sensor detects.
■AUTO sensitivity adjustment
When in AUTO, you can also adjust the
rainfall sensor sensitivity using the adjustment
ring.
Sensor sensitivity
■Automatic Intermittent Wipers*1 Wipers and Washers
The wiper motor may stop motor operation
temporarily to prevent an overload. Wiper operation
will return to normal within a few minutes, once the
circuit has returned to normal.
Adjustment Ring
1 Automatic Intermittent Wipers*
The rainfall sensor is in the location shown below.
Do not put the wiper lever in AUTO when cleaning
the windshield or driving through a car wash. If the
wiper lever is in AUTO , and the power mode is in ON,
the rainfall sensor may re spond to your hand or car
wash liquids, and the wipers may operate
automatically.
Rainfall Sensor
Low: The wipers start to
react to a larger amount
of rainfall.
High: The wipers start to
react to a smaller amount
of rainfall.
* Not available on all models
15 CR-V-31T0A6300.book 165 ページ 2015年2月2日 月曜日 午前10時35分
Page 169 of 532
168
uuOperating the Switches Around the Steering Wheel uDefogger/Heated Door Mirror*
Controls
Defogger/Heated Door Mirror*
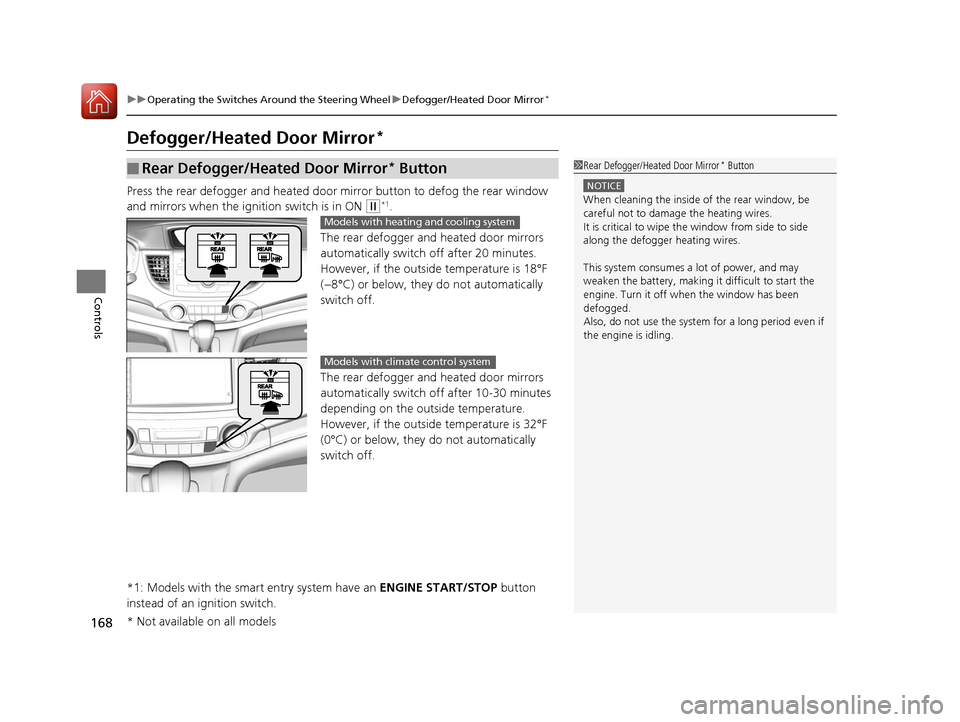
Press the rear defogger and heated door mirror button to defog the rear window
and mirrors when the ignition switch is in ON
(w*1.
The rear defogger and heated door mirrors
automatically switch off after 20 minutes.
However, if the outside temperature is 18°F
(−8°C) or below, they do not automatically
switch off.
The rear defogger and heated door mirrors
automatically switch off after 10-30 minutes
depending on the outside temperature.
However, if the outside temperature is 32°F
(0°C) or below, they do not automatically
switch off.
*1: Models with the smart entry system have an ENGINE START/STOP button
instead of an ignition switch.
■Rear Defogger/Heated Door Mirror* Button1 Rear Defogger/Heated Door Mirror* Button
NOTICE
When cleaning the inside of the rear window, be
careful not to damage the heating wires.
It is critical to wipe the window from side to side
along the defogger heating wires.
This system consumes a lot of power, and may
weaken the battery, making it difficult to start the
engine. Turn it off when the window has been
defogged.
Also, do not use the system for a long period even if
the engine is idling.
Models with heating and cooling system
Models with climate control system
* Not available on all models
15 CR-V-31T0A6300.book 168 ページ 2015年2月2日 月曜日 午前10時35分
Page 170 of 532
169
uuOperating the Switches Around the Steering Wheel uDefogger/Heated Door Mirror*
Controls
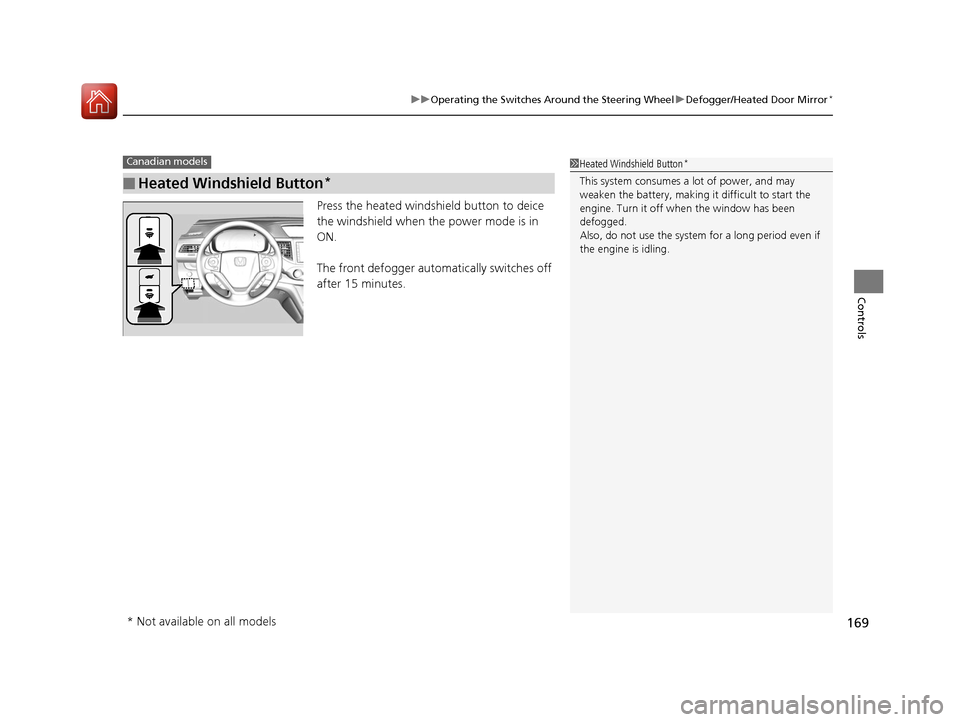
Press the heated windshield button to deice
the windshield when the power mode is in
ON.
The front defogger automatically switches off
after 15 minutes.
■Heated Windshield Button*
Canadian models1Heated Windshield Button*
This system consumes a lot of power, and may
weaken the battery, making it difficult to start the
engine. Turn it off when the window has been
defogged.
Also, do not use the system for a long period even if
the engine is idling.
* Not available on all models
15 CR-V-31T0A6300.book 169 ページ 2015年2月2日 月曜日 午前10時35分
Page 171 of 532
170
uuOperating the Switches Around the Steering Wheel uDriving Position Memory System*
Controls
Driving Position Memory System*
You can store two driver’s seat positions (except for power lumbar) with the driving
position memory system.
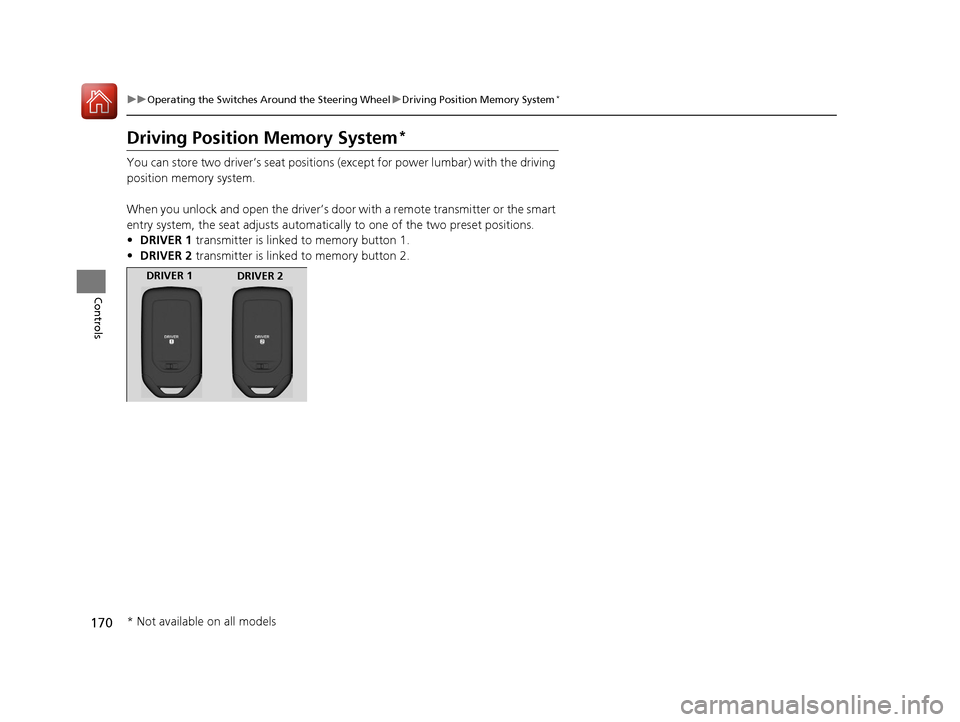
When you unlock and open the driver’s door with a remote transmitter or the smart
entry system, the seat adjusts automatica lly to one of the two preset positions.
• DRIVER 1 transmitter is linked to memory button 1.
• DRIVER 2 transmitter is linked to memory button 2.
DRIVER 1
DRIVER 2
* Not available on all models
15 CR-V-31T0A6300.book 170 ページ 2015年2月2日 月曜日 午前10時35分
Page 172 of 532
171
uuOperating the Switches Around the Steering Wheel uDriving Position Memory System*
Controls
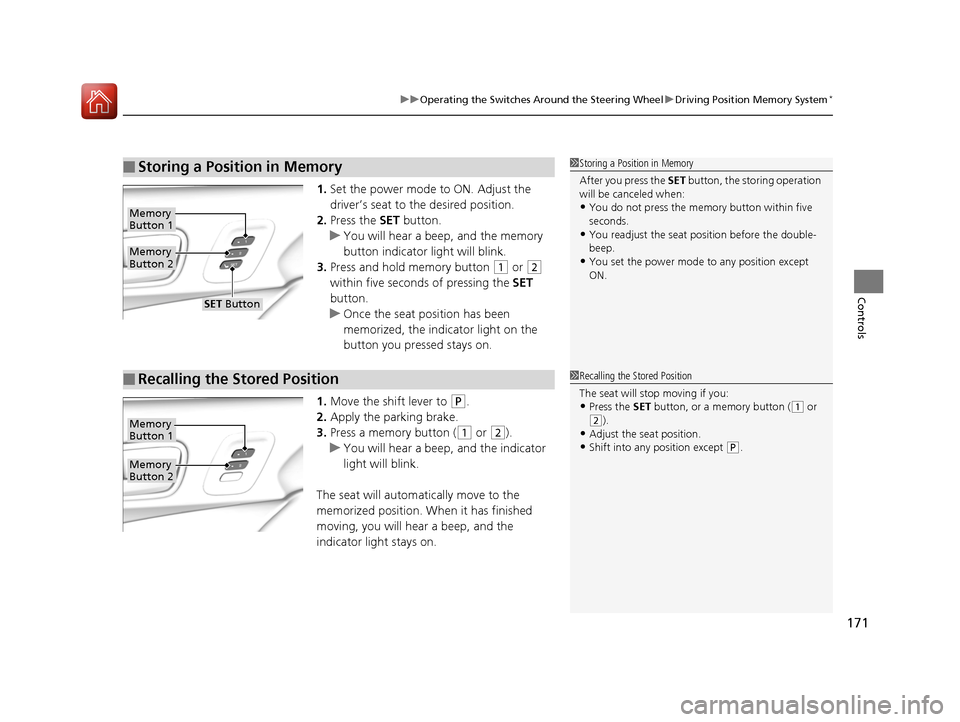
1. Set the power mode to ON. Adjust the
driver’s seat to the desired position.
2. Press the SET button.
u You will hear a beep, and the memory
button indicator light will blink.
3. Press and hold memory button
(1 or (2
within five seconds of pressing the SET
button.
u Once the seat position has been
memorized, the indicator light on the
button you pressed stays on.
1. Move the shift lever to
(P.
2. Apply the parking brake.
3. Press a memory button (
(1 or (2).
u You will hear a beep, and the indicator
light will blink.
The seat will automatically move to the
memorized position. When it has finished
moving, you will hear a beep, and the
indicator light stays on.
■Storing a Position in Memory1 Storing a Position in Memory
After you press the SET button, the storing operation
will be canceled when:
•You do not press the memory button within five
seconds.
•You readjust the seat position before the double-
beep.
•You set the power mode to any position except
ON.
Memory
Button 1
Memory
Button 2
SET Button
■Recalling the Stored Position1 Recalling the Stored Position
The seat will st op moving if you:
•Press the SET button, or a memory button ((1 or (2).
•Adjust the seat position.
•Shift into any position except (P.
Memory
Button 1
Memory
Button 2
15 CR-V-31T0A6300.book 171 ページ 2015年2月2日 月曜日 午前10時35分
Page 176 of 532
175Continued
Controls
Adjusting the Seats
Adjusting the Seat Positions
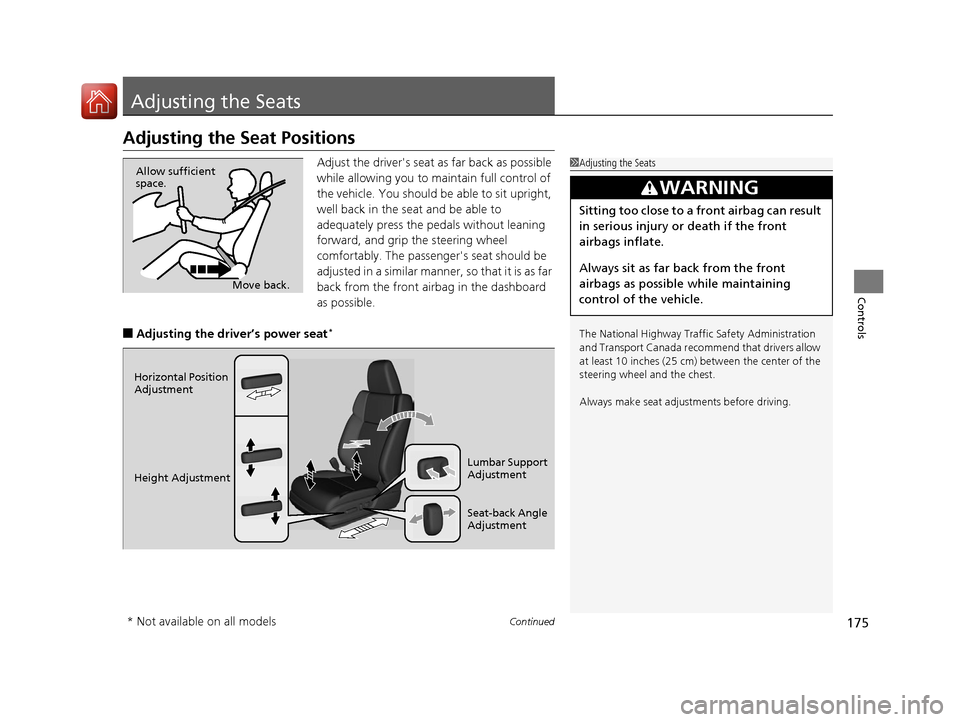
Adjust the driver's seat as far back as possible
while allowing you to ma intain full control of
the vehicle. You should be able to sit upright,
well back in the seat and be able to
adequately press the pedals without leaning
forward, and grip the steering wheel
comfortably. The passenger's seat should be
adjusted in a similar manner, so that it is as far
back from the front airbag in the dashboard
as possible.
■Adjusting the driver’s power seat*
1 Adjusting the Seats
The National Highway Traffic Safety Administration
and Transport Cana da recommend that drivers allow
at least 10 inches (25 cm) between the center of the
steering wheel and the chest.
Always make seat adjustments before driving.
3WARNING
Sitting too close to a front airbag can result
in serious injury or death if the front
airbags inflate.
Always sit as far back from the front
airbags as possible while maintaining
control of the vehicle.
Move back.
Allow sufficient
space.
Horizontal Position
Adjustment
Height Adjustment
Seat-back Angle
Adjustment Lumbar Support
Adjustment
* Not available on all models
15 CR-V-31T0A6300.book 175 ページ 2015年2月2日 月曜日 午前10時35分