Indicator HONDA CR-V 2018 (in English) Repair Manual
[x] Cancel search | Manufacturer: HONDA, Model Year: 2018, Model line: CR-V, Model: HONDA CR-V 2018Pages: 679, PDF Size: 23.22 MB
Page 140 of 679
uuLocking and Unlocking the Doors uLocking/Unlocking the Doors from the Outside
138
Controls
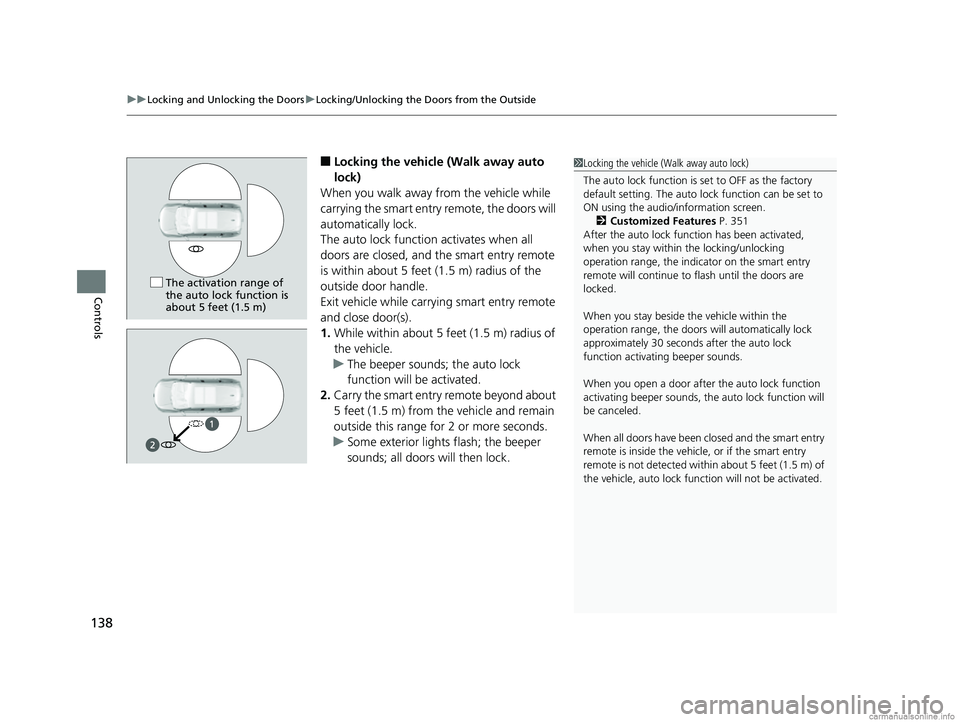
■Locking the vehicle (Walk away auto
lock)
When you walk away from the vehicle while
carrying the smart entry remote, the doors will
automatically lock.
The auto lock function activates when all
doors are closed, and the smart entry remote
is within about 5 feet (1.5 m) radius of the
outside door handle.
Exit vehicle while carrying smart entry remote
and close door(s).
1. While within about 5 feet (1.5 m) radius of
the vehicle.
u The beeper sounds; the auto lock
function will be activated.
2. Carry the smart entry remote beyond about
5 feet (1.5 m) from the vehicle and remain
outside this range fo r 2 or more seconds.
u Some exterior lights flash; the beeper
sounds; all doors will then lock.1Locking the vehicle (Walk away auto lock)
The auto lock function is set to OFF as the factory
default setting. The auto lo ck function can be set to
ON using the audio/information screen. 2 Customized Features P. 351
After the auto lock function has been activated,
when you stay within the locking/unlocking
operation range, the indicator on the smart entry
remote will continue to flash until the doors are
locked.
When you stay beside the vehicle within the
operation range, the doors wi ll automatically lock
approximately 30 seconds after the auto lock
function activating beeper sounds.
When you open a door after the auto lock function
activating beeper sounds, the auto lock function will
be canceled.
When all doors have been closed and the smart entry
remote is inside the vehicle, or if the smart entry
remote is not detect ed within about 5 feet (1.5 m) of
the vehicle, auto lock func tion will not be activated.
The activation range of
the auto lock function is
about 5 feet (1.5 m)
18 CR-V-31TLA6100.book 138 ページ 2017年9月7日 木曜日 午後3時56分
Page 164 of 679
uuSecurity System uSecurity System Alarm*
162
Controls
■To deactivate the security system alarm
Unlock the vehicle using the key, remote transmitter or smart entry system. The
system, along with the horn and flashing lights, is deactivated.
■Setting the security system alarm
The security system alarm automatically sets when the following conditions have
been met:
• The power mode is set to VEHICLE OFF (LOCK).
• The hood and tailgate are closed.
• All doors and tailgate are locked with th e key, the remote transmitter, or smart
entry system.
■When the security system alarm sets
The security system alarm indicator in the instrument panel blinks. When the
blinking interval changes after about 15 seconds, the security system alarm is set.
■To cancel the security system alarm
The security system is canceled when the vehicle is unlocked using the key, remote
transmitter, smart entry system, or the power mode is set to ON. The security system
alarm indicator goes off at the same time.
1 Security System Alarm*
Do not set the security system alarm when someone
is in the vehicle or a window is open. The system can
accidentally activate when:
•Unlocking the door with the lock tab.•Opening the hood with the hood release handle.
•Moving the shift lever out of ( P.
If the battery goes dead after you have set the
security system alarm, the security alarm may go off
once the battery is re charged or replaced.
If this occurs, deactivate the security system alarm by
unlocking a door using the ke y or remote transmitter.
Do not attempt to alter th is system or add another
device to it.
* Not available on all models
18 CR-V-31TLA6100.book 162 ページ 2017年9月7日 木曜日 午後3時56分
Page 166 of 679
164
Controls
Opening and Closing the Windows
Opening/Closing the Power Windows
The power windows can be opened and closed when the ignition switch is in ON
(w*1, using the switches on the doors. The driver side switches can be used to open
and close all the windows.
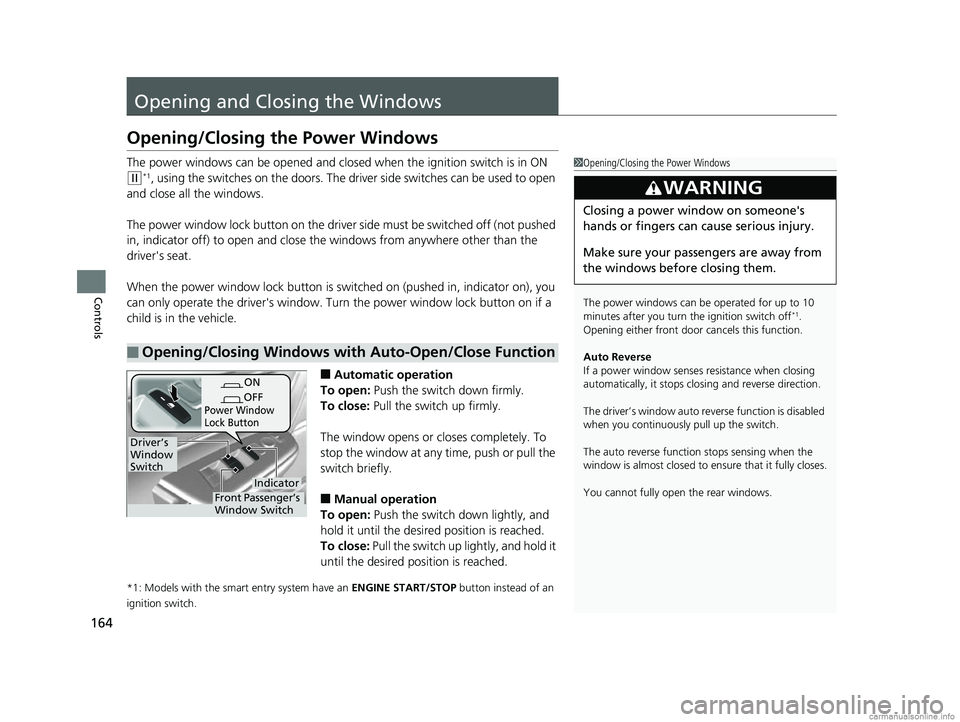
The power window lock button on the driver side must be switched off (not pushed
in, indicator off) to open and close th e windows from anywhere other than the
driver's seat.
When the power window lock button is switched on (pushed in, indicator on), you
can only operate the driver's window. Turn the power window lock button on if a
child is in the vehicle.
■Automatic operation
To open: Push the switch down firmly.
To close: Pull the switch up firmly.
The window opens or cl oses completely. To
stop the window at any time, push or pull the
switch briefly.
■Manual operation
To open: Push the switch down lightly, and
hold it until the desired position is reached.
To close: Pull the switch up lightly, and hold it
until the desired position is reached.
*1: Models with the smart entry system have an ENGINE START/STOP button instead of an
ignition switch.
■Opening/Closing Windows with Auto-Open/Close Function
1 Opening/Closing the Power Windows
The power windows can be operated for up to 10
minutes after you turn the ignition switch off
*1.
Opening either front door cancels this function.
Auto Reverse
If a power window senses resistance when closing
automatically, it stops clos ing and reverse direction.
The driver’s window auto re verse function is disabled
when you continuously pull up the switch.
The auto reverse function stops sensing when the
window is almost closed to en sure that it fully closes.
You cannot fully ope n the rear windows.
3WARNING
Closing a power window on someone's
hands or fingers can cause serious injury.
Make sure your passengers are away from
the windows before closing them.
ON
OFF
Power Window
Lock Button
Indicator
Front Passenger’s
Window Switch
Driver’s
Window
Switch
18 CR-V-31TLA6100.book 164 ページ 2017年9月7日 木曜日 午後3時56分
Page 178 of 679
176
uuOperating the Switches Around the Steering Wheel uTurn Signals
Controls
Turn Signals
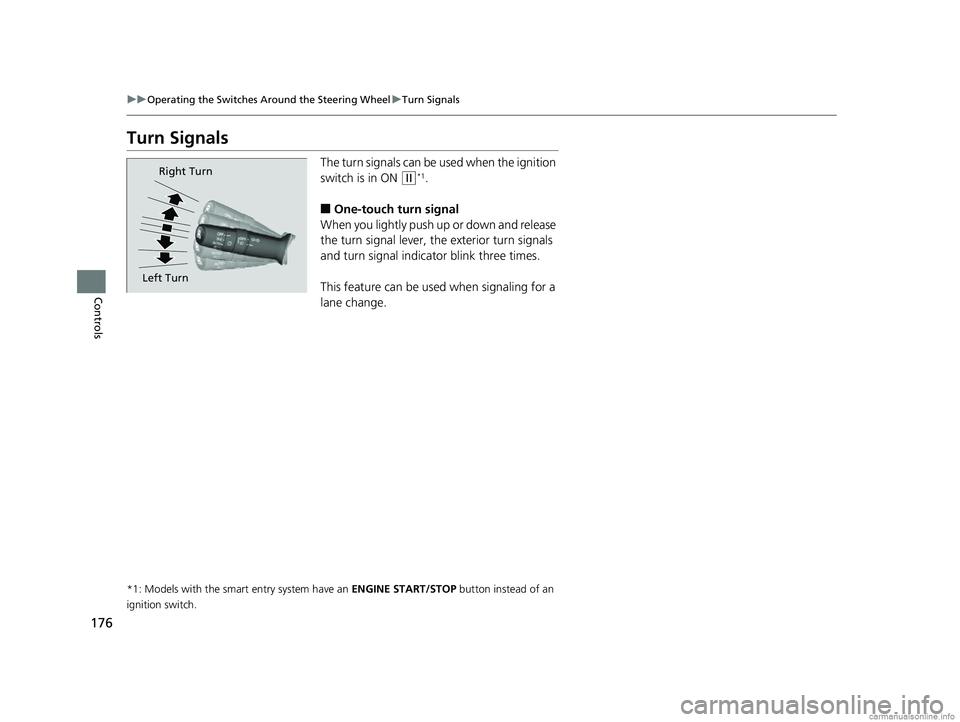
The turn signals can be used when the ignition
switch is in ON
(w*1.
■One-touch turn signal
When you lightly push up or down and release
the turn signal lever, th e exterior turn signals
and turn signal indicator blink three times.
This feature can be used when signaling for a
lane change.
*1: Models with the smart entry system have an ENGINE START/STOP button instead of an
ignition switch.
Right Turn
Left Turn
18 CR-V-31TLA6100.book 176 ページ 2017年9月7日 木曜日 午後3時56分
Page 179 of 679
177
uuOperating the Switches Around the Steering Wheel uLight Switches
Continued
Controls
Light Switches
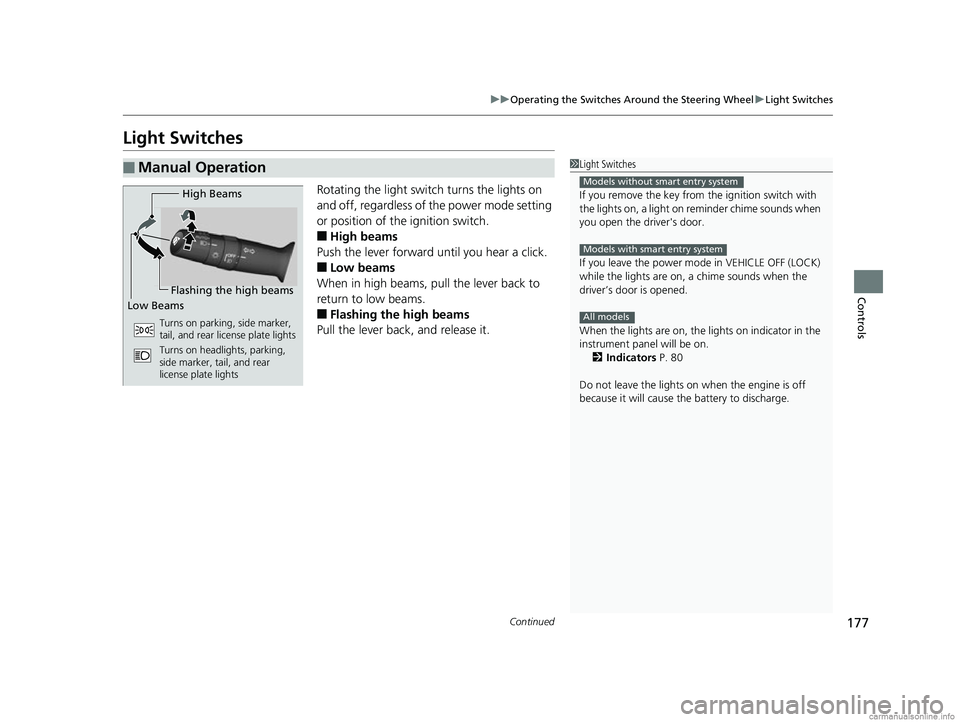
Rotating the light switch turns the lights on
and off, regardless of the power mode setting
or position of the ignition switch.
■High beams
Push the lever forward until you hear a click.
■Low beams
When in high beams, pull the lever back to
return to low beams.
■Flashing the high beams
Pull the lever back, and release it.
■Manual Operation1 Light Switches
If you remove the key from the ignition switch with
the lights on, a light on reminder chime sounds when
you open the driver's door.
If you leave the power mode in VEHICLE OFF (LOCK)
while the lights are on, a chime sounds when the
driver’s door is opened.
When the lights are on, the lights on indicator in the
instrument pane l will be on.
2 Indicators P. 80
Do not leave the lights on when the engine is off
because it will cause the battery to discharge.
Models without smart entry system
Models with smart entry system
All models
High Beams
Flashing the high beams
Low Beams
Turns on parking, side marker,
tail, and rear license plate lights
Turns on headlights, parking,
side marker, tail, and rear
license plate lights
18 CR-V-31TLA6100.book 177 ページ 2017年9月7日 木曜日 午後3時56分
Page 182 of 679
180
uuOperating the Switches Around the Steering Wheel uFog Lights*
Controls
Fog Lights*
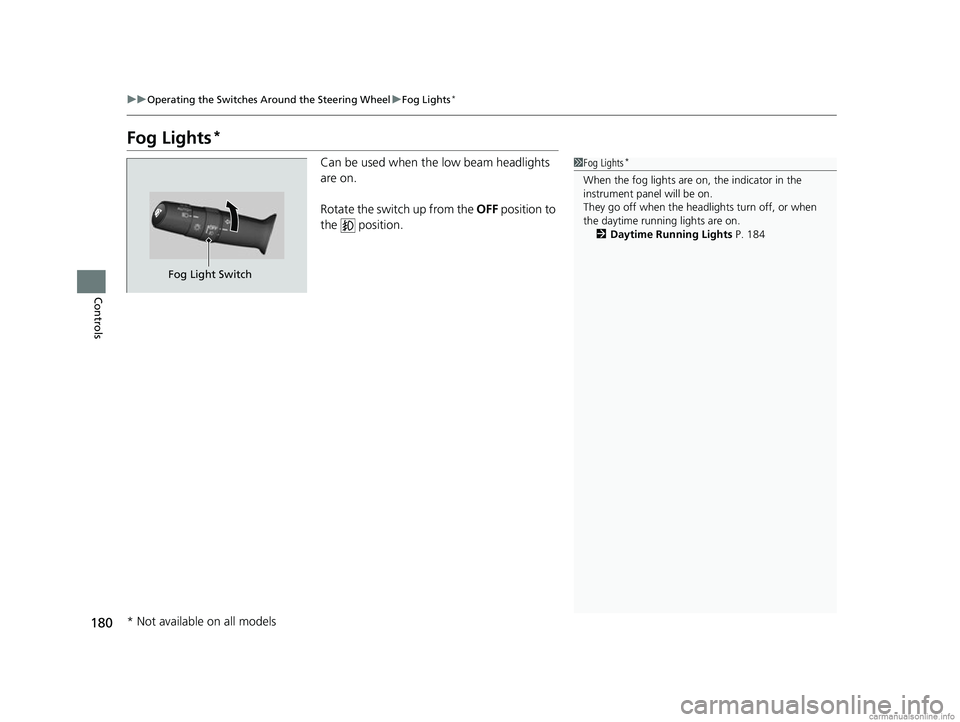
Can be used when th e low beam headlights
are on.
Rotate the switch up from the OFF position to
the position.1 Fog Lights*
When the fog lights are on, the indicator in the
instrument pane l will be on.
They go off when the headlights turn off, or when
the daytime running lights are on. 2 Daytime Running Lights P. 184
Fog Light Switch
* Not available on all models
18 CR-V-31TLA6100.book 180 ページ 2017年9月7日 木曜日 午後3時56分
Page 184 of 679
uuOperating the Switches Around the Steering Wheel uAuto High-Beam System*
182
Controls
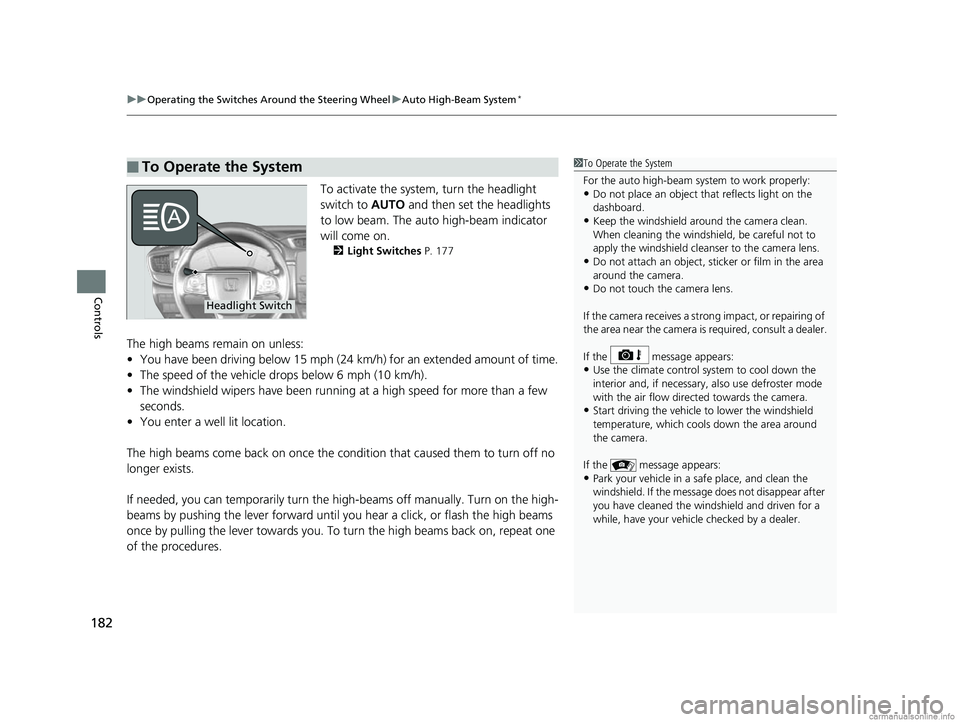
To activate the system, turn the headlight
switch to AUTO and then set the headlights
to low beam. The auto high-beam indicator
will come on.
2 Light Switches P. 177
The high beams remain on unless:
•You have been driving below 15 mph (24 km/h) for an extended amount of time.
• The speed of the vehicle drops below 6 mph (10 km/h).
• The windshield wipers have been running at a high speed for more than a few
seconds.
• You enter a well lit location.
The high beams come back on once the condition that caused them to turn off no
longer exists.
If needed, you can temporarily turn the high-beams off manually. Turn on the high-
beams by pushing the lever forward until yo u hear a click, or flash the high beams
once by pulling the lever towards you. To turn the high beams back on, repeat one
of the procedures.
■To Operate the System1 To Operate the System
For the auto high-beam system to work properly:
•Do not place an object that reflects light on the
dashboard.
•Keep the windshield around the camera clean.
When cleaning the windshield, be careful not to
apply the windshield cleanser to the camera lens.
•Do not attach an object, sticker or film in the area
around the camera.
•Do not touch the camera lens.
If the camera receives a st rong impact, or repairing of
the area near the camera is required, consult a dealer.
If the message appears:
•Use the climate control system to cool down the
interior and, if necessary, also use defroster mode
with the air flow directed towards the camera.
•Start driving the vehicle to lower the windshield
temperature, which cool s down the area around
the camera.
If the message appears:
•Park your vehicle in a sa fe place, and clean the
windshield. If the message does not disappear after
you have cleaned the winds hield and driven for a
while, have your vehicle checked by a dealer.
Headlight Switch
18 CR-V-31TLA6100.book 182 ページ 2017年9月7日 木曜日 午後3時56分
Page 191 of 679
189
uuOperating the Switches Around the Steering Wheel uBrightness Control
Controls
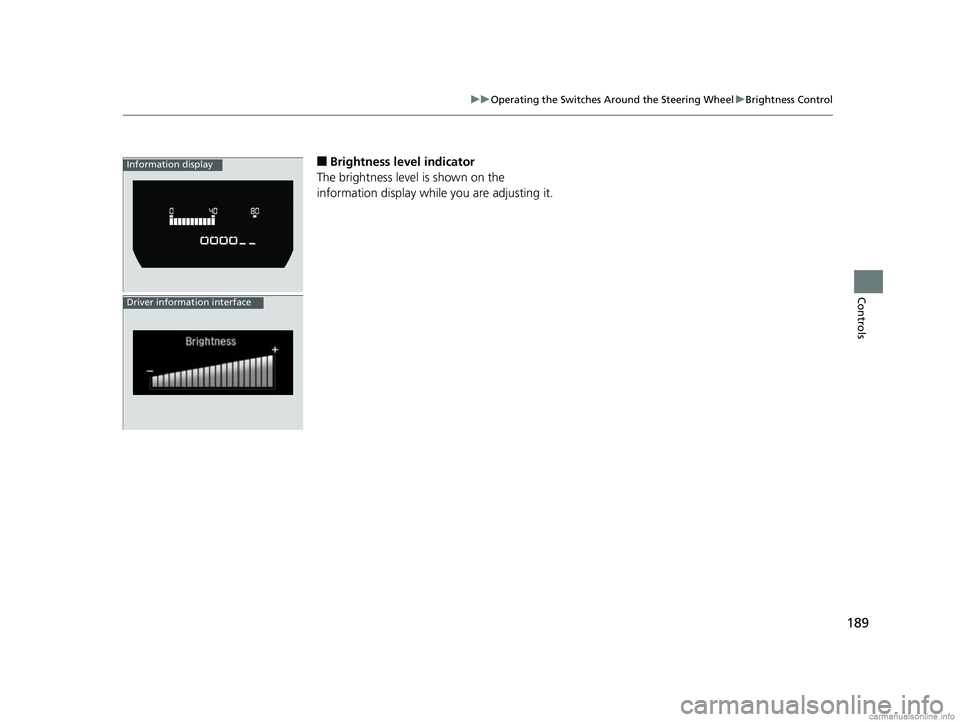
■Brightness level indicator
The brightness level is shown on the
information display whil e you are adjusting it.Information display
Driver information interface
18 CR-V-31TLA6100.book 189 ページ 2017年9月7日 木曜日 午後3時56分
Page 195 of 679
193
uuOperating the Switches Around the Steering Wheel uDriving Position Memory System*
Controls
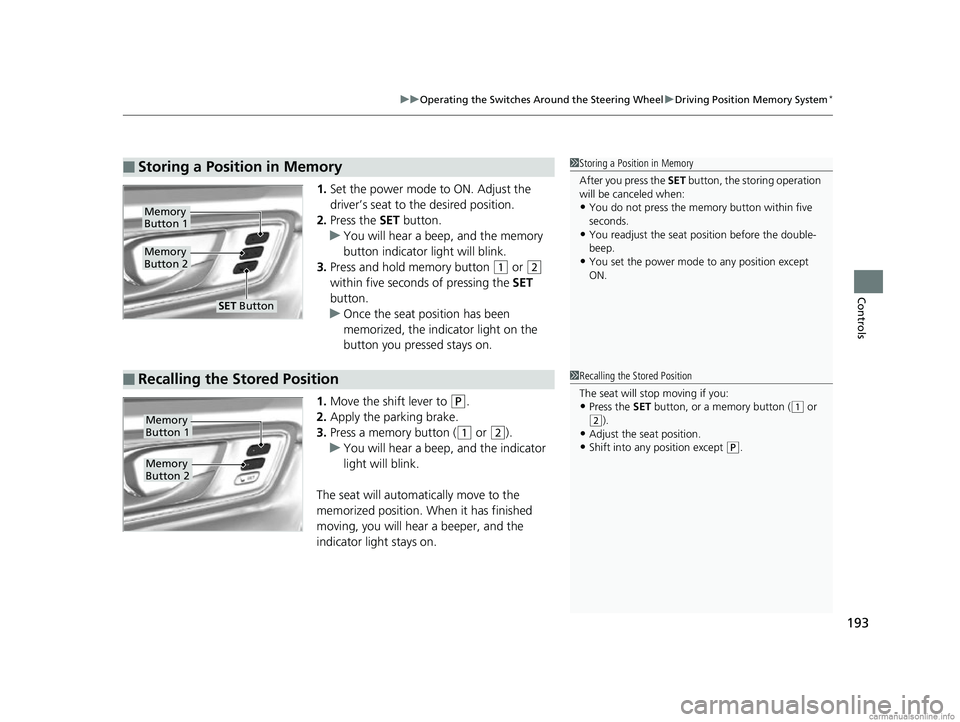
1. Set the power mode to ON. Adjust the
driver’s seat to the desired position.
2. Press the SET button.
u You will hear a beep, and the memory
button indicator light will blink.
3. Press and hold memory button
(1 or (2
within five seconds of pressing the SET
button.
u Once the seat position has been
memorized, the indicator light on the
button you pressed stays on.
1. Move the shift lever to
(P.
2. Apply the parking brake.
3. Press a memory button (
(1 or (2).
u You will hear a beep, and the indicator
light will blink.
The seat will automatically move to the
memorized position. When it has finished
moving, you will hear a beeper, and the
indicator light stays on.
■Storing a Position in Memory1 Storing a Position in Memory
After you press the SET button, the storing operation
will be canceled when:
•You do not press the memory button within five
seconds.
•You readjust the seat position before the double-
beep.
•You set the power mode to any position except
ON.
Memory
Button 1
Memory
Button 2
SET Button
■Recalling the Stored Position1 Recalling the Stored Position
The seat will st op moving if you:
•Press the SET button, or a memory button ((1 or
(2).
•Adjust the seat position.•Shift into any position except (P.
Memory
Button 1
Memory
Button 2
18 CR-V-31TLA6100.book 193 ページ 2017年9月7日 木曜日 午後3時56分
Page 196 of 679
194
uuOperating the Switches Around the Steering Wheel uAdjusting the Steering Wheel
Controls
Adjusting the Steering Wheel
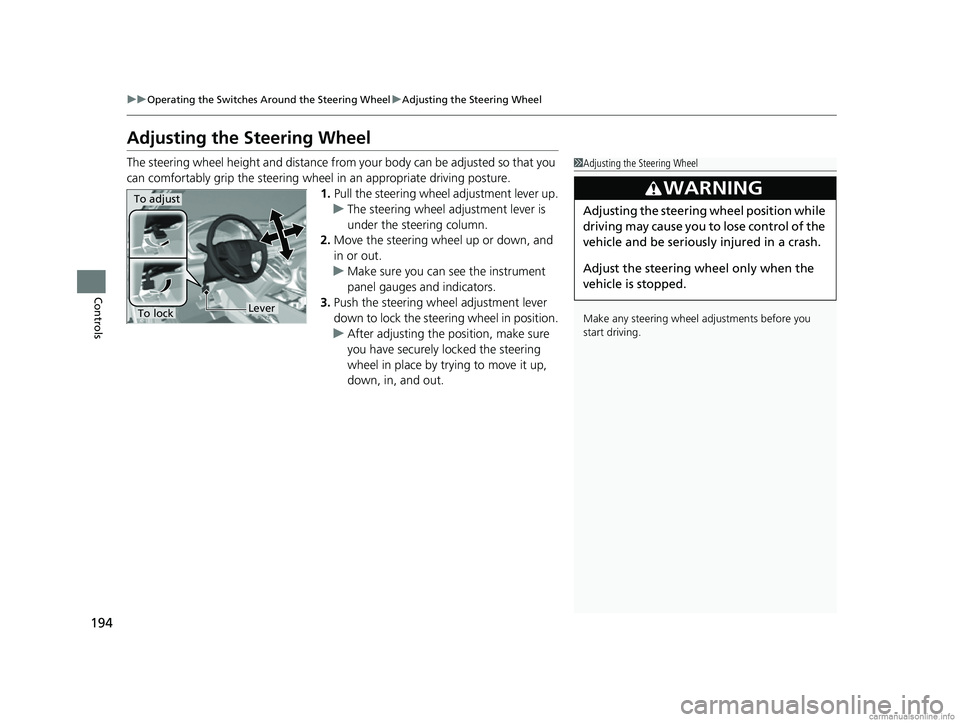
The steering wheel height and distance from your body can be adjusted so that you
can comfortably grip the steering wheel in an appropriate driving posture.
1.Pull the steering wheel adjustment lever up.
u The steering wheel adjustment lever is
under the steering column.
2. Move the steering wheel up or down, and
in or out.
u Make sure you can see the instrument
panel gauges and indicators.
3. Push the steering wheel adjustment lever
down to lock the steering wheel in position.
u After adjusting the position, make sure
you have securely locked the steering
wheel in place by trying to move it up,
down, in, and out.1Adjusting the Steering Wheel
Make any steering wheel adjustments before you
start driving.
3WARNING
Adjusting the steering wheel position while
driving may cause you to lose control of the
vehicle and be seriously injured in a crash.
Adjust the steering wheel only when the
vehicle is stopped.To adjust
To lockLever
18 CR-V-31TLA6100.book 194 ページ 2017年9月7日 木曜日 午後3時56分