engine HONDA CR-V 2020 (in English) Manual PDF
[x] Cancel search | Manufacturer: HONDA, Model Year: 2020, Model line: CR-V, Model: HONDA CR-V 2020Pages: 671, PDF Size: 33.11 MB
Page 191 of 671
189
uuOperating the Switches Around the Steering Wheel uBrightness Control
Continued
Controls
Brightness Control
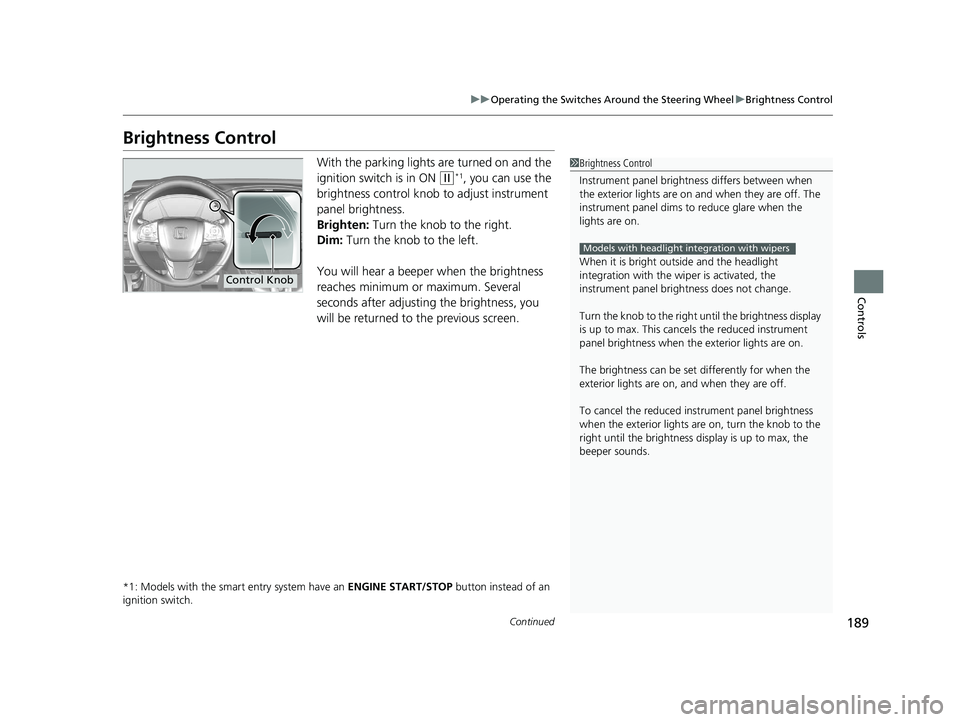
With the parking lights are turned on and the
ignition switch is in ON
(w*1, you can use the
brightness control knob to adjust instrument
panel brightness.
Brighten: Turn the knob to the right.
Dim: Turn the knob to the left.
You will hear a beeper when the brightness
reaches minimum or maximum. Several
seconds after adjusting the brightness, you
will be returned to the previous screen.
*1: Models with the smart entry system have an ENGINE START/STOP button instead of an
ignition switch.
1 Brightness Control
Instrument panel brightne ss differs between when
the exterior lights are on a nd when they are off. The
instrument panel dims to reduce glare when the
lights are on.
When it is bright out side and the headlight
integration with the wi per is activated, the
instrument panel bri ghtness does not change.
Turn the knob to the right until the brightness display
is up to max. This canc els the reduced instrument
panel brightness when the exterior lights are on.
The brightness can be set differently for when the
exterior lights are on, and when they are off.
To cancel the reduced in strument panel brightness
when the exterior lights are on, turn the knob to the
right until the brightness display is up to max, the
beeper sounds.
Models with headlight integration with wipers
Control Knob
20 CR-V PET ELP_MAP_HMIN_HCM_J-31TLA6310.book 189 ページ 2019年10月3日 木曜日 午後4時55分
Page 193 of 671
191
uuOperating the Switches Around the Steering Wheel uDefogger/Heated Door Mirror*
Continued
Controls
Defogger/Heated Door Mirror*
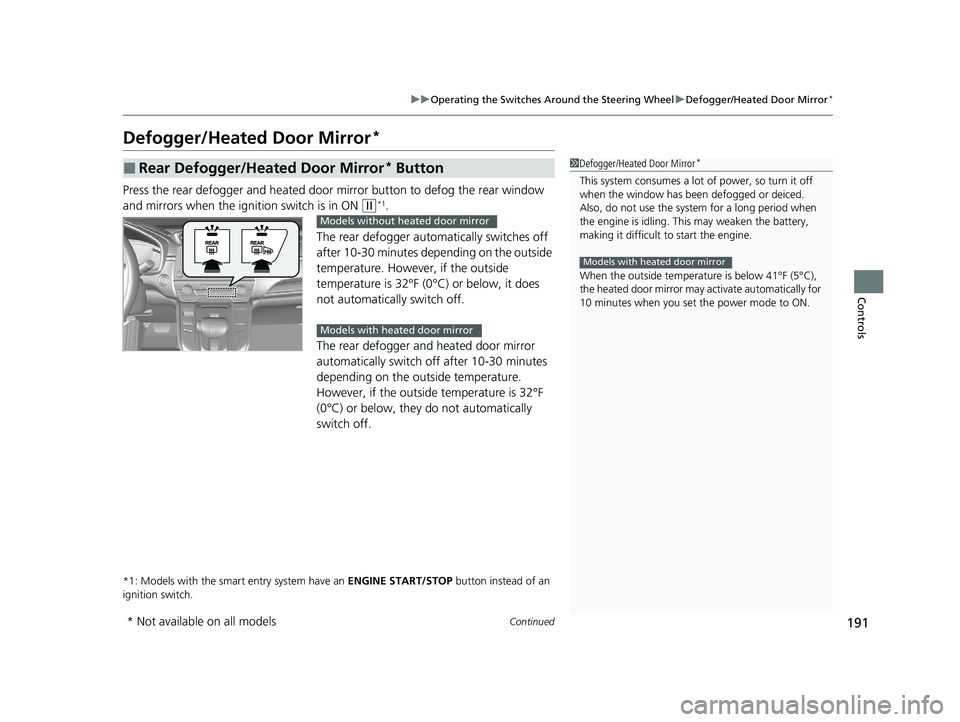
Press the rear defogger and heated door mirror button to defog the rear window
and mirrors when the ignition switch is in ON
(w*1.
The rear defogger automatically switches off
after 10-30 minutes depending on the outside
temperature. However, if the outside
temperature is 32°F (0°C) or below, it does
not automatically switch off.
The rear defogger and heated door mirror
automatically switch of f after 10-30 minutes
depending on the outside temperature.
However, if the outsid e temperature is 32°F
(0°C) or below, they do not automatically
switch off.
*1: Models with the smart entry system have an ENGINE START/STOP button instead of an
ignition switch.
■Rear Defogger/Heated Door Mirror* Button1 Defogger/Heated Door Mirror*
This system consumes a lot of power, so turn it off
when the window has been defogged or deiced.
Also, do not use the system for a long period when
the engine is idling. This may weaken the battery,
making it difficult to start the engine.
When the outside temperature is below 41°F (5°C),
the heated door mirror may activate automatically for
10 minutes when you set the power mode to ON.
Models with heated door mirror
Models without heated door mirror
Models with heated door mirror
* Not available on all models
20 CR-V PET ELP_MAP_HMIN_HCM_J-31TLA6310.book 191 ページ 2019年10月3日 木曜日 午後4時55分
Page 194 of 671
uuOperating the Switches Around the Steering Wheel uDefogger/Heated Door Mirror*
192
Controls
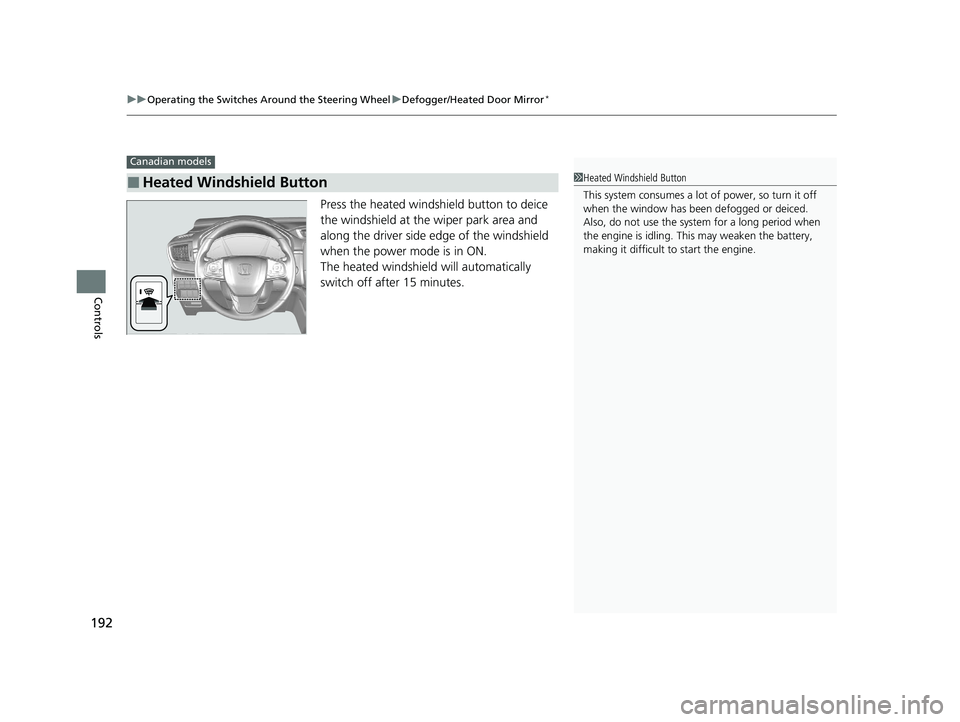
Press the heated windshield button to deice
the windshield at the wiper park area and
along the driver side edge of the windshield
when the power mode is in ON.
The heated windshield will automatically
switch off after 15 minutes.
■Heated Windshield Button
Canadian models
1Heated Windshield Button
This system consumes a lot of power, so turn it off
when the window has been defogged or deiced.
Also, do not use the system for a long period when
the engine is idling. This may weaken the battery,
making it difficult to start the engine.
20 CR-V PET ELP_MAP_HMIN_HCM_J-31TLA6310.book 192 ページ 2019年10月3日 木曜日 午後4時55分
Page 199 of 671
197
uuAdjusting the Mirrors uPower Door Mirrors
Controls
Power Door Mirrors
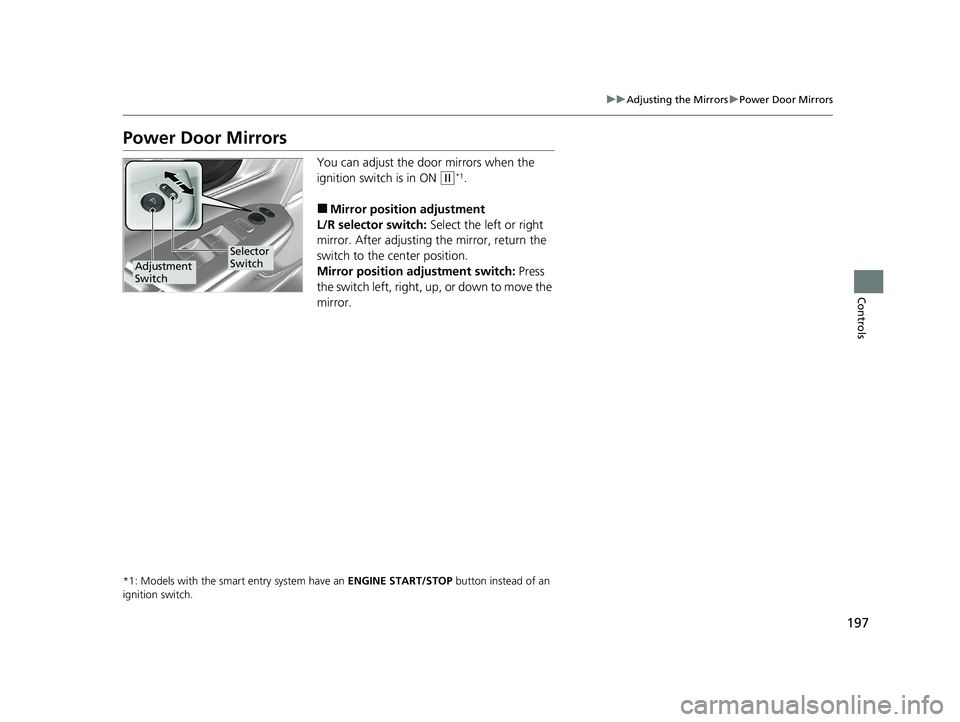
You can adjust the door mirrors when the
ignition switch is in ON
(w*1.
■Mirror position adjustment
L/R selector switch: Select the left or right
mirror. After adjusting the mirror, return the
switch to the center position.
Mirror positi on adjustment switch: Press
the switch left, right, up, or down to move the
mirror.
*1: Models with the smart entry system have an ENGINE START/STOP button instead of an
ignition switch.
Selector
Switch
Adjustment
Switch
20 CR-V PET ELP_MAP_HMIN_HCM_J-31TLA6310.book 197 ページ 2019年10月3日 木曜日 午後4時55分
Page 208 of 671
206
uuAdjusting the Seats uMaintain a Proper Sitting Position
Controls
Maintain a Proper Sitting Position
After all occupants have adjusted their seats and head restraints, and put on their
seat belts, it is very important that they continue to sit upright, well back in their
seats, with their feet on the floor, until the vehicle is safely parked and the engine is
off.
Sitting improperly can increase the chance of injury during a crash. For example, if
an occupant slouches, lies down, turns si deways, sits forward, leans forward or
sideways, or puts one or both feet up, the chance of injury during a crash is greatly
increased.
In addition, an occupant who is out of position in the front seat can be seriously or
fatally injured in a crash by striking interior parts of the vehicle or being struck by an
inflating front airbag.1 Maintain a Proper Sitting Position
3WARNING
Sitting improperly or out of position can
result in serious injury or death in a crash.
Always sit upright, well back in the seat,
with your feet on the floor.
20 CR-V PET ELP_MAP_HMIN_HCM_J-31TLA6310.book 206 ページ 2019年10月3日 木曜日 午後4時55分
Page 211 of 671
Continued209
uuInterior Lights/Interior Convenience Items uInterior Lights
Controls
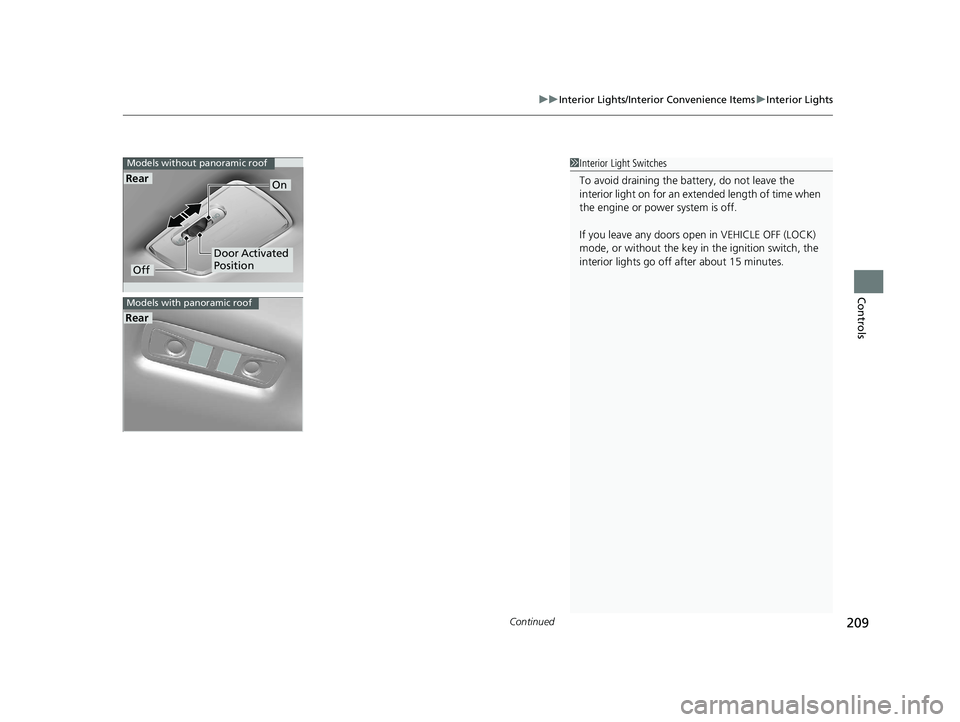
1Interior Light Switches
To avoid draining the ba ttery, do not leave the
interior light on for an extended length of time when
the engine or power system is off.
If you leave any doors open in VEHICLE OFF (LOCK)
mode, or without the key in the ignition switch, the
interior lights go off after about 15 minutes.
Rear
Models without panoramic roof
Off
On
Door Activated
Position
Rear
Models with panoramic roof
20 CR-V PET ELP_MAP_HMIN_HCM_J-31TLA6310.book 209 ページ 2019年10月3日 木曜日 午後4時55分
Page 219 of 671
Continued217
uuInterior Lights/Interior Convenience Items uInterior Convenience Items
Controls
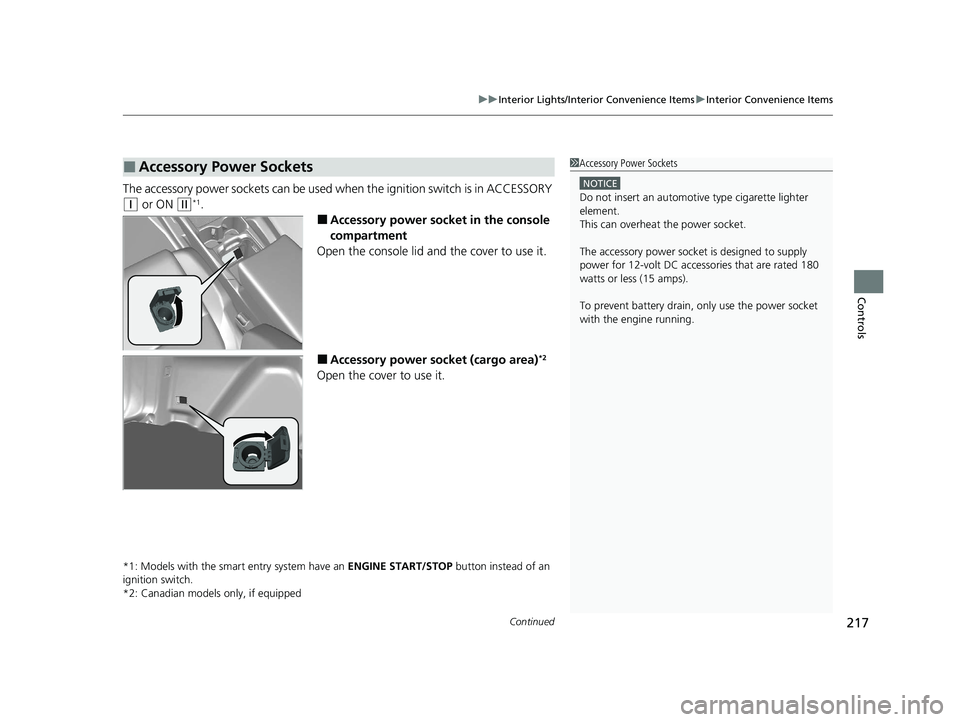
The accessory power sockets can be used wh en the ignition switch is in ACCESSORY
(q or ON (w*1.
■Accessory power socket in the console
compartment
Open the console lid and the cover to use it.
■Accessory power socket (cargo area)*2
Open the cover to use it.
*1: Models with the smart entry system have an ENGINE START/STOP button instead of an
ignition switch.
*2: Canadian models only, if equipped
■Accessory Power Sockets1 Accessory Power Sockets
NOTICE
Do not insert an automotive type cigarette lighter
element.
This can overheat the power socket.
The accessory power socket is designed to supply
power for 12-volt DC accessories that are rated 180
watts or less (15 amps).
To prevent battery drain, only use the power socket
with the engine running.
20 CR-V PET ELP_MAP_HMIN_HCM_J-31TLA6310.book 217 ページ 2019年10月3日 木曜日 午後4時55分
Page 220 of 671
uuInterior Lights/Interior Convenience Items uInterior Convenience Items
218
Controls
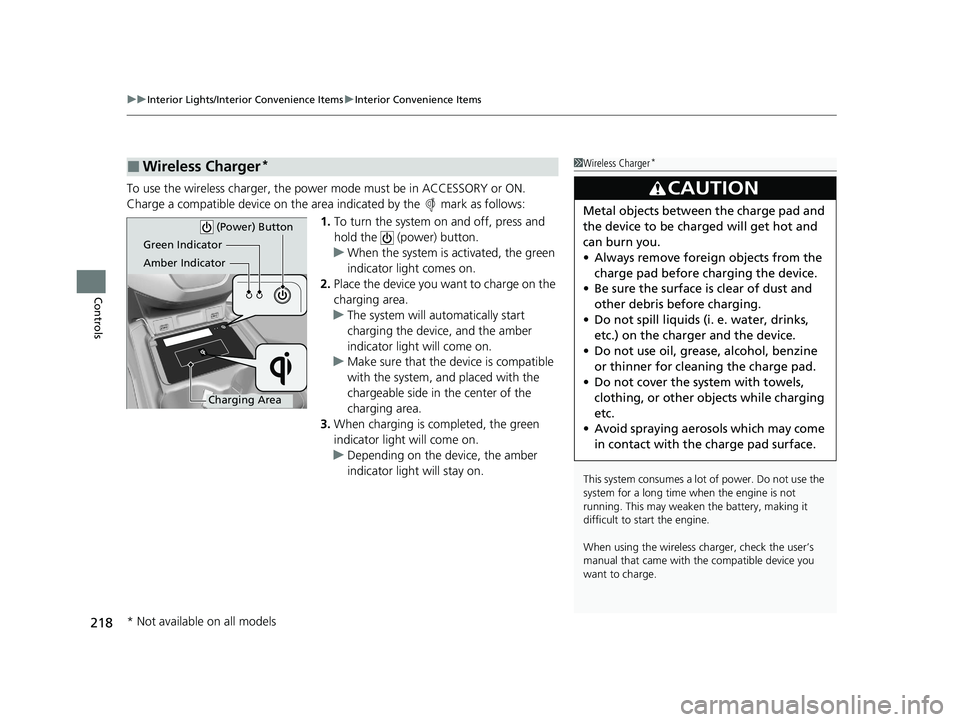
To use the wireless charger, the powe r mode must be in ACCESSORY or ON.
Charge a compatible device on the ar ea indicated by the mark as follows:
1. To turn the system on and off, press and
hold the (power) button.
u When the system is activated, the green
indicator light comes on.
2. Place the device you want to charge on the
charging area.
u The system will automatically start
charging the device, and the amber
indicator light will come on.
u Make sure that the device is compatible
with the system, a nd placed with the
chargeable side in the center of the
charging area.
3. When charging is completed, the green
indicator light will come on.
u Depending on the device, the amber
indicator light will stay on.
■Wireless Charger*1Wireless Charger*
This system consumes a lot of power. Do not use the
system for a long time when the engine is not
running. This may weaken the battery, making it
difficult to start the engine.
When using the wireless charger, check the user’s
manual that came with th e compatible device you
want to charge.
3CAUTION
Metal objects between the charge pad and
the device to be charged will get hot and
can burn you.
• Always remove foreign objects from the
charge pad before charging the device.
• Be sure the surface is clear of dust and
other debris before charging.
• Do not spill liquids (i. e. water, drinks,
etc.) on the charger and the device.
• Do not use oil, grease, alcohol, benzine
or thinner for cleaning the charge pad.
• Do not cover the system with towels,
clothing, or other objects while charging
etc.
• Avoid spraying aerosols which may come
in contact with the charge pad surface.
Green Indicator
Amber Indicator
Charging Area (Power) Button
* Not available on all models
20 CR-V PET ELP_MAP_HMIN_HCM_J-31TLA6310.book 218 ページ 2019年10月3日 木曜日 午後4時55分
Page 226 of 671
uuInterior Lights/Interior Convenience Items uInterior Convenience Items
224
Controls
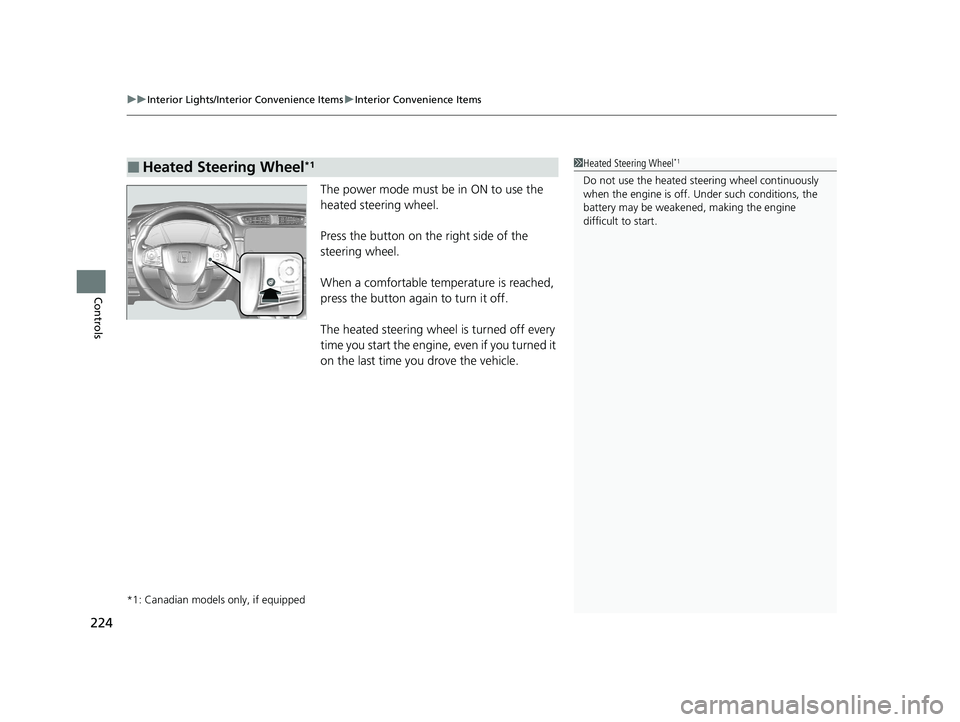
The power mode must be in ON to use the
heated steering wheel.
Press the button on the right side of the
steering wheel.
When a comfortable temperature is reached,
press the button again to turn it off.
The heated steering wheel is turned off every
time you start the engine, even if you turned it
on the last time you drove the vehicle.
*1: Canadian models only, if equipped
■Heated Steering Wheel*11Heated Steering Wheel*1
Do not use the heated st eering wheel continuously
when the engine is off. Under such conditions, the
battery may be weaken ed, making the engine
difficult to start.
20 CR-V PET ELP_MAP_HMIN_HCM_J-31TLA6310.book 224 ページ 2019年10月3日 木曜日 午後4時55分
Page 227 of 671
Continued225
uuInterior Lights/Interior Convenience Items uInterior Convenience Items
Controls
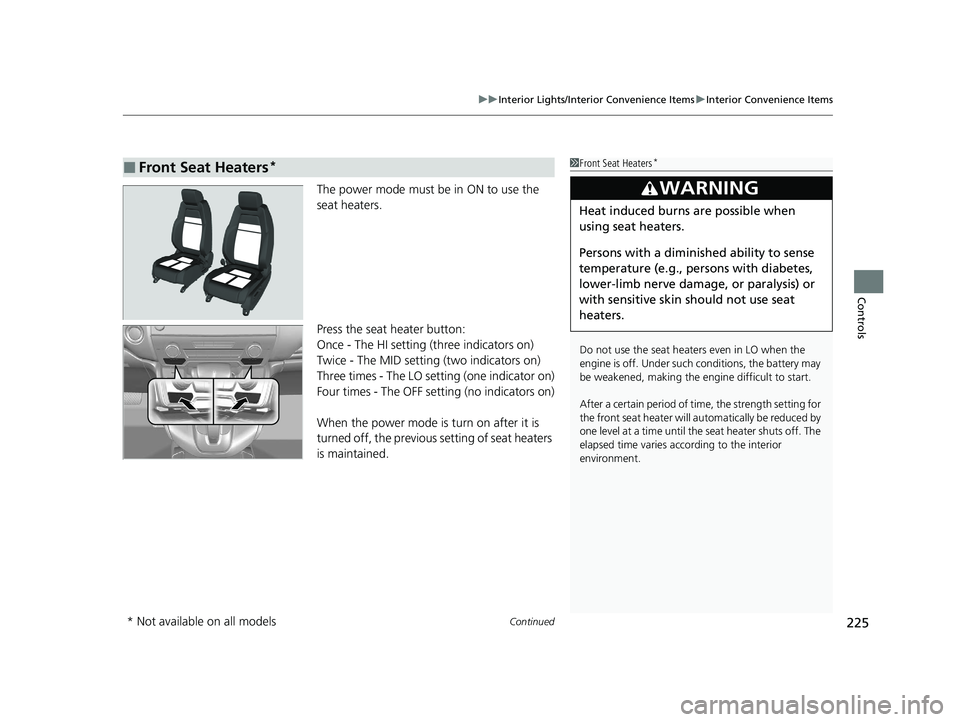
The power mode must be in ON to use the
seat heaters.
Press the seat heater button:
Once - The HI setting (three indicators on)
Twice - The MID setting (two indicators on)
Three times - The LO setting (one indicator on)
Four times - The OFF setting (no indicators on)
When the power mode is turn on after it is
turned off, the previous setting of seat heaters
is maintained.
■Front Seat Heaters*1Front Seat Heaters*
Do not use the seat heaters even in LO when the
engine is off. Under such conditions, the battery may
be weakened, making the engine difficult to start.
After a certain period of time, the strength setting for
the front seat heater will automatically be reduced by
one level at a time until the seat heater shuts off. The
elapsed time varies according to the interior
environment.
3WARNING
Heat induced burns are possible when
using seat heaters.
Persons with a diminished ability to sense
temperature (e.g., persons with diabetes,
lower-limb nerve damage, or paralysis) or
with sensitive skin should not use seat
heaters.
* Not available on all models
20 CR-V PET ELP_MAP_HMIN_HCM_J-31TLA6310.book 225 ページ 2019年10月3日 木曜日 午後4時55分