check engine HONDA CR-V 2021 (in English) Owner's Guide
[x] Cancel search | Manufacturer: HONDA, Model Year: 2021, Model line: CR-V, Model: HONDA CR-V 2021Pages: 690, PDF Size: 42.09 MB
Page 586 of 690
585
uuMaintenance Under the Hood uOpening the Hood
Maintenance
Opening the Hood
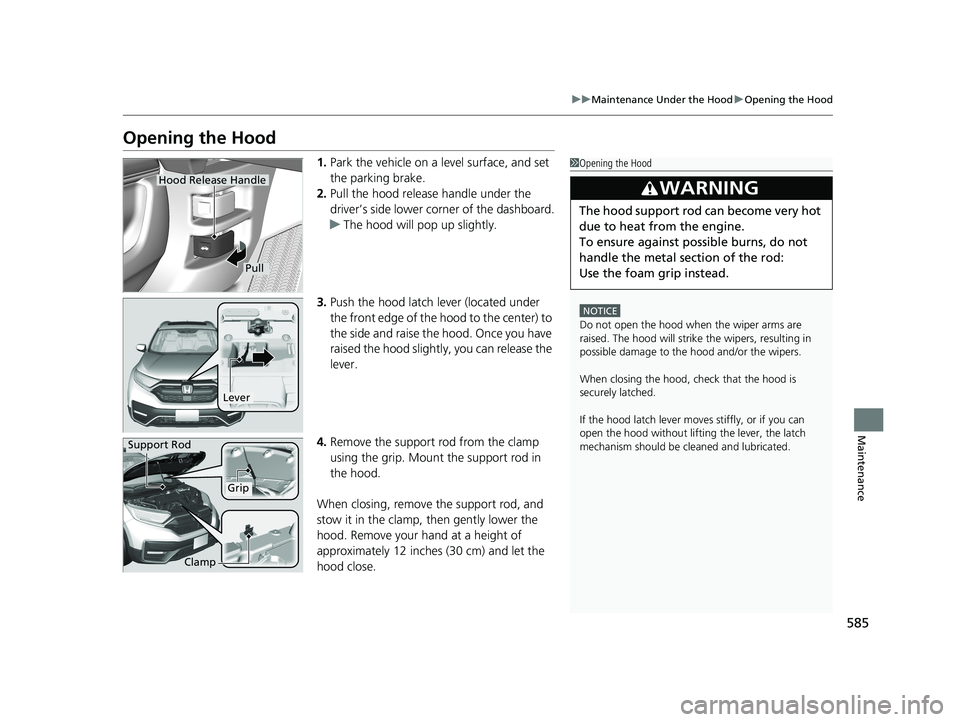
1. Park the vehicle on a level surface, and set
the parking brake.
2. Pull the hood release handle under the
driver’s side lower corner of the dashboard.
u The hood will pop up slightly.
3. Push the hood latch lever (located under
the front edge of the hood to the center) to
the side and raise the hood. Once you have
raised the hood slightly, you can release the
lever.
4. Remove the support rod from the clamp
using the grip. Mount the support rod in
the hood.
When closing, remove the support rod, and
stow it in the clamp, then gently lower the
hood. Remove your hand at a height of
approximately 12 inches (30 cm) and let the
hood close.1 Opening the Hood
NOTICE
Do not open the hood when the wiper arms are
raised. The hood will strike the wipers, resulting in
possible damage to the hood and/or the wipers.
When closing the hood, check that the hood is
securely latched.
If the hood latch lever moves stiffly, or if you can
open the hood without lifti ng the lever, the latch
mechanism should be cl eaned and lubricated.
3WARNING
The hood support rod can become very hot
due to heat from the engine.
To ensure against po ssible burns, do not
handle the metal section of the rod:
Use the foam grip instead.
Hood Release Handle
Pull
Lever
Support Rod
Grip
Clamp
21 CR-V HYBRID HMIN-31TPG6100.book 585 ページ 2020年9月14日 月曜日 午前11時36分
Page 588 of 690
587
uuMaintenance Under the Hood uOil Check
Maintenance
Oil Check
We recommend that you check the engine oil level every time you refuel.
Park the vehicle on level ground.
Turn off the power system. You can check the oil level without the engine having
run beforehand. If the engine has been ru nning, wait approximately three minutes
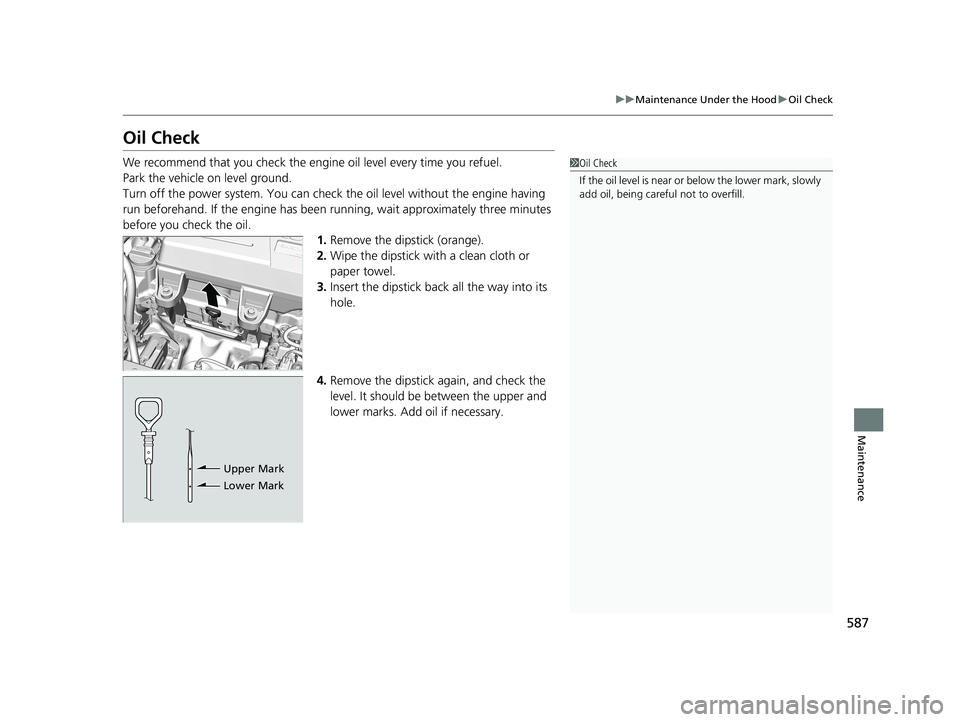
before you check the oil. 1.Remove the dipstick (orange).
2. Wipe the dipstick with a clean cloth or
paper towel.
3. Insert the dipstick back all the way into its
hole.
4. Remove the dipstick again, and check the
level. It should be between the upper and
lower marks. Add oil if necessary.1Oil Check
If the oil level is near or below the lower mark, slowly
add oil, being carefu l not to overfill.
Upper Mark
Lower Mark
21 CR-V HYBRID HMIN-31TPG6100.book 587 ページ 2020年9月14日 月曜日 午前11時36分
Page 589 of 690
588
uuMaintenance Under the Hood uAdding Engine Oil
Maintenance
Adding Engine Oil
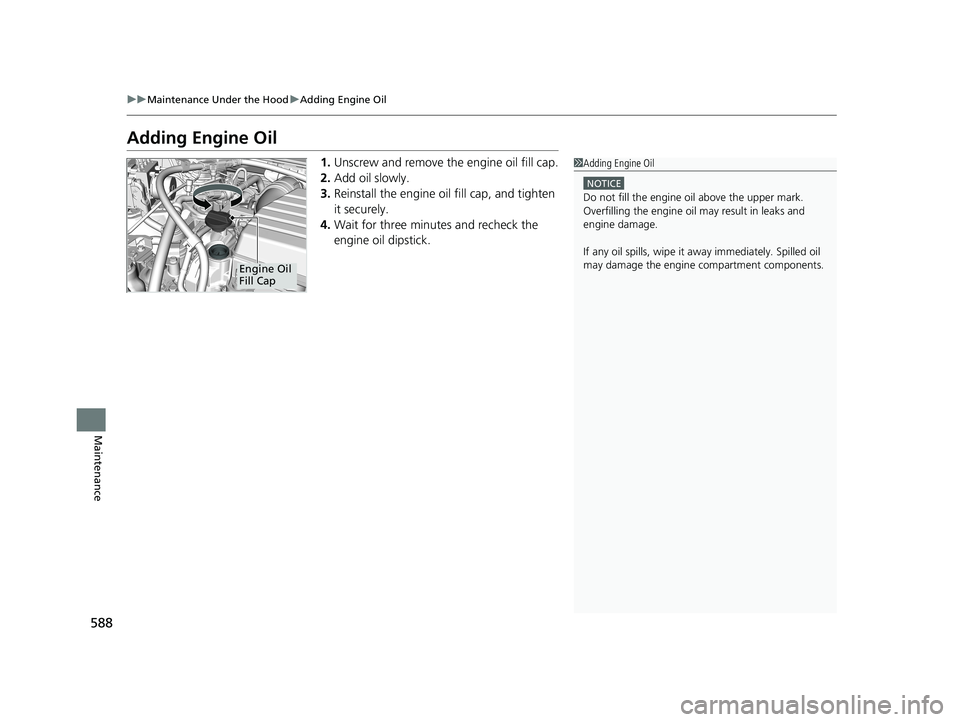
1. Unscrew and remove the engine oil fill cap.
2. Add oil slowly.
3. Reinstall the engine oil fill cap, and tighten
it securely.
4. Wait for three minutes and recheck the
engine oil dipstick.1Adding Engine Oil
NOTICE
Do not fill the engine oil above the upper mark.
Overfilling the engine oil may result in leaks and
engine damage.
If any oil spills, wipe it away immediately. Spilled oil
may damage the engine compartment components.
Engine Oil
Fill Cap
21 CR-V HYBRID HMIN-31TPG6100.book 588 ページ 2020年9月14日 月曜日 午前11時36分
Page 591 of 690
uuMaintenance Under the Hood uChanging the Engine Oil and Oil Filter
590
Maintenance
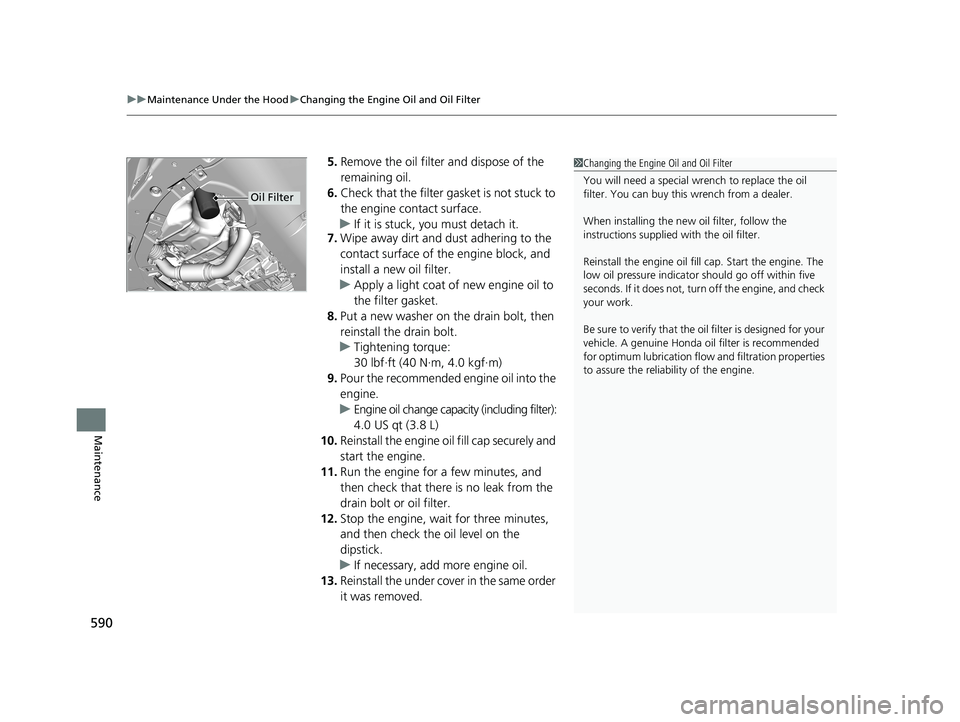
5. Remove the oil filter and dispose of the
remaining oil.
6. Check that the filter ga sket is not stuck to
the engine contact surface.
u If it is stuck, you must detach it.
7. Wipe away dirt and dust adhering to the
contact surface of the engine block, and
install a new oil filter.
u Apply a light coat of new engine oil to
the filter gasket.
8. Put a new washer on the drain bolt, then
reinstall the drain bolt.
u Tightening torque:
30 lbf∙ft (40 N∙m, 4.0 kgf∙m)
9. Pour the recommended engine oil into the
engine.
u Engine oil change capacity (including filter):
4.0 US qt (3.8 L)
10. Reinstall the engine oi l fill cap securely and
start the engine.
11. Run the engine for a few minutes, and
then check that there is no leak from the
drain bolt or oil filter.
12. Stop the engine, wait for three minutes,
and then check the oil level on the
dipstick.
u If necessary, add more engine oil.
13. Reinstall the under cover in the same order
it was removed.1Changing the Engine Oil and Oil Filter
You will need a special wrench to replace the oil
filter. You can buy this wrench from a dealer.
When installing the new oil filter, follow the
instructions supplied with the oil filter.
Reinstall the engine oil fill cap. Start the engine. The
low oil pressure indicator should go off within five
seconds. If it does not, turn off the engine, and check
your work.
Be sure to verify that the o il filter is designed for your
vehicle. A genuine Honda oil filter is recommended
for optimum lubrication flow and filtration properties
to assure the reliability of the engine.
Oil Filter
21 CR-V HYBRID HMIN-31TPG6100.book 590 ページ 2020年9月14日 月曜日 午前11時36分
Page 592 of 690
591
uuMaintenance Under the Hood uCooling System
Continued
Maintenance
Cooling System
This coolant is premixed with 50% an tifreeze and 50% water. Do not add any
straight antifreeze or water.
We recommend you check the engine coolant level every time you refuel. Check the
reserve tank first. If it is completely empty, also check the coolant level in the
radiator. Add the engine coolant accordingly.
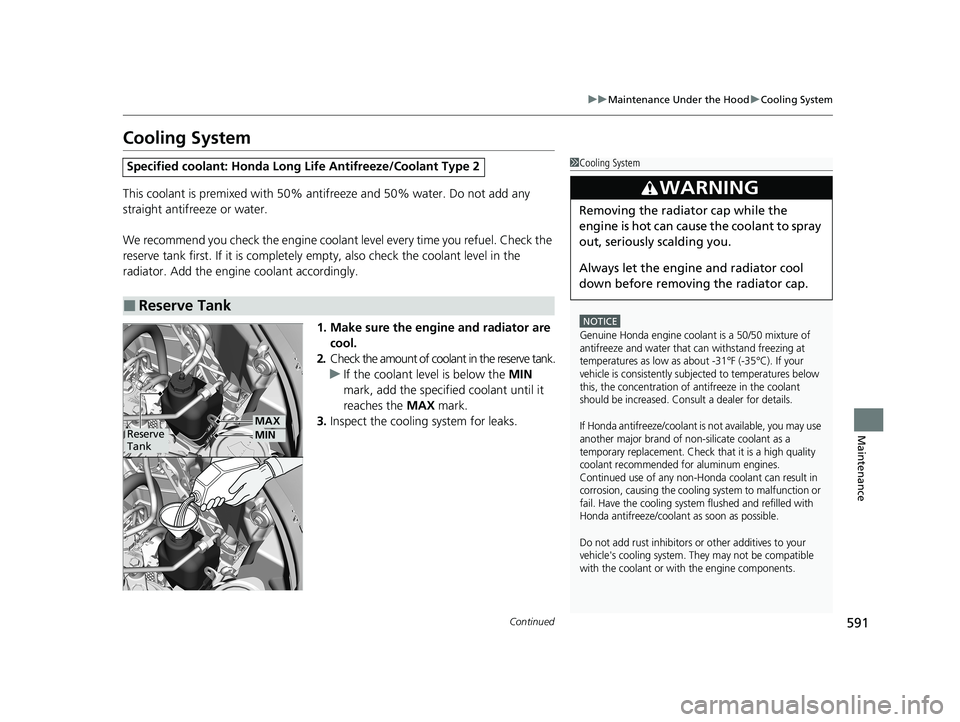
1. Make sure the engine and radiator are cool.
2. Check the amount of cool ant in the reserve tank.
u If the coolant level is below the MIN
mark, add the specified coolant until it
reaches the MAX mark.
3. Inspect the cooling system for leaks.
Specified coolant: Ho nda Long Life Antifreeze/Coolant Type 2
■Reserve Tank
1Cooling System
NOTICE
Genuine Honda engine coolant is a 50/50 mixture of
antifreeze and water that can withstand freezing at
temperatures as low as about -31°F (-35°C). If your
vehicle is consistently subjected to temperatures below
this, the concentration of antifreeze in the coolant
should be increased. Consult a dealer for details.
If Honda antifreeze/coolant is not available, you may use
another major brand of non-silicate coolant as a
temporary replacement. Check that it is a high quality
coolant recommended for aluminum engines.
Continued use of any non-Honda coolant can result in
corrosion, causing the cooling system to malfunction or
fail. Have the cooling system flushed and refilled with
Honda antifreeze/coolant as soon as possible.
Do not add rust inhibitors or other additives to your
vehicle's cooling system. They may not be compatible
with the coolant or with the engine components.
3WARNING
Removing the radiator cap while the
engine is hot can cause the coolant to spray
out, seriously scalding you.
Always let the engine and radiator cool
down before removing the radiator cap.
Reserve
TankMAX
MIN
21 CR-V HYBRID HMIN-31TPG6100.book 591 ページ 2020年9月14日 月曜日 午前11時36分
Page 596 of 690
595
uuMaintenance Under the Hood uRefilling Window Washer Fluid
Maintenance
Refilling Window Washer Fluid
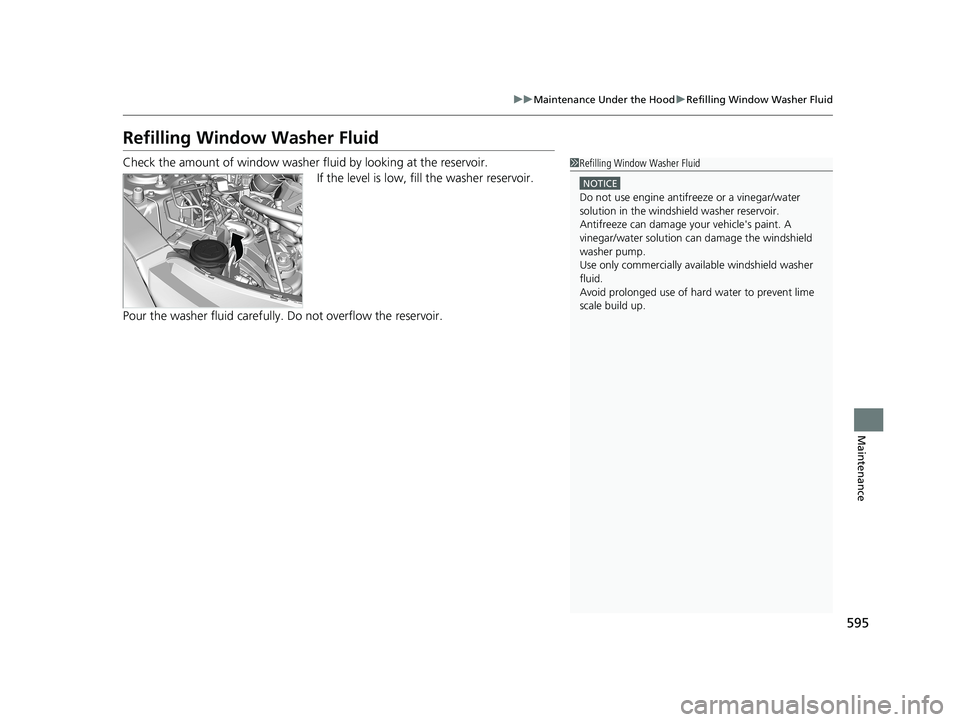
Check the amount of window washer fluid by looking at the reservoir.
If the level is low, fill the washer reservoir.
Pour the washer fluid carefully. Do not overflow the reservoir.1Refilling Window Washer Fluid
NOTICE
Do not use engine antifreeze or a vinegar/water
solution in the windshield washer reservoir.
Antifreeze can damage y our vehicle's paint. A
vinegar/water solution ca n damage the windshield
washer pump.
Use only commercially avai lable windshield washer
fluid.
Avoid prolonged use of hard water to prevent lime
scale build up.
21 CR-V HYBRID HMIN-31TPG6100.book 595 ページ 2020年9月14日 月曜日 午前11時36分
Page 623 of 690
622
Maintenance
Accessories and Modifications
Accessories
When installing accessories, check the following:
• Do not install accessories on the windshield. They can obstruct your view and
delay your reaction to driving conditions.
• Do not install any accessories over areas marked SRS Airbag, on the sides or backs
of the front seats, on front or side pillars, or near the side windows.
Accessories installed in these areas may interfere with proper operation of the
vehicle’s airbags or may be propelled into you or another occupant if the airbags
deploy.
• Be sure electronic accessories do not over load electrical circuits or interfere with
proper operation of your vehicle.
2 Fuses P. 657
•Before installing any electron ic accessory, have the installer contact a dealer for
assistance. If possible, have a d ealer inspect the final installation.
1Accessories and Modifications
Honda Genuine accessor ies are recommended to
ensure proper operati on on your vehicle.
3WARNING
Improper accessories or modifications can
affect your vehicle's handling, stability, and
performance, and cause a crash in which
you can be seriously hurt or killed.
Follow all instruction s in this owner's
manual regarding accessories and
modifications.
3WARNING
Use of improperly designed, engineered or
manufactured high-voltage battery
assemblies could cause a fire in your
vehicle.
A vehicle fire could result in a crash or
injury.
Only use a genuine Honda high-voltage
battery assembly, or it s equivalent, in your
vehicle.
21 CR-V HYBRID HMIN-31TPG6100.book 622 ページ 2020年9月14日 月曜日 午前11時36分
Page 635 of 690
uuIf a Tire Goes Flat uTemporarily Repairing a Flat Tire
634
Handling the Unexpected
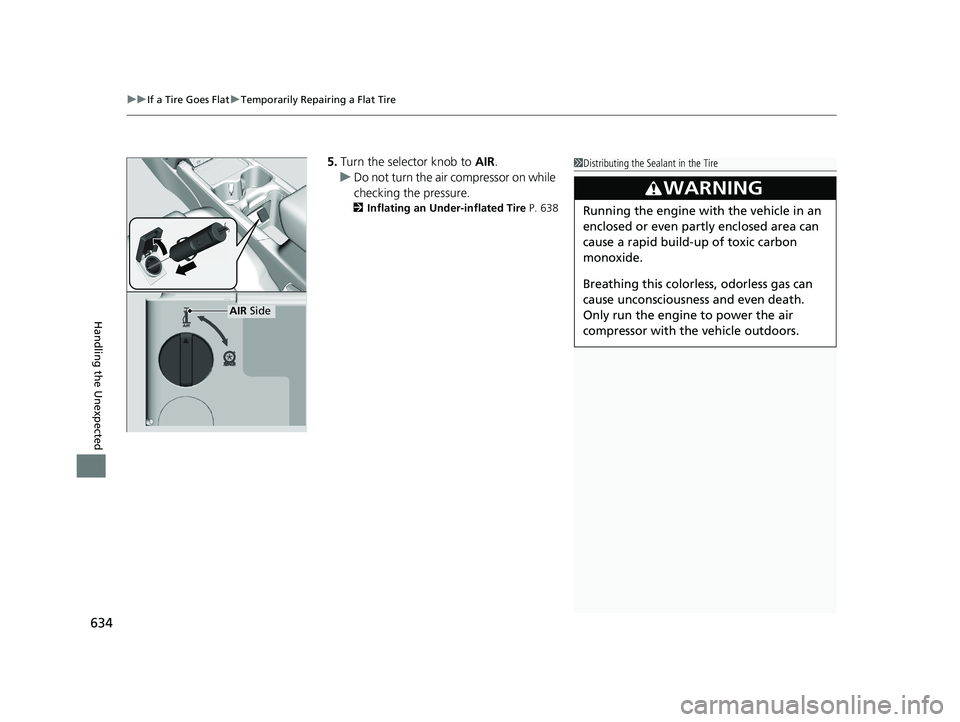
5. Turn the selector knob to AIR.
u Do not turn the air compressor on while
checking the pressure.
2 Inflating an Under-inflated Tire P. 638
1Distributing the Sealant in the Tire
3WARNING
Running the engine with the vehicle in an
enclosed or even partly enclosed area can
cause a rapid build-up of toxic carbon
monoxide.
Breathing this colorless, odorless gas can
cause unconsciousness and even death.
Only run the engine to power the air
compressor with th e vehicle outdoors.
AIR Side
21 CR-V HYBRID HMIN-31TPG6100.book 634 ページ 2020年9月14日 月曜日 午前11時36分
Page 646 of 690
645Continued
Handling the Unexpected
If the 12-Volt Battery Is Dead
Turn off the power to electric devices, such as audio and lights. Turn off the power
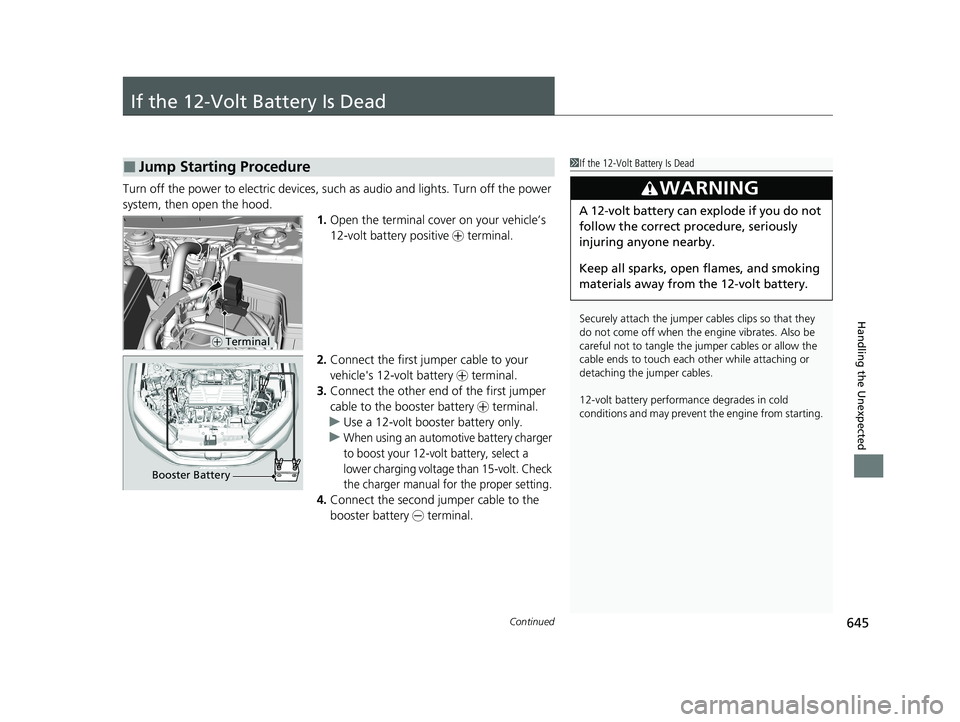
system, then open the hood. 1.Open the terminal cover on your vehicle’s
12-volt battery positive + terminal.
2. Connect the first jumper cable to your
vehicle's 12-volt battery + terminal.
3. Connect the other end of the first jumper
cable to the booster battery + terminal.
u Use a 12-volt booster battery only.
u
When using an automotive battery charger
to boost your 12-volt battery, select a
lower charging voltage than 15-volt. Check
the charger manual for the proper setting.
4. Connect the second jumper cable to the
booster battery - terminal.
■Jump Starting Procedure1If the 12-Volt Battery Is Dead
Securely attach the jumper cables clips so that they
do not come off when the e ngine vibrates. Also be
careful not to tangle the ju mper cables or allow the
cable ends to touch each other while attaching or
detaching the jumper cables.
12-volt battery performa nce degrades in cold
conditions and may prevent the engine from starting.
3WARNING
A 12-volt battery can explode if you do not
follow the correct procedure, seriously
injuring anyone nearby.
Keep all sparks, open flames, and smoking
materials away from the 12-volt battery.
+ Terminal
Booster Battery
21 CR-V HYBRID HMIN-31TPG6100.book 645 ページ 2020年9月14日 月曜日 午前11時36分
Page 647 of 690
uuIf the 12-Volt Battery Is Dead u
646
Handling the Unexpected
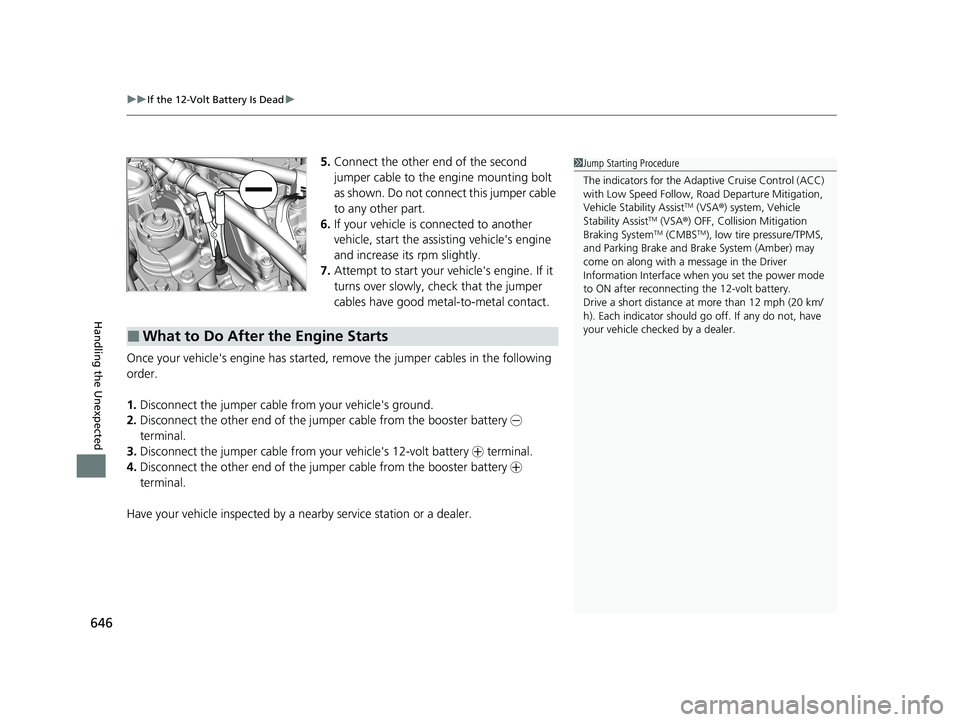
5.Connect the other end of the second
jumper cable to the engine mounting bolt
as shown. Do not connect this jumper cable
to any other part.
6. If your vehicle is connected to another
vehicle, start the assisting vehicle's engine
and increase its rpm slightly.
7. Attempt to start your vehicle's engine. If it
turns over slowly, check that the jumper
cables have good metal-to-metal contact.
Once your vehicle's engine has started, re move the jumper cables in the following
order.
1. Disconnect the jumper cable from your vehicle's ground.
2. Disconnect the other end of the jumper cable from the booster battery -
terminal.
3. Disconnect the jumper cable from your vehicle's 12-volt battery + terminal.
4. Disconnect the other end of the jumper cable from the booster battery +
terminal.
Have your vehicle inspected by a n earby service station or a dealer.
■What to Do After the Engine Starts
1Jump Starting Procedure
The indicators for the Adaptive Cruise Control (ACC)
with Low Speed Follow, Roa d Departure Mitigation,
Vehicle Stability Assist
TM (VSA ®) system, Vehicle
Stability AssistTM (VSA ®) OFF, Collision Mitigation
Braking SystemTM (CMBSTM), low tire pressure/TPMS,
and Parking Brake and Br ake System (Amber) may
come on along with a message in the Driver
Information Interface when you set the power mode
to ON after reconnecting the 12-volt battery.
Drive a short distance at more than 12 mph (20 km/
h). Each indicator should go off. If any do not, have
your vehicle checked by a dealer.
21 CR-V HYBRID HMIN-31TPG6100.book 646 ページ 2020年9月14日 月曜日 午前11時36分