door lock HONDA CR-Z 2012 1.G Owners Manual
[x] Cancel search | Manufacturer: HONDA, Model Year: 2012, Model line: CR-Z, Model: HONDA CR-Z 2012 1.GPages: 333, PDF Size: 10.43 MB
Page 1 of 333
Contents
This owner’s manual should be considered a permanent part of the
vehicle and should remain with the vehicle when it is sold.
This owner’s manual covers all models of your vehicle. You may find
descriptions of equipment and features that are not on your
particular model.
Images throughout this owner’s manual (including the front cover)
represent features and equipment that are available on some, but
not all, models. Your particular model may not have some of these features.
This owner's manual is for vehicles sold in the United States and Canada.
The information and specifications included in this publication were
in effect at the time of approval for printing. Honda Motor Co., Ltd.
reserves the right, however, to discontinue or change specifications
or design at any time without notice and without incurring any
obligation.2 Safe Driving P. 29
For Safe Driving P. 30 Seat Belts P. 34 Airbags P. 41
2Instrument Panel P. 67
Indicators P. 68 Gauges and Multi-Information Display P. 81
2Controls P. 97
Setting the Clock P. 98 Locking and Unlocking the Doors P. 99
Operating the Switches Around the Steering Wheel P. 109
Interior Lights/Interior Convenience Items P. 124
2Features P. 135
Audio System P. 136 Audio without Navigation System P. 141
General Information on the Audio System P. 169
2Driving P. 191
Before Driving P. 192 Towing a Trailer P. 197
Refueling P. 232 Fuel Economy P. 235
2Maintenance P. 237
Before Performing Maintenance P. 238 Maintenance Minder ™
P. 241
Checking and Maintaining Wiper Blades P. 266
Climate Control System Maintenance P. 280
2 Handling the Unexpected P. 285
Tools P. 286 If a Tire Goes Flat P. 287
Overheating P. 297 Indicator, Coming On/Blinking P. 299
2Information P. 311
Specifications P. 312 Identification Numbers P. 314
Emissions Testing P. 317 Warranty Coverages P. 319
Main Menu2012 CR-Z Online Reference Owner's Manual
Page 5 of 333
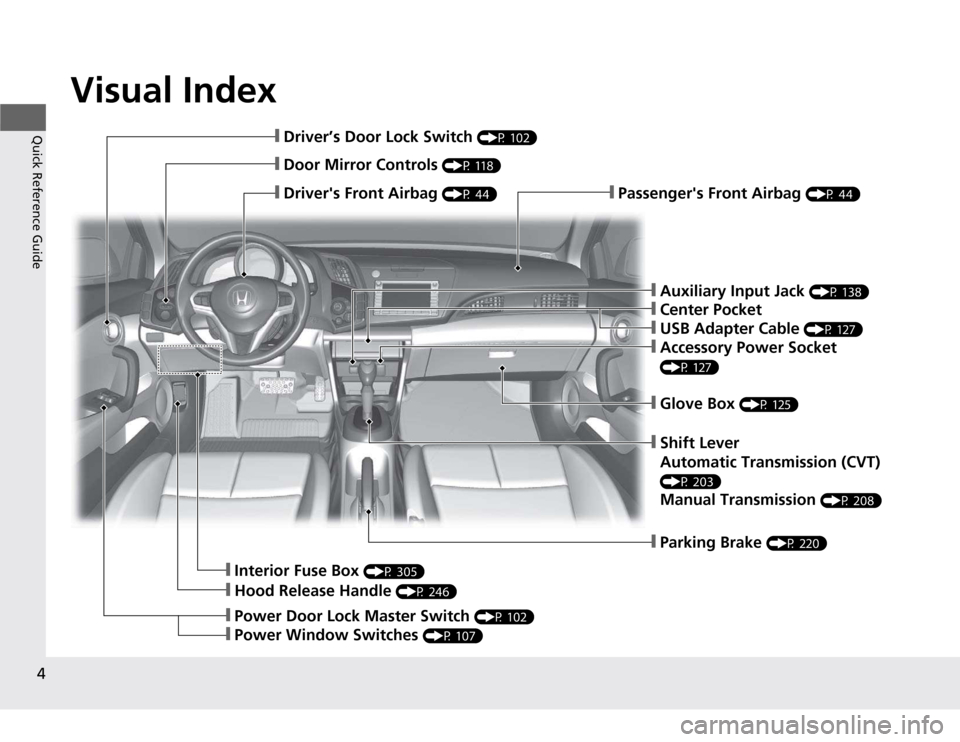
Visual Index
4
Quick Reference Guide
❙Passenger's Front Airbag (P 44)❙Driver's Front Airbag (P 44)
❙Driver’s Door Lock Switch (P 102)
❙Door Mirror Controls (P 118)
❙Hood Release Handle (P 246)
❙Interior Fuse Box (P 305)
❙Power Door Lock Master Switch (P 102)
❙Power Window Switches (P 107)
❙Shift Lever
Automatic Transmission (CVT)
(P 203) Manual Transmission (P 208)
❙Glove Box (P 125)
❙Auxiliary Input Jack (P 138)
❙Center Pocket
❙USB Adapter Cable (P 127)
❙Accessory Power Socket
(P 127)
❙Parking Brake (P 220)
Page 7 of 333
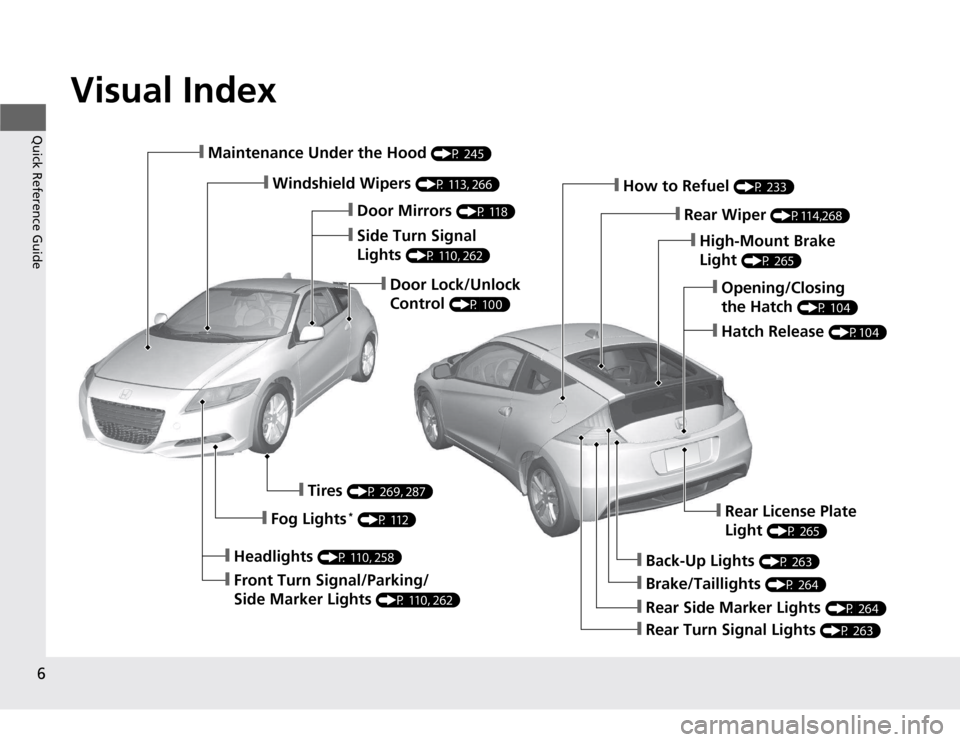
Visual Index
6
Quick Reference Guide
❙Maintenance Under the Hood (P 245)
❙Windshield Wipers (P 113, 266)
❙Door Lock/Unlock
Control (P 100)
❙Headlights
(P 110, 258)
❙Front Turn Signal/Parking/
Side Marker Lights (P 110, 262)
❙Tires
(P 269, 287)
❙Fog Lights *
(P 112)❙Rear License Plate Light (P 265)
❙Brake/Taillights
(P 264)
❙Back-Up Lights (P 263)
❙Rear Turn Signal Lights (P 263)
❙Rear Side Marker Lights (P 264)
❙High-Mount Brake Light (P 265)
❙How to Refuel
(P 233)
❙Rear Wiper (P114,268)
❙Opening/Closing the Hatch (P 104)
❙Hatch Release
(P104)
❙Side Turn Signal Lights (P 110, 262)
❙Door Mirrors
(P 118)
Page 15 of 333
14
Quick Reference Guide
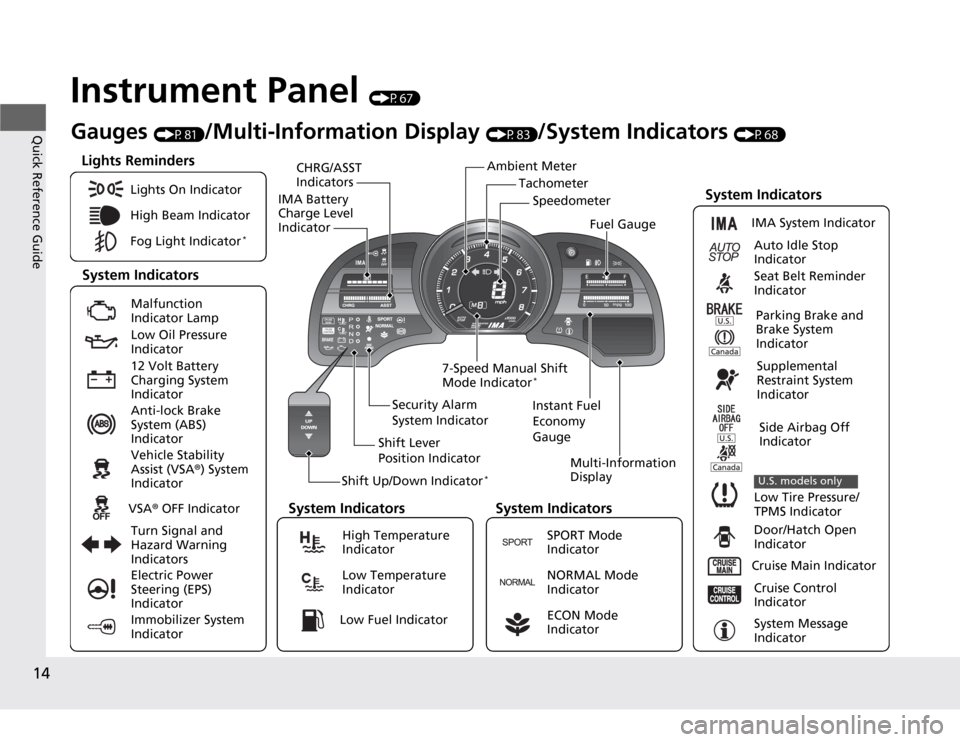
Instrument Panel (P67)
Tachometer
CHRG/ASST Indicators
IMA Battery Charge Level Indicator
Shift Up/Down Indicator *Multi-Information
Display
7-Speed Manual Shift Mode Indicator
*
System Indicators
Lights Reminders
Instant Fuel
Economy GaugeSpeedometer
Fuel Gauge
Security Alarm
System Indicator
Shift Lever
Position Indicator
Gauges
(P81)/Multi-Information Display (P83)/System Indicators (P68)
Ambient Meter
System Indicators System Indicators
System IndicatorsLights On Indicator
High Beam Indicator
Fog Light Indicator *
Malfunction
Indicator Lamp
Low Oil Pressure Indicator
12 Volt Battery
Charging System Indicator
Anti-lock Brake
System (ABS) Indicator
Vehicle Stability Assist (VSA
®) System
Indicator
VSA ® OFF Indicator
Turn Signal and
Hazard Warning
Indicators
Electric Power Steering (EPS) Indicator
Immobilizer System Indicator
IMA System Indicator
Auto Idle Stop
Indicator
Seat Belt Reminder
Indicator
Parking Brake and
Brake System
Indicator
Supplemental
Restraint System
Indicator
Side Airbag Off
Indicator
Low Tire Pressure/
TPMS Indicator
U.S. models only
Door/Hatch Open
Indicator
Cruise Main Indicator
Cruise Control
Indicator
System Message
Indicator
High Temperature Indicator
Low Temperature Indicator
SPORT Mode
Indicator
NORMAL Mode
Indicator
ECON Mode
Indicator Low Fuel Indicator
Page 17 of 333
16
Quick Reference Guide
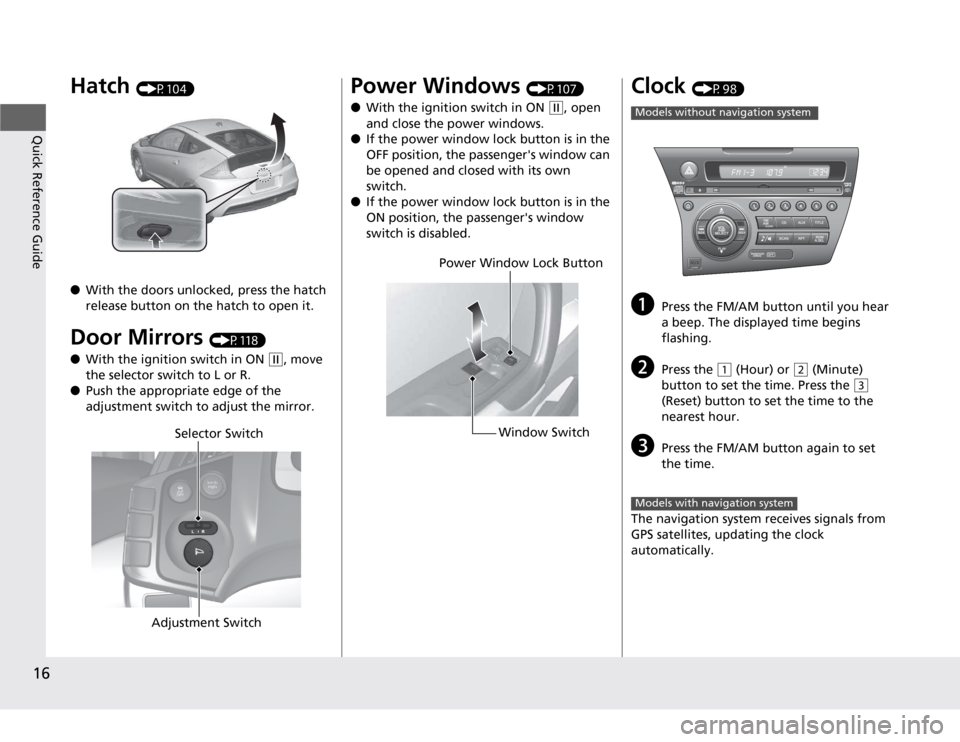
Hatch (P104)
● With the doors unlocked, press the hatch
release button on the hatch to open it.
Door Mirrors (P118)
● With the ignition switch in ON
(w, move
the selector switch to L or R.
● Push the appropriate edge of the
adjustment switch to adjust the mirror.
Selector Switch
Adjustment Switch
Power Windows (P107)
● With the ignition switch in ON
(w, open
and close the power windows.
● If the power window lock button is in the
OFF position, the passenger's window can
be opened and closed with its own switch.
● If the power window lock button is in the
ON position, the passenger's window
switch is disabled.
Power Window Lock Button
Window Switch
Clock (P98)
a Press the FM/AM button until you hear
a beep. The displayed time begins flashing.
b Press the
(1 (Hour) or (2 (Minute)
button to set the time. Press the
(3
(Reset) button to set the time to the nearest hour.
c Press the FM/AM button again to set the time.
The navigation system receives signals from
GPS satellites, updating the clock
automatically.
Models without navigation system
Models with navigation system
Page 25 of 333
24
Quick Reference Guide
What to Do If
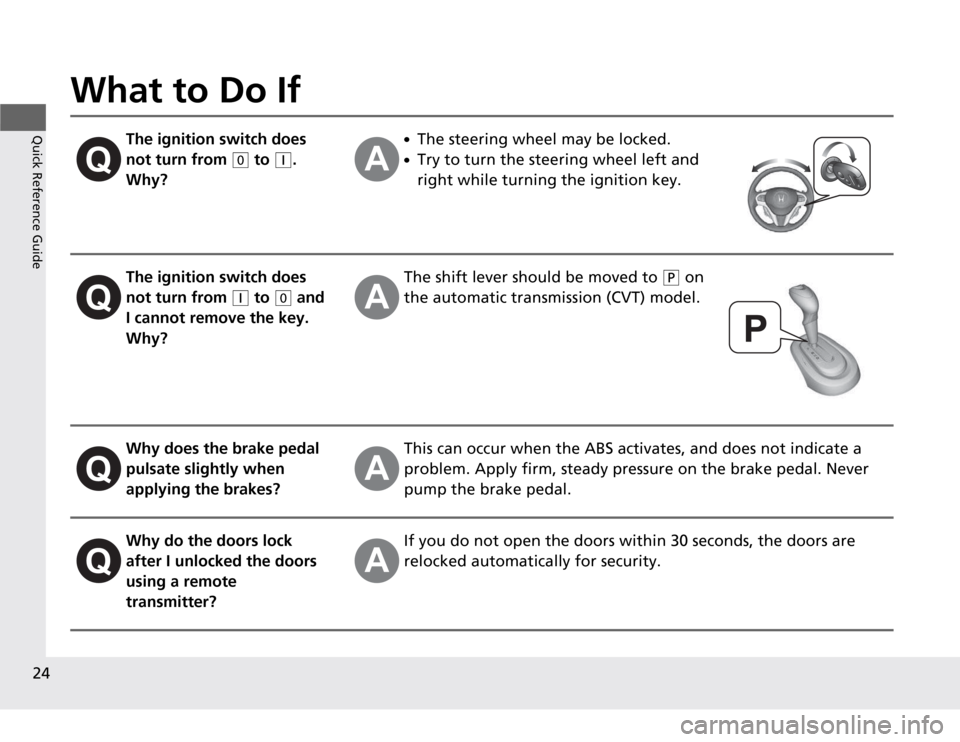
The ignition switch does
not turn from
(0 to (q.
Why?
● The steering wheel may be locked.
● Try to turn the steering wheel left and
right while turning the ignition key.
The ignition switch does
not turn from
(q to (0 and
I cannot remove the key.
Why?
The shift lever s hould be moved to (P on
the automatic transmission (CVT) model.
Why does the brake pedal
pulsate slightly when
applying the brakes?This can occur when the ABS act ivates, and does not indicate a
problem. Apply firm, steady pressure on the brake pedal. Never
pump the brake pedal.
Why do the doors lock
after I unlocked the doors
using a remote
transmitter?If you do not open the doors within 30 seconds, the doors are
relocked automatically for security.
Page 33 of 333
32
uuFor Safe DrivinguYour Vehicle's Safety Features
Safe Driving
Your Vehicle's Safety Features
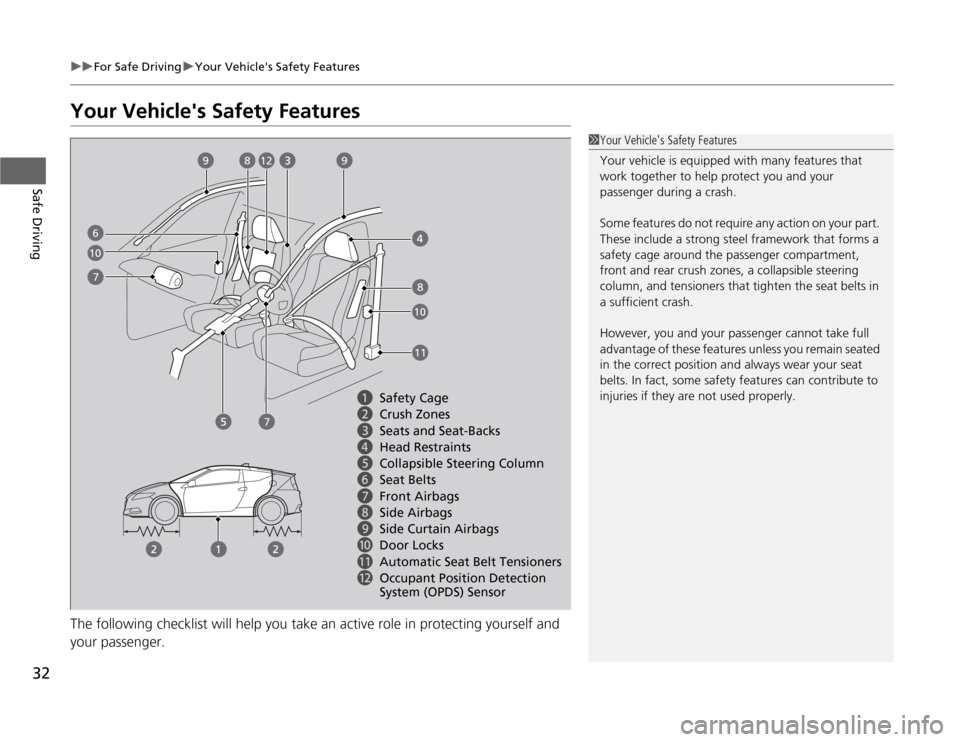
The following checklist will help you take an active role in protecting yourself and your passenger.
1Your Vehicle's Safety Features
Your vehicle is equipped with many features that
work together to help protect you and your
passenger during a crash.
Some features do not require any action on your part.
These include a strong steel framework that forms a
safety cage around the passenger compartment,
front and rear crush zones, a collapsible steering
column, and tensioners that tighten the seat belts in
a sufficient crash.
However, you and your passenger cannot take full
advantage of these features unless you remain seated
in the correct position and always wear your seat
belts. In fact, some safety features can contribute to
injuries if they are not used properly.
6
7
89
10
11
12
Safety Cage
Crush Zones
Seats and Seat-Backs
Head Restraints
Collapsible Steering Column
Seat BeltsFront Airbags
Side Airbags
Side Curtain Airbags
Door Locks
Automatic Seat Belt Tensioners Occupant Position Detection
System (OPDS) Sensor
7
8
9
10
a b c d e fg h i j k l
Page 34 of 333
33
uuFor Safe DrivinguYour Vehicle's Safety Features
Safe Driving
For the safety of you and your passenger, make a habit of checking these items each
time before you drive.•After everyone has entered the vehicle, be sure both doors and the hatch are
closed and locked. Locking the doors and the hatch helps prevent an occupant
from being ejected and an outsider from unexpectedly opening a door or the
hatch. 2 Locking/Unlocking the Doors from the Inside P. 102
• Adjust your seat to a position suitable for driving. Be sure the seats are adjusted
as far to the rear as possible while allowing the driver to control the vehicle.
Sitting too close to a front airbag can result in serious or fatal injury in a crash.
2 Adjusting the Seats P. 119
• Always wear your seat belt, and make sure you wear it properly. Confirm that any
passenger is properly belted as well.
2 Fastening a Seat Belt P. 37
• If you choose to ignore our warnings and carry a child in this vehicle, make every
effort to protect them by properly using a seat belt or a child seat according to the
child’s age, height, and weight.
2 Child Safety P. 56
■Safety Checklist1Safety Checklist
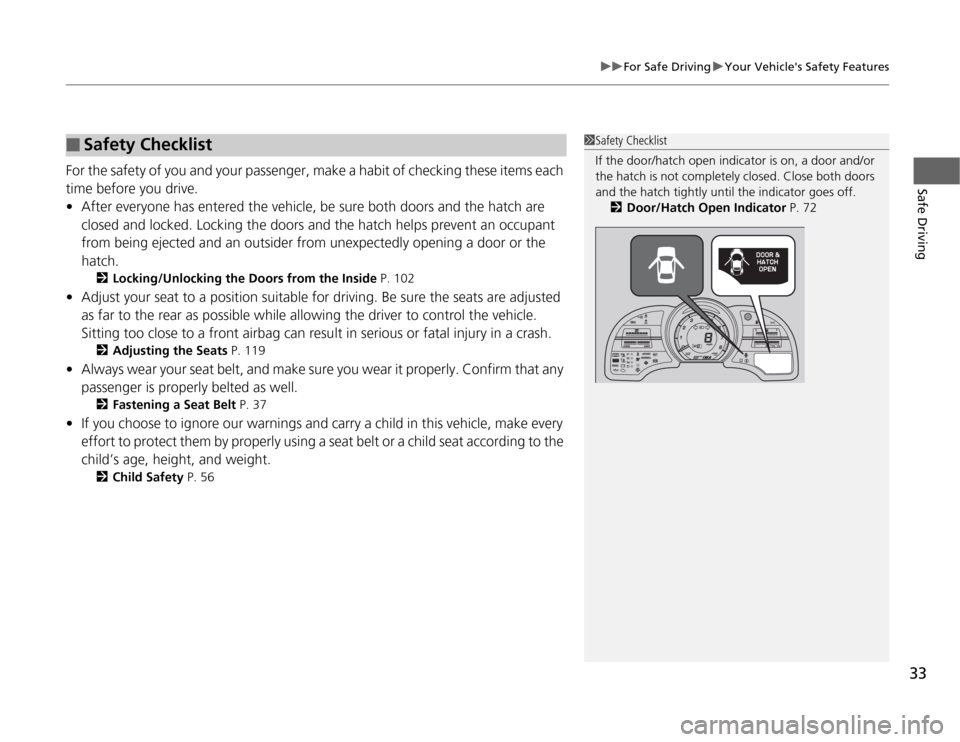
If the door/hatch open indicator is on, a door and/or
the hatch is not completely closed. Close both doors
and the hatch tightly until the indicator goes off.
2 Door/Hatch Open Indicator P. 72
Page 58 of 333
57
uuChild SafetyuProtecting Child Passengers
Safe Driving
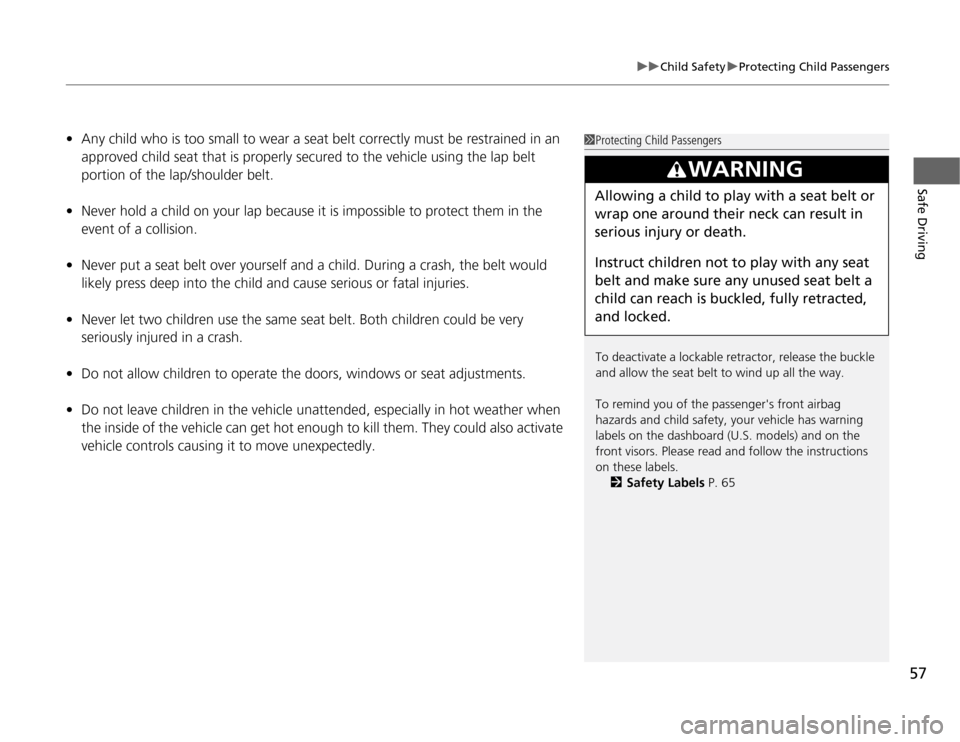
•Any child who is too small to wear a seat belt correctly must be restrained in an
approved child seat that is properly secured to the vehicle using the lap belt
portion of the lap/shoulder belt.
• Never hold a child on your lap because it is impossible to protect them in the
event of a collision.
• Never put a seat belt over yourself and a child. During a crash, the belt would
likely press deep into the child and cause serious or fatal injuries.
• Never let two children use the same seat belt. Both children could be very
seriously injured in a crash.
• Do not allow children to operate the doors, windows or seat adjustments.
• Do not leave children in the vehic le unattended, especially in hot weather when
the inside of the vehicle can get hot enou gh to kill them. They could also activate
vehicle controls causing it to move unexpectedly.1Protecting Child Passengers
To deactivate a lockable retractor, release the buckle
and allow the seat belt to wind up all the way.
To remind you of the passenger's front airbag
hazards and child safety, your vehicle has warning
labels on the dashboard (U.S. models) and on the
front visors. Please read and follow the instructions
on these labels. 2 Safety Labels P. 65
3WARNING
Allowing a child to play with a seat belt or
wrap one around their neck can result in
serious injury or death.
Instruct children not to play with any seat
belt and make sure any unused seat belt a
child can reach is bu ckled, fully retracted,
and locked.
Page 79 of 333
78
uuIndicatorsuMulti-Information Display Warning and Information Messages
Instrument Panel
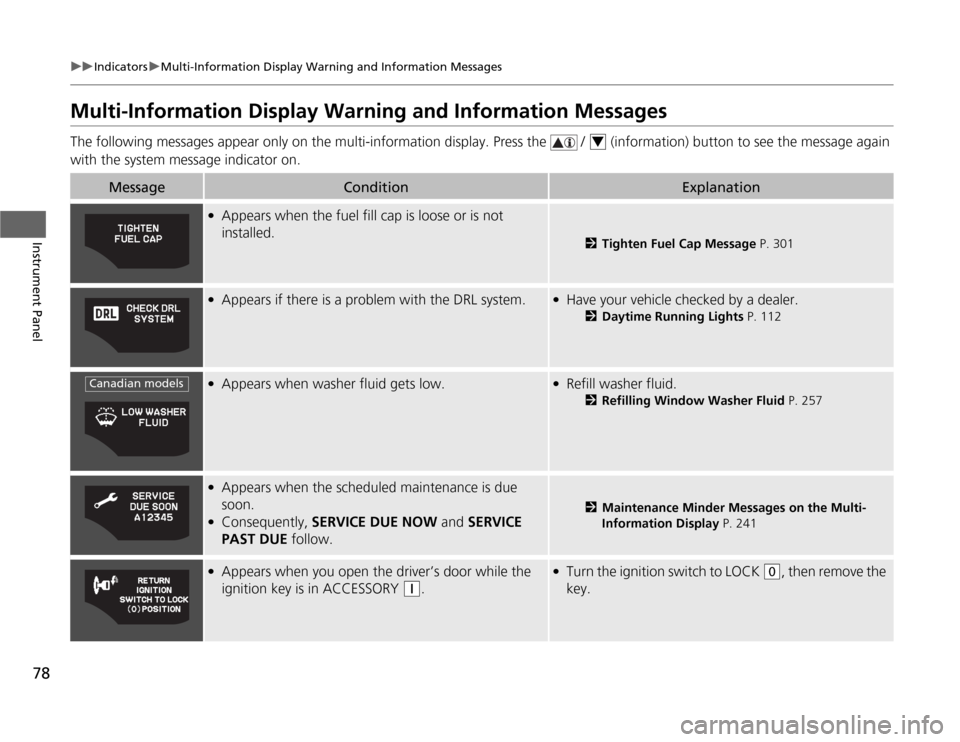
Multi-Information Display Warning and Information Messages
The following messages appear only on the multi-information display. Press the / (information) button to see the message agai n
with the system message indicator on.
MessageConditionExplanation
● Appears when the fuel fill cap is loose or is not installed.
2 Tighten Fuel Cap Message P. 301
●
Appears if there is a problem with the DRL system.●Have your vehicle checked by a dealer.
2Daytime Running Lights P. 112
●
Appears when washer fluid gets low.●Refill washer fluid.
2Refilling Window Washer Fluid P. 257
●
Appears when the scheduled maintenance is due
soon.
● Consequently, SERVICE DUE NOW and SERVICE
PAST DUE follow.
2Maintenance Minder Messages on the Multi-
Information Display P. 241
●
Appears when you open the driver’s door while the
ignition key is in ACCESSORY
(q .
●
Turn the ignition switch to LOCK (0 , then remove the
key.
4
Canadian models