seats HONDA CR-Z 2013 1.G User Guide
[x] Cancel search | Manufacturer: HONDA, Model Year: 2013, Model line: CR-Z, Model: HONDA CR-Z 2013 1.GPages: 325, PDF Size: 11.73 MB
Page 58 of 325
Continued57
uuChild SafetyuSafety of Infants and Small Children
Safe Driving
Since this vehicle does not have a back seat, Honda recommends that you do not
carry a child, age 12 or under, as a passenger.
This is because placing a forward-facing child seat in the passenger’s seat can be
hazardous, even with advanced front airbags that automatically turn the
passenger’s front airbag off.
If you choose to ignore our warnings and transport a small child in this vehicle, be
sure to move the passenger seat as far to the rear as possible, and follow the
instructions and guidelines in the following pages.
■ Important consideration when selecting a child seat
Make sure the child seat meets the following three requirements:• The child seat is the correct type and size for the child.
• The child seat is the correct type for the seating position.
• The child seat is compliant with Federal Motor Vehicle Safety Standard 213 or
Canadian Motor Vehicle Safety Standard 213.
■Protecting Smaller Children
■Selecting a Forward-facing Child Seat
1Protecting Smaller Children
Educate yourself about the laws and regulations
regarding child seat use where you are driving, and
follow the child seat manufacturer's instructions.
All child seats must be secured to the vehicle with the lap part of a lap/shoulder belt. A child whose seat is
not properly secured to the vehicle can be
endangered in a crash.
3WARNING
Placing a forward-facing child seat in the
passenger’s seat can result in serious injury
or death if the front airbag inflates.
If you must place a forward-facing child
seat in the passenger’s seat, move the
vehicle seat as far back as possible, and
properly restrain the child.
Main MenuTable of Contents
Page 59 of 325
uuChild SafetyuSafety of Infants and Small Children
58
Safe Driving
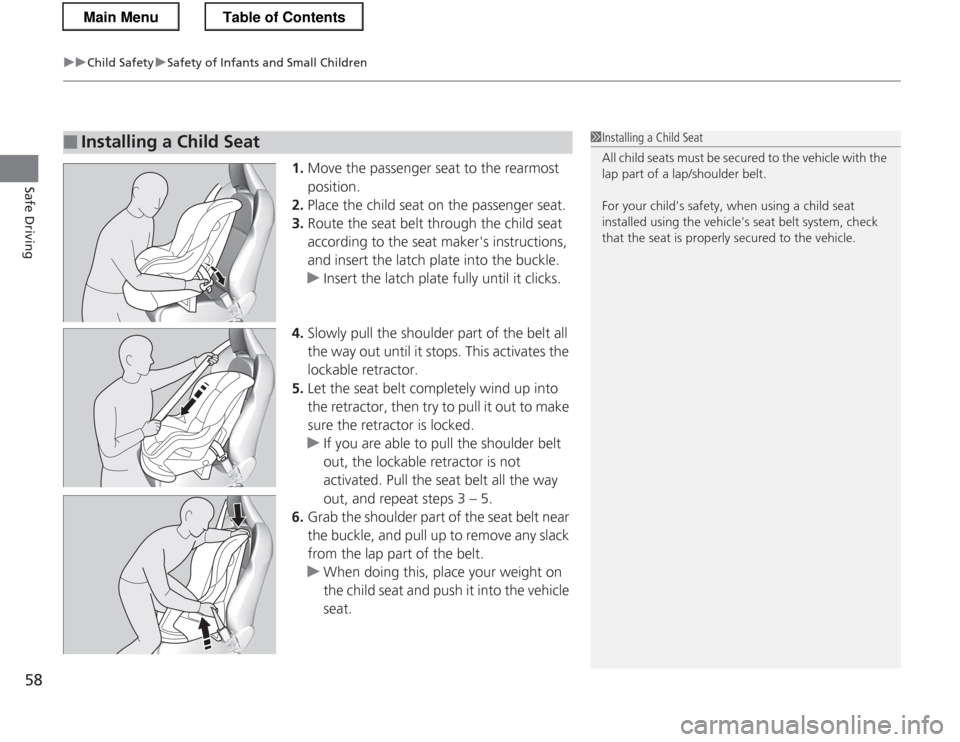
1. Move the passenger seat to the rearmost position.
2. Place the child seat on the passenger seat.
3. Route the seat belt through the child seat according to the seat maker's instructions,
and insert the latch plate into the buckle.
uInsert the latch plate fully until it clicks.
4. Slowly pull the shoulder part of the belt all
the way out until it stops. This activates the lockable retractor.
5. Let the seat belt completely wind up into
the retractor, then try to pull it out to make
sure the retractor is locked.
uIf you are able to pull the shoulder belt
out, the lockable retractor is not
activated. Pull the seat belt all the way
out, and repeat steps 3 – 5.
6. Grab the shoulder part of the seat belt near
the buckle, and pull up to remove any slack
from the lap part of the belt.
uWhen doing this, place your weight on
the child seat and push it into the vehicle seat.
■Installing a Child Seat1Installing a Child Seat
All child seats must be secured to the vehicle with the
lap part of a lap/shoulder belt.
For your child's safety, when using a child seat
installed using the vehicle's seat belt system, check
that the seat is properly secured to the vehicle.
Main MenuTable of Contents
Page 61 of 325
60
uuChild SafetyuSafety of Larger Children
Safe Driving
Safety of Larger Children
Since this vehicle does not have a back seat, Honda recommends that you do
not carry a child age 12 or under as a passenger. This is because children
who have outgrown child seats are also at risk of being injured or killed by
an inflating passen ger’s front airbag. If a larger child must ride in this vehicle,
the information in the following pages provides guidelines to help you decide when
a given child may ride in this vehicle, and how to properly protect the child.
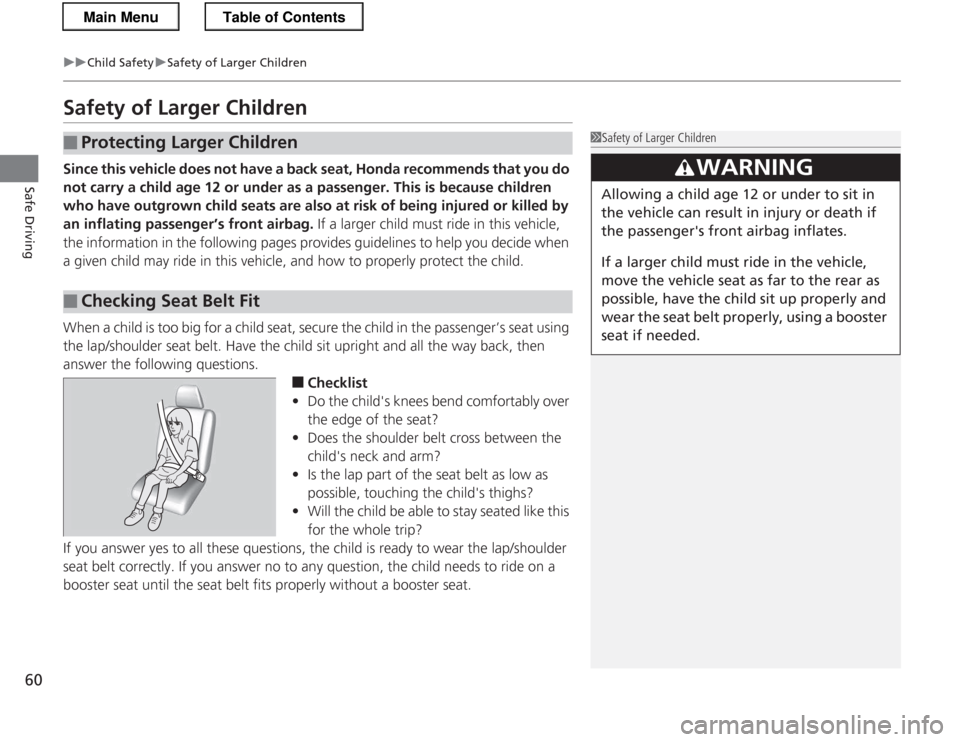
When a child is too big for a child seat, secure the child in the passenger’s seat using
the lap/shoulder seat belt. Have the child sit upright and all the way back, then
answer the following questions.
■Checklist
• Do the child's knees bend comfortably over
the edge of the seat?
• Does the shoulder belt cross between the
child's neck and arm?
• Is the lap part of the seat belt as low as
possible, touching the child's thighs?
• Will the child be able to stay seated like this
for the whole trip?
If you answer yes to all these questions, the child is ready to wear the lap/shoulder
seat belt correctly. If you answer no to any question, the child needs to ride on a
booster seat until the seat belt fits properly without a booster seat.
■Protecting Larger Children
■Checking Seat Belt Fit
1Safety of Larger Children
3WARNING
Allowing a child age 12 or under to sit in
the vehicle can result in injury or death if
the passenger's front airbag inflates.
If a larger child must ride in the vehicle,
move the vehicle seat as far to the rear as
possible, have the child sit up properly and
wear the seat belt properly, using a booster seat if needed.
Main MenuTable of Contents
Page 62 of 325
61
uuChild SafetyuSafety of Larger Children
Safe Driving
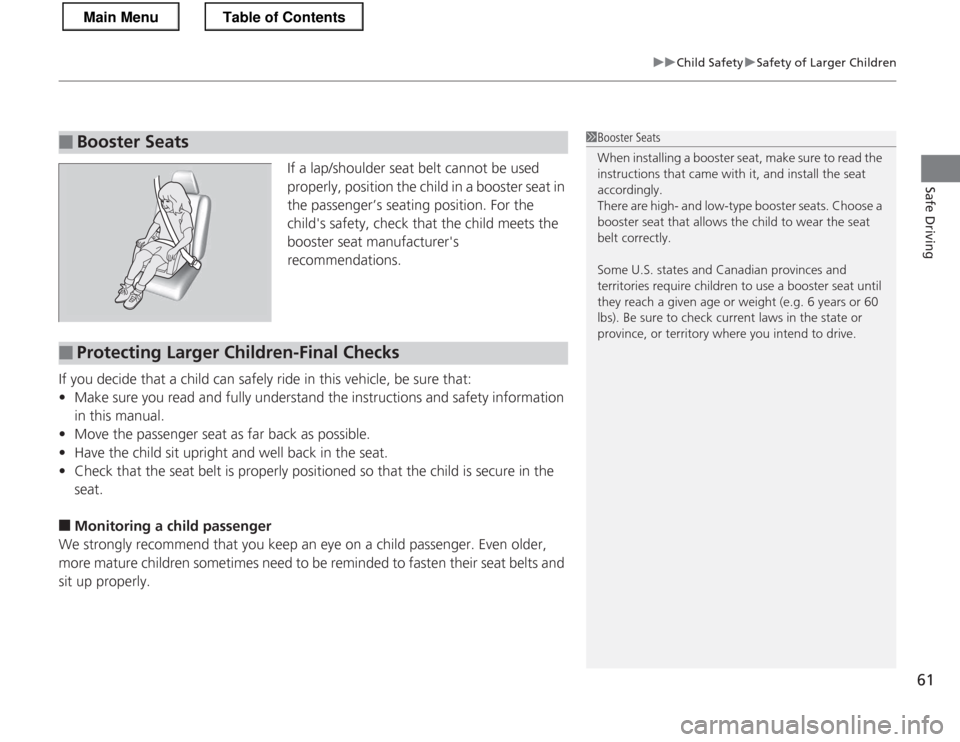
If a lap/shoulder seat belt cannot be used
properly, position the child in a booster seat in
the passenger’s seating position. For the
child's safety, check that the child meets the
booster seat manufacturer's
recommendations.
If you decide that a child can safely ride in this vehicle, be sure that:
• Make sure you read and fully understand the instructions and safety information
in this manual.
• Move the passenger seat as far back as possible.
• Have the child sit upright and well back in the seat.
• Check that the seat belt is properly positioned so that the child is secure in the seat.
■ Monitoring a child passenger
We strongly recommend that you keep an eye on a child passenger. Even older,
more mature children sometimes need to be reminded to fasten their seat belts and
sit up properly.
■Booster Seats1Booster Seats
When installing a booster seat, make sure to read the
instructions that came with it, and install the seat
accordingly.
There are high- and low-type booster seats. Choose a booster seat that allows the child to wear the seat
belt correctly.
Some U.S. states and Canadian provinces and
territories require children to use a booster seat until
they reach a given age or weight (e.g. 6 years or 60
lbs). Be sure to check current laws in the state or
province, or territory where you intend to drive.
■Protecting Larger Children-Final Checks
Main MenuTable of Contents
Page 98 of 325
97
Controls
This chapter explains how to operate the various controls necessary for driving.
Setting the Clock................................ 98
Locking and Unlocking the Doors
Key Types and Functions .................... 99
Locking/Unlocking the Doors from the Outside .......................................... 100
Locking/Unlocking the Doors from the Inside ............................................. 102
Auto Door Locking/Unlocking .......... 103
Opening and Closing the Hatch ....... 104
Security System Immobilizer System .......................... 106
Security System Alarm ...................... 106
Opening and Closing the Windows ..... 108Operating the Switches Around the
Steering Wheel
Ignition Switch ................................. 110
Turn Signals ..................................... 111
Light Switches.................................. 111 Fog Lights *
...................................... 113
Daytime Running Lights ................... 113
Wipers and Washers ........................ 114
Brightness Control ........................... 116
Rear Defogger/Heated Door Mirror *
Button ........................................... 117
Adjusting the Steering Wheel........... 118 Adjusting the Mirrors
Interior Rearview Mirror ................... 119
Power Door Mirrors ......................... 120
Adjusting the Seats Adjusting the Seat Positions ............. 121
Interior Lights/Interior Convenience ItemsInterior Lights .................................. 126
Interior Convenience Items .............. 127
Climate Control System Using Automatic Climate Control .... 134
Automatic Climate Control Sensors ...... 136
* Not available on all models
Main Menu
Page 122 of 325
121
Continued
Controls
Adjusting the Seats
Adjusting the Seat Positions
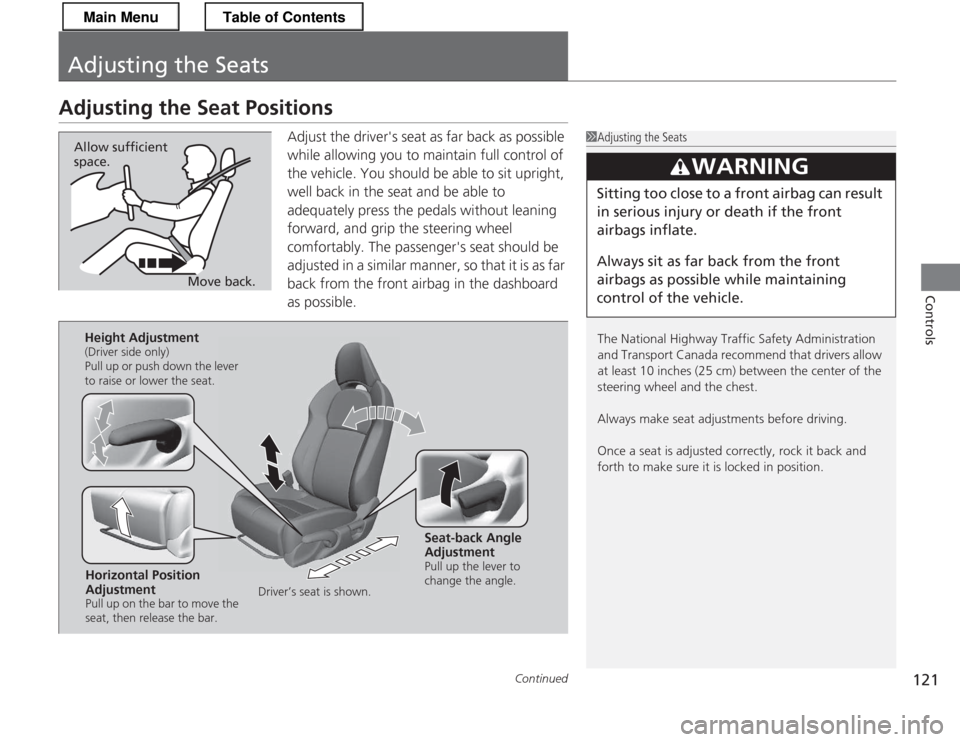
Adjust the driver's seat as far back as possible
while allowing you to maintain full control of
the vehicle. You should be able to sit upright,
well back in the seat and be able to
adequately press the pedals without leaning
forward, and grip the steering wheel
comfortably. The passenger's seat should be
adjusted in a similar manner, so that it is as far
back from the front airbag in the dashboard
as possible.
1Adjusting the Seats
The National Highway Traffic Safety Administration
and Transport Canada recommend that drivers allow
at least 10 inches (25 cm) between the center of the
steering wheel and the chest.
Always make seat adjustments before driving.
Once a seat is adjusted correctly, rock it back and forth to make sure it is locked in position.
3WARNING
Sitting too close to a front airbag can result
in serious injury or death if the front
airbags inflate.
Always sit as far back from the front
airbags as possible while maintaining
control of the vehicle.
Move back.
Allow sufficient space.
Horizontal Position
Adjustment
Pull up on the bar to move the
seat, then release the bar.
Height Adjustment
(Driver side only)
Pull up or push down the lever
to raise or lower the seat.
Seat-back Angle
Adjustment
Pull up the lever to
change the angle.
Driver’s seat is shown.
Main MenuTable of Contents
Page 123 of 325
uuAdjusting the SeatsuAdjusting the Seat Positions
122
Controls
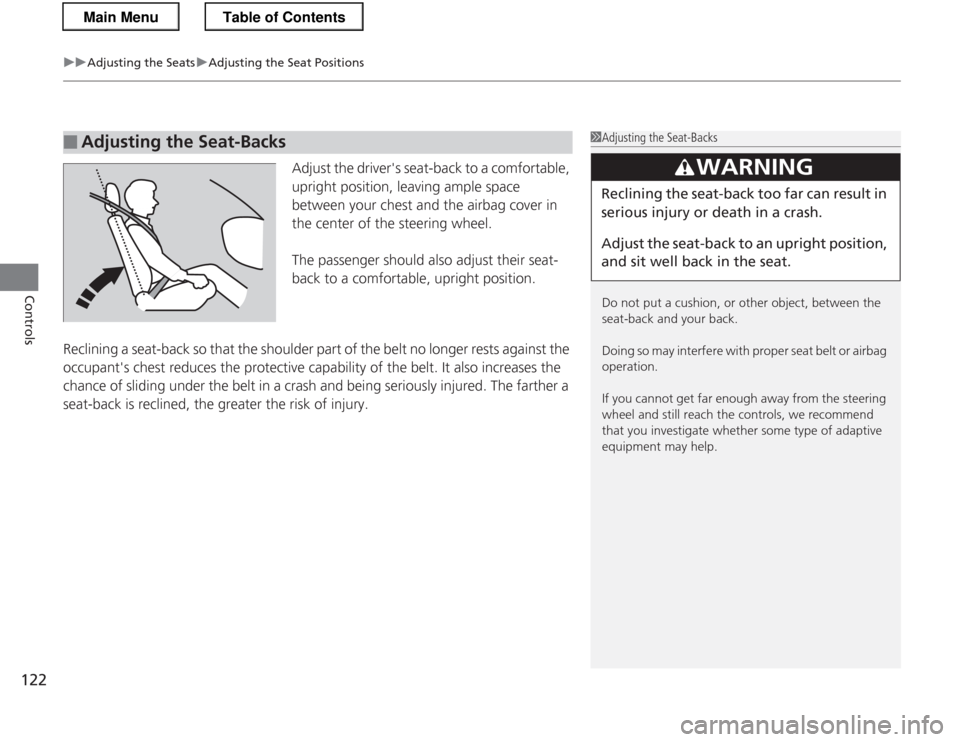
Adjust the driver's seat-back to a comfortable,
upright position, leaving ample space
between your chest and the airbag cover in
the center of the steering wheel.
The passenger should also adjust their seat-
back to a comfortable, upright position.
Reclining a seat-back so that the shoulder part of the belt no longer rests against the
occupant's chest reduces the protective capability of the belt. It also increases the
chance of sliding under the belt in a crash and being seriously injured. The farther a
seat-back is reclined, the greater the risk of injury.
■Adjusting the Seat-Backs1Adjusting the Seat-Backs
Do not put a cushion, or other object, between the
seat-back and your back.
Doing so may interfe re with proper seat belt or airbag
operation.
If you cannot get far enough away from the steering
wheel and still reach the controls, we recommend
that you investigate whether some type of adaptive
equipment may help.
3WARNING
Reclining the seat-back too far can result in
serious injury or death in a crash.
Adjust the seat-back to an upright position,
and sit well back in the seat.
Main MenuTable of Contents
Page 124 of 325
Continued123
uuAdjusting the SeatsuAdjusting the Seat Positions
Controls
Your vehicle is equipped with head restraints in both seating positions. However,
they are non-adjustable.
Head restraints are most effective for protection against whiplash and other rear-
impact crash injuries.
Head restraints can be removed for cleaning or repair.
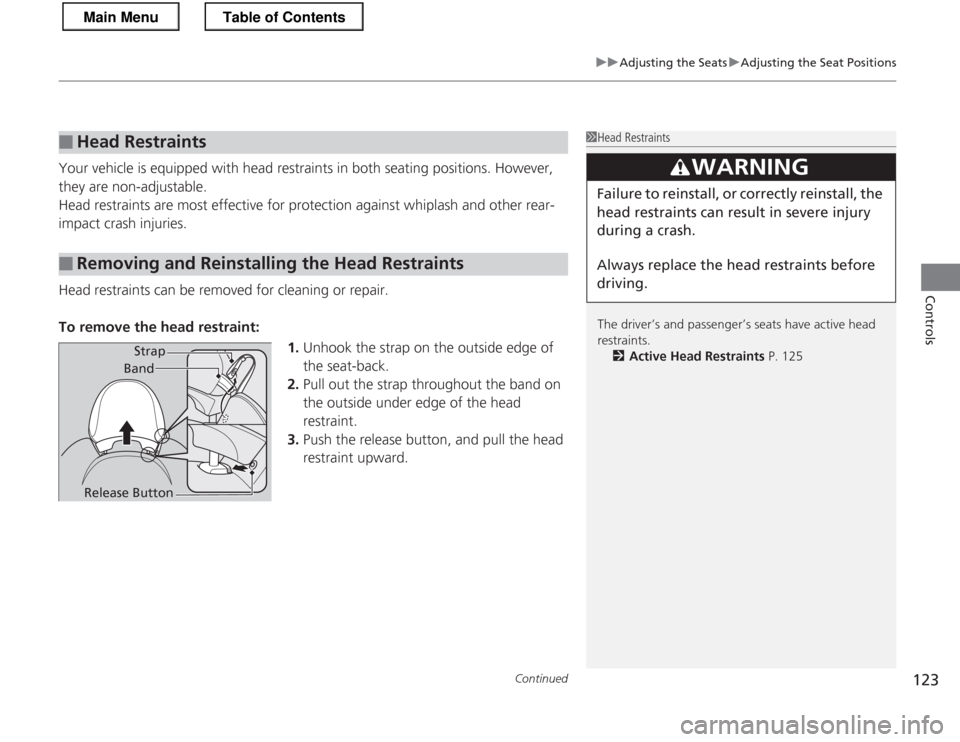
To remove the head restraint:
1.Unhook the strap on the outside edge of the seat-back.
2. Pull out the strap throughout the band on
the outside under edge of the head restraint.
3. Push the release button, and pull the head restraint upward.
■Head Restraints
■Removing and Reinstalling the Head Restraints
1Head Restraints
The driver’s and passenger’s seats have active head restraints.
2 Active Head Restraints P. 125
3WARNING
Failure to reinstall, or correctly reinstall, the
head restraints can result in severe injury
during a crash.
Always replace the head restraints before
driving.
Strap
Band
Release Button
Main MenuTable of Contents
Page 125 of 325
uuAdjusting the SeatsuAdjusting the Seat Positions
124
Controls
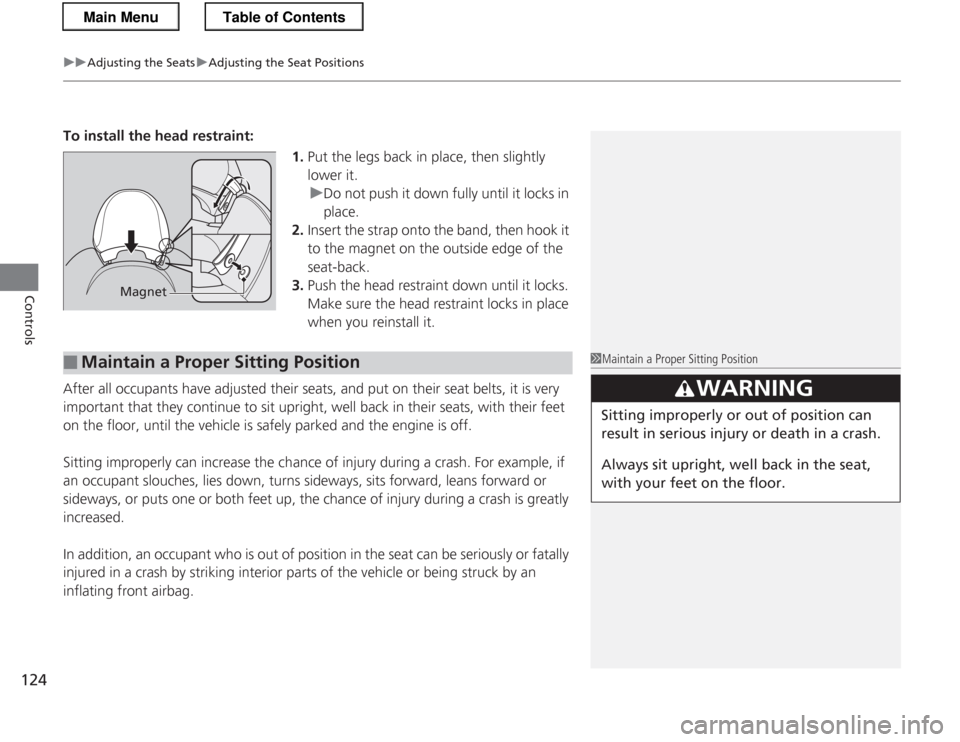
To install the head restraint: 1.Put the legs back in place, then slightly lower it.
uDo not push it down fully until it locks in
place.
2. Insert the strap onto the band, then hook it
to the magnet on the outside edge of the seat-back.
3. Push the head restraint down until it locks.
Make sure the head restraint locks in place
when you reinstall it.
After all occupants have adjusted their seats, and put on their seat belts, it is very
important that they continue to sit upright, well back in their seats, with their feet
on the floor, until the vehicle is safely parked and the engine is off.
Sitting improperly can increase the ch ance of injury during a crash. For example, if
an occupant slouches, lies down, turns sideways, sits forward, leans forward or
sideways, or puts one or both feet up, the chance of injury during a crash is greatly increased.
In addition, an occupant who is out of position in the seat can be seriously or fatally
injured in a crash by striking interior parts of the vehicle or being struck by an
inflating front airbag.
Magnet
■Maintain a Proper Sitting Position1Maintain a Proper Sitting Position
3WARNING
Sitting improperly or out of position can
result in serious injury or death in a crash.
Always sit upright, well back in the seat,
with your feet on the floor.
Main MenuTable of Contents
Page 126 of 325
125
uuAdjusting the SeatsuAdjusting the Seat Positions
Controls
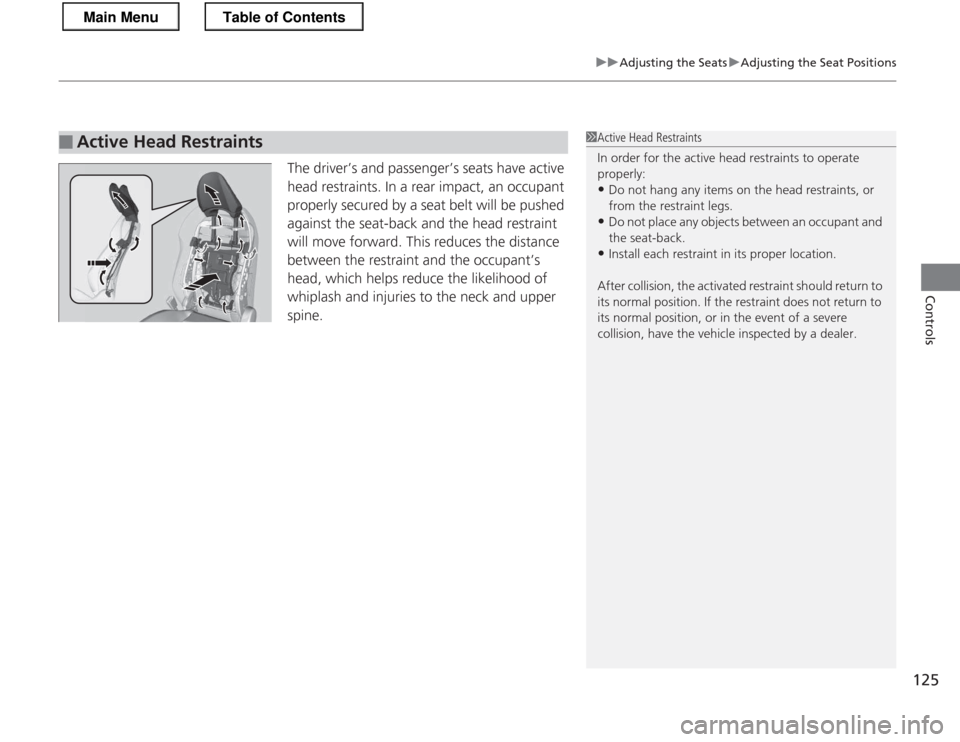
The driver’s and passenger’s seats have active
head restraints. In a rear impact, an occupant
properly secured by a seat belt will be pushed
against the seat-back and the head restraint
will move forward. This reduces the distance
between the restraint and the occupant’s
head, which helps reduce the likelihood of
whiplash and injuries to the neck and upper spine.
■Active Head Restraints1Active Head Restraints
In order for the active head restraints to operate
properly:
• Do not hang any items on the head restraints, or
from the restraint legs.
• Do not place any objects between an occupant and
the seat-back.
• Install each restraint in its proper location.
After collision, the activa ted restraint should return to
its normal position. If the restraint does not return to
its normal position, or in the event of a severe
collision, have the vehicle inspected by a dealer.
Main MenuTable of Contents