engine HONDA CR-Z 2013 1.G Owner's Manual
[x] Cancel search | Manufacturer: HONDA, Model Year: 2013, Model line: CR-Z, Model: HONDA CR-Z 2013 1.GPages: 325, PDF Size: 11.73 MB
Page 87 of 325
uuGauges and Multi-Information DisplayuMulti-Information Display
86
Instrument Panel
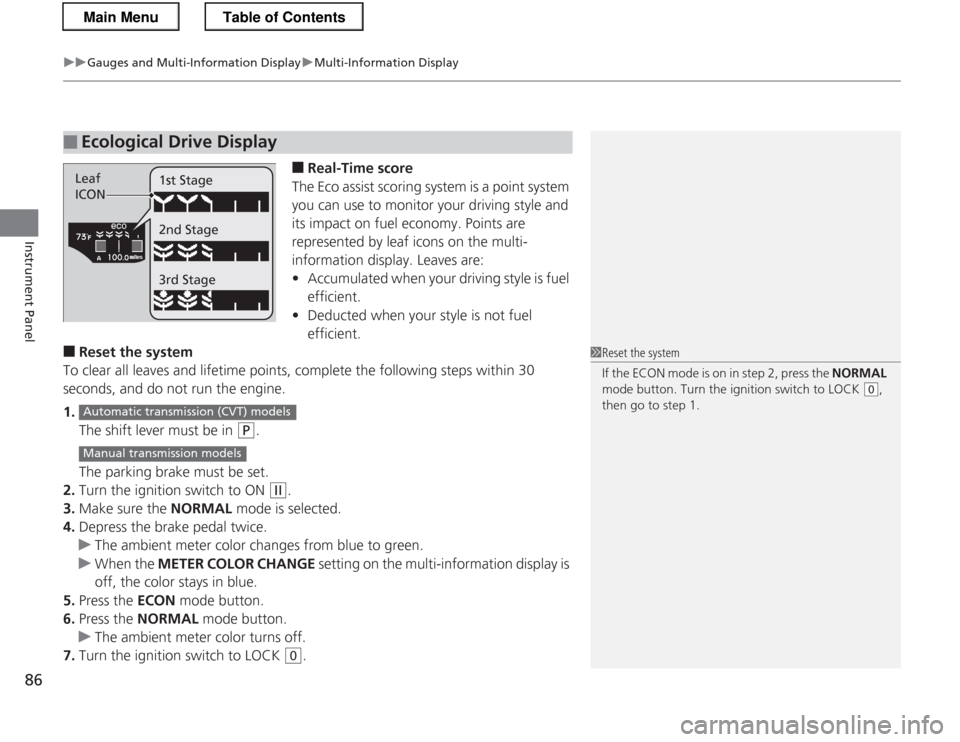
■ Real-Time score
The Eco assist scoring system is a point system
you can use to monitor your driving style and
its impact on fuel economy. Points are
represented by leaf icons on the multi-
information display. Leaves are:• Accumulated when your driving style is fuel
efficient.
• Deducted when your style is not fuel efficient.
■ Reset the system
To clear all leaves and lifetime points, complete the following steps within 30
seconds, and do not run the engine. 1. The shift lever must be in
(P .
The parking brake must be set.
2. Turn the ignition switch to ON
(w .
3. Make sure the NORMAL mode is selected.
4. Depress the brake pedal twice.
uThe ambient meter color changes from blue to green.
uWhen the METER COLOR CHANGE setting on the multi-information display is
off, the color stays in blue.
5. Press the ECON mode button.
6. Press the NORMAL mode button.
uThe ambient meter color turns off.
7. Turn the ignition switch to LOCK
(0 .
■Ecological Drive Display
Leaf
ICON 1st Stage 2nd Stage 3rd Stage
1Reset the system
If the ECON mode is on in step 2, press the
NORMAL
mode button. Turn the ignition switch to LOCK
(0 ,
then go to step 1.
Automatic transmiss ion (CVT) models
Manual transmission models
Main MenuTable of Contents
Page 90 of 325
Continued89
uuGauges and Multi-Information DisplayuMulti-Information Display
Instrument Panel
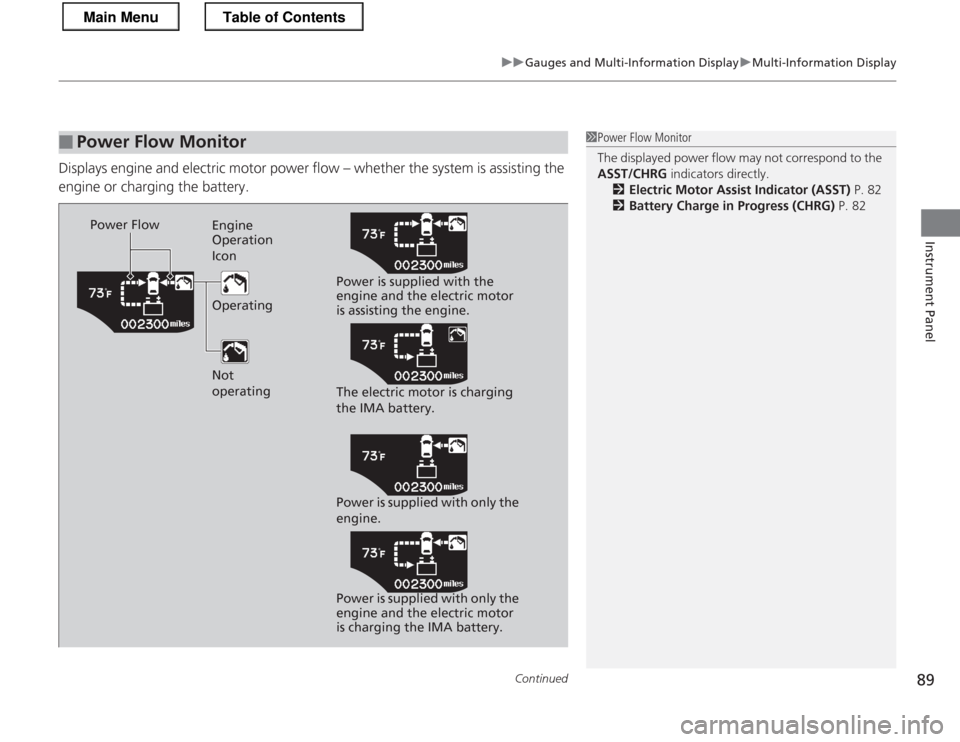
Displays engine and electric motor power flow – whether the system is assisting the
engine or charging the battery.
■Power Flow Monitor1Power Flow Monitor
The displayed power flow may not correspond to the
ASST/CHRG indicators directly.
2 Electric Motor Assist Indicator (ASST) P. 82
2 Battery Charge in Progress (CHRG) P. 82
Power Flow
Engine Operation
Icon Operating Not
operating Power is supplied with the
engine and the electric motor
is assisting the engine.
The electric motor is charging
the IMA battery.
Power is supplied with only the
engine.
Power is supplied with only the
engine and the electric motor
is charging the IMA battery.
Main MenuTable of Contents
Page 100 of 325
99
Controls
Locking and Unlocking the Doors
Key Types and Functions
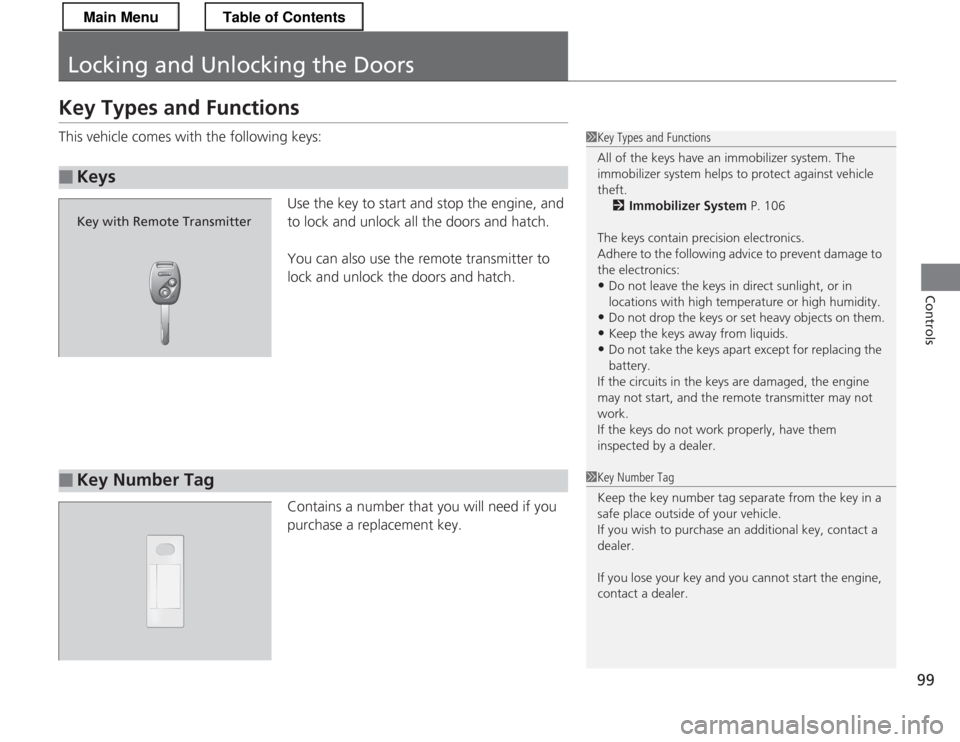
This vehicle comes with the following keys:Use the key to start and stop the engine, and
to lock and unlock all the doors and hatch.
You can also use the remote transmitter to
lock and unlock the doors and hatch.
Contains a number that you will need if you
purchase a replacement key.
■Keys
1Key Types and Functions
All of the keys have an immobilizer system. The
immobilizer system helps to protect against vehicle
theft.2 Immobilizer System P. 106
The keys contain precision electronics.
Adhere to the following advice to prevent damage to
the electronics:
• Do not leave the keys in direct sunlight, or in
locations with high temperature or high humidity.
• Do not drop the keys or set heavy objects on them.
• Keep the keys away from liquids.
• Do not take the keys apa rt except for replacing the
battery.
If the circuits in the keys are damaged, the engine
may not start, and the re mote transmitter may not
work.
If the keys do not work properly, have them
inspected by a dealer.
Key with Remote Transmitter
■Key Number Tag1Key Number Tag
Keep the key number tag separate from the key in a
safe place outside of your vehicle.
If you wish to purchase an additional key, contact a
dealer.
If you lose your key and you cannot start the engine,
contact a dealer.
Main MenuTable of Contents
Page 105 of 325
104
Controls
Opening and Closing the Hatch
Precautions for Opening/Closing the Hatch
Always make sure individuals and objects are clear of the hatch before opening or
closing it. ■Opening the hatch
• Open the hatch all the way.
uIf it is not fully opened, the hatch may come down accidentally by its own
weight.
• Be careful when it is windy. The wind may cause the hatch to close.
■ Closing the hatch
Keep the hatch closed while driving to:
uAvoid possible damage.
uPrevent exhaust gas from leaking into the vehicle.
2 Carbon Monoxide Gas P. 62
1Precautions for Opening/Closing the Hatch
Be careful not to hit your head on the hatch or to put
your hands between the hatch and the cargo area
when closing the hatch.
When you are storing or picking up luggage from the
cargo area while the engine is idling, do not stand in
front of the exhaust pipe. You may get burned.
Do not allow any passenger in the cargo space.
They may get hurt during hard braking, a sudden
acceleration, or a crash.
Main MenuTable of Contents
Page 107 of 325
106
Controls
Security System
Immobilizer System
The immobilizer system prevents a key that has not been pre-registered from
starting the engine. Each key contains electronic transmitters that use electronic
signals to verify the key.
Pay attention to the following when inserting the key into the ignition switch: •Do not allow objects that emit strong radio waves near the ignition switch.
• Make sure the key is not covered by or touching a metal object.
• Do not bring a key from another ve hicle's immobilizer system near the ignition
switch.
Security System Alarm
The security system alarm activates when the doors, hatch, or hood are opened
without the key, or remote transmitter. ■ When the security system alarm activates
The horn sounds intermittently, and all of the exterior lights flash. ■ To deactivate the security system alarm
Unlock the vehicle using the key or remote transmitter or turn the ignition switch to ON
(w . The system, along with the horn and flashing lights, is deactivated.
1Immobilizer System
NOTICE
Leaving the ignition key in the vehicle can result in
theft or accidental movement of the vehicle.
Always take the ignition key with you whenever you
leave the vehicle unattended.
Do not alter the system or add other devices to it.
Doing so may damage the system and make your
vehicle inoperable.
1Security System Alarm
The security alarm continues for a maximum of two
minutes until the security system alarm deactivates.
Main MenuTable of Contents
Page 111 of 325
110
Controls
Operating the Switches Around the Steering Wheel
Ignition Switch
1Ignition Switch
You cannot take the key out unless the shift lever is
in
(P.
If you open the driver's door when the key is in LOCK
(0 or ACCESSORY (q, a warning buzzer will sound
to remind you to take the key out.
When this happens, the following messages appear
on the multi-information display: • In LOCK
(0 : REMOVE KEY
• In ACCESSORY
(q : RETURN IGNITION SWITCH
TO LOCK (0) POSITION
The buzzer will stop when you take the key out.
If the key won't turn from LOCK
(0 to ACCESSORY
(q, turn the key while moving the steering wheel left
and right. The steering wheel will unlock, allowing
the key to turn.
3WARNING
Removing the key from the ignition switch
while driving locks the steering. This can
cause you to lose co ntrol of the vehicle.
Remove the key from the ignition switch
only when parked.
Manual transmission models
Automatic transmission (CVT) models
All models
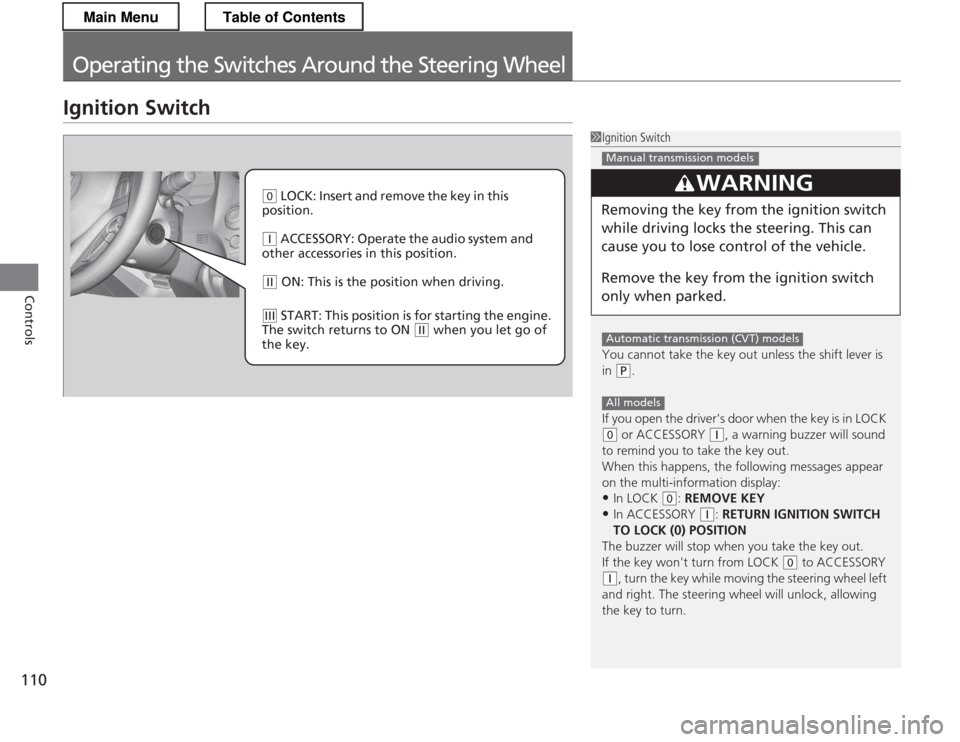
(0 LOCK: Insert and remove the key in this
position.
(q ACCESSORY: Operate the audio system and
other accessories in this position.
(w ON: This is the pos ition when driving.
(e START: This position is for starting the engine.
The switch returns to ON
(w when you let go of
the key.
Main MenuTable of Contents
Page 112 of 325
111
uuOperating the Switches Around the Steering WheeluTurn Signals
Continued
Controls
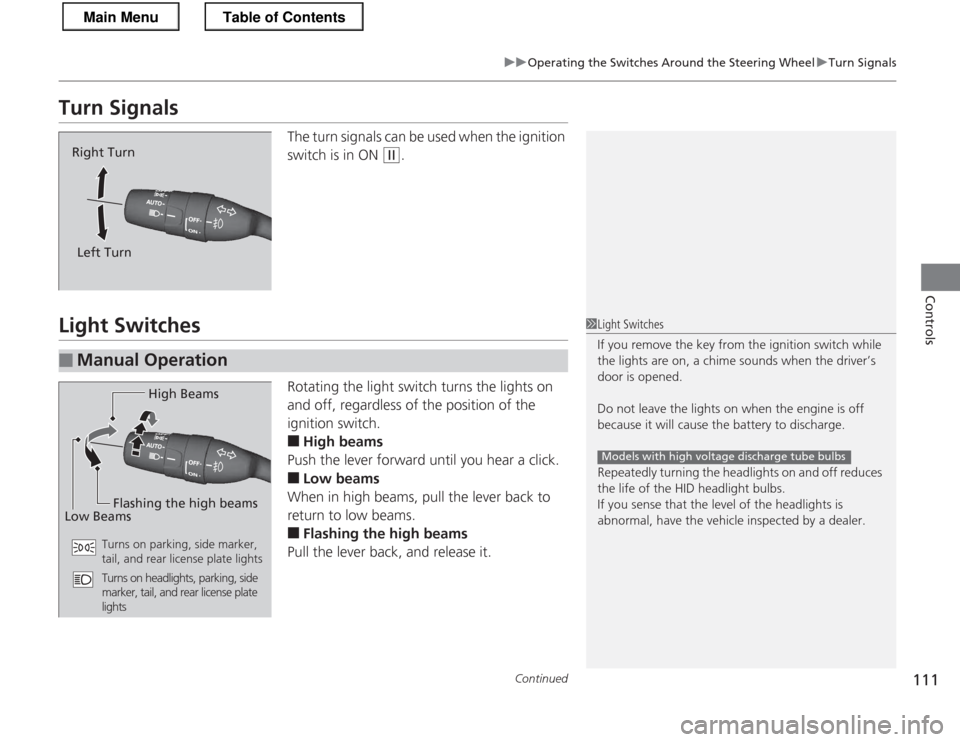
Turn SignalsThe turn signals can be used when the ignition
switch is in ON
(w.
Light Switches
Rotating the light switch turns the lights on
and off, regardless of the position of the
ignition switch. ■High beams
Push the lever forward until you hear a click. ■ Low beams
When in high beams, pull the lever back to
return to low beams. ■ Flashing the high beams
Pull the lever back, and release it.
Right Turn
Left Turn
■Manual Operation
1Light Switches
If you remove the key fr om the ignition switch while
the lights are on, a chime sounds when the driver’s door is opened.
Do not leave the lights on when the engine is off
because it will cause the battery to discharge.
Repeatedly turning the headlights on and off reduces
the life of the HID headlight bulbs.
If you sense that the level of the headlights is
abnormal, have the vehicle inspected by a dealer.
Models with high voltage discharge tube bulbs
High Beams
Flashing the high beams
Low Beams
Turns on parking, side marker,
tail, and rear license plate lights
Turns on headlights, parking, side
marker, tail, and rear license plate
lights
Main MenuTable of Contents
Page 118 of 325
117
uuOperating the Switches Around the Steering WheeluRear Defogger/Heated Door Mirror*
Button
Controls
Rear Defogger/Heated Door Mirror *
Button
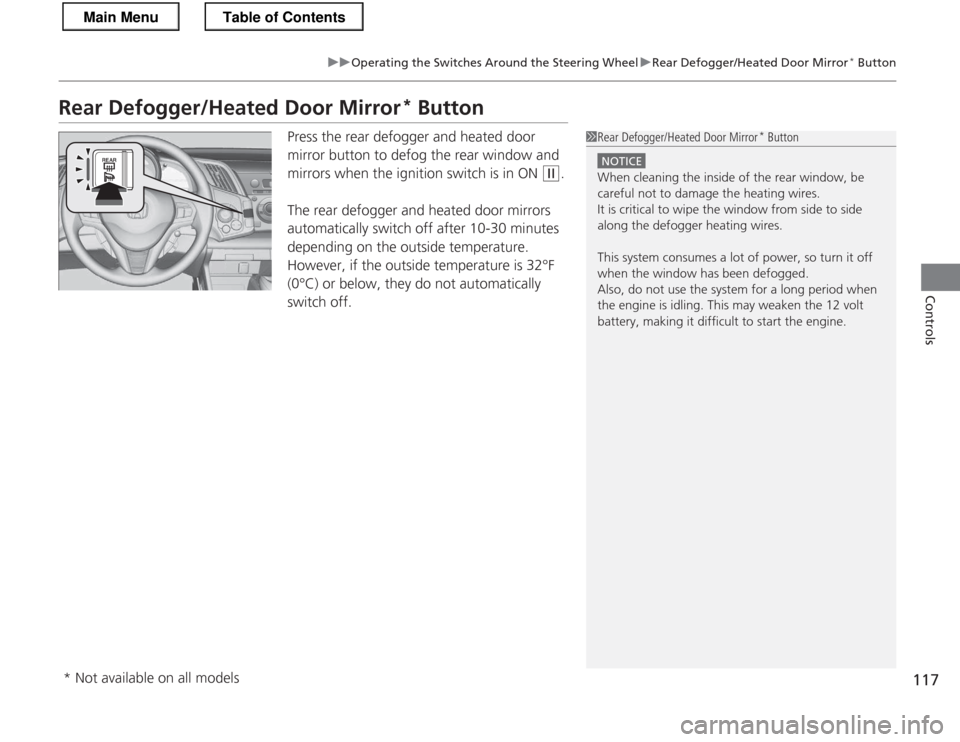
Press the rear defogger and heated door
mirror button to defog the rear window and
mirrors when the ignition switch is in ON
(w .
The rear defogger and heated door mirrors
automatically switch off after 10-30 minutes
depending on the outside temperature.
However, if the outside temperature is 32°F
(0°C) or below, they do not automatically switch off.
1Rear Defogger/Heated Door Mirror *
Button
NOTICE
When cleaning the inside of the rear window, be
careful not to damage the heating wires.
It is critical to wipe the window from side to side
along the defogger heating wires.
This system consumes a lot of power, so turn it off
when the window has been defogged.
Also, do not use the system for a long period when
the engine is idling. This may weaken the 12 volt
battery, making it difficult to start the engine.
* Not available on all models
Main MenuTable of Contents
Page 125 of 325
uuAdjusting the SeatsuAdjusting the Seat Positions
124
Controls
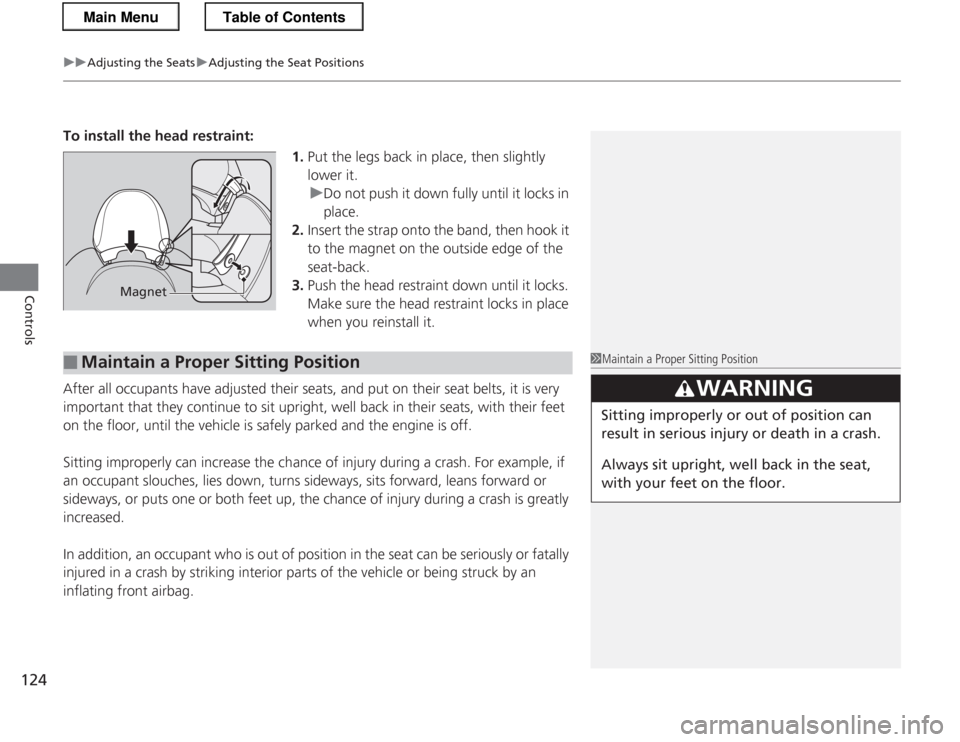
To install the head restraint: 1.Put the legs back in place, then slightly lower it.
uDo not push it down fully until it locks in
place.
2. Insert the strap onto the band, then hook it
to the magnet on the outside edge of the seat-back.
3. Push the head restraint down until it locks.
Make sure the head restraint locks in place
when you reinstall it.
After all occupants have adjusted their seats, and put on their seat belts, it is very
important that they continue to sit upright, well back in their seats, with their feet
on the floor, until the vehicle is safely parked and the engine is off.
Sitting improperly can increase the ch ance of injury during a crash. For example, if
an occupant slouches, lies down, turns sideways, sits forward, leans forward or
sideways, or puts one or both feet up, the chance of injury during a crash is greatly increased.
In addition, an occupant who is out of position in the seat can be seriously or fatally
injured in a crash by striking interior parts of the vehicle or being struck by an
inflating front airbag.
Magnet
■Maintain a Proper Sitting Position1Maintain a Proper Sitting Position
3WARNING
Sitting improperly or out of position can
result in serious injury or death in a crash.
Always sit upright, well back in the seat,
with your feet on the floor.
Main MenuTable of Contents
Page 130 of 325
Continued129
uuInterior Lights/Interior Convenience ItemsuInterior Convenience Items
Controls
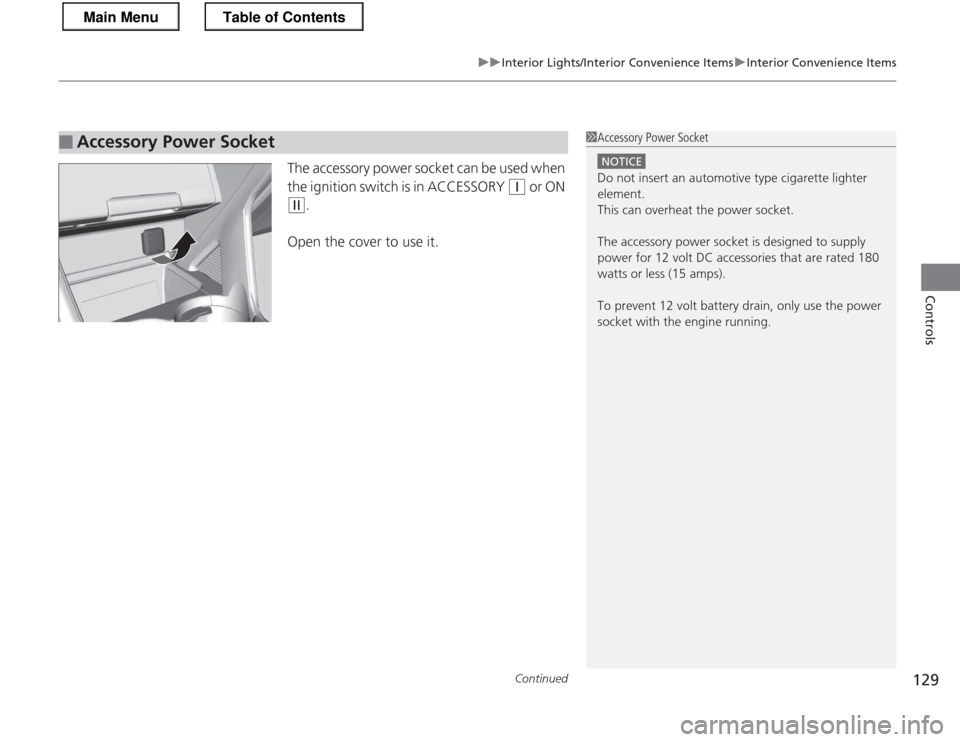
The accessory power socket can be used when
the ignition switch is in ACCESSORY
(q or ON
(w.
Open the cover to use it.
■Accessory Power Socket1Accessory Power Socket
NOTICE
Do not insert an automotive type cigarette lighter
element.
This can overheat the power socket.
The accessory power socket is designed to supply
power for 12 volt DC accessories that are rated 180
watts or less (15 amps).
To prevent 12 volt battery drain, only use the power socket with the engine running.
Main MenuTable of Contents