audio HONDA CR-Z 2013 1.G Owners Manual
[x] Cancel search | Manufacturer: HONDA, Model Year: 2013, Model line: CR-Z, Model: HONDA CR-Z 2013 1.GPages: 325, PDF Size: 11.73 MB
Page 1 of 325
Contents
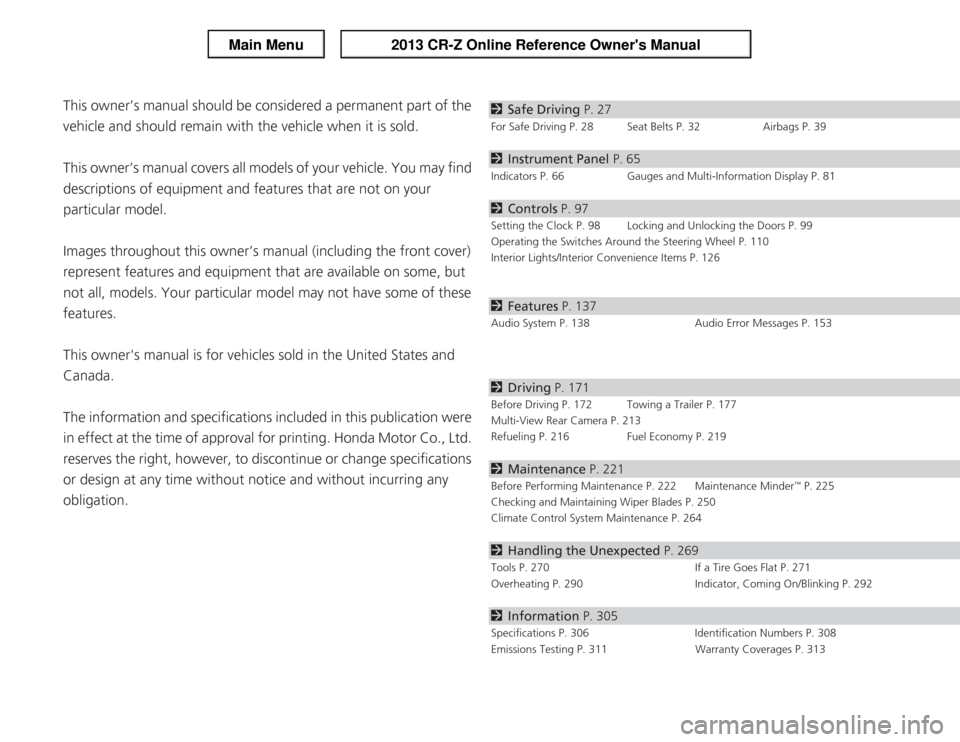
This owner’s manual should be considered a permanent part of the
vehicle and should remain with the vehicle when it is sold.
This owner’s manual covers all models of your vehicle. You may find
descriptions of equipment and features that are not on your
particular model.
Images throughout this owner’s manual (including the front cover)
represent features and equipment that are available on some, but
not all, models. Your particular model may not have some of these features.
This owner's manual is for vehicles sold in the United States and Canada.
The information and specifications included in this publication were
in effect at the time of approval for printing. Honda Motor Co., Ltd.
reserves the right, however, to discontinue or change specifications
or design at any time without notice and without incurring any
obligation.2 Safe Driving P. 27
For Safe Driving P. 28 Seat Belts P. 32 Airbags P. 39
2Instrument Panel P. 65
Indicators P. 66 Gauges and Multi-Information Display P. 81
2Controls P. 97
Setting the Clock P. 98 Locking and Unlocking the Doors P. 99
Operating the Switches Around the Steering Wheel P. 110
Interior Lights/Interior Convenience Items P. 126
2Features P. 137
Audio System P. 138 Audio Error Messages P. 153
2Driving P. 171
Before Driving P. 172 Towing a Trailer P. 177
Multi-View Rear Camera P. 213
Refueling P. 216 Fuel Economy P. 219
2Maintenance P. 221
Before Performing Maintenance P. 222 Maintenance Minder
Page 2 of 325
Contents
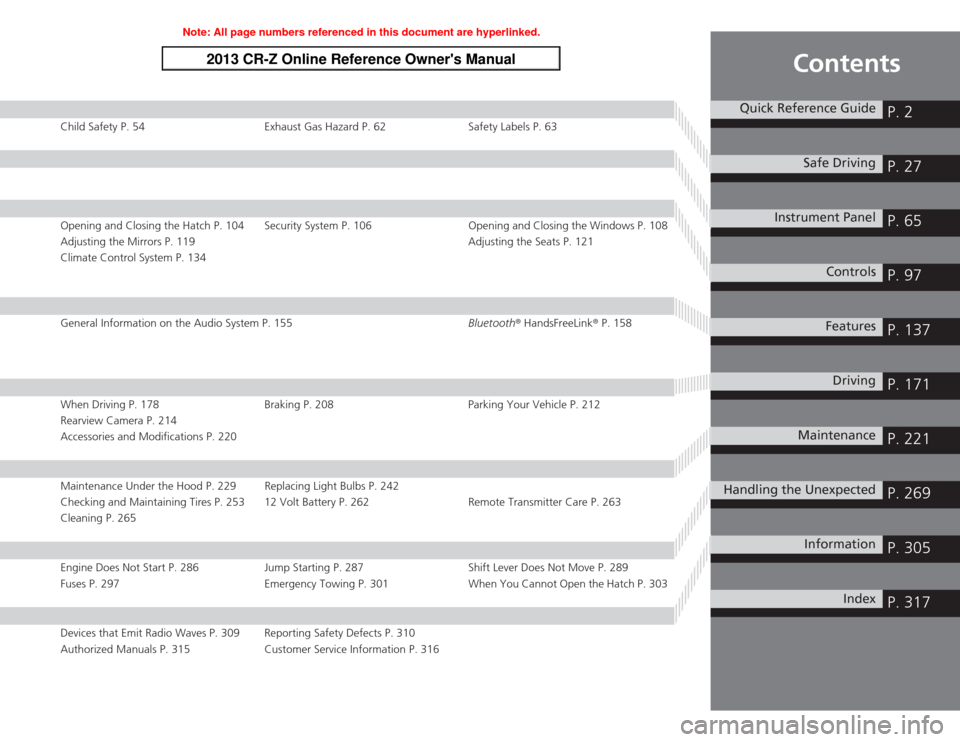
Child Safety P. 54 Exhaust Gas Hazard P. 62 Safety Labels P. 63
Opening and Closing the Hatch P. 104 Security System P. 106 Opening and Closing the Windows P. 108
Adjusting the Mirrors P. 119Adjusting the Seats P. 121
Climate Control System P. 134
General Information on the Audio System P. 155 Bluetooth® HandsFreeLink ® P. 158
When Driving P. 178 Braking P. 208 Parking Your Vehicle P. 212
Rearview Camera P. 214
Accessories and Modifications P. 220
Maintenance Under the Hood P. 229 Replacing Light Bulbs P. 242
Checking and Maintaining Tires P. 253 12 Volt Battery P. 262 Remote Transmitter Care P. 263
Cleaning P. 265
Engine Does Not Start P. 286 Jump Starting P. 287 Shift Lever Does Not Move P. 289
Fuses P. 297 Emergency Towing P. 301 When You Cannot Open the Hatch P. 303
Devices that Emit Radio Waves P. 309 Reporting Safety Defects P. 310
Authorized Manuals P. 315 Customer Service Information P. 316
Quick Reference GuideP. 2
Safe DrivingP. 27
Instrument PanelP. 65
ControlsP. 97
FeaturesP. 137
DrivingP. 171
MaintenanceP. 221
Handling the UnexpectedP. 269
InformationP. 305
IndexP. 317
Note: All page numbers referenced in this document are hyperlinked.
2013 CR-Z Online Reference Owner's Manual
Page 3 of 325
2
Quick Reference Guide
Quick Reference Guide
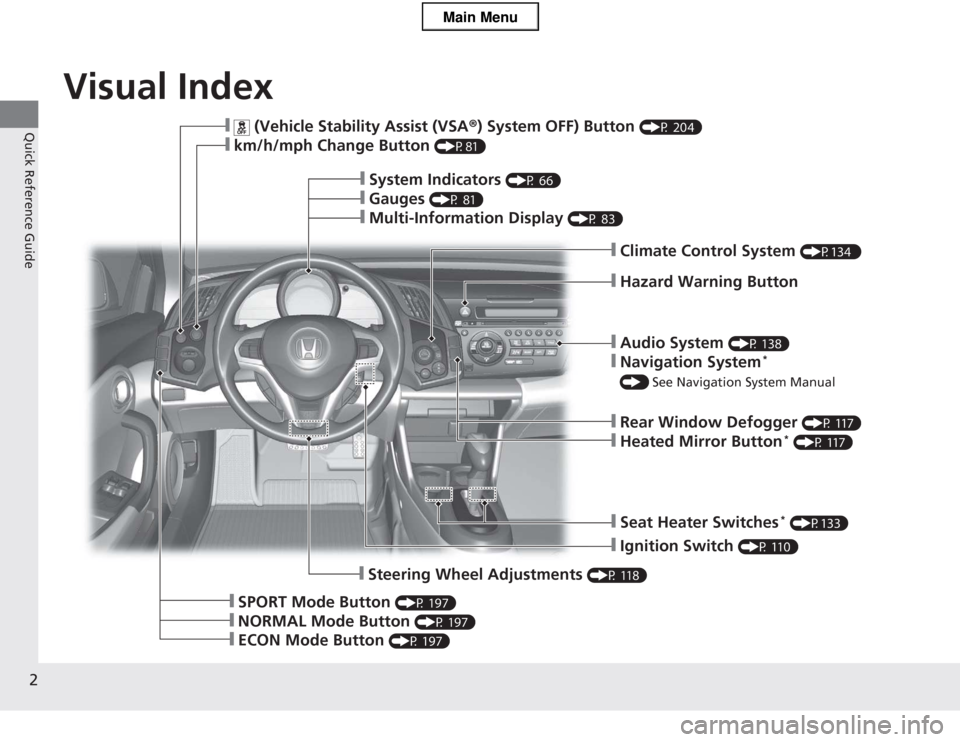
Visual Index
❙Audio System (P 138)
❙Navigation System *
() See Navigation System Manual
❙Rear Window Defogger (P 117)
❙Heated Mirror Button *
(P 117)
❙Seat Heater Switches *
(P133)
❙Ignition Switch (P 110)
❙Steering Wheel Adjustments (P 118)
❙SPORT Mode Button (P 197)
❙NORMAL Mode Button (P 197)
❙ECON Mode Button (P 197)
❙ (Vehicle Stability Assist (VSA ®) System OFF) Button (P 204)
❙km/h/mph Change Button (P81)
❙System Indicators (P 66)
❙Gauges (P 81)
❙Multi-Information Display (P 83)
❙Climate Control System (P134 )
❙Hazard Warning Button
Main Menu
Page 4 of 325
3
Quick Reference Guide
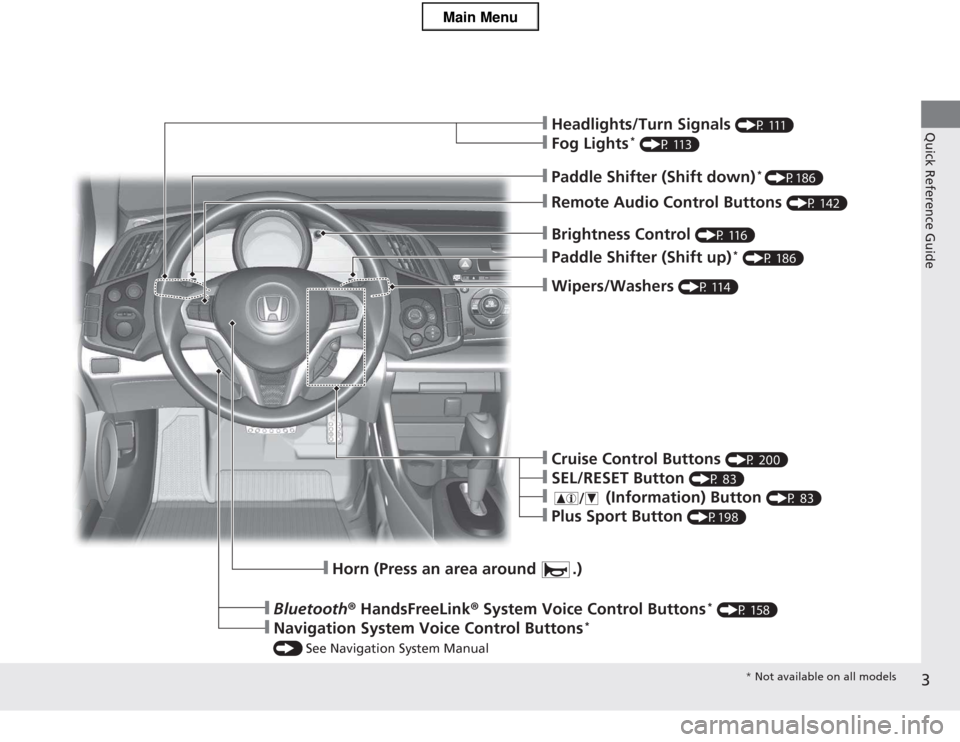
❙Wipers/Washers (P 114)
❙Paddle Shifter (Shift up) *
(P 186)
❙Brightness Control (P 116)
❙Headlights/Turn Signals (P 111)
❙Fog Lights*
(P 113)
❙Remote Audio Control Buttons (P 142)
❙Paddle Shifter (Shift down)*
(P186)
❙Horn (Press an area around .)
❙Bluetooth ® HandsFreeLink ® System Voice Control Buttons *
(P 158)
❙Navigation System Voice Control Buttons *
() See Navigation System Manual
❙Cruise Control Buttons (P 200)
❙SEL/RESET Button (P 83)
❙ (Information) Button (P 83)
❙Plus Sport Button (P198)
* Not available on all models
Main Menu
Page 19 of 325
18
Quick Reference Guide
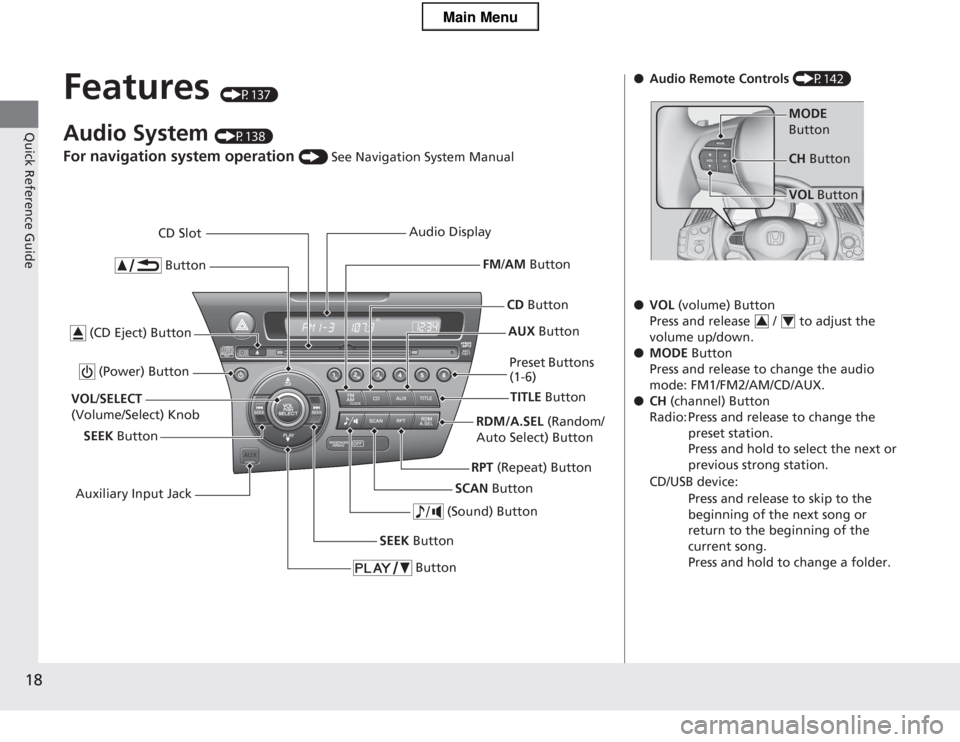
Features (P137)
Audio System (P138)
For navigation system operation () See Navigation System Manual
Button
TITLE Button
FM
/AM Button
(Power) Button
CD Button
AUX Button
CD Slot
(CD Eject) Button
SCAN Button
(Sound) Button
VOL /SELECT
(Volume/Select) Knob
SEEK Button Preset Buttons
(1-6)
Button
SEEK Button
Auxiliary Input Jack Audio Display
RDM/A.SEL (Random/
Auto Select) Button
RPT (Repeat) Button
●Audio Remote Controls (P142)
● VOL (volume) Button
Press and release / to adjust the volume up/down.
● MODE Button
Press and release to change the audio
mode: FM1/FM2/AM/CD/AUX.
● CH (channel) Button
Radio: Press and release to change the preset station. Press and hold to select the next or previous strong station.
CD/USB device:
Press and release to skip to the
beginning of the next song or
return to the beginning of the current song.
Press and hold to change a folder.
MODE
Button
VOL Button
CH
Button
34
Main Menu
Page 111 of 325
110
Controls
Operating the Switches Around the Steering Wheel
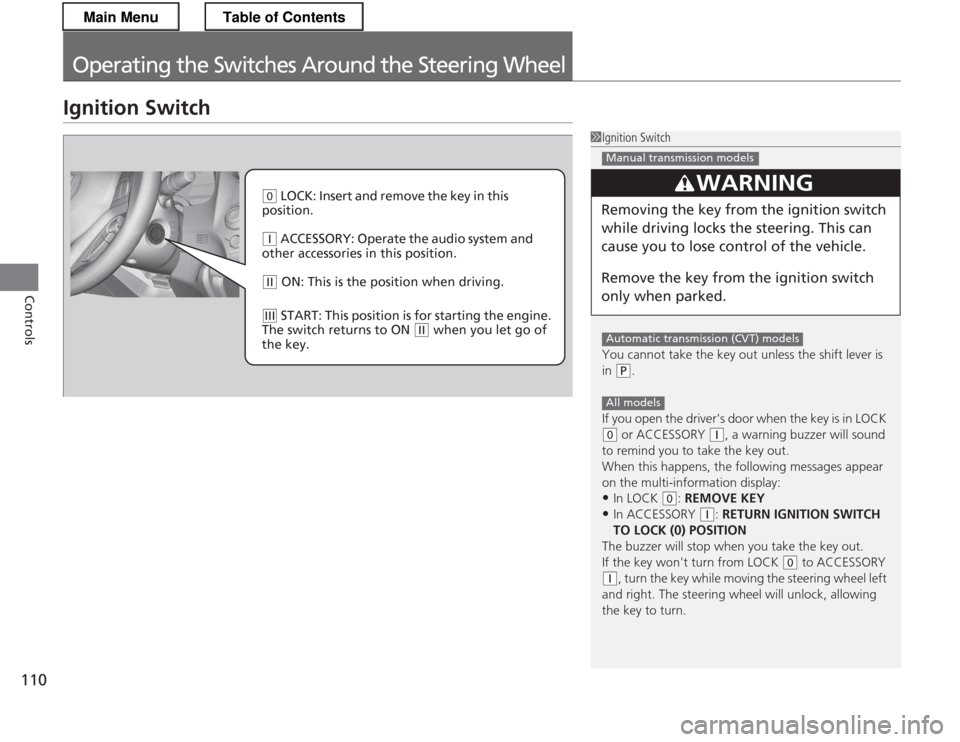
Ignition Switch
1Ignition Switch
You cannot take the key out unless the shift lever is
in
(P.
If you open the driver's door when the key is in LOCK
(0 or ACCESSORY (q, a warning buzzer will sound
to remind you to take the key out.
When this happens, the following messages appear
on the multi-information display: • In LOCK
(0 : REMOVE KEY
• In ACCESSORY
(q : RETURN IGNITION SWITCH
TO LOCK (0) POSITION
The buzzer will stop when you take the key out.
If the key won't turn from LOCK
(0 to ACCESSORY
(q, turn the key while moving the steering wheel left
and right. The steering wheel will unlock, allowing
the key to turn.
3WARNING
Removing the key from the ignition switch
while driving locks the steering. This can
cause you to lose co ntrol of the vehicle.
Remove the key from the ignition switch
only when parked.
Manual transmission models
Automatic transmission (CVT) models
All models
(0 LOCK: Insert and remove the key in this
position.
(q ACCESSORY: Operate the audio system and
other accessories in this position.
(w ON: This is the pos ition when driving.
(e START: This position is for starting the engine.
The switch returns to ON
(w when you let go of
the key.
Main MenuTable of Contents
Page 138 of 325
137
Features
This chapter describes how to operate technology features.
Audio System
About Your Audio System................ 138
USB Adapter Cable .......................... 139
Auxiliary Input Jack .......................... 140
Audio System Theft Protection ......... 141
Audio Remote Controls.................... 142
Audio System Basic Operation.......... 143
Playing the AM/FM Radio ................. 145
Playing a CD .................................... 147
Playing an iPod ®............................... 149
Playing a USB Flash Drive ................. 151 Audio Error Messages
CD Player......................................... 153
iPod ®/USB Flash Drive ...................... 154
General Information on the Audio System
Recommended CDs ......................... 155
Compatible iPod® and USB Flash Drives ... 157
Bluetooth ® HandsFreeLink ®
Using HFL ........................................ 158
HFL Menus ...................................... 160
Main Menu
Page 139 of 325
138
Features
Audio System
About Your Audio System
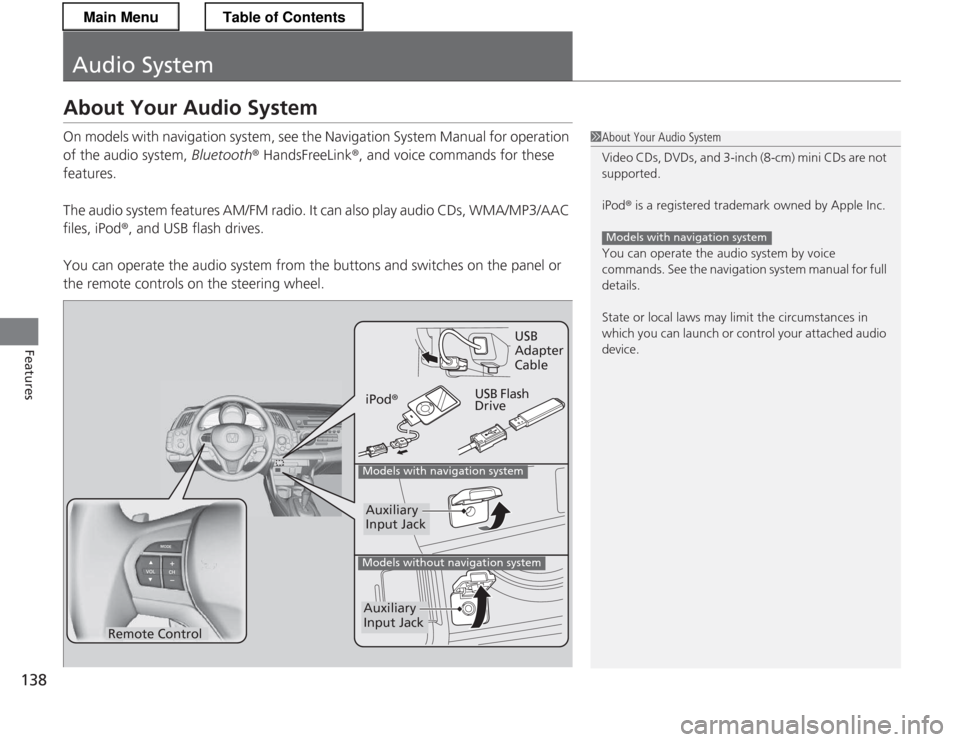
On models with navigation system, see the Navigation System Manual for operation
of the audio system, Bluetooth® HandsFreeLink ®, and voice commands for these
features.
The audio system features AM/FM radio. It can also play audio CDs, WMA/MP3/AAC files, iPod ®, and USB flash drives.
You can operate the audio system from the buttons and switches on the panel or
the remote controls on the steering wheel.
1About Your Audio System
Video CDs, DVDs, and 3-inch (8-cm) mini CDs are not
supported.
iPod ® is a registered trademark owned by Apple Inc.
You can operate the audio system by voice
commands. See the navigation system manual for full details.
State or local laws may limit the circumstances in
which you can launch or control your attached audio
device.
Models with navigation system
Remote Control iPod
® USB Flash DriveUSB Adapter
Cable
Models with navigation system
Models without navigation system
Auxiliary
Input Jack
Auxiliary
Input Jack
Main MenuTable of Contents
Page 140 of 325
139
uuAudio SystemuUSB Adapter Cable
Features
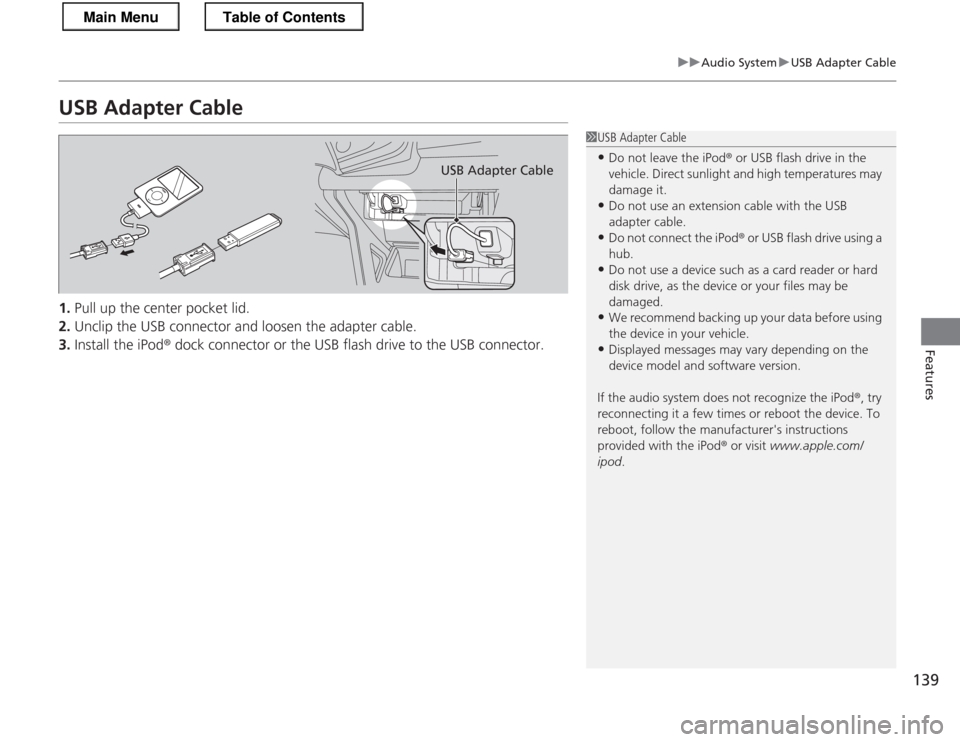
USB Adapter Cable 1.Pull up the center pocket lid.
2. Unclip the USB connector and loosen the adapter cable.
3. Install the iPod ® dock connector or the USB flash drive to the USB connector.
1USB Adapter Cable
• Do not leave the iPod ® or USB flash drive in the
vehicle. Direct sunlight and high temperatures may damage it.
• Do not use an extension cable with the USB
adapter cable.
• Do not connect the iPod ® or USB flash drive using a
hub.
• Do not use a device such as a card reader or hard
disk drive, as the device or your files may be damaged.
• We recommend backing up your data before using
the device in your vehicle.
• Displayed messages may vary depending on the
device model and software version.
If the audio system does not recognize the iPod ®, try
reconnecting it a few times or reboot the device. To
reboot, follow the manufacturer's instructions
provided with the iPod ® or visit www.apple.com/
ipod .
USB Adapter Cable
Main MenuTable of Contents
Page 141 of 325
140
uuAudio SystemuAuxiliary Input Jack
Features
Auxiliary Input Jack
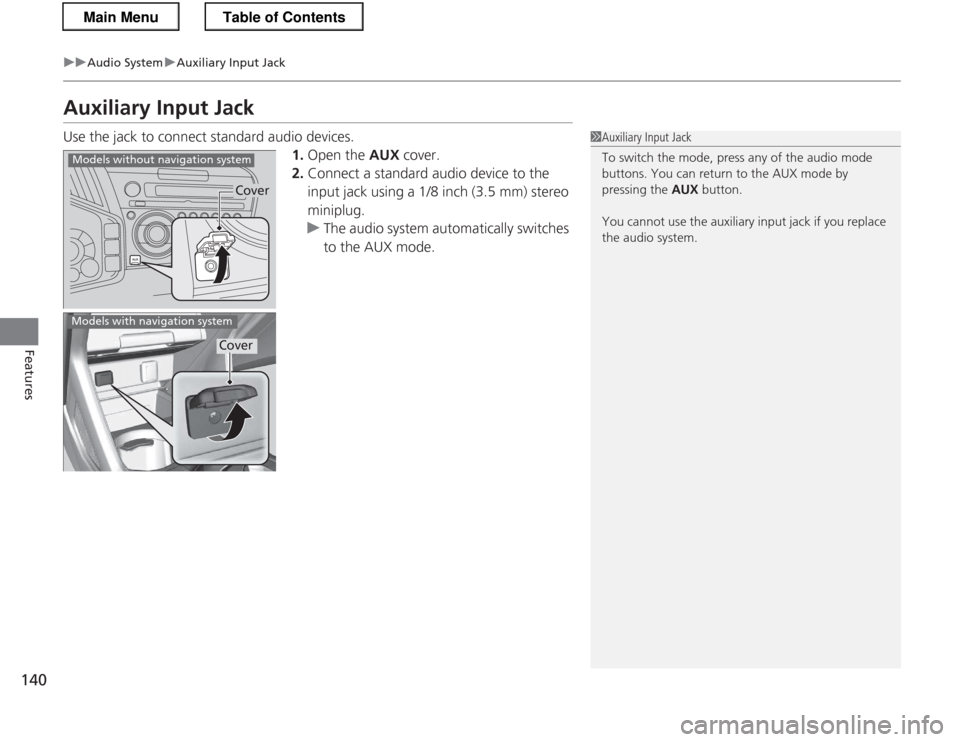
Use the jack to connect standard audio devices.1.Open the AUX cover.
2. Connect a standard audio device to the
input jack using a 1/8 inch (3.5 mm) stereo
miniplug.
uThe audio system automatically switches
to the AUX mode.
1Auxiliary Input Jack
To switch the mode, press any of the audio mode
buttons. You can return to the AUX mode by pressing the AUX button.
You cannot use the auxiliary input jack if you replace
the audio system.
Cover
Models without navigation system
Models with navigation system
Cover
Main MenuTable of Contents