parking brake HONDA CROSSTOUR 2013 1.G Owners Manual
[x] Cancel search | Manufacturer: HONDA, Model Year: 2013, Model line: CROSSTOUR, Model: HONDA CROSSTOUR 2013 1.GPages: 573, PDF Size: 25.21 MB
Page 7 of 573
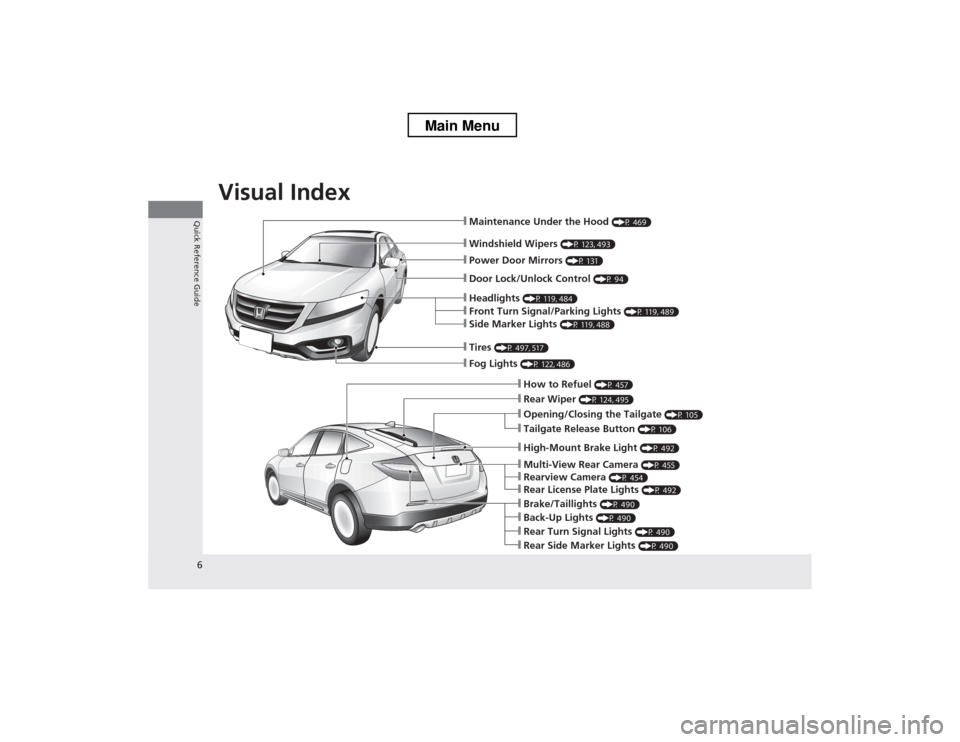
Visual Index
6
Quick Reference Guide
❙Windshield Wipers (P 123, 493)
❙Maintenance Under the Hood (P 469)
❙Fog Lights (P 122, 486)
❙Front Turn Signal/Parking Lights (P 119, 489)
❙Side Marker Lights (P 119, 488)
❙Tires (P 497, 517)
❙How to Refuel (P 457)
❙Opening/Closing the Tailgate (P 105)
❙Rear Wiper (P 124, 495)
❙Back-Up Lights (P 490)
❙Brake/Taillights (P 490)
❙Rear Turn Signal Lights (P 490)
❙Rear Side Marker Lights (P 490)
❙Multi-View Rear Camera (P 455)
❙Rearview Camera (P 454)
❙Rear License Plate Lights (P 492)
❙Headlights (P 119, 484)
❙Power Door Mirrors (P 131)
❙Door Lock/Unlock Control (P 94)
❙High-Mount Brake Light (P 492)
❙Tailgate Release Button (P 106)
Main Menu
Page 9 of 573
8
Quick Reference Guide
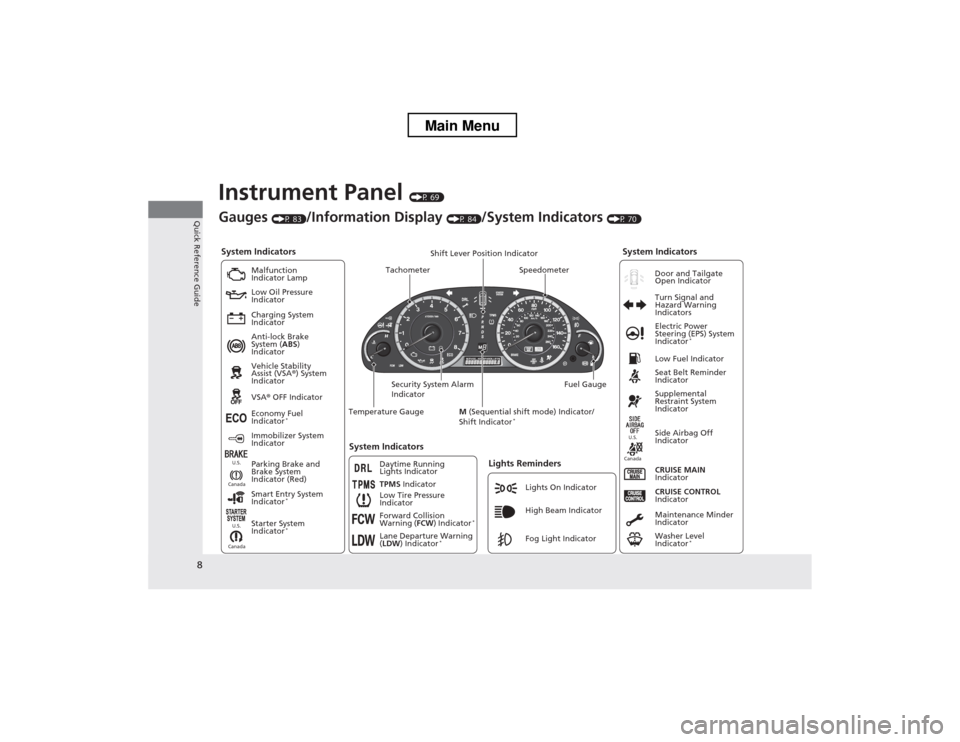
Instrument Panel (P 69)
System Indicators
Malfunction
Indicator Lamp
Low Oil Pressure
Indicator
Charging System
Indicator Anti-lock Brake
System ( ABS)
Indicator Vehicle Stability
Assist (VSA ®) System
Indicator VSA ® OFF Indicator
Low Tire Pressure
IndicatorLights Reminders
Lights On Indicator
High Beam Indicator
Fog Light Indicator
Immobilizer System
Indicator
Seat Belt Reminder
Indicator
System Indicators
CRUISE CONTROL
Indicator
Parking Brake and
Brake System
Indicator (Red) Supplemental
Restraint System
Indicator
Side Airbag Off
Indicator
CRUISE MAIN
Indicator
Tachometer Speedometer
Fuel Gauge
Security System Alarm
Indicator Shift Lever Position Indicator
Low Fuel Indicator
Gauges
(P 83)/Information Display (P 84)/System Indicators (P 70)
Economy Fuel
Indicator *
TPMS Indicator
Maintenance Minder
Indicator
Washer Level
Indicator*
Temperature Gauge
Electric Power
Steering (EPS) System
Indicator
*
Turn Signal and
Hazard Warning
Indicators
System Indicators
Canada U.S.Canada
U.S.
Starter System
Indicator
* Door and Tailgate Open Indicator
Smart Entry System
Indicator *
Canada U.S.Forward Collision
Warning (
FCW) Indicator *
Lane Departure Warning ( LDW ) Indicator *
M
(Sequential shift mode) Indicator/
Shift Indicator *
Daytime Running
Lights Indicator
Main Menu
Page 71 of 573
70
Instrument Panel
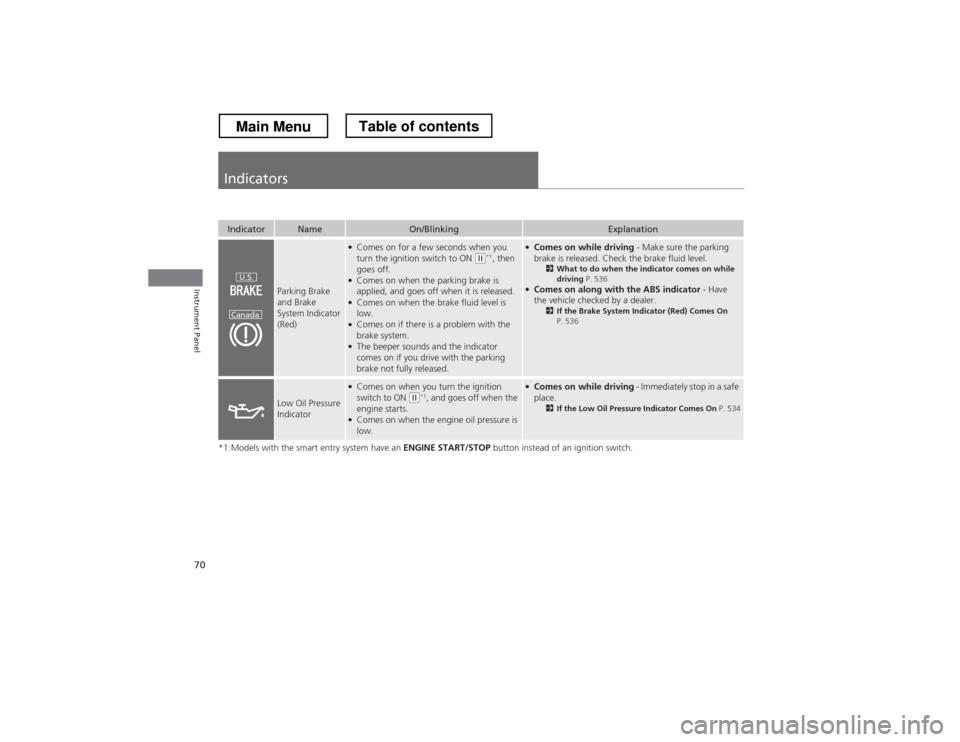
Indicators
*1:Models with the smart entry system have an ENGINE START/STOP button instead of an ignition switch.
IndicatorNameOn/BlinkingExplanation
Parking Brake and Brake
System Indicator (Red)
●
Comes on for a few seconds when you
turn the ignition switch to ON
(w *1
, then
goes off.
● Comes on when the parking brake is
applied, and goes off when it is released.
● Comes on when the brake fluid level is
low.
● Comes on if there is a problem with the
brake system.
● The beeper sounds and the indicator
comes on if you drive with the parking
brake not fully released.
● Comes on while driving - Make sure the parking
brake is released. Check the brake fluid level. 2What to do when the indicator comes on while
driving P. 536
● Comes on along with the ABS indicator - Have
the vehicle checked by a dealer. 2If the Brake System Indicator (Red) Comes On
P. 536
Low Oil Pressure
Indicator
● Comes on when you turn the ignition
switch to ON
(w *1
, and goes off when the
engine starts.
● Comes on when the engine oil pressure is
low.
● Comes on while driving - Immediately stop in a safe
place. 2If the Low Oil Pressure Indicator Comes On P. 534
U.S.
Canada
Main MenuTable of contents
Page 104 of 573
103
uuLocking and Unlocking the DoorsuCustomizing the Auto Door Locking/Unlocking Setting*
Continued
Controls
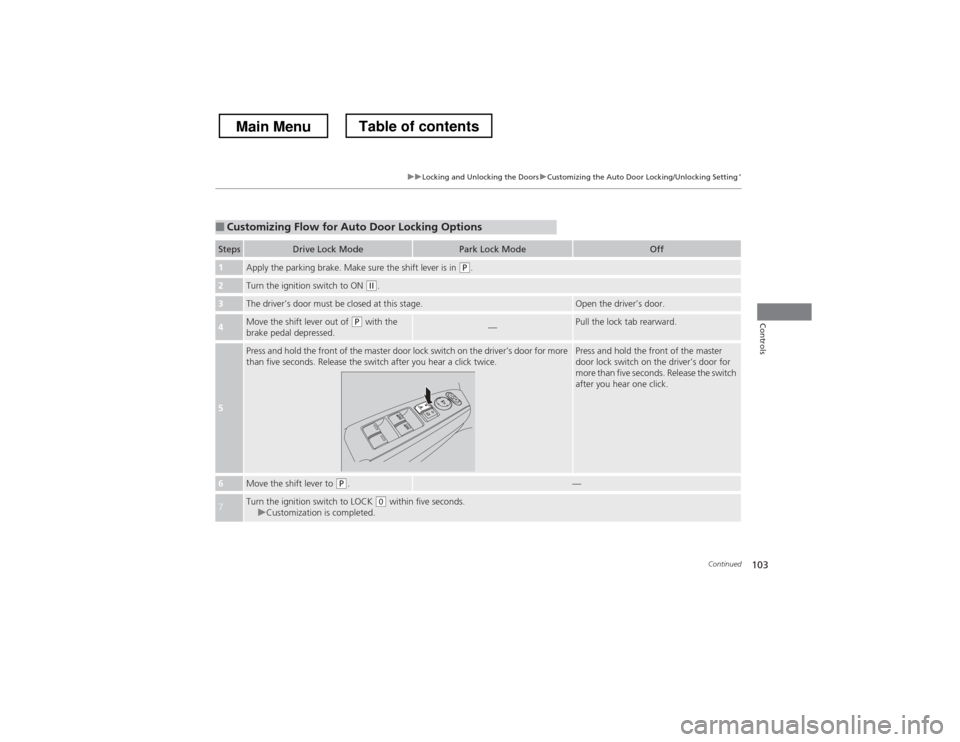
■Customizing Flow for Auto Door Locking Options
StepsDrive Lock ModePark Lock ModeOff
1Apply the parking brake. Make sure the shift lever is in (P
.
2Turn the ignition switch to ON (w .
3The driver’s door must be closed at this stage.Open the driver’s door.
4Move the shift lever out of (P with the
brake pedal depressed.—Pull the lock tab rearward.
5
Press and hold the front of the master door lock switch on the driver’s door for more
than five seconds. Release the switch after you hear a click twice.Press and hold the front of the master
door lock switch on the driver’s door for
more than five seconds. Release the switch
after you hear one click.
6Move the shift lever to (P .—
7Turn the ignition switch to LOCK (0 within five seconds.uCustomization is completed.
Main MenuTable of contents
Page 123 of 573
122
uuOperating the Switches Around the Steering WheeluFog Lights
Controls
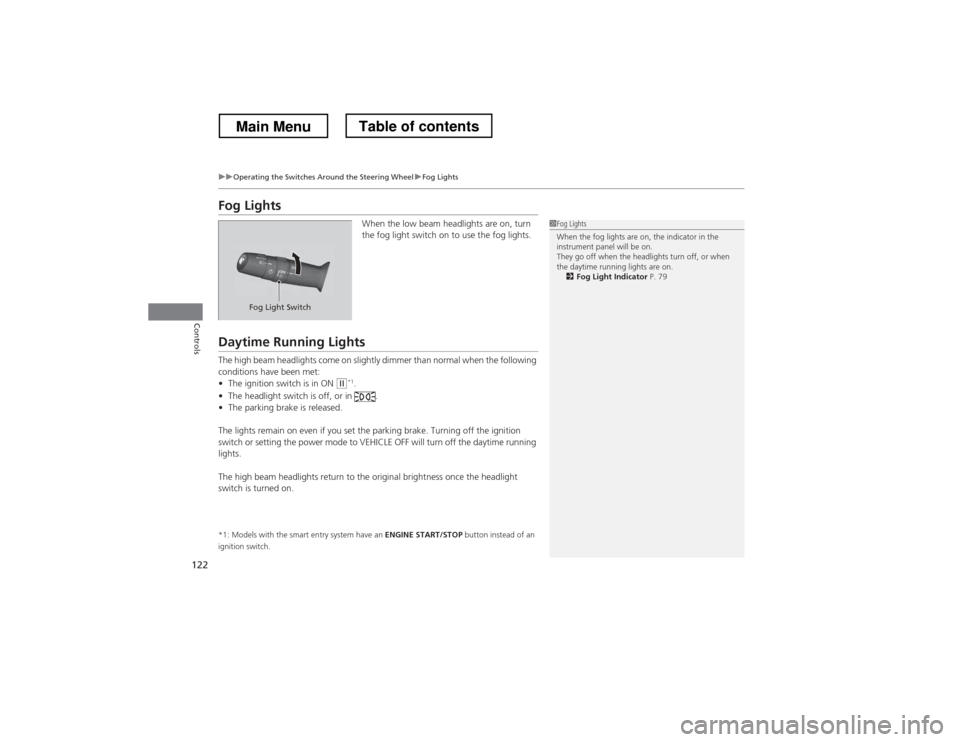
Fog LightsWhen the low beam headlights are on, turn
the fog light switch on to use the fog lights.
Daytime Running Lights
The high beam headlights come on slightly dimmer than normal when the following
conditions have been met:•The ignition switch is in ON
(w *1
.
• The headlight switch is off, or in .
• The parking brake is released.
The lights remain on even if you set the parking brake. Turning off the ignition
switch or setting the power mode to VEHICLE OFF will turn off the daytime running
lights.
The high beam headlights return to the origin al brightness once the headlight
switch is turned on.
*1: Models with the smart entry system have an ENGINE START/STOP button instead of an
ignition switch.
1Fog Lights
When the fog lights are on, the indicator in the
instrument panel will be on.
They go off when the headlights turn off, or when
the daytime running lights are on. 2 Fog Light Indicator P. 79
Fog Light Switch
Main MenuTable of contents
Page 129 of 573
uuOperating the Switches Around the Steering WheeluDriving Position Memory System*
128
Controls
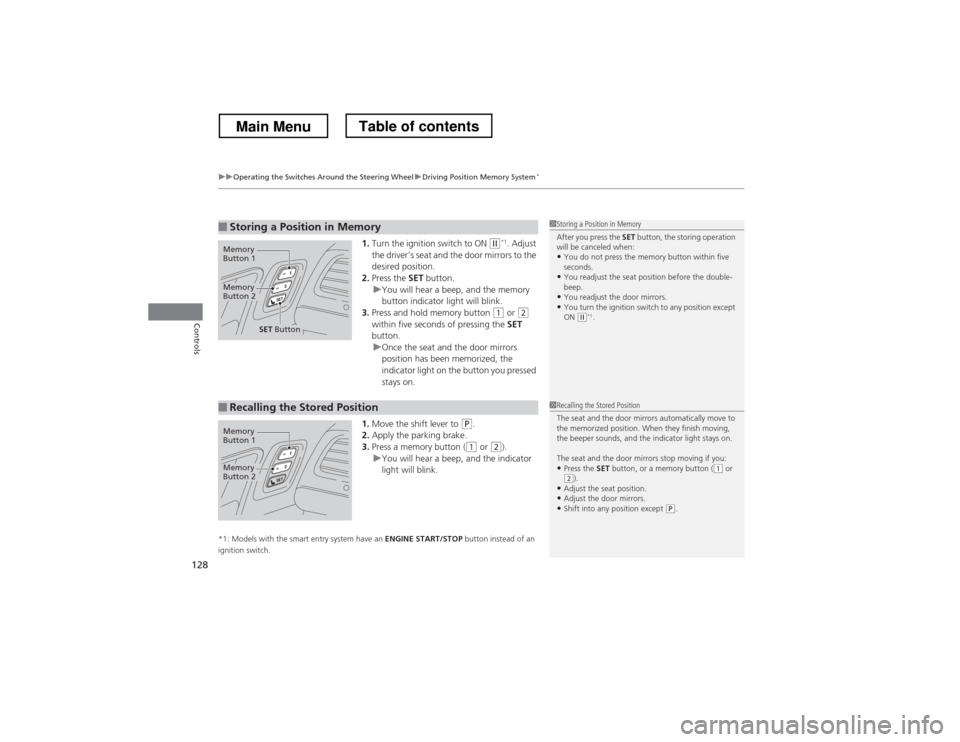
1. Turn the ignition switch to ON (w *1
. Adjust
the driver’s seat and the door mirrors to the
desired position.
2. Press the SET button.
uYou will hear a beep, and the memory
button indicator light will blink.
3. Press and hold memory button
(1 or (2
within five seconds of pressing the SET
button.
uOnce the seat and the door mirrors
position has been memorized, the
indicator light on the button you pressed stays on.
1. Move the shift lever to
(P .
2. Apply the parking brake.
3. Press a memory button (
(1 or (2).uYou will hear a beep, and the indicator
light will blink.
*1: Models with the smart entry system have an ENGINE START/STOP button instead of an
ignition switch.
■Storing a Position in Memory1Storing a Position in Memory
After you press the SET button, the storing operation
will be canceled when:
• You do not press the memory button within five
seconds.
• You readjust the seat position before the double-beep.
• You readjust the door mirrors.
• You turn the ignition switch to any position except
ON
(w *1
.
Memory
Button 1
Memory
Button 2
SET Button
■Recalling the Stored Position1Recalling the Stored Position
The seat and the door mirrors automatically move to
the memorized position. When they finish moving,
the beeper sounds, and the indicator light stays on.
The seat and the door mirrors stop moving if you:
• Press the SET button, or a memory button (
(1 or (2).
• Adjust the seat position.
• Adjust the door mirrors.
• Shift into any position except
(P .
Memory
Button 1
Memory
Button 2
Main MenuTable of contents
Page 410 of 573
409
Driving
This chapter discusses driving, refueling, and information on items such as accessories.
Before Driving Driving Preparation .......................... 410
Maximum Load Limit........................ 413
Towing a Trailer
Towing Preparation .......................... 415
Driving Safely with a Trailer .............. 418
Towing Your Vehicle ........................ 419
When Driving Starting the Engine .......................... 420
Precautions While Driving................. 424
Automatic Transmission ................... 425
Shifting ............................................ 426 Cruise Control ................................. 432
Forward Collision Warning (FCW)
*
.. 435
Lane Departure Warning (LDW) *
..... 439
VSA ® (Vehicle Stability Assist), aka ESC
(Electronic Stability Control), System .. 442
LaneWatch TM
*
.................................. 444
TPMS (Tire Pressure Monitoring System) .. 446Tire Pressure Monitoring System (TPMS) -
Required Federal Explanation ......... 447
Braking
Brake System ................................... 449
ABS (Anti-lock Brake System) ........... 451 Brake Assist System ......................... 452
Parking Your Vehicle
When Stopped ................................ 453
Rearview Camera ............................. 454
Multi-View Rear Camera .................. 455
Refueling Fuel Information .............................. 456
How to Refuel ................................. 457
Fuel Economy .................................... 459
Improving Fuel Economy .................. 459
Accessories and Modifications ........ 460
* Not available on all models
Main Menu
Page 419 of 573
418
uuTowing a TraileruDriving Safely with a Trailer
Driving
Driving Safely with a Trailer •Have the trailer properly serviced and keep it in good condition.
• Make sure that all the weights and load in the vehicle and trailer are within limits.
2 Towing Load Limits P. 415
• Securely attach the hitch, safety chains, and other necessary parts to the trailer.
• Securely store all the items in and on the trailer so that they do not shift while
driving.
• Check if the lights and brakes on the trailer are working properly.
• Check the pressures of the trailer tires, including the spare.
• Drive slower than normal.
• Obey posted speed limits for vehicles with trailers.
• Use the
(D position when towing a trailer on level roads.
• Turn more slowly and with a wider turning arc than normal.
• Allow more time and distance for braking.
• Do not brake or turn suddenly.
■Things You Need To Know Before Towing a Trailer
■Towing Speeds and Gears
■Turning and Braking
1Driving Safely with a Trailer
Parking
In addition to the normal precautions, place wheel
chocks at each of the trailer’s tires.
Main MenuTable of contents
Page 421 of 573
420
Driving
When Driving
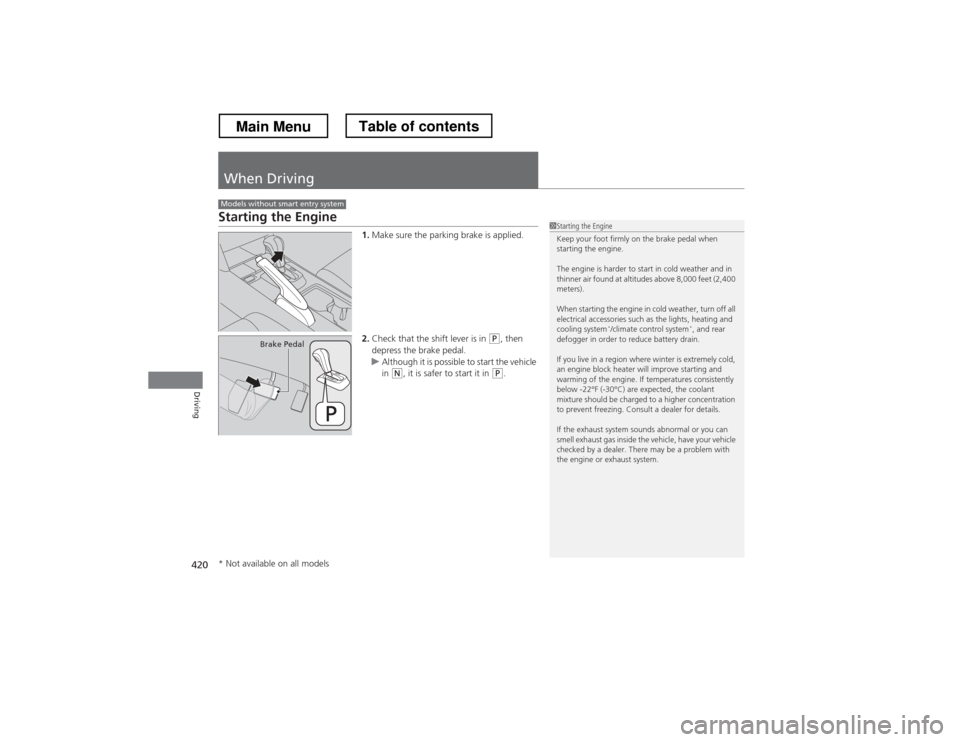
Starting the Engine1.Make sure the parking brake is applied.
2. Check that the shift lever is in
(P , then
depress the brake pedal.
uAlthough it is possible to start the vehicle
in (N , it is safer to start it in (P.
Models without smart entry system
1Starting the Engine
Keep your foot firmly on the brake pedal when
starting the engine.
The engine is harder to start in cold weather and in
thinner air found at altitudes above 8,000 feet (2,400 meters).
When starting the engine in cold weather, turn off all
electrical accessories such as the lights, heating and
cooling system *
/climate control system *
, and rear
defogger in order to reduce battery drain.
If you live in a region where winter is extremely cold,
an engine block heater will improve starting and
warming of the engine. If temperatures consistently
below -22°F (-30°C) are expected, the coolant
mixture should be charged to a higher concentration
to prevent freezing. Consult a dealer for details.
If the exhaust system sounds abnormal or you can
smell exhaust gas inside the vehicle, have your vehicle
checked by a dealer. There may be a problem with
the engine or exhaust system.
Brake Pedal
* Not available on all models
Main MenuTable of contents
Page 422 of 573
421
uuWhen DrivinguStarting the Engine
Driving
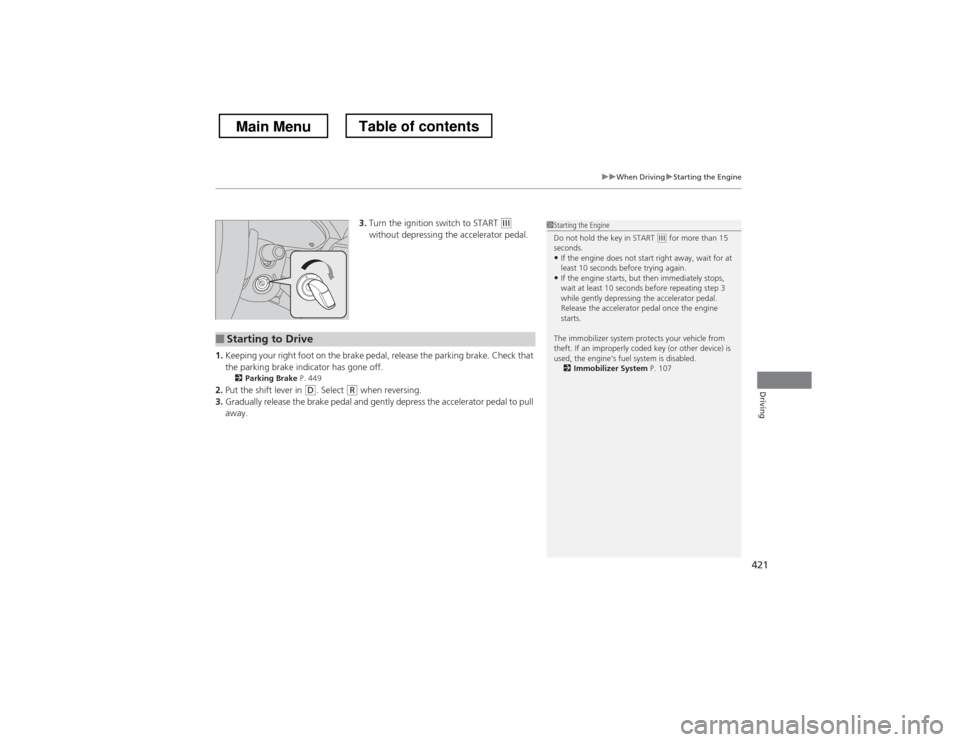
3.Turn the ignition switch to START (e
without depressing the accelerator pedal.
1. Keeping your right foot on the brake pedal, release the parking brake. Check that
the parking brake indicator has gone off.
2 Parking Brake P. 449
2. Put the shift lever in
(D . Select (R when reversing.
3. Gradually release the brake pedal and gently depress the accelerator pedal to pull away.
■Starting to Drive
1Starting the Engine
Do not hold the key in START
(e for more than 15
seconds.
• If the engine does not start right away, wait for at
least 10 seconds before trying again.
• If the engine starts, but then immediately stops,
wait at least 10 seconds before repeating step 3
while gently depressing the accelerator pedal.
Release the accelerator pedal once the engine starts.
The immobilizer system protects your vehicle from
theft. If an improperly coded key (or other device) is
used, the engine’s fuel system is disabled. 2 Immobilizer System P. 107
Main MenuTable of contents