start HONDA CRV 2023 Repair Manual
[x] Cancel search | Manufacturer: HONDA, Model Year: 2023, Model line: CRV, Model: HONDA CRV 2023Pages: 719, PDF Size: 13.43 MB
Page 460 of 719
Continued459
uuWhen Driving uTurning on the Power
Driving
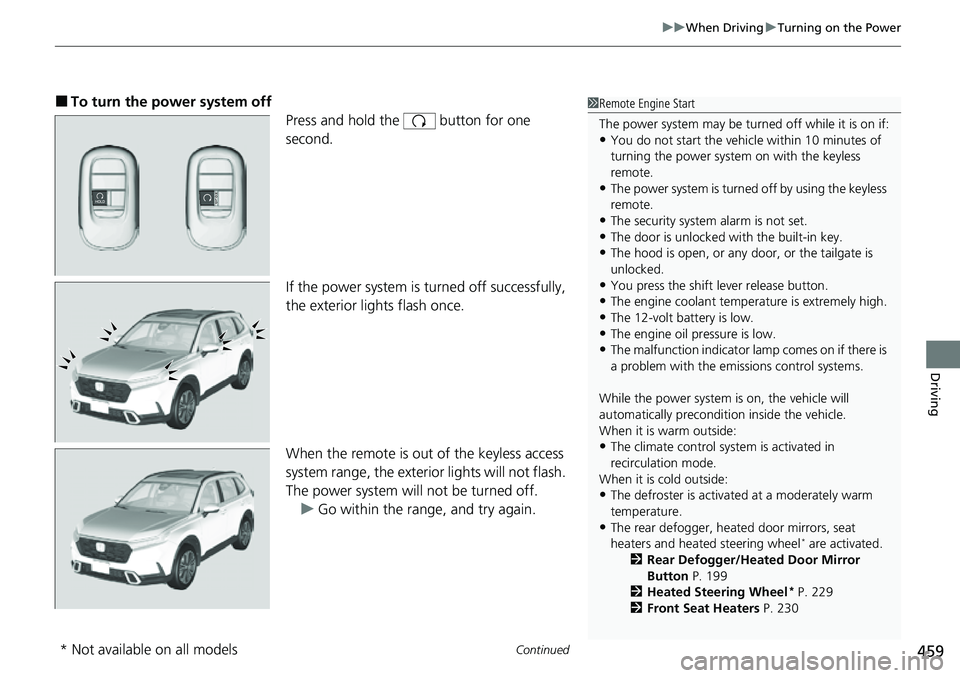
■To turn the power system off
Press and hold the button for one
second.
If the power system is turned off successfully,
the exterior lights flash once.
When the remote is out of the keyless access
system range, the exteri or lights will not flash.
The power system will not be turned off. u Go within the range, and try again.1Remote Engine Start
The power system may be turned off while it is on if:
•You do not start the vehicl e within 10 minutes of
turning the power system on with the keyless
remote.
•The power system is turned off by using the keyless
remote.
•The security system alarm is not set.•The door is unlocked with the built-in key.
•The hood is open, or any door, or the tailgate is
unlocked.
•You press the shift lever release button.
•The engine coolant temper ature is extremely high.
•The 12-volt battery is low.•The engine oil pressure is low.
•The malfunction indicator la mp comes on if there is
a problem with the emissions control systems.
While the power system is on, the vehicle will
automatically preconditi on inside the vehicle.
When it is warm outside:
•The climate control system is activated in
recirculation mode.
When it is cold outside:
•The defroster is activated at a moderately warm
temperature.
•The rear defogger, heated door mirrors, seat
heaters and heated steering wheel* are activated.
2 Rear Defogger/Heated Door Mirror
Button P. 199
2 Heated Steering Wheel
* P. 229
2 Front Seat Heaters P. 230
* Not available on all models
Page 461 of 719
uuWhen Driving uTurning on the Power
460
Driving
1. Depress and hold the brake pedal, then press the POWER button.
2. Keeping your right foot on the brake pedal, check that the READY indicator is on,
then put the tra nsmission into
(D. Select (R when reversing.
3. With the parking brake applied, release the brake pedal and gently depress the
accelerator pedal.
u Make sure the parking brake and brake system indicator (red) goes off.
2 Parking Brake P. 572
■Hill start assist system
Hill start assist keeps the brake engaged br iefly to help prevent the vehicle from
rolling on inclines as you move your fo ot from the brake pedal to the accelerator.
Put the transmission into
(D or when facing uphill, or (R when facing downhill,
then release the brake pedal.
■Starting to Drive1 Starting to Drive
The power system is turned off when the transmission
is taken out of
( P before the POWER button is
pressed. Follow step 1 when starting to drive.
You can also release the parking brake by pressing
the electric parking brake sw itch while depressing the
brake pedal.
When facing downhill, you can start your vehicle
more smoothly by manually releasing it with the
electric parking brake switch than by releasing it with
the accelerator pedal.
As a hybrid vehicle, the sounds and vibrations from
the engine may be absent even though the vehicle is
ready for driving. It also makes you fail to recognize
that you can start.
Make sure to check if the READY indicator is on
before you start to drive.
When the power system was turned on using the
button on the keyless remoteWhen the power system was turned on using the button on the keyless remote
When the power system was turned on in any case
1 Hill start assist system
Hill start assist may not prevent the vehicle from
rolling downhill on a very st eep or slippery slope, and
will not operate on small inclines.
Hill start assist is not a replacement for the parking
brake.
Hill start assist will operate even when VSA ® is
switched off.
B
Page 474 of 719
473
uuWhen Driving uDrive Mode Switch
Driving
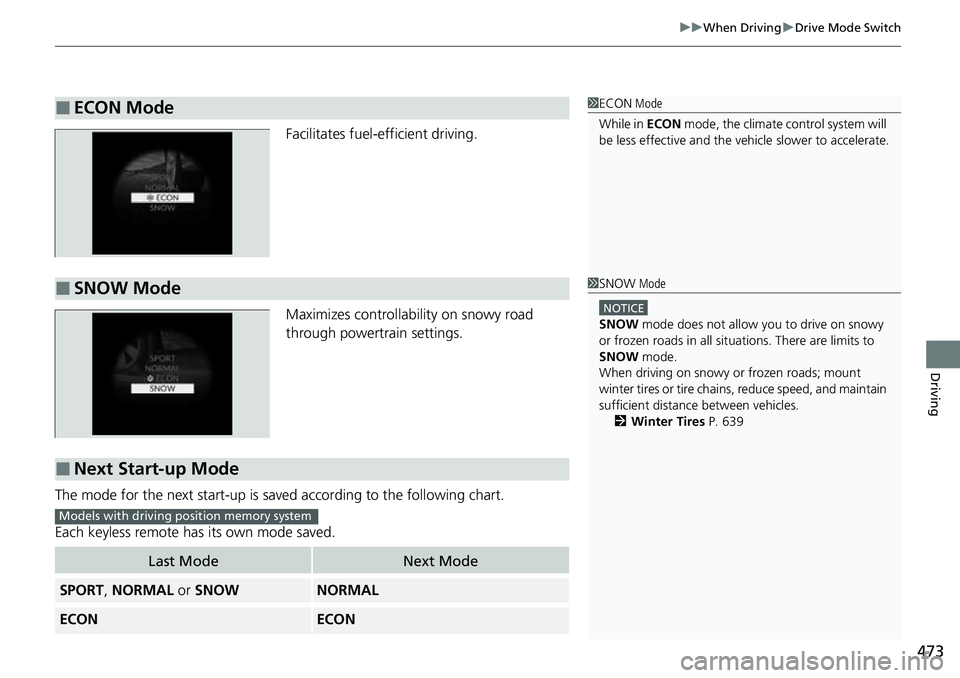
Facilitates fuel-efficient driving.
Maximizes controllability on snowy road
through powertrain settings.
The mode for the next start-up is sa ved according to the following chart.
Each keyless remote has its own mode saved.
■ECON Mode1 ECON Mode
While in ECON mode, the climate control system will
be less effective and the vehi cle slower to accelerate.
■SNOW Mode1SNOW Mode
NOTICE
SNOW mode does not allow you to drive on snowy
or frozen roads in all situations. There are limits to
SNOW mode.
When driving on snowy or frozen roads; mount
winter tires or tire chains , reduce speed, and maintain
sufficient distance between vehicles.
2 Winter Tires P. 639
■Next Start-up Mode
Last ModeNext Mode
SPORT, NORMAL or SNOWNORMAL
ECONECON
Models with driving position memory system
Page 482 of 719
Continued481
uuWhen Driving uTire Pressure Monitoring System (TPMS)
Driving
You must start TPMS calibration every time you:
• Adjust the pressure in one or more tires.
• Rotate the tires.
• Replace one or more tires.
Before calibrating the TPMS:
• Set the cold tire pressure in all four tires.
2 Checking Tires P. 631
Make sure:
•The vehicle is at a complete stop.
• The transmission is in
(P.
• The power mode is in ON.
1Tire Pressure Monitoring System (TPMS)
The Vehicle Stability Assist
TM (VSA ®) system, brake
system (Amber), Adaptive Cruise Control (ACC) with
Low Speed Follow, low tire pressure/TPMS and safety
support indicators may come on in amber along with
a message in the gauge when you set the power
mode to ON after re connecting the battery.
Drive a short distance at more than 12 mph (20 km/h).
Each indicator should go off. If any do not, have your
vehicle checked by a dealer.
■TPMS Calibration1 TPMS Calibration
The calibration process requires approximately 30
minutes of cumulative dr iving at speeds between
31-62 mph (50-100 km/h).
During this period, if power mode is set to ON and
the vehicle is not moved within 45 seconds, you may
notice the low tire pres sure indicator comes on
briefly. This is normal and indicates that the
calibration process is not yet complete.
If the tire chains are installed, remove them before
calibrating the TPMS.
If the low tire pressure/TPMS indicator comes on even
when the properly inflated specified regular tires are
installed, have your vehi cle checked by a dealer.
We recommend that the tires be replaced with the
same brand, model, and size as the originals. Ask a
dealer for details.
Page 484 of 719
483
uuWhen Driving uTire Pressure Monitoring System (TPMS)
Continued
Driving
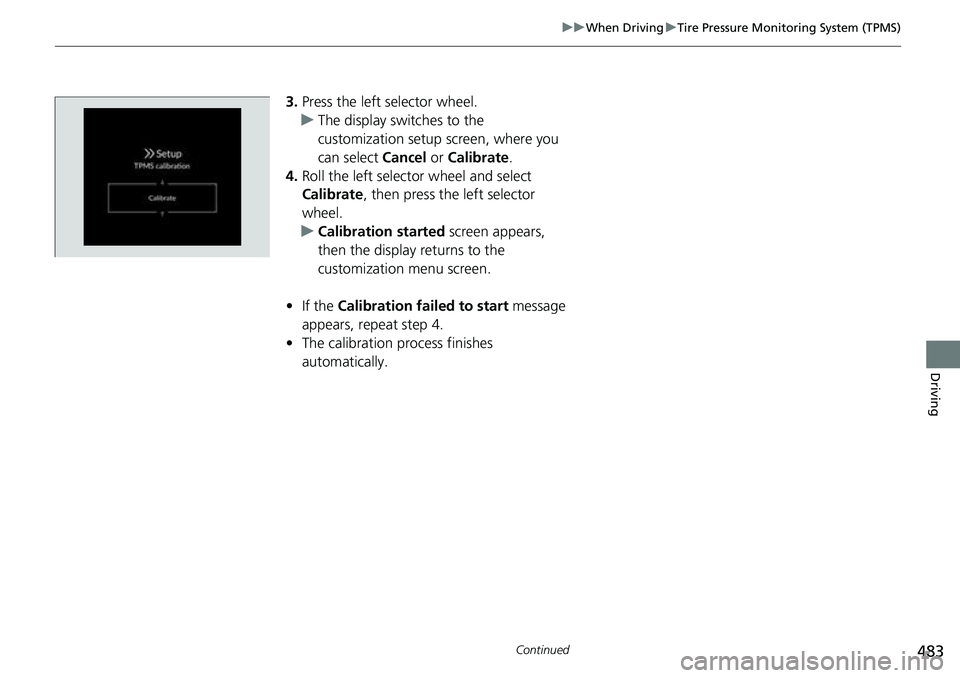
3. Press the left selector wheel.
u The display swit ches to the
customization setup screen, where you
can select Cancel or Calibrate .
4. Roll the left selector wheel and select
Calibrate , then press the left selector
wheel.
u Calibration started screen appears,
then the display returns to the
customization menu screen.
• If the Calibration failed to start message
appears, repeat step 4.
• The calibration process finishes
automatically.
Page 485 of 719
484
uuWhen Driving uTire Pressure Monitoring System (TPMS)
Driving
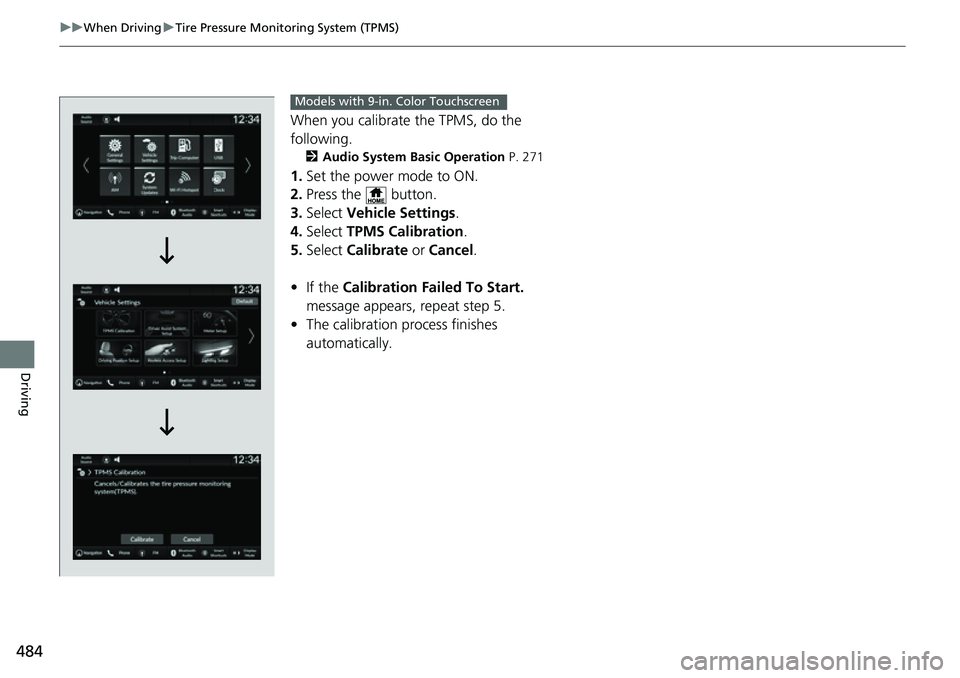
When you calibrate the TPMS, do the
following.
2 Audio System Basic Operation P. 271
1.Set the power mode to ON.
2. Press the button.
3. Select Vehicle Settings .
4. Select TPMS Calibration .
5. Select Calibrate or Cancel .
• If the Calibration Failed To Start.
message appears, repeat step 5.
• The calibration pr ocess finishes
automatically.
Models with 9-in. Color Touchscreen
Page 487 of 719
486
uuWhen Driving uTire Pressure Monitoring System (TPMS) - Required Federal Explanation
Driving
Please note that the TPMS is not a substitute for proper tire
maintenance, and it is the driver 's responsibility to maintain
correct tire pressure, even if un der-inflation has not reached the
level to trigger illumina tion of the TPMS low ti re pressure telltale.
Your vehicle has also been eq uipped with a TPMS malfunction
indicator to indicate when the sy stem is not operating properly.
The TPMS malfunction indicator is combined with the low tire
pressure telltale. When the system detects a malfunction, the
telltale will flash fo r approximately one minute and then remain
continuously illuminated. This sequence will continue upon
subsequent vehicle start-ups as long as the malfunction exists.
When the malfunction indicator is illuminated, the system may
not be able to detect or signal low tire pressure as intended.
TPMS malfunctions may occur for a variety of reasons, including
the installation of replacement or alternate tires or wheels on the
vehicle that prevent the TPMS from functioning properly.
Always check the TPMS malfunction telltale after replacing one or
more tires or wheels on your vehicle to ensure that the
replacement or alternate tires and wheels allow the TPMS to
continue to function properly.
Page 497 of 719
uuHonda Sensing ®u Collision Mitigation Braking SystemTM (CMBSTM)
496
Driving
■How the system works
The CMBS
TM will be canceled when your vehi cle stops or the system determines
there no longer is the potential for a collision.
The CMBS
TM may also be canceled when a driver operates the steering wheel and
the brake or accelerator pedal to avoid a collision.
1 How the system works
The camera in the CMBS
TM is also designed to detect
pedestrians.
However, this pedestrian detection feature may not
activate or may not detect a pedestrian in front of
your vehicle under certain conditions.
Refer to the ones indicating the pedestrian detection
limitations from the list. 2 CMBS
TM Conditions and Limitations P. 500
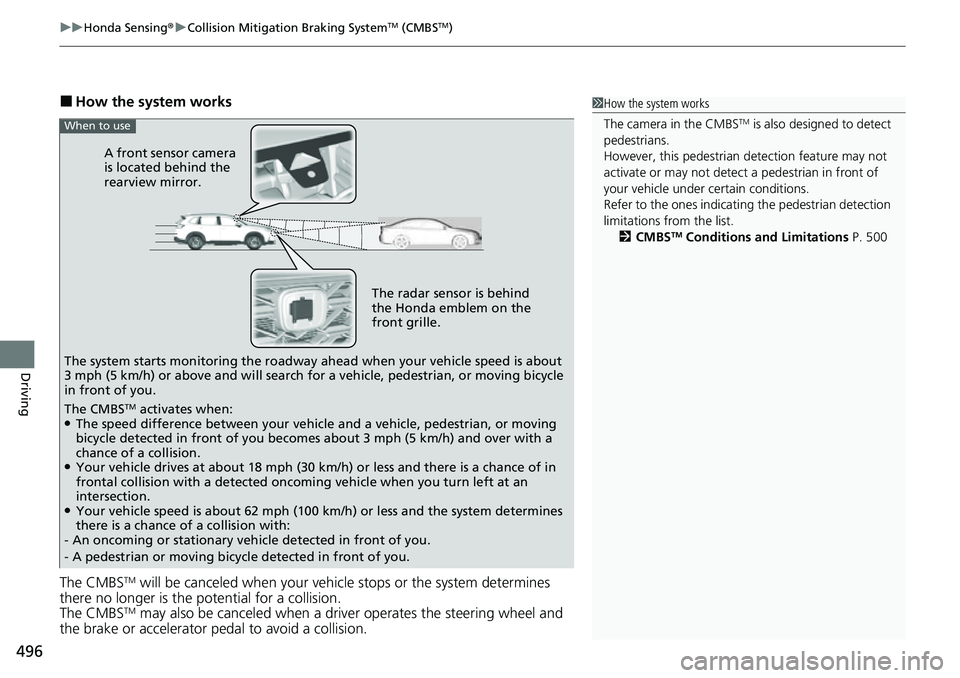
The radar sensor is behind
the Honda emblem on the
front grille.
A front sensor camera
is located behind the
rearview mirror.
The system starts monitoring the roadway ah ead when your vehicle speed is about
3 mph (5 km/h) or above and will search for a vehicle, pedestrian, or moving bicycle
in front of you.
When to use
The CMBSTM activates when:●The speed difference between your vehicle and a vehicle, pedestrian, or moving
bicycle detected in front of you becomes about 3 mph (5 km/h) and over with a
chance of a collision.
●Your vehicle drives at about 18 mph (30 km/h) or less and there is a chance of in
frontal collision with a detected oncoming vehicle when you turn left at an
intersection.
●Your vehicle speed is about 62 mph (100 km/h) or less and the system determines
there is a chance of a collision with:
- An oncoming or stationary vehicle detected in front of you.
- A pedestrian or moving bicycle detected in front of you.
Page 509 of 719
uuHonda Sensing ®u Low Speed Braking Control*
508
Driving
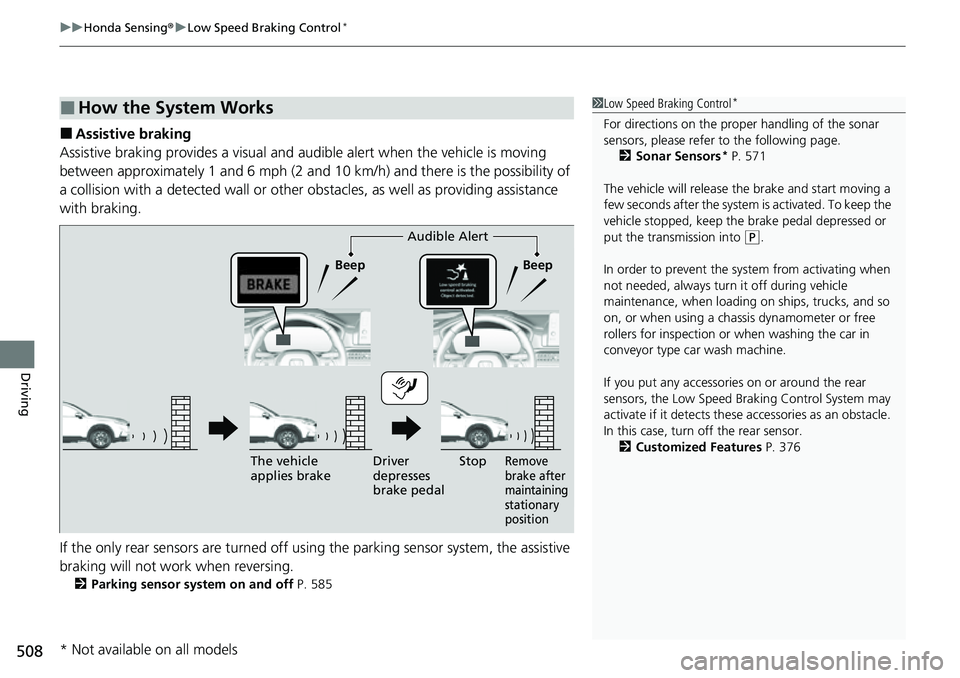
■Assistive braking
Assistive braking provides a visual and audible alert when the vehicle is moving
between approximately 1 and 6 mph (2 and 10 km/h) and there is the possibility of
a collision with a detected wall or other obstacles, as well as providing assistance
with braking.
If the only rear sensors are turned off using the parking sensor system, the assistive
braking will not work when reversing.
2 Parking sensor system on and off P. 585
■How the System Works1Low Speed Braking Control*
For directions on the prop er handling of the sonar
sensors, please refer to the following page.
2 Sonar Sensors
* P. 571
The vehicle will release the brake and start moving a
few seconds after the system is activated. To keep the
vehicle stopped, keep the brake pedal depressed or
put the transmission into
( P.
In order to prevent the sy stem from activating when
not needed, always turn it off during vehicle
maintenance, when loading on ships, trucks, and so
on, or when using a chas sis dynamometer or free
rollers for inspection or when washing the car in
conveyor type car wash machine.
If you put any accessories on or around the rear
sensors, the Low Speed Br aking Control System may
activate if it detects these accessories as an obstacle.
In this case, turn off the rear sensor. 2 Customized Features P. 376Audible Alert
Beep Beep
The vehicle
applies brake Driver
depresses
brake pedal
Remove
brake after
maintaining
stationary
positionStop
* Not available on all models
Page 517 of 719
516
uuHonda Sensing ®u Adaptive Cruise Control (ACC) with Low Speed Follow
Driving
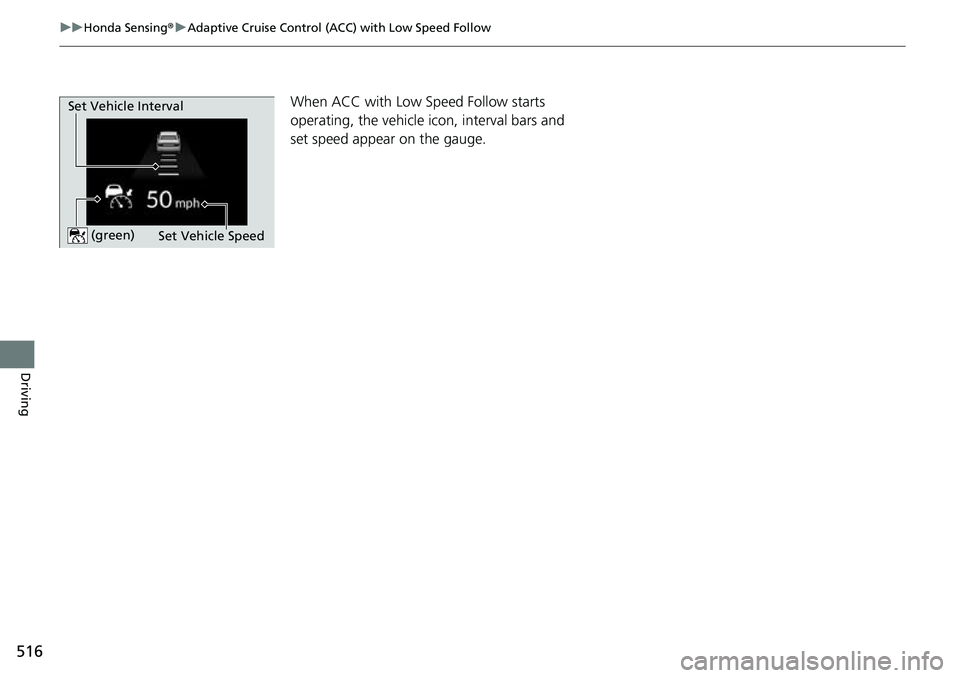
When ACC with Low Speed Follow starts
operating, the vehicle ic on, interval bars and
set speed appear on the gauge.
Set Vehicle Speed
Set Vehicle Interval (green)