buttons HONDA ELEMENT 2009 1.G Owner's Manual
[x] Cancel search | Manufacturer: HONDA, Model Year: 2009, Model line: ELEMENT, Model: HONDA ELEMENT 2009 1.GPages: 345, PDF Size: 18.9 MB
Page 167 of 345

To Play an iPod
ꭂ
This audio system can select and
play the audio files on the iPod
®with
the same controls used for the
in-dash disc player. To play an iPod,
connect it to the USB adapter cable
in the glove box by using your dock
connector. Press the AUDIO button
beside the screen to show the audio
display and touch the AUX icon. The
ignition switch must be in the
ACCESSORY (I) or ON (II) position.
The iPod will also be recharged with
the ignition switch in these positions.
You can also select an icon by
moving the joystick. Move it to left,
right, up, or down to change the
highlighting and scroll through lists,
then press ENT on the top of the
joystick to set your selection. To select the USB mode without
using the icon, press the CD/XM
button repeatedly. The status bar
appears on the bottom of the screen.
The audio system reads and plays
sound files to be playable on the
iPod. The system cannot operate an
iPod as a mass storage device. The
system will only play songs stored on
the iPod with iTunes.
iPod and iTunes are registered
trademarks owned by Apple Inc.
Voice Control SystemYou can select the AUX mode by
using the navigation system voice
control buttons, but cannot operate
the play mode functions.
iPods that are compatible with your
audio system are listed below.
Model
Firmware
ꭧ
iPod 5G Ver. 1.2 or more
iPod classic Ver. 1.0 or more
iPod nano Ver. 1.2 or more
iPod nano 2nd
generation Ver. 1.1.2 or more
iPod nano 3rd
generation Ver. 1.0 or more
iPod touch Ver. 1.1.1 or more
iPhone Ver. 1.1.1 or moreꭧ: Use the latest firmware.
Use only compatible iPods with the
latest firmware. iPods that are not
compatible will not work in this audio
unit.
CONTINUED
Playing an iPod
®(Models with navigation system)
163
Features
2009 Element
Page 170 of 345
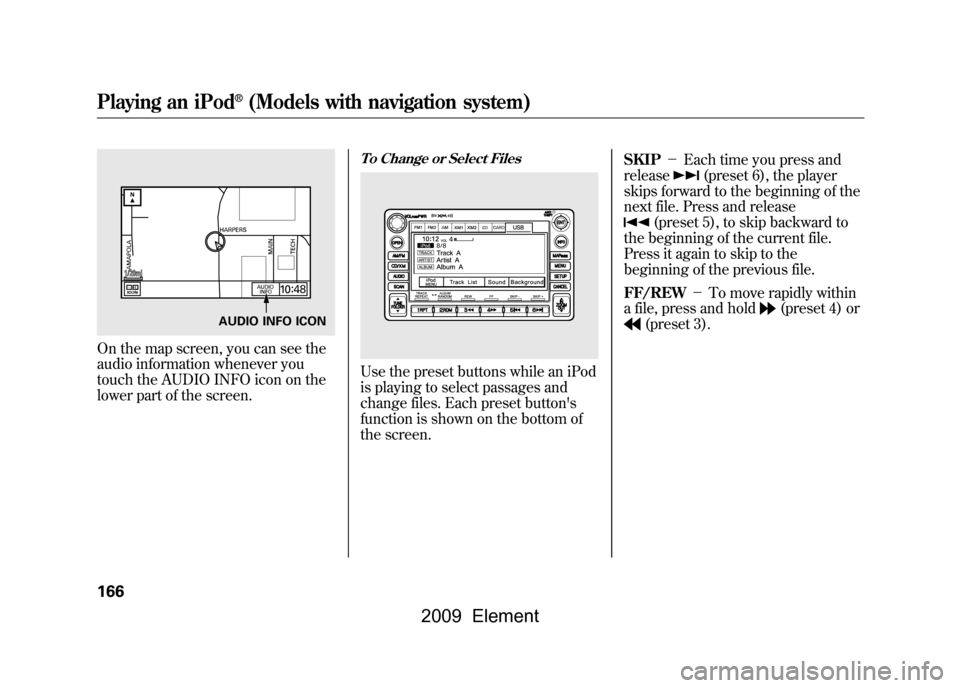
On the map screen, you can see the
audio information whenever you
touch the AUDIO INFO icon on the
lower part of the screen.
To Change or Select FilesUse the preset buttons while an iPod
is playing to select passages and
change files. Each preset button's
function is shown on the bottom of
the screen.SKIP
-Each time you press and
release
(preset 6), the player
skips forward to the beginning of the
next file. Press and release
(preset 5), to skip backward to
the beginning of the current file.
Press it again to skip to the
beginning of the previous file.
FF/REW -To move rapidly within
a file, press and hold
(preset 4) or
(preset 3).
AUDIO INFO ICON
Playing an iPod
®(Models with navigation system)
166
2009 Element
Page 173 of 345
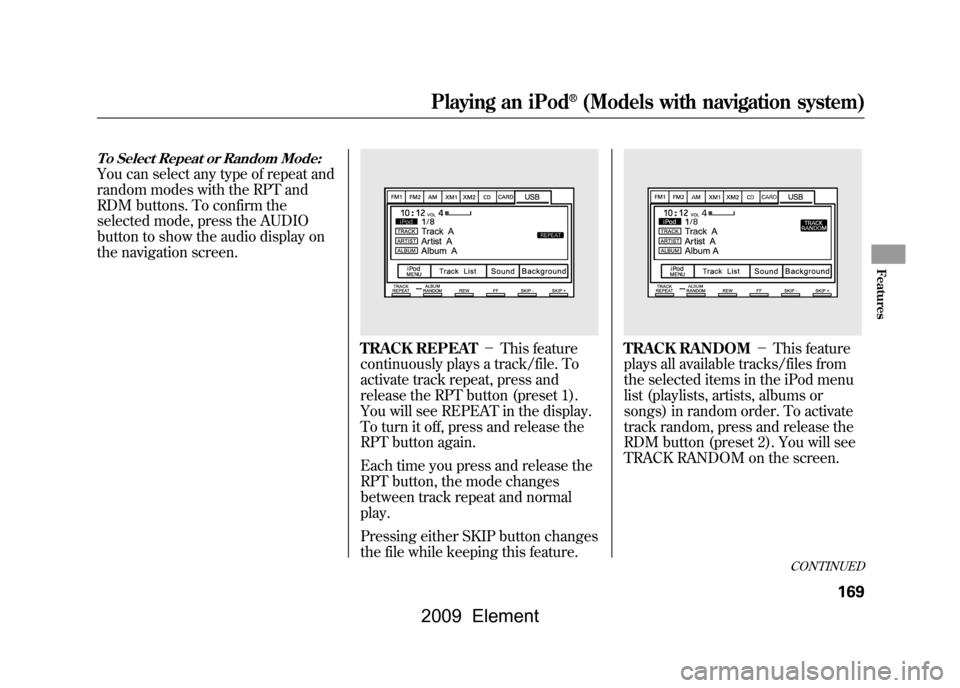
To Select Repeat or Random Mode:You can select any type of repeat and
random modes with the RPT and
RDM buttons. To confirm the
selected mode, press the AUDIO
button to show the audio display on
the navigation screen.
TRACK REPEAT-This feature
continuously plays a track/file. To
activate track repeat, press and
release the RPT button (preset 1).
You will see REPEAT in the display.
To turn it off, press and release the
RPT button again.
Each time you press and release the
RPT button, the mode changes
between track repeat and normal
play.
Pressing either SKIP button changes
the file while keeping this feature.
TRACK RANDOM -This feature
plays all available tracks/files from
the selected items in the iPod menu
list (playlists, artists, albums or
songs) in random order. To activate
track random, press and release the
RDM button (preset 2). You will see
TRACK RANDOM on the screen.
CONTINUED
Playing an iPod
®(Models with navigation system)
169
Features
2009 Element
Page 179 of 345

NOTE:●Do not use a device such as a card
reader or hard drive as the device
or your files may be damaged.●Do not connect your USB flash
memory device using a HUB.●Do not use an extension cable to
the USB adapter cable equipped
with your vehicle.●Do not keep the USB flash
memory device in the vehicle.
Direct sunlight and high heat will
damage it.●We recommend backing up your
data before playing a USB flash
memory device.
●Depending on the type and
number of files, it may take some
time before they begin to play.●Depending on the software the
files were made with, it may not be
possible to play some files, or
display some text data.Voice Control SystemYou can select the AUX mode by
using the navigation system voice
control buttons, but cannot operate
the play mode functions.The specifications for compatible
MP3 files are:
– Sampling frequency:
32/44.1/48 kHz (MPEG1)
16/22.05/24 kHz (MPEG2)
– Bitrate:
32/40/48/56/64/80/96/112/128/
160/192/224/256/320/VBR kbps
(MPEG1)
– Supported standards:
MPEG1 Audio Layer3
MPEG2 Audio Layer3
– Partition: Top partition only
– Maximum layers: 8
CONTINUED
Playing a USB Flash Memory Device (Models with navigation system)
175
Features
2009 Element
Page 182 of 345
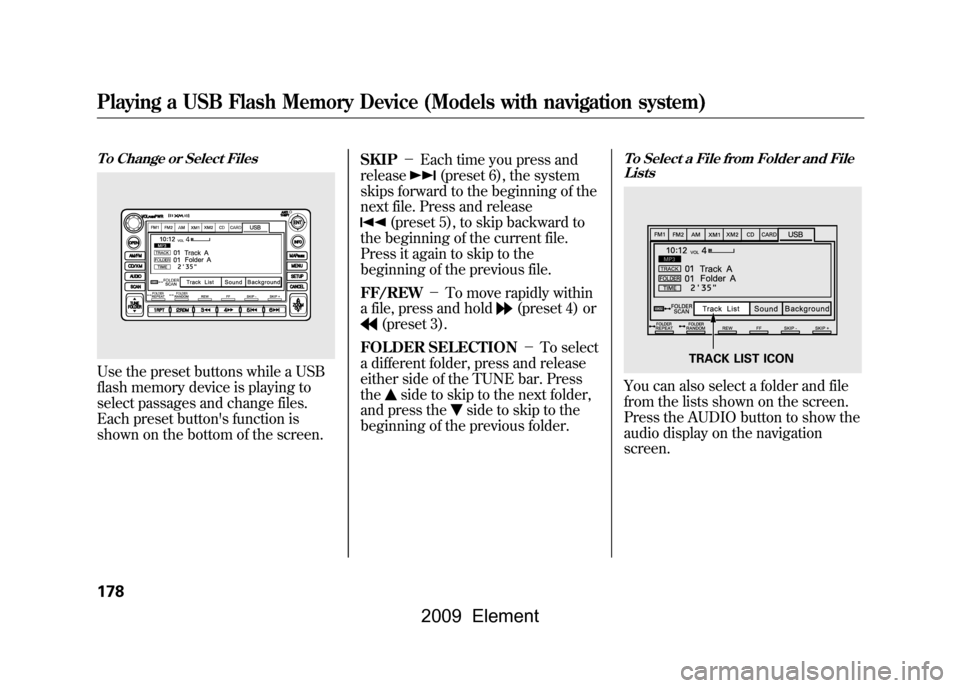
To Change or Select FilesUse the preset buttons while a USB
flash memory device is playing to
select passages and change files.
Each preset button's function is
shown on the bottom of the screen.SKIP
-Each time you press and
release
(preset 6), the system
skips forward to the beginning of the
next file. Press and release
(preset 5), to skip backward to
the beginning of the current file.
Press it again to skip to the
beginning of the previous file.
FF/REW -To move rapidly within
a file, press and hold
(preset 4) or
(preset 3).
FOLDER SELECTION -To select
a different folder, press and release
either side of the TUNE bar. Press
the
side to skip to the next folder,
and press the
side to skip to the
beginning of the previous folder.
To Select a File from Folder and File ListsYou can also select a folder and file
from the lists shown on the screen.
Press the AUDIO button to show the
audio display on the navigation
screen.
TRACK LIST ICON
Playing a USB Flash Memory Device (Models with navigation system)178
2009 Element
Page 184 of 345
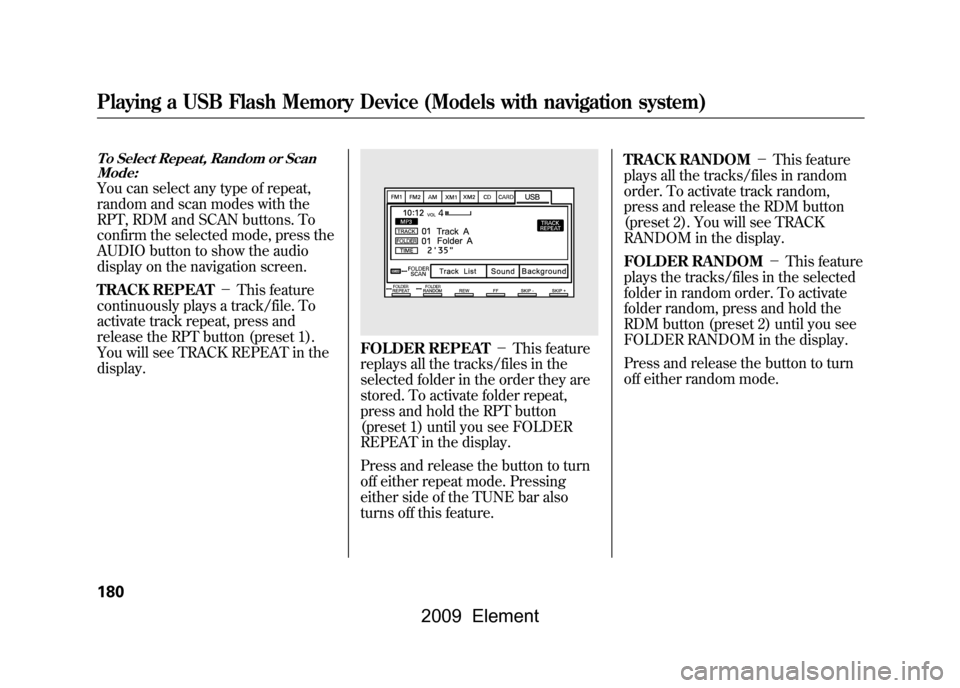
To Select Repeat, Random or ScanMode:You can select any type of repeat,
random and scan modes with the
RPT, RDM and SCAN buttons. To
confirm the selected mode, press the
AUDIO button to show the audio
display on the navigation screen.
TRACK REPEAT -This feature
continuously plays a track/file. To
activate track repeat, press and
release the RPT button (preset 1).
You will see TRACK REPEAT in the
display.
FOLDER REPEAT -This feature
replays all the tracks/files in the
selected folder in the order they are
stored. To activate folder repeat,
press and hold the RPT button
(preset 1) until you see FOLDER
REPEAT in the display.
Press and release the button to turn
off either repeat mode. Pressing
either side of the TUNE bar also
turns off this feature. TRACK RANDOM
-This feature
plays all the tracks/files in random
order. To activate track random,
press and release the RDM button
(preset 2). You will see TRACK
RANDOM in the display.
FOLDER RANDOM -This feature
plays the tracks/files in the selected
folder in random order. To activate
folder random, press and hold the
RDM button (preset 2) until you see
FOLDER RANDOM in the display.
Press and release the button to turn
off either random mode.
Playing a USB Flash Memory Device (Models with navigation system)180
2009 Element
Page 192 of 345

On EX and SC modelsYour vehicle's audio system will
disable itself if it is disconnected
from electrical power for any reason.
To make it work again, you must
enter a specific code in the preset
buttons (icon on vehicle's with
navigation system). Because there
are hundreds of number
combinations possible from specific
digits, making the system work
without knowing the exact code is
nearly impossible.
You should have received a radio
code card that lists your audio
system's code and serial numbers. It
is best to store this card in a safe
place at home. In addition, you
should write the audio system's
serial number in this owner's
manual.
If you lose the card, you must obtain
the code number from a dealer. To
do this, you will need the system's
serial number.If your vehicle's battery is
disconnected or goes dead, or the
radio fuse is removed, the audio
system will disable itself. If this
happens, you will see
‘‘ENTER
CODE ’’in the frequency display the
next time you turn on the system.
Use the preset buttons (icons on
vehicles with navigation system) to
enter the code. The code is on the
radio code card included in your
owner's manual kit. When it is
entered correctly, the radio will start
playing.
If you make a mistake entering the
code, do not start over; complete the
sequence, then enter the correct
code. You have 10 tries to enter the
correct code. If you are unsuccessful
in 10 attempts, you must then leave
the system on for 1 hour before
trying again.Radio Theft Protection188
2009 Element
Page 200 of 345
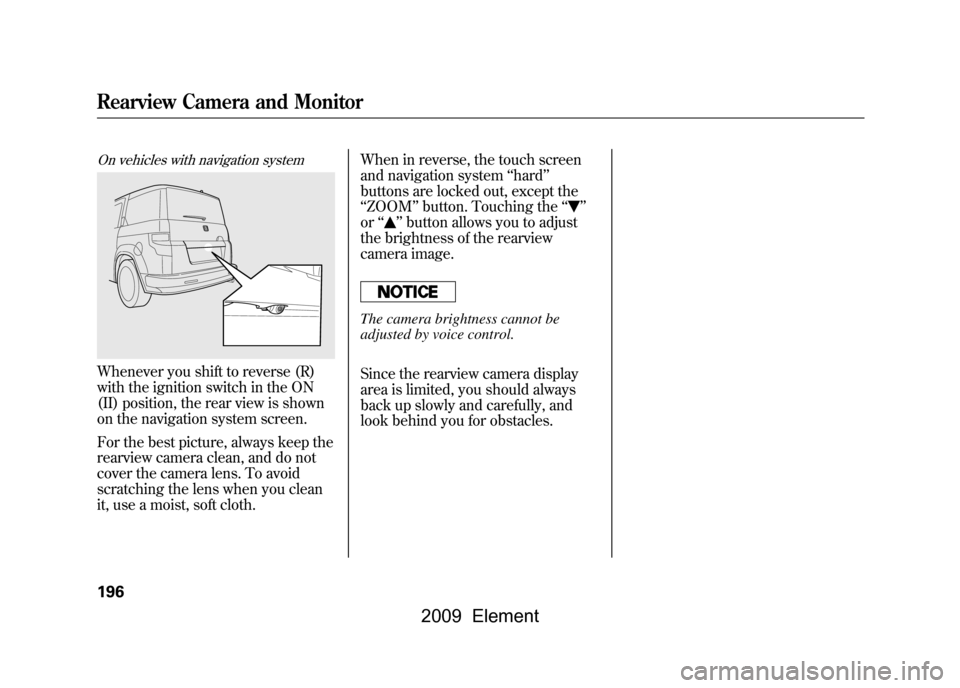
On vehicles with navigation systemWhenever you shift to reverse (R)
with the ignition switch in the ON
(II) position, the rear view is shown
on the navigation system screen.
For the best picture, always keep the
rearview camera clean, and do not
cover the camera lens. To avoid
scratching the lens when you clean
it, use a moist, soft cloth.When in reverse, the touch screen
and navigation system
‘‘hard ’’
buttons are locked out, except the
‘‘ ZOOM ’’button. Touching the ‘‘
’’
or ‘‘
’’button allows you to adjust
the brightness of the rearview
camera image.
The camera brightness cannot be
adjusted by voice control.
Since the rearview camera display
area is limited, you should always
back up slowly and carefully, and
look behind you for obstacles.
Rearview Camera and Monitor196
2009 Element
Page 281 of 345
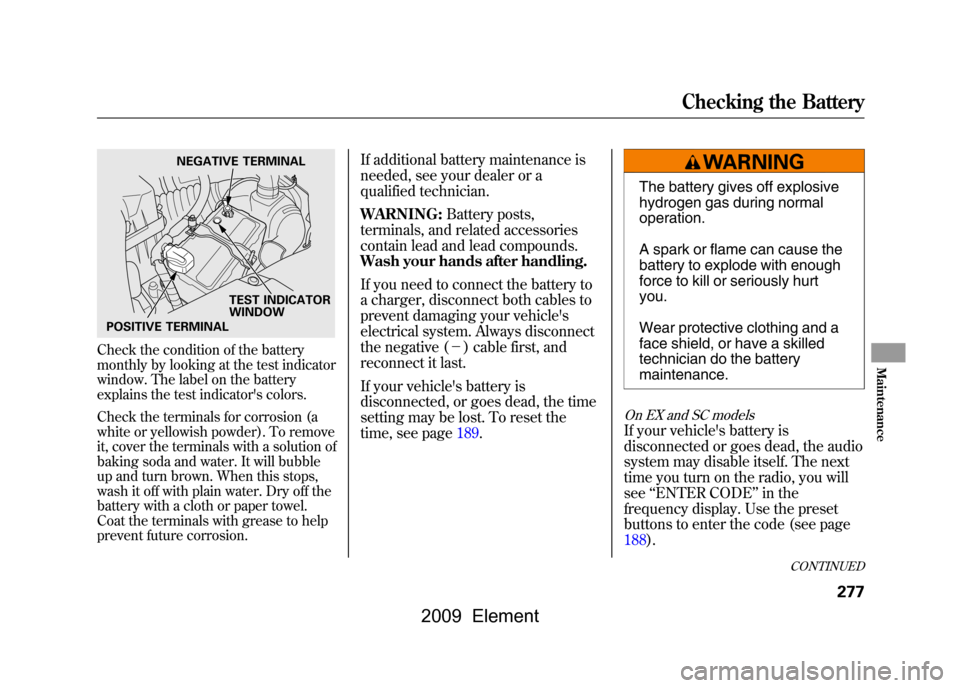
Check the condition of the battery
monthly by looking at the test indicator
window. The label on the battery
explains the test indicator's colors.
Check the terminals for corrosion (a
white or yellowish powder). To remove
it, cover the terminals with a solution of
baking soda and water. It will bubble
up and turn brown. When this stops,
wash it off with plain water. Dry off the
battery with a cloth or paper towel.
Coat the terminals with grease to help
prevent future corrosion.
If additional battery maintenance is
needed, see your dealer or a
qualified technician.
WARNING:Battery posts,
terminals, and related accessories
contain lead and lead compounds.
Wash your hands after handling.
If you need to connect the battery to
a charger, disconnect both cables to
prevent damaging your vehicle's
electrical system. Always disconnect
the negative (- ) cable first, and
reconnect it last.
If your vehicle's battery is
disconnected, or goes dead, the time
setting may be lost. To reset the
time, see page189.
The battery gives off explosive
hydrogen gas during normal
operation.
A spark or flame can cause the
battery to explode with enough
force to kill or seriously hurt
you.
Wear protective clothing and a
face shield, or have a skilled
technician do the battery
maintenance.
On EX and SC modelsIf your vehicle's battery is
disconnected or goes dead, the audio
system may disable itself. The next
time you turn on the radio, you will
see ‘‘ENTER CODE ’’in the
frequency display. Use the preset
buttons to enter the code (see page
188).
NEGATIVE TERMINAL
TEST INDICATOR
WINDOW
POSITIVE TERMINAL
CONTINUED
Checking the Battery
277
Maintenance
2009 Element
Page 304 of 345
If you cannot drive the vehicle
without fixing the problem, and you
do not have a spare fuse, take a fuse
of the same rating or a lower rating
from one of the other circuits. Make
sure you can do without that circuit
temporarily (such as the accessory
power socket or radio).
If you replace the blown fuse with a
spare fuse that has a lower rating, it
might blow out again. This does not
indicate anything wrong. Replace the
fuse with one of the correct rating as
soon as you can.
Replacing a fuse with one that has a
higher rating greatly increases the
chances of damaging the electrical
system. If you do not have a
replacement fuse with the proper rating
for the circuit, install one with a lower
rating.6. If the replacement fuse of the same
rating blows in a short time, there
is probably a serious electrical
problem in your vehicle. Leave the
blown fuse in that circuit and have
your vehicle checked by a
qualified technician.
On EX and SC modelsIf the radio fuse is removed, the
audio system will disable itself. The
next time you turn on the radio you
will see ‘‘ENTER CODE ’’in the
frequency display. Use the preset
buttons to enter the specific digit
code (see page188).On vehicles with navigation systemIf the navigation system fuse is
removed, the navigation system will
disable itself. The next time you turn
on the ignition switch, the system
will require you to enter a PIN before
it can be used. Refer to the
navigation system manual.
Fuses300
2009 Element