display HONDA ELEMENT 2009 1.G Repair Manual
[x] Cancel search | Manufacturer: HONDA, Model Year: 2009, Model line: ELEMENT, Model: HONDA ELEMENT 2009 1.GPages: 345, PDF Size: 18.9 MB
Page 182 of 345
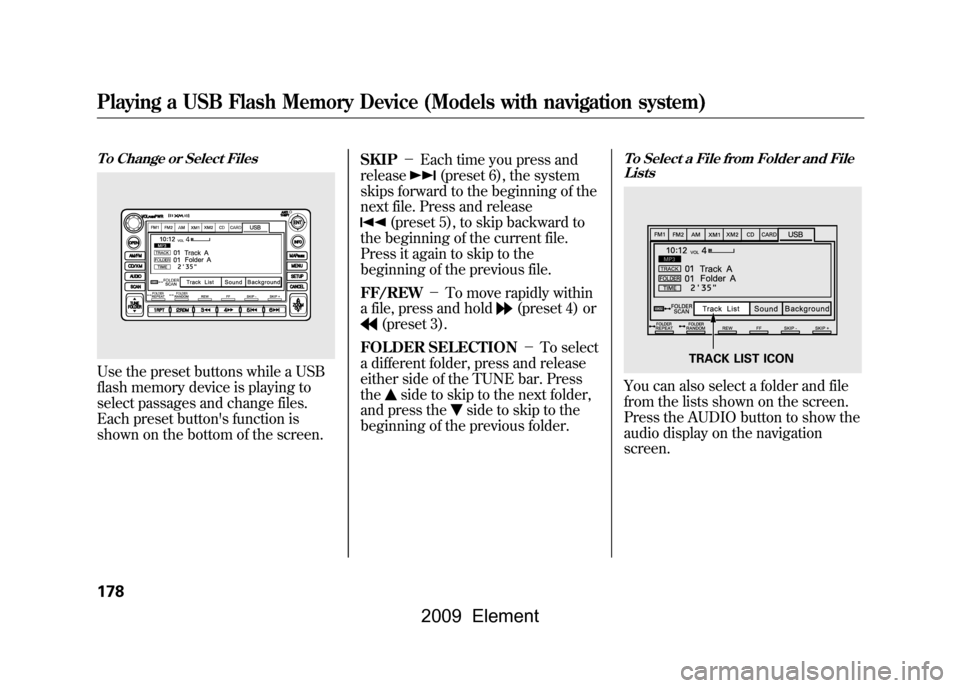
To Change or Select FilesUse the preset buttons while a USB
flash memory device is playing to
select passages and change files.
Each preset button's function is
shown on the bottom of the screen.SKIP
-Each time you press and
release
(preset 6), the system
skips forward to the beginning of the
next file. Press and release
(preset 5), to skip backward to
the beginning of the current file.
Press it again to skip to the
beginning of the previous file.
FF/REW -To move rapidly within
a file, press and hold
(preset 4) or
(preset 3).
FOLDER SELECTION -To select
a different folder, press and release
either side of the TUNE bar. Press
the
side to skip to the next folder,
and press the
side to skip to the
beginning of the previous folder.
To Select a File from Folder and File ListsYou can also select a folder and file
from the lists shown on the screen.
Press the AUDIO button to show the
audio display on the navigation
screen.
TRACK LIST ICON
Playing a USB Flash Memory Device (Models with navigation system)178
2009 Element
Page 183 of 345
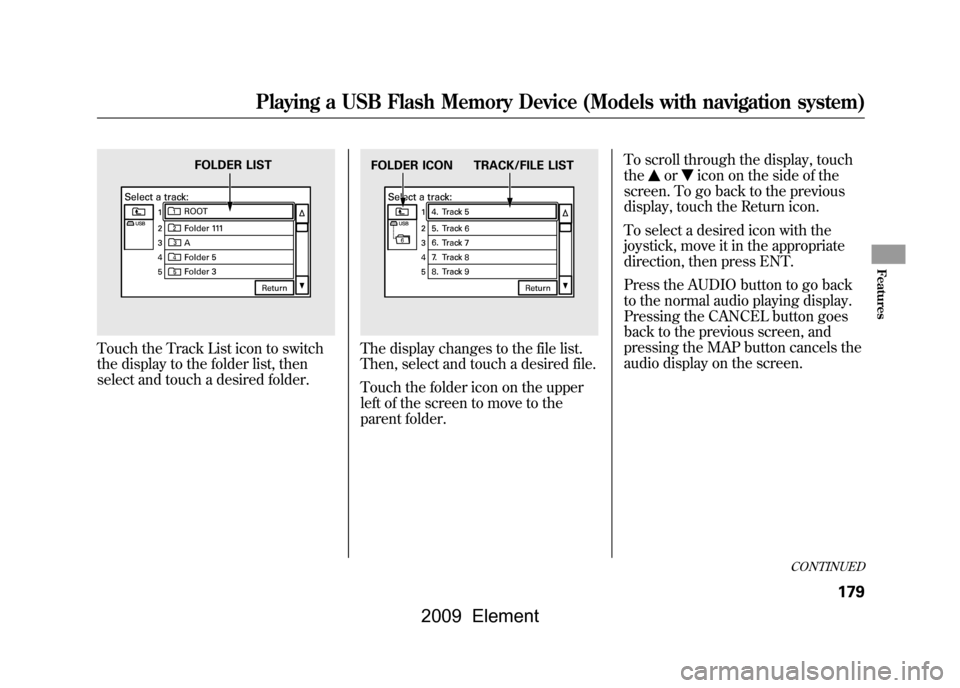
Touch the Track List icon to switch
the display to the folder list, then
select and touch a desired folder.
The display changes to the file list.
Then, select and touch a desired file.
Touch the folder icon on the upper
left of the screen to move to the
parent folder.To scroll through the display, touch
the
or
icon on the side of the
screen. To go back to the previous
display, touch the Return icon.
To select a desired icon with the
joystick, move it in the appropriate
direction, then press ENT.
Press the AUDIO button to go back
to the normal audio playing display.
Pressing the CANCEL button goes
back to the previous screen, and
pressing the MAP button cancels the
audio display on the screen.
FOLDER LIST
FOLDER ICON TRACK/FILE LIST
CONTINUED
Playing a USB Flash Memory Device (Models with navigation system)
179
Features
2009 Element
Page 184 of 345
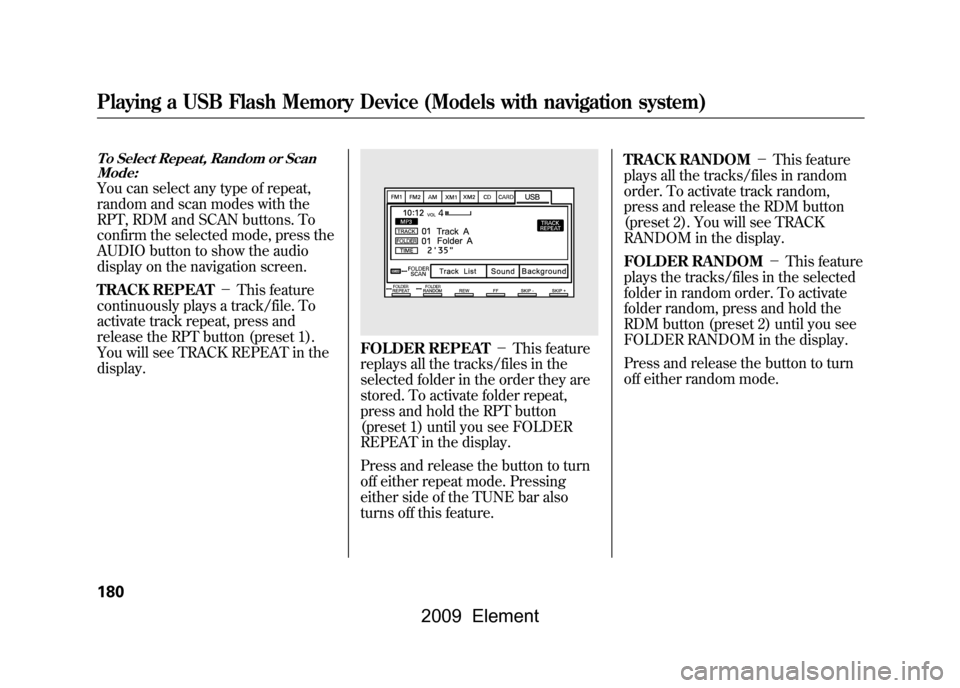
To Select Repeat, Random or ScanMode:You can select any type of repeat,
random and scan modes with the
RPT, RDM and SCAN buttons. To
confirm the selected mode, press the
AUDIO button to show the audio
display on the navigation screen.
TRACK REPEAT -This feature
continuously plays a track/file. To
activate track repeat, press and
release the RPT button (preset 1).
You will see TRACK REPEAT in the
display.
FOLDER REPEAT -This feature
replays all the tracks/files in the
selected folder in the order they are
stored. To activate folder repeat,
press and hold the RPT button
(preset 1) until you see FOLDER
REPEAT in the display.
Press and release the button to turn
off either repeat mode. Pressing
either side of the TUNE bar also
turns off this feature. TRACK RANDOM
-This feature
plays all the tracks/files in random
order. To activate track random,
press and release the RDM button
(preset 2). You will see TRACK
RANDOM in the display.
FOLDER RANDOM -This feature
plays the tracks/files in the selected
folder in random order. To activate
folder random, press and hold the
RDM button (preset 2) until you see
FOLDER RANDOM in the display.
Press and release the button to turn
off either random mode.
Playing a USB Flash Memory Device (Models with navigation system)180
2009 Element
Page 185 of 345
TRACK SCAN-This feature
samples all tracks/files in the
selected folder in the order they are
stored. To activate track scan, press
and release the SCAN button. You
will see TRACK SCAN in the display.
You will get a 10 second sampling of
each track/file in the folder.
FOLDER-SCAN -This feature
samples the first track/file in each
folder in the order they are stored.
To activate folder scan, press and
hold the SCAN button. You will see
FOLDER SCAN in the display. You
will get a 10 second sampling of each
first track/file in the folder(s).
Press and release the button to turn
off either scan mode. Pressing either
SKIP button also turns off this
feature. To Stop Playing a USB Flash
Memory Device
To play the radio when an USB flash
memory device is playing, press the
AM/FM button or touch the FM1,
FM2, AM, XM1, or XM2 icon. If a
disc is in the audio unit, press the
CD/XM button or touch the CD icon
to play the disc. If a PC card is in the
audio unit, Press the CD/XM button
or touch the CARD icon to play a PC
card.
Press the CD/XM button again or
touch the AUX icon to switch back to
the USB flash memory device.
Disconnecting a USB Flash Memory
DeviceYou can disconnect the USB flash
memory device at any time even if
the USB mode is selected on the
audio system. Make sure to follow
the USB flash memory device's
instructions when you remove it.
When you disconnect the USB flash
memory device while it is playing,
the audio display (if selected) shows
NO DATA.
If you reconnect the same USB flash
memory device, the system will
begin playing where it left off.
USB Flash Memory Device Error
Messages
If you see an error message in the
screen, see page182.
Playing a USB Flash Memory Device (Models with navigation system)
181
Features
2009 Element
Page 190 of 345
Radio Frequencies
The radio can receive the complete
AM and FM bands.
Those bands cover these
frequencies:
AM band: 530 to 1,710 kHz
FM band: 87.7 to 107.9 MHz
Radio stations on the AM band are
assigned frequencies at least 10 kHz
apart (530, 540, 550). Stations on the
FM band are assigned frequencies at
least 0.2 MHz apart (87.9, 88.1, 88.3).
Stations must use these exact
frequencies. It is fairly common for
stations to round-off the frequency in
their advertising, so your radio could
display a frequency of 100.9 even
though the announcer may identify
the station as‘‘FM101. ’’ Radio Reception
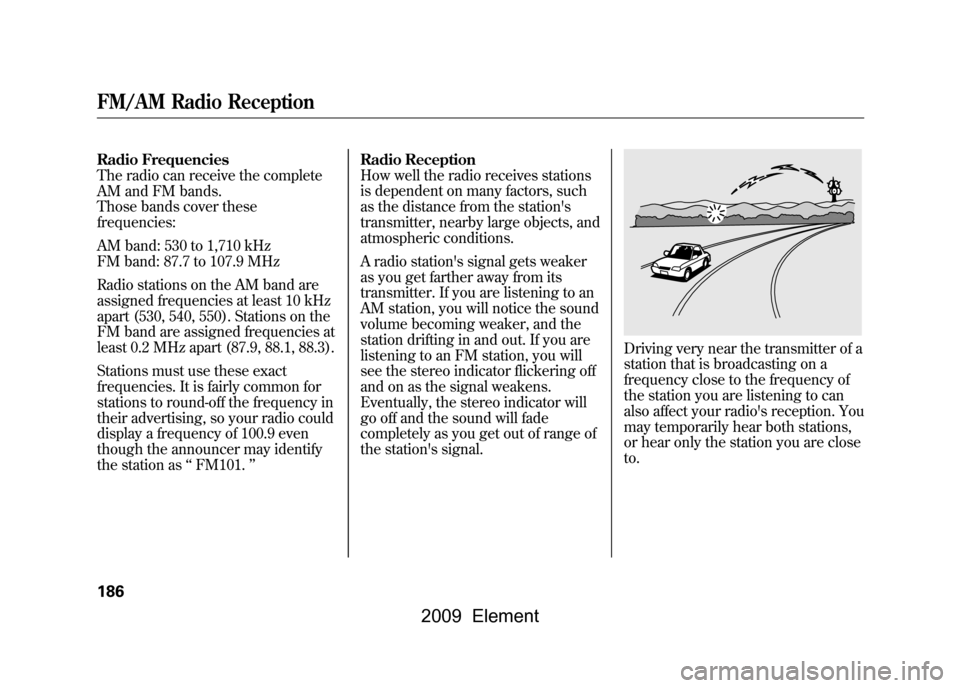
How well the radio receives stations
is dependent on many factors, such
as the distance from the station's
transmitter, nearby large objects, and
atmospheric conditions.
A radio station's signal gets weaker
as you get farther away from its
transmitter. If you are listening to an
AM station, you will notice the sound
volume becoming weaker, and the
station drifting in and out. If you are
listening to an FM station, you will
see the stereo indicator flickering off
and on as the signal weakens.
Eventually, the stereo indicator will
go off and the sound will fade
completely as you get out of range of
the station's signal.
Driving very near the transmitter of a
station that is broadcasting on a
frequency close to the frequency of
the station you are listening to can
also affect your radio's reception. You
may temporarily hear both stations,
or hear only the station you are close
to.
FM/AM Radio Reception186
2009 Element
Page 192 of 345

On EX and SC modelsYour vehicle's audio system will
disable itself if it is disconnected
from electrical power for any reason.
To make it work again, you must
enter a specific code in the preset
buttons (icon on vehicle's with
navigation system). Because there
are hundreds of number
combinations possible from specific
digits, making the system work
without knowing the exact code is
nearly impossible.
You should have received a radio
code card that lists your audio
system's code and serial numbers. It
is best to store this card in a safe
place at home. In addition, you
should write the audio system's
serial number in this owner's
manual.
If you lose the card, you must obtain
the code number from a dealer. To
do this, you will need the system's
serial number.If your vehicle's battery is
disconnected or goes dead, or the
radio fuse is removed, the audio
system will disable itself. If this
happens, you will see
‘‘ENTER
CODE ’’in the frequency display the
next time you turn on the system.
Use the preset buttons (icons on
vehicles with navigation system) to
enter the code. The code is on the
radio code card included in your
owner's manual kit. When it is
entered correctly, the radio will start
playing.
If you make a mistake entering the
code, do not start over; complete the
sequence, then enter the correct
code. You have 10 tries to enter the
correct code. If you are unsuccessful
in 10 attempts, you must then leave
the system on for 1 hour before
trying again.Radio Theft Protection188
2009 Element
Page 193 of 345
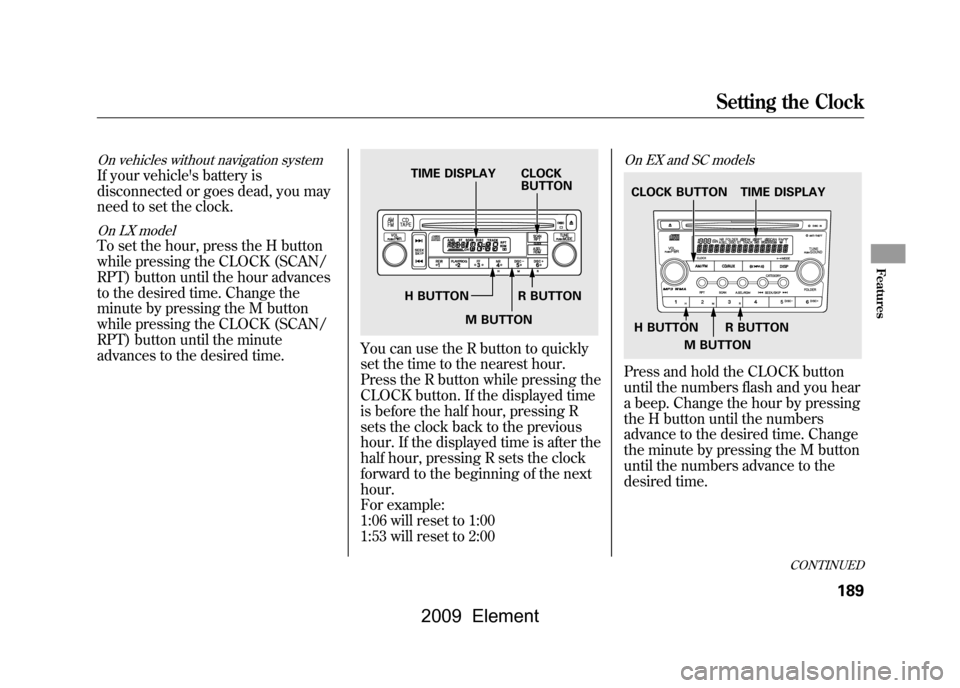
On vehicles without navigation systemIf your vehicle's battery is
disconnected or goes dead, you may
need to set the clock.On LX modelTo set the hour, press the H button
while pressing the CLOCK (SCAN/
RPT) button until the hour advances
to the desired time. Change the
minute by pressing the M button
while pressing the CLOCK (SCAN/
RPT) button until the minute
advances to the desired time.
You can use the R button to quickly
set the time to the nearest hour.
Press the R button while pressing the
CLOCK button. If the displayed time
is before the half hour, pressing R
sets the clock back to the previous
hour. If the displayed time is after the
half hour, pressing R sets the clock
forward to the beginning of the next
hour.
For example:
1:06 will reset to 1:00
1:53 will reset to 2:00
On EX and SC modelsPress and hold the CLOCK button
until the numbers flash and you hear
a beep. Change the hour by pressing
the H button until the numbers
advance to the desired time. Change
the minute by pressing the M button
until the numbers advance to the
desired time.
TIME DISPLAY CLOCKBUTTON
H BUTTON R BUTTON M BUTTON
TIME DISPLAY
CLOCK BUTTON
H BUTTON R BUTTON
M BUTTON
CONTINUED
Setting the Clock
189
Features
2009 Element
Page 194 of 345

You can quickly set the time to the
nearest hour. If the displayed time is
before the half hour, press the R
(RESET) button to set the clock back
to the previous hour. If the displayed
time is after the half hour, pressing R
sets the clock forward to the
beginning of the next hour.
For example:
1:06 will reset to 1:00
1:53 will reset to 2:00
When you are finished, press the
CLOCK button again.
On vehicles with navigation systemThe navigation system receives
signals from the global positioning
system (GPS), and the displayed
time is updated automatically by the
GPS. Refer to the navigation system
manual for how to adjust the time.
Setting the Clock190
2009 Element
Page 195 of 345
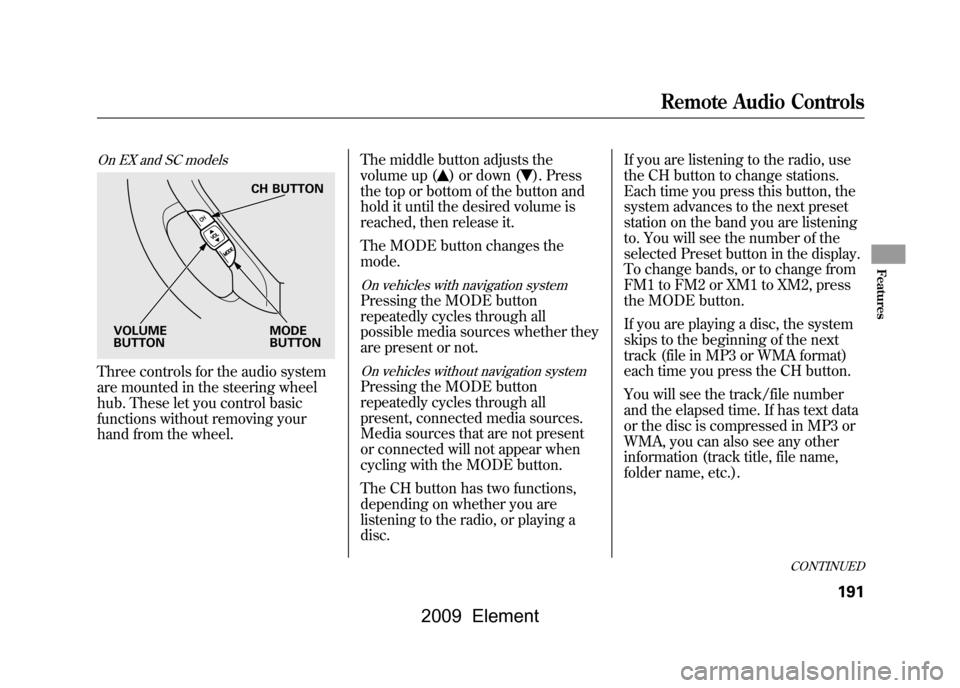
On EX and SC modelsThree controls for the audio system
are mounted in the steering wheel
hub. These let you control basic
functions without removing your
hand from the wheel.The middle button adjusts the
volume up (
) or down (
). Press
the top or bottom of the button and
hold it until the desired volume is
reached, then release it.
The MODE button changes the
mode.
On vehicles with navigation systemPressing the MODE button
repeatedly cycles through all
possible media sources whether they
are present or not.On vehicles without navigation systemPressing the MODE button
repeatedly cycles through all
present, connected media sources.
Media sources that are not present
or connected will not appear when
cycling with the MODE button.
The CH button has two functions,
depending on whether you are
listening to the radio, or playing a
disc. If you are listening to the radio, use
the CH button to change stations.
Each time you press this button, the
system advances to the next preset
station on the band you are listening
to. You will see the number of the
selected Preset button in the display.
To change bands, or to change from
FM1 to FM2 or XM1 to XM2, press
the MODE button.
If you are playing a disc, the system
skips to the beginning of the next
track (file in MP3 or WMA format)
each time you press the CH button.
You will see the track/file number
and the elapsed time. If has text data
or the disc is compressed in MP3 or
WMA, you can also see any other
information (track title, file name,
folder name, etc.).
CH BUTTON
MODE
BUTTON
VOLUME
BUTTON
CONTINUED
Remote Audio Controls
191
Features
2009 Element
Page 200 of 345
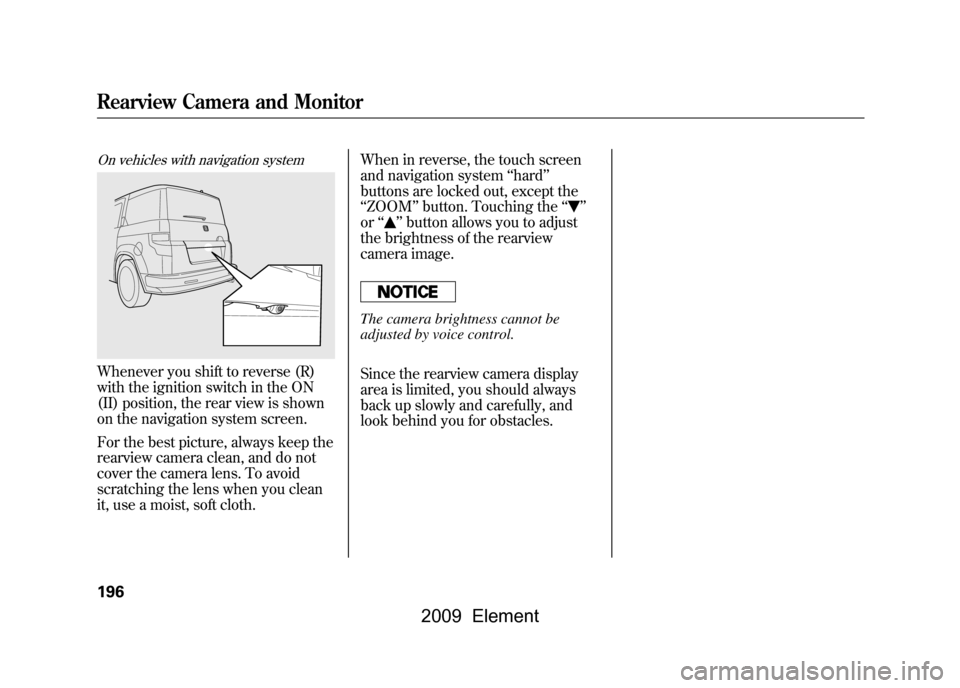
On vehicles with navigation systemWhenever you shift to reverse (R)
with the ignition switch in the ON
(II) position, the rear view is shown
on the navigation system screen.
For the best picture, always keep the
rearview camera clean, and do not
cover the camera lens. To avoid
scratching the lens when you clean
it, use a moist, soft cloth.When in reverse, the touch screen
and navigation system
‘‘hard ’’
buttons are locked out, except the
‘‘ ZOOM ’’button. Touching the ‘‘
’’
or ‘‘
’’button allows you to adjust
the brightness of the rearview
camera image.
The camera brightness cannot be
adjusted by voice control.
Since the rearview camera display
area is limited, you should always
back up slowly and carefully, and
look behind you for obstacles.
Rearview Camera and Monitor196
2009 Element