display HONDA ELEMENT 2009 1.G Workshop Manual
[x] Cancel search | Manufacturer: HONDA, Model Year: 2009, Model line: ELEMENT, Model: HONDA ELEMENT 2009 1.GPages: 345, PDF Size: 18.9 MB
Page 168 of 345
NOTE:●Do not connect your iPod using a
HUB.●Do not keep the iPod in the
vehicle. Direct sunlight and high
heat will damage it.●Do not use an extension cable
between the USB adapter cable
equipped with your vehicle and
your dock connector.●We recommend backing up your
data before playing it.
In AAC format, DRM (digital rights
management) files cannot be played.
If the system finds a DRM file, the
audio unit displays UNPLAYABLE,
and then skips to the next file.
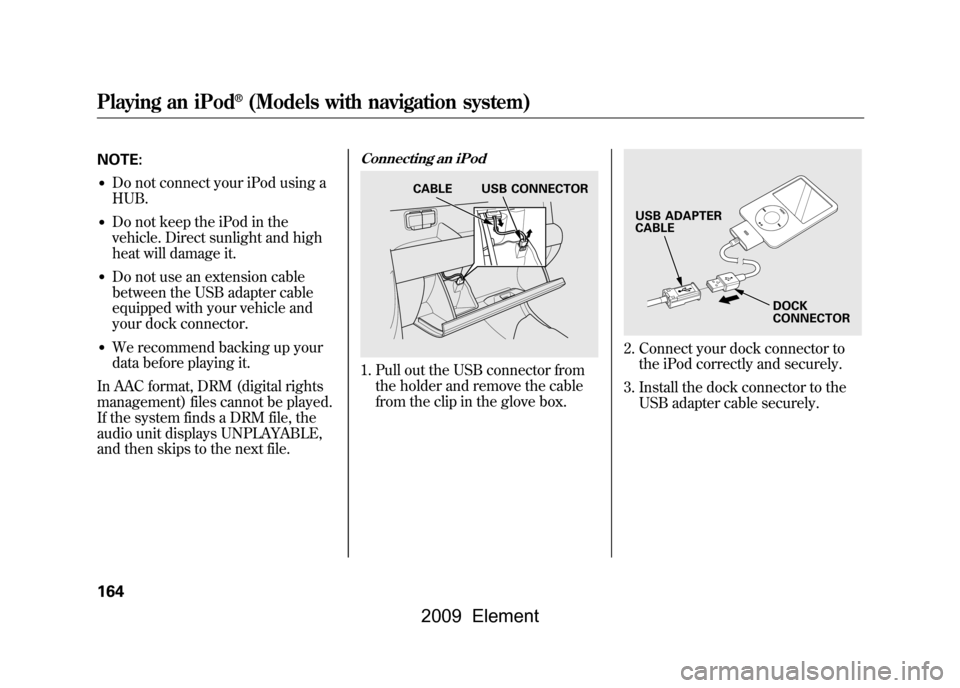
Connecting an iPod1. Pull out the USB connector from the holder and remove the cable
from the clip in the glove box.
2. Connect your dock connector tothe iPod correctly and securely.
3. Install the dock connector to the USB adapter cable securely.
CABLE USB CONNECTOR
USB ADAPTER
CABLE
DOCK
CONNECTOR
Playing an iPod
®(Models with navigation system)
164
2009 Element
Page 169 of 345
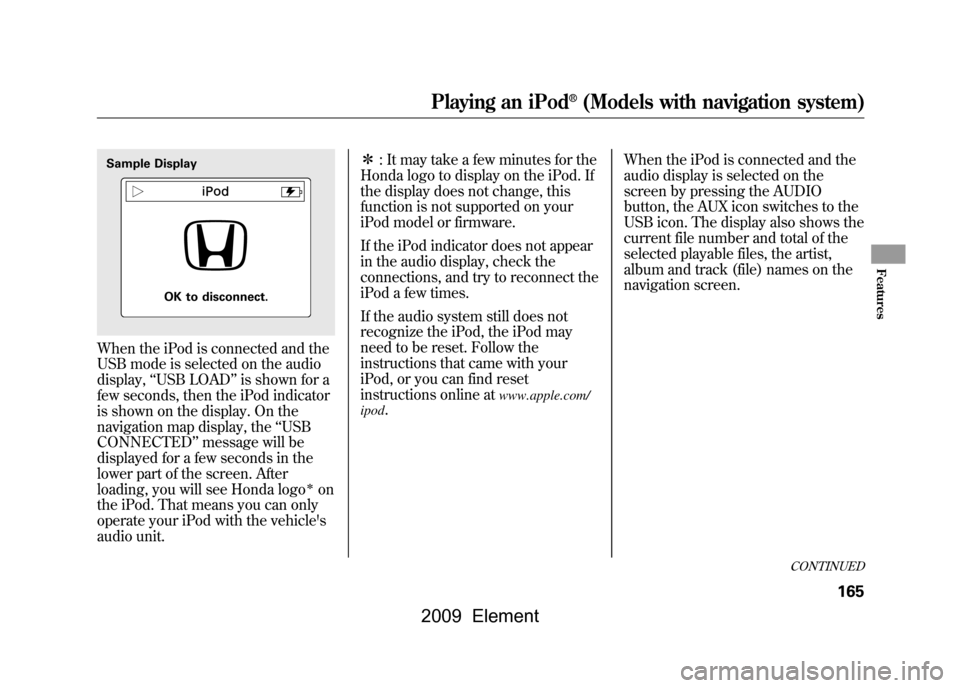
When the iPod is connected and the
USB mode is selected on the audio
display,‘‘USB LOAD ’’is shown for a
few seconds, then the iPod indicator
is shown on the display. On the
navigation map display, the ‘‘USB
CONNECTED ’’message will be
displayed for a few seconds in the
lower part of the screen. After
loading, you will see Honda logo
ꭧon
the iPod. That means you can only
operate your iPod with the vehicle's
audio unit. ꭧ
: It may take a few minutes for the
Honda logo to display on the iPod. If
the display does not change, this
function is not supported on your
iPod model or firmware.
If the iPod indicator does not appear
in the audio display, check the
connections, and try to reconnect the
iPod a few times.
If the audio system still does not
recognize the iPod, the iPod may
need to be reset. Follow the
instructions that came with your
iPod, or you can find reset
instructions online at
www.apple.com/
ipod
. When the iPod is connected and the
audio display is selected on the
screen by pressing the AUDIO
button, the AUX icon switches to the
USB icon. The display also shows the
current file number and total of the
selected playable files, the artist,
album and track (file) names on the
navigation screen.
Sample Display
OK to disconnect.
CONTINUED
Playing an iPod
®(Models with navigation system)
165
Features
2009 Element
Page 171 of 345
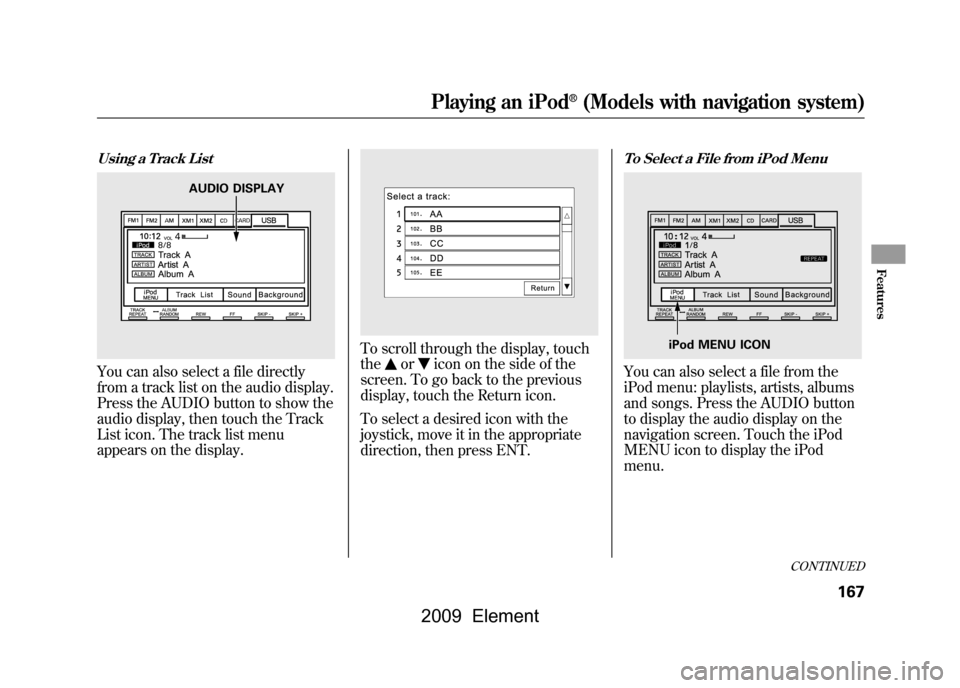
Using a Track ListYou can also select a file directly
from a track list on the audio display.
Press the AUDIO button to show the
audio display, then touch the Track
List icon. The track list menu
appears on the display.
To scroll through the display, touch
the
or
icon on the side of the
screen. To go back to the previous
display, touch the Return icon.
To select a desired icon with the
joystick, move it in the appropriate
direction, then press ENT.
To Select a File from iPod MenuYou can also select a file from the
iPod menu: playlists, artists, albums
and songs. Press the AUDIO button
to display the audio display on the
navigation screen. Touch the iPod
MENU icon to display the iPod
menu.
AUDIO DISPLAY
iPod MENU ICON
CONTINUED
Playing an iPod
®(Models with navigation system)
167
Features
2009 Element
Page 172 of 345
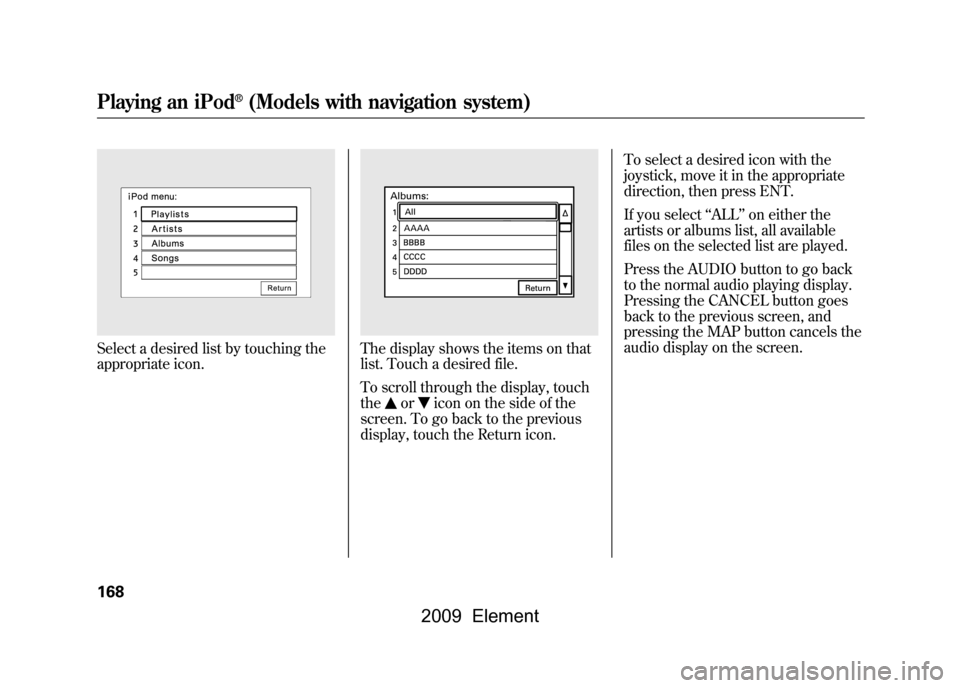
Select a desired list by touching the
appropriate icon.
The display shows the items on that
list. Touch a desired file.
To scroll through the display, touch
the
or
icon on the side of the
screen. To go back to the previous
display, touch the Return icon. To select a desired icon with the
joystick, move it in the appropriate
direction, then press ENT.
If you select
‘‘ALL ’’on either the
artists or albums list, all available
files on the selected list are played.
Press the AUDIO button to go back
to the normal audio playing display.
Pressing the CANCEL button goes
back to the previous screen, and
pressing the MAP button cancels the
audio display on the screen.
Playing an iPod
®(Models with navigation system)
168
2009 Element
Page 173 of 345
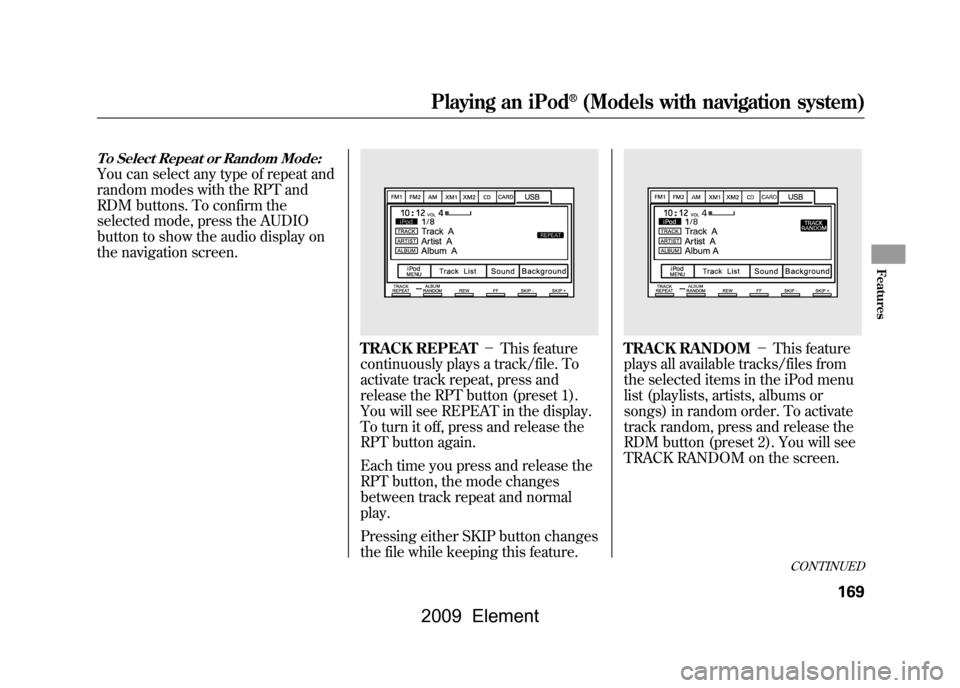
To Select Repeat or Random Mode:You can select any type of repeat and
random modes with the RPT and
RDM buttons. To confirm the
selected mode, press the AUDIO
button to show the audio display on
the navigation screen.
TRACK REPEAT-This feature
continuously plays a track/file. To
activate track repeat, press and
release the RPT button (preset 1).
You will see REPEAT in the display.
To turn it off, press and release the
RPT button again.
Each time you press and release the
RPT button, the mode changes
between track repeat and normal
play.
Pressing either SKIP button changes
the file while keeping this feature.
TRACK RANDOM -This feature
plays all available tracks/files from
the selected items in the iPod menu
list (playlists, artists, albums or
songs) in random order. To activate
track random, press and release the
RDM button (preset 2). You will see
TRACK RANDOM on the screen.
CONTINUED
Playing an iPod
®(Models with navigation system)
169
Features
2009 Element
Page 174 of 345

ALBUM RANDOM-This feature
plays all available albums from the
selected item in the iPod menu list
(playlists, artists, albums or songs) in
random order. The tracks/files in
each album are played in the
recorded order. To activate album
random, press and release the RDM
button (preset 2) repeatedly until you
see ALBUM RANDOM on the
screen.
Press and hold the button until you
hear a beep to turn off either random
mode.
You can also select another list from
the iPod menu while keeping the
random function.
NOTE:
Available operating functions vary on
models or versions. Some functions
may not be available on the vehicle's
audio system. To Stop Playing Your iPod
To play the radio when an iPod is
playing, press the AM/FM button or
touch the FM1, FM2, AM, XM1, or
XM2 icon. If a disc is in the audio
unit, press the CD/XM button or
touch the CD icon to play the disc. If
a PC card is in the audio unit, Press
the CD/XM button or touch the
CARD icon to play a PC card.
Press the CD/XM button again or
touch the AUX icon to switch back to
the iPod.
Disconnecting an iPodYou can disconnect the iPod at any
time when you see the
‘‘OK to
disconnect ’’message
ꭧin the iPod
display. Always make sure you see
the ‘‘OK to disconnect ’’message in
the iPod display before you
disconnect it. Make sure to follow
the iPod's instructions on how to
disconnect the dock connector from
the USB adapter cable.
ꭧ : The displayed message may vary
on models or versions. On some
models, there is no message to
disconnect.
When you disconnect the iPod while
it is playing, the audio screen (if
selected) shows NO DATA.
If you reconnect the same iPod, the
system may begin playing where it
left off, depending on what mode the
iPod is in when it is reconnected.
Playing an iPod
®(Models with navigation system)
170
2009 Element
Page 178 of 345

To Play a USB Flash Memory
Device
This audio system can select and
play the audio files from a USB flash
memory device with the same
controls used for the in-dash disc
player. To play a USB flash memory
device, connect it to the USB adapter
cable in the glove box. The ignition
switch must be in the ACCESSORY
(I) or ON (II) position. Press the
AUDIO button beside the screen to
show the audio display and touch the
AUX icon.
You can also select an icon by
moving the joystick. Move it to left,
right, up, or down to change the
highlighting and scroll through lists,
then press ENT on the top of the
joystick to set your selection.To select the USB mode without
using the icon, press the CD/XM
button repeatedly. The status bar
appears on the bottom of the screen.
The audio system reads and plays
the audio files on the USB flash
memory device in MP3, WMA or
AAC
ꭧformats. Depending on the
format, the display shows MP3,
WMA or AAC when a USB flash
memory device is playing. The USB
flash memory device limit is up to
700 folders or up to 65535 files.
ꭧ : Only AAC format files recorded
with iTunes are playable on this
audio unit. The recommended USB flash
memory devices are 256 Mbyte or
higher. Some digital audio players
may be compatible as well.
Some USB flash memory device
(such as devices with security lock-
out features, etc.) will not work in
this audio unit.
Playing a USB Flash Memory Device (Models with navigation system)174
2009 Element
Page 179 of 345

NOTE:●Do not use a device such as a card
reader or hard drive as the device
or your files may be damaged.●Do not connect your USB flash
memory device using a HUB.●Do not use an extension cable to
the USB adapter cable equipped
with your vehicle.●Do not keep the USB flash
memory device in the vehicle.
Direct sunlight and high heat will
damage it.●We recommend backing up your
data before playing a USB flash
memory device.
●Depending on the type and
number of files, it may take some
time before they begin to play.●Depending on the software the
files were made with, it may not be
possible to play some files, or
display some text data.Voice Control SystemYou can select the AUX mode by
using the navigation system voice
control buttons, but cannot operate
the play mode functions.The specifications for compatible
MP3 files are:
– Sampling frequency:
32/44.1/48 kHz (MPEG1)
16/22.05/24 kHz (MPEG2)
– Bitrate:
32/40/48/56/64/80/96/112/128/
160/192/224/256/320/VBR kbps
(MPEG1)
– Supported standards:
MPEG1 Audio Layer3
MPEG2 Audio Layer3
– Partition: Top partition only
– Maximum layers: 8
CONTINUED
Playing a USB Flash Memory Device (Models with navigation system)
175
Features
2009 Element
Page 180 of 345

The specifications for compatible
WMA files are:– Sampling frequency:
32/44.1/48 kHz
– Bitrate:
48 -320/VBR kbps (Max 384)
– Supported standards:
WMA version 7/8/9
– Partition: Top partition only
– Maximum layers: 8 The specifications for compatible
AAC files are:
– Sampling frequency:
8/11.025/12/16/22.05/24/32/
44.1/48 kHz
– Bitrate:
48 -320 kbps
– Supported standards:
MPEG4/AAC LC
MPEG2/AAC LC
– Partition: Top partition only
– Maximum layers: 8 Even if recorded in MP3, WMA or
AAC format, a file with an
unsupported version cannot be
played. If the system finds an
unsupported file, the screen displays
UNSUPPORTED, and then skips to
the next file.
In WMA or AAC format, DRM
(digital rights management) files
cannot be played. If the system finds
a DRM file, the screen displays
UNPLAYABLE FILE, and then skips
to the next file.Playing a USB Flash Memory Device (Models with navigation system)176
2009 Element
Page 181 of 345
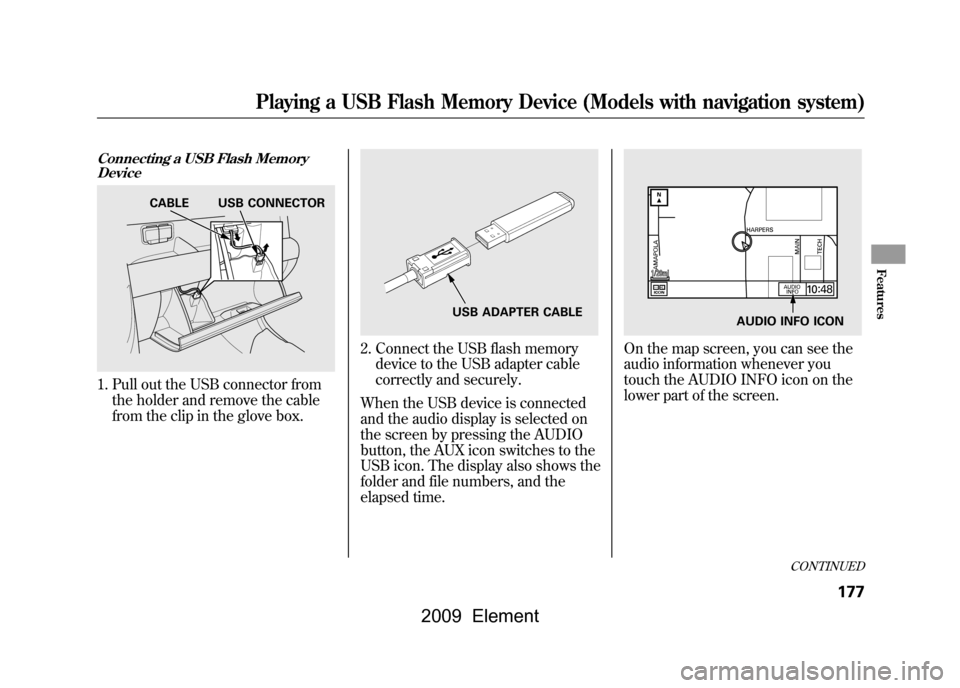
Connecting a USB Flash MemoryDevice1. Pull out the USB connector from
the holder and remove the cable
from the clip in the glove box.
2. Connect the USB flash memorydevice to the USB adapter cable
correctly and securely.
When the USB device is connected
and the audio display is selected on
the screen by pressing the AUDIO
button, the AUX icon switches to the
USB icon. The display also shows the
folder and file numbers, and the
elapsed time.
On the map screen, you can see the
audio information whenever you
touch the AUDIO INFO icon on the
lower part of the screen.
CABLE USB CONNECTOR
USB ADAPTER CABLE
AUDIO INFO ICON
CONTINUED
Playing a USB Flash Memory Device (Models with navigation system)
177
Features
2009 Element